check engine light GMC CANYON 2018 Get To Know Guide
[x] Cancel search | Manufacturer: GMC, Model Year: 2018, Model line: CANYON, Model: GMC CANYON 2018Pages: 417, PDF Size: 5.47 MB
Page 240 of 417

GMC Canyon/Canyon Denali Owner Manual (GMNA-Localizing-U.S./Canada-
11354423) - 2018 - crc - 10/12/17
Driving and Operating 239
4. Turn the transfer case knob tothe desired setting.
After the transfer case has
shifted out of N (Neutral), the
N (Neutral) light will go out.
5. Release the parking brake.
6. Start the engine and shift the transmission to the
desired gear.Brakes
Antilock Brake
System (ABS)
This vehicle has an Antilock Brake
System (ABS), an advanced
electronic braking system that helps
prevent a braking skid.
When the vehicle begins to drive
away, ABS checks itself.
A momentary motor or clicking noise
may be heard while this test is going
on, and it may even be noticed that
the brake pedal moves a little. This
is normal.
If there is a problem with ABS, this
warning light stays on. See Antilock
Brake System (ABS) Warning Light
0 123. If driving safely on a wet road and it
becomes necessary to slam on the
brakes and continue braking to
avoid a sudden obstacle, a
computer senses the wheels are
slowing down. If one of the wheels
is about to stop rolling, the computer
will separately work the brakes at
each wheel.
ABS can change the brake pressure
to each wheel, as required, faster
than any driver could. This can help
you steer around the obstacle while
braking hard.
As the brakes are applied, the
computer keeps receiving updates
on wheel speed and controls
braking pressure accordingly.
Remember: ABS does not change
the time needed to get a foot up to
the brake pedal or always decrease
stopping distance. If you get too
close to the vehicle in front of you,
there will not be enough time to
apply the brakes if that vehicle
suddenly slows or stops. Always
leave enough room up ahead to
stop, even with ABS.
Page 243 of 417
GMC Canyon/Canyon Denali Owner Manual (GMNA-Localizing-U.S./Canada-
11354423) - 2018 - crc - 10/12/17
242 Driving and Operating
vehicle wheel brakes to assist the
driver in keeping the vehicle on the
intended path.
If cruise control is being used and
traction control or StabiliTrak begins
to limit wheel spin, cruise control will
disengage. Cruise control may be
turned back on when road
conditions allow.
Both systems come on
automatically when the vehicle is
started and begins to move. The
systems may be heard or felt while
they are operating or while
performing diagnostic checks. This
is normal and does not mean there
is a problem with the vehicle.
It is recommended to leave both
systems on for normal driving
conditions, but it may be necessary
to turn TCS off if the vehicle gets
stuck in sand, mud, ice, or snow.
SeeIf the Vehicle Is Stuck 0210
and “Turning the Systems Off and
On” later in this section.
When the transfer case (if equipped)
is in Four-Wheel Drive Low, the
stability system is automatically disabled, andgcomes on in the
instrument cluster. Both traction
control and StabiliTrak are
automatically disabled in this
condition.
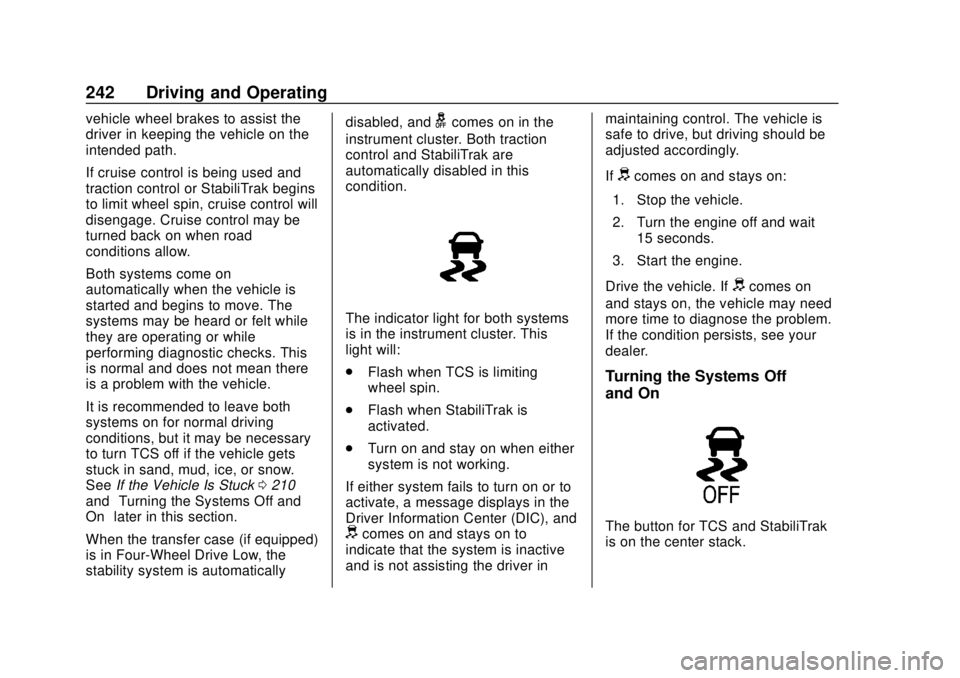
The indicator light for both systems
is in the instrument cluster. This
light will:
. Flash when TCS is limiting
wheel spin.
. Flash when StabiliTrak is
activated.
. Turn on and stay on when either
system is not working.
If either system fails to turn on or to
activate, a message displays in the
Driver Information Center (DIC), and
dcomes on and stays on to
indicate that the system is inactive
and is not assisting the driver in maintaining control. The vehicle is
safe to drive, but driving should be
adjusted accordingly.
If
dcomes on and stays on:
1. Stop the vehicle.
2. Turn the engine off and wait 15 seconds.
3. Start the engine.
Drive the vehicle. If
dcomes on
and stays on, the vehicle may need
more time to diagnose the problem.
If the condition persists, see your
dealer.
Turning the Systems Off
and On
The button for TCS and StabiliTrak
is on the center stack.
Page 254 of 417
GMC Canyon/Canyon Denali Owner Manual (GMNA-Localizing-U.S./Canada-
11354423) - 2018 - crc - 10/12/17
Driving and Operating 253
Caution (Continued)
.Fuel containing metals such
as methylcyclopentadienyl
manganese tricarbonyl
(MMT), which can damage
the emissions control
system and spark plugs.
. Fuel with a posted octane
rating of less than the
recommended fuel. Using
this fuel will lower fuel
economy and performance,
and may decrease the life of
the emissions catalyst.
California Fuel
Requirements
If the vehicle is certified to meet
California Emissions Standards, it is
designed to operate on fuels that
meet California specifications. See
the underhood emission control
label. If this fuel is not available in
states adopting California Emissions
Standards, the vehicle will operate
satisfactorily on fuels meeting federal specifications, but emission
control system performance may be
affected. The malfunction indicator
lamp could turn on and the vehicle
may not pass a smog-check test.
See
Malfunction Indicator Lamp
(Check Engine Light) 0120. If this
occurs, return to your authorized
dealer for diagnosis. If it is
determined that the condition is
caused by the type of fuel used,
repairs may not be covered by the
vehicle warranty.
Fuels in Foreign
Countries
The U.S., Canada, and Mexico post
fuel octane ratings in anti-knock
index (AKI). For fuel not to use in a
foreign country, see “Prohibited
Fuels” inFuel 0252.
Fuel Additives
To keep fuel systems clean, TOP
TIER detergent gasoline is
recommended. See Fuel0252. If TOP TIER detergent gasoline is
not available, one bottle of GM Fuel
System Treatment Cleaner added to
the fuel tank at every engine oil
change, can help. GM Fuel System
Treatment Cleaner is the only
gasoline additive recommended by
General Motors. It is available at
your dealer.
Filling the Tank
If the vehicle has a diesel engine,
see
“Filling the Tank” in the
Duramax diesel supplement.
{Warning
Fuel vapors and fuel fires burn
violently and can cause injury or
death.
. To help avoid injuries to you
and others, read and follow
all the instructions on the
fuel pump island.
. Turn off the engine when
refueling.
(Continued)
Page 269 of 417
GMC Canyon/Canyon Denali Owner Manual (GMNA-Localizing-U.S./Canada-
11354423) - 2018 - crc - 10/12/17
268 Driving and Operating
A GM dealer may be able to
diagnose and repair problems with
the trailer. However, any diagnosis
and repair of the trailer is not
covered under the vehicle warranty.
Contact your trailer dealer for
assistance with trailer repairs and
trailer warranty information.
Trailer Sway
Control (TSC)
Vehicles with StabiliTrak have a
Trailer Sway Control (TSC) feature.
Trailer sway is unintended
side-to-side motion of a trailer while
being towed. If the vehicle is towing
a trailer and the TSC detects that
sway is increasing, the vehicle
brakes are selectively applied at
each wheel, to help reduce
excessive trailer sway. If the vehicle
is equipped with the Integrated
Trailer Brake Control (ITBC) system,
and the trailer has the electric
actuated brake system, StabiliTrak
may also apply the trailer brakes.
If TSC is enabled, the Traction
Control System (TCS)/StabiliTrak
warning light will flash on theinstrument cluster. Vehicle speed
must be reduced. If trailer sway
continues, StabiliTrak can reduce
engine torque to help slow the
vehicle. See
Traction Control/
Electronic Stability Control 0241.
{Warning
Even if the vehicle is equipped
with TSC, trailer sway could result
in loss of control and the vehicle
could crash. If excessive trailer
sway is detected, slow down to a
safe speed. Check the trailer and
vehicle to help correct possible
causes. These could include an
improperly or overloaded trailer,
unrestrained cargo, improper
trailer hitch configuration,
excessive vehicle-trailer speed,
or improperly inflated or incorrect
vehicle or trailer tires. See Towing
Equipment 0261 for trailer ratings
and hitch setup
recommendations. Adding non-dealer accessories can
affect the vehicle performance. See
Accessories and Modifications
0
273.
Electronic Trailer Sway Control
Devices
Some trailers may come equipped
with an electronic device designed
to reduce or control trailer sway.
Aftermarket equipment
manufacturers also offer similar
devices that connect to the wiring
between the trailer and the vehicle.
These devices may interfere with
the vehicle’ s trailer brake or other
systems, including integrated
anti-sway systems, if equipped.
Messages related to trailer
connections or trailer brakes could
appear on the Driver Information
Center (DIC). The effect that these
devices may have on vehicle
handling or trailer brake
performance is unknown.
Page 270 of 417

GMC Canyon/Canyon Denali Owner Manual (GMNA-Localizing-U.S./Canada-
11354423) - 2018 - crc - 10/12/17
Driving and Operating 269
{Warning
Use of electronic trailer sway
control devices could result in
reduced trailer brake
performance, loss of trailer
brakes, or other malfunctions, and
could cause a crash. You or
others could be injured or killed.
Before using one of these
devices:. Ask the device or trailer
manufacturer if the device
has been thoroughly tested
for compatibility with the
make, model, and year of
the vehicle as well as
optional equipment installed
on the vehicle.
. Before driving on the open
roads, check that the trailer
brakes are working properly.
Drive the vehicle with the
trailer attached on a level
road surface that is free of
traffic at about 32-40 km/h
(Continued)
Warning (Continued)
(20-25 mph) and fully apply
the manual trailer brake
apply lever. Also check that
the trailer brake lamps and
other lamps are functioning
correctly.
. If the trailer brakes are not
operating properly at any
time, or if a DIC message
indicates problems with the
trailer connections or trailer
brakes, carefully pull the
vehicle over to the side of
the road when traffic
conditions allow.
Conversions and
Add-Ons
Add-On Electrical
Equipment
{Warning
The Data Link Connector (DLC) is
used for vehicle service and
Emission Inspection/Maintenance
testing. See Malfunction
Indicator Lamp (Check Engine
Light) 0120. A device connected
to the DLC —such as an
aftermarket fleet or
driver-behavior tracking device —
may interfere with vehicle
systems. This could affect vehicle
operation and cause a crash.
Such devices may also access
information stored in the vehicle’s
systems.
Page 284 of 417
GMC Canyon/Canyon Denali Owner Manual (GMNA-Localizing-U.S./Canada-
11354423) - 2018 - crc - 10/12/17
Vehicle Care 283
Do not remove the cap to check the
fluid level or to top-off the fluid level.
Remove the cap only when
necessary to add the proper fluid
until the level reaches the MIN line.
Engine Air Cleaner/Filter
The engine air cleaner/filter is in the
engine compartment on the
passenger side of the vehicle. See
Engine Compartment Overview
0275.
When to Inspect the Engine Air
Cleaner/Filter
For intervals on changing and
inspecting the engine air cleaner/
filter, see Maintenance Schedule
0 361.
How to Inspect the Engine Air
Cleaner/Filter
Do not start the engine or have the
engine running with the engine air
cleaner/filter housing open. Before
removing the engine air cleaner/
filter, make sure that the engine air
cleaner/filter housing and nearby
components are free of dirt and debris. Remove the engine air
cleaner/filter. Lightly tap and shake
the engine air cleaner/filter (away
from the vehicle), to release loose
dust and dirt. Inspect the engine air
cleaner/filter for damage, and
replace if damaged. Do not clean
the engine air cleaner/filter or
components with water or
compressed air.
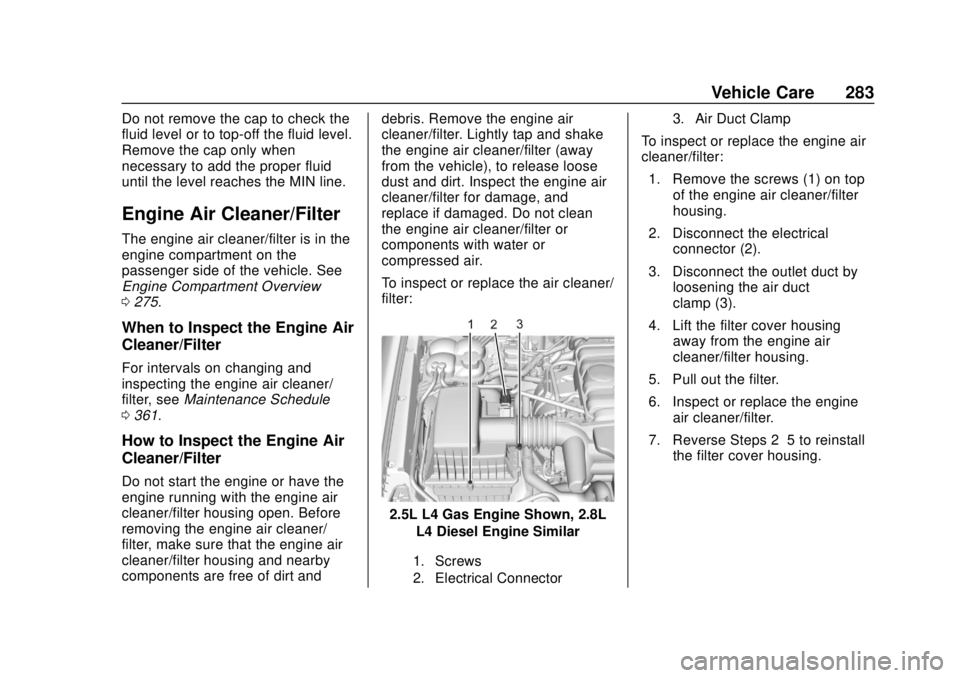
To inspect or replace the air cleaner/
filter:
2.5L L4 Gas Engine Shown, 2.8L
L4 Diesel Engine Similar
1. Screws
2. Electrical Connector 3. Air Duct Clamp
To inspect or replace the engine air
cleaner/filter:
1. Remove the screws (1) on top of the engine air cleaner/filter
housing.
2. Disconnect the electrical connector (2).
3. Disconnect the outlet duct by loosening the air duct
clamp (3).
4. Lift the filter cover housing away from the engine air
cleaner/filter housing.
5. Pull out the filter.
6. Inspect or replace the engine air cleaner/filter.
7. Reverse Steps 2–5 to reinstall the filter cover housing.
Page 292 of 417
GMC Canyon/Canyon Denali Owner Manual (GMNA-Localizing-U.S./Canada-
11354423) - 2018 - crc - 10/12/17
Vehicle Care 291
heard all the time the vehicle is
moving, except when applying the
brake pedal firmly.
{Warning
The brake wear warning sound
means that soon the brakes will
not work well. That could lead to
a crash. When the brake wear
warning sound is heard, have the
vehicle serviced.
Caution
Continuing to drive with worn-out
brake pads could result in costly
brake repair.
Some driving conditions or climates
can cause a brake squeal when the
brakes are first applied or lightly
applied. This does not mean
something is wrong with the brakes.
Properly torqued wheel nuts are
necessary to help prevent brake
pulsation. When tires are rotated, inspect brake pads for wear and
evenly tighten wheel nuts in the
proper sequence to torque
specifications in
Capacities and
Specifications 0375.
Brake linings should always be
replaced as complete axle sets.
Brake Pedal Travel
See your dealer if the brake pedal
does not return to normal height,
or if there is a rapid increase in
pedal travel. This could be a sign
that brake service may be required.
Replacing Brake System Parts
Always replace brake system parts
with new, approved replacement
parts. If this is not done, the brakes
may not work properly. The braking
performance expected can change
in many other ways if the wrong
replacement brake parts are
installed or parts are improperly
installed.
Brake Fluid
The brake/clutch master cylinder
reservoir is filled with GM approved
DOT 3 brake fluid as indicated on
the reservoir cap. See Engine
Compartment Overview 0275 for
the location of the reservoir.
Checking Brake Fluid
Place the vehicle in P (Park) or
Neutral with the parking brake
applied if equipped with a manual
transmission. On a level surface,
the brake fluid level should be
between the minimum and
maximum marks on the brake fluid
reservoir.
Page 344 of 417
GMC Canyon/Canyon Denali Owner Manual (GMNA-Localizing-U.S./Canada-
11354423) - 2018 - crc - 10/12/17
Vehicle Care 343
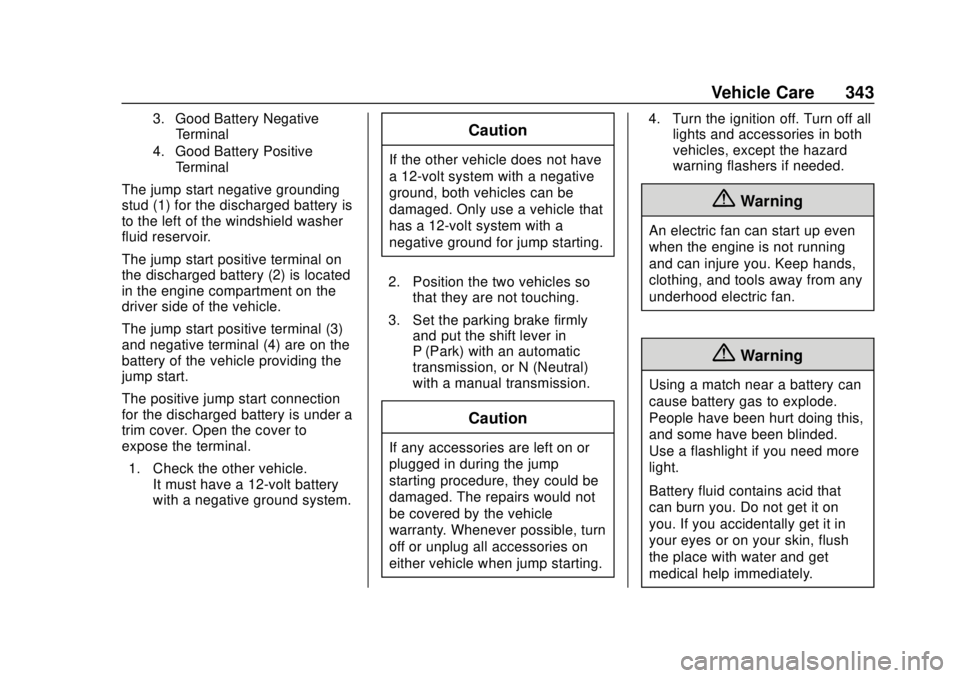
3. Good Battery NegativeTerminal
4. Good Battery Positive Terminal
The jump start negative grounding
stud (1) for the discharged battery is
to the left of the windshield washer
fluid reservoir.
The jump start positive terminal on
the discharged battery (2) is located
in the engine compartment on the
driver side of the vehicle.
The jump start positive terminal (3)
and negative terminal (4) are on the
battery of the vehicle providing the
jump start.
The positive jump start connection
for the discharged battery is under a
trim cover. Open the cover to
expose the terminal.
1. Check the other vehicle. It must have a 12-volt battery
with a negative ground system.
Caution
If the other vehicle does not have
a 12-volt system with a negative
ground, both vehicles can be
damaged. Only use a vehicle that
has a 12-volt system with a
negative ground for jump starting.
2. Position the two vehicles so that they are not touching.
3. Set the parking brake firmly and put the shift lever in
P (Park) with an automatic
transmission, or N (Neutral)
with a manual transmission.
Caution
If any accessories are left on or
plugged in during the jump
starting procedure, they could be
damaged. The repairs would not
be covered by the vehicle
warranty. Whenever possible, turn
off or unplug all accessories on
either vehicle when jump starting. 4. Turn the ignition off. Turn off all
lights and accessories in both
vehicles, except the hazard
warning flashers if needed.
{Warning
An electric fan can start up even
when the engine is not running
and can injure you. Keep hands,
clothing, and tools away from any
underhood electric fan.
{Warning
Using a match near a battery can
cause battery gas to explode.
People have been hurt doing this,
and some have been blinded.
Use a flashlight if you need more
light.
Battery fluid contains acid that
can burn you. Do not get it on
you. If you accidentally get it in
your eyes or on your skin, flush
the place with water and get
medical help immediately.
Page 368 of 417

GMC Canyon/Canyon Denali Owner Manual (GMNA-Localizing-U.S./Canada-
11354423) - 2018 - crc - 10/12/17
Service and Maintenance 367
Additional
Maintenance and Care
Your vehicle is an important
investment and caring for it properly
may help to avoid future costly
repairs. To maintain vehicle
performance, additional
maintenance services may be
required.
It is recommended that your dealer
perform these services—their
trained dealer technicians know
your vehicle best. Your dealer can
also perform a thorough
assessment with a multi-point
inspection to recommend when your
vehicle may need attention.
The following list is intended to
explain the services and conditions
to look for that may indicate
services are required.
Battery
The 12-volt battery supplies power
to start the engine and operate any
additional electrical accessories. .
To avoid break-down or failure to
start the vehicle, maintain a
battery with full cranking power.
. Trained dealer technicians have
the diagnostic equipment to test
the battery and ensure that the
connections and cables are
corrosion-free.
Belts
. Belts may need replacing if they
squeak or show signs of
cracking or splitting.
. Trained dealer technicians have
access to tools and equipment
to inspect the belts and
recommend adjustment or
replacement when necessary.
Brakes
Brakes stop the vehicle and are
crucial to safe driving.
. Signs of brake wear may include
chirping, grinding, or squealing
noises, or difficulty stopping. .
Trained dealer technicians have
access to tools and equipment
to inspect the brakes and
recommend quality parts
engineered for the vehicle.
Fluids
Proper fluid levels and approved
fluids protect the vehicle’s systems
and components. See
Recommended Fluids and
Lubricants 0370 for GM approved
fluids.
. Engine oil and windshield
washer fluid levels should be
checked at every fuel fill.
. Instrument cluster lights may
come on to indicate that fluids
may be low and need to be
filled.
Hoses
Hoses transport fluids and should
be regularly inspected to ensure
that there are no cracks or leaks.
With a multi-point inspection, your
dealer can inspect the hoses and
advise if replacement is needed.
Page 405 of 417

GMC Canyon/Canyon Denali Owner Manual (GMNA-Localizing-U.S./Canada-
11354423) - 2018 - crc - 10/12/17
404 Index
IndexA
Accessories andModifications . . . . . . . . . . . . . . . . . . 273
Accessory Power . . . . . . . . . . . . . . . 221
Add-On Electrical Equipment . . . 269
Additional Information OnStar . . . . . . . . . . . . . . . . . . . . . . . 398
Additional Maintenance and Care . . . . . . . . . . . . . . . . . . . . . . 367
Adjustments
Lumbar, Front Seats . . . . . . . . . . . . 47
Agreements Trademarks and License . . . . . 186
Air Cleaner/Filter, Engine . . . . . . . 283
Air Conditioning . . . . . . . . . . . 192, 194
Air Filter, Passenger
Compartment . . . . . . . . . . . . . . . . . 197
Air Vents . . . . . . . . . . . . . . . . . . . . . . . 196
Airbag System Check . . . . . . . . . . . . . . . . . . . . . . . . . . 70
How Does an AirbagRestrain? . . . . . . . . . . . . . . . . . . . . . 63
Passenger Sensing System . . . . 64
What Makes an Airbag Inflate? . . . . . . . . . . . . . . . . . . . . . . . . 62
What Will You See after an Airbag Inflates? . . . . . . . . . . . . . . . 63 Airbag System (cont'd)
When Should an Airbag
Inflate? . . . . . . . . . . . . . . . . . . . . . . . . 62
Where Are the Airbags? . . . . . . . . 60
Airbags Adding Equipment to theVehicle . . . . . . . . . . . . . . . . . . . . . . . . 69
Passenger Status Indicator . . . .119
Readiness Light . . . . . . . . . . . . . . .118
Servicing Airbag-Equipped Vehicles . . . . . . . . . . . . . . . . . . . . . . . 69
System Check . . . . . . . . . . . . . . . . . . 58
Alarm Vehicle Security . . . . . . . . . . . . . . . . 35
All-Season Tires . . . . . . . . . . . . . . . . 310
All-Terrain Tires . . . . . . . . . . . . . . . . . 311
AM-FM Radio . . . . . . . . . . . . . . . . . . . 155
Antenna Multi-band . . . . . . . . . . . . . . . . . . . . 159
Antilock Brake System (ABS) . . . 239 Warning Light . . . . . . . . . . . . . . . . . 123
Appearance Care Exterior . . . . . . . . . . . . . . . . . . . . . . . 350
Interior . . . . . . . . . . . . . . . . . . . . . . . . 355
Apple CarPlay and Android Auto . . . . . . . . . . . . . . . . . . 185
Assistance Program, Roadside . . . . . . . . . . . . . . . . . . . . . . 382