buttons GMC CANYON 2018 Get To Know Guide
[x] Cancel search | Manufacturer: GMC, Model Year: 2018, Model line: CANYON, Model: GMC CANYON 2018Pages: 417, PDF Size: 5.47 MB
Page 12 of 417
GMC Canyon/Canyon Denali Owner Manual (GMNA-Localizing-U.S./Canada-
11354423) - 2018 - crc - 10/12/17
In Brief 11
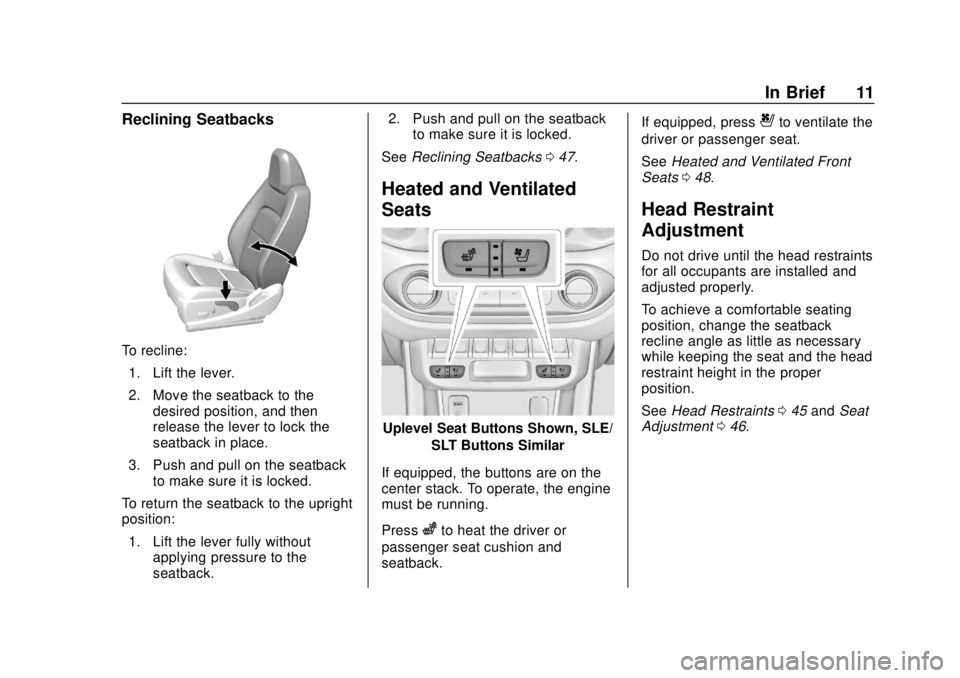
Reclining Seatbacks
To recline:1. Lift the lever.
2. Move the seatback to the desired position, and then
release the lever to lock the
seatback in place.
3. Push and pull on the seatback to make sure it is locked.
To return the seatback to the upright
position:
1. Lift the lever fully without applying pressure to the
seatback. 2. Push and pull on the seatback
to make sure it is locked.
See Reclining Seatbacks 047.
Heated and Ventilated
Seats
Uplevel Seat Buttons Shown, SLE/
SLT Buttons Similar
If equipped, the buttons are on the
center stack. To operate, the engine
must be running.
Press
zto heat the driver or
passenger seat cushion and
seatback. If equipped, press
{to ventilate the
driver or passenger seat.
See Heated and Ventilated Front
Seats 048.
Head Restraint
Adjustment
Do not drive until the head restraints
for all occupants are installed and
adjusted properly.
To achieve a comfortable seating
position, change the seatback
recline angle as little as necessary
while keeping the seat and the head
restraint height in the proper
position.
See Head Restraints 045 and Seat
Adjustment 046.
Page 25 of 417
GMC Canyon/Canyon Denali Owner Manual (GMNA-Localizing-U.S./Canada-
11354423) - 2018 - crc - 10/12/17
24 In Brief
pressure shown on the Tire and
Loading Information label. See
Vehicle Load Limits0211. The
warning light will remain on until the
tire pressure is corrected.
The low tire pressure warning light
may come on in cool weather when
the vehicle is first started, and then
turn off as the vehicle is driven. This
may be an early indicator that the
tire pressures are getting low and
the tires need to be inflated to the
proper pressure.
The TPMS does not replace normal
monthly tire maintenance. Maintain
the correct tire pressures.
See Tire Pressure Monitor System
0 318.
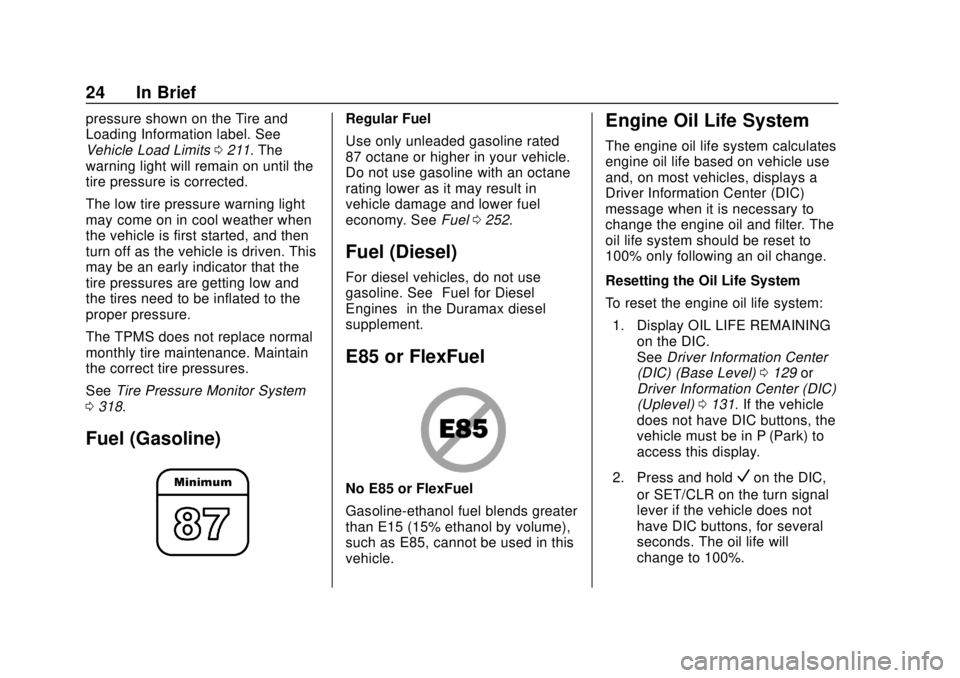
Fuel (Gasoline)
Regular Fuel
Use only unleaded gasoline rated
87 octane or higher in your vehicle.
Do not use gasoline with an octane
rating lower as it may result in
vehicle damage and lower fuel
economy. See Fuel0252.
Fuel (Diesel)
For diesel vehicles, do not use
gasoline. See “Fuel for Diesel
Engines” in the Duramax diesel
supplement.
E85 or FlexFuel
No E85 or FlexFuel
Gasoline-ethanol fuel blends greater
than E15 (15% ethanol by volume),
such as E85, cannot be used in this
vehicle.
Engine Oil Life System
The engine oil life system calculates
engine oil life based on vehicle use
and, on most vehicles, displays a
Driver Information Center (DIC)
message when it is necessary to
change the engine oil and filter. The
oil life system should be reset to
100% only following an oil change.
Resetting the Oil Life System
To reset the engine oil life system:
1. Display OIL LIFE REMAINING on the DIC.
See Driver Information Center
(DIC) (Base Level) 0129 or
Driver Information Center (DIC)
(Uplevel) 0131. If the vehicle
does not have DIC buttons, the
vehicle must be in P (Park) to
access this display.
2. Press and hold
Von the DIC,
or SET/CLR on the turn signal
lever if the vehicle does not
have DIC buttons, for several
seconds. The oil life will
change to 100%.
Page 41 of 417
GMC Canyon/Canyon Denali Owner Manual (GMNA-Localizing-U.S./Canada-
11354423) - 2018 - crc - 10/12/17
40 Keys, Doors, and Windows
Interior Mirrors
Interior Rearview Mirrors
Adjust the rearview mirror for a clear
view of the area behind your
vehicle.
If equipped with OnStar, the vehicle
may have three control buttons at
the bottom of the mirror. See your
dealer for more information about
OnStar and how to subscribe to it.
SeeOnStar Overview 0392.
Do not spray glass cleaner directly
on the mirror. Use a soft towel
dampened with water.
Manual Rearview Mirror
If equipped, push the tab forward for
daytime use and pull it rearward for
nighttime use to avoid glare from
the headlamps from behind.
Automatic Dimming
Rearview Mirror
If equipped, the mirror will
automatically reduce the glare of the
headlamps from behind. The
dimming feature comes on each
time the vehicle is started.
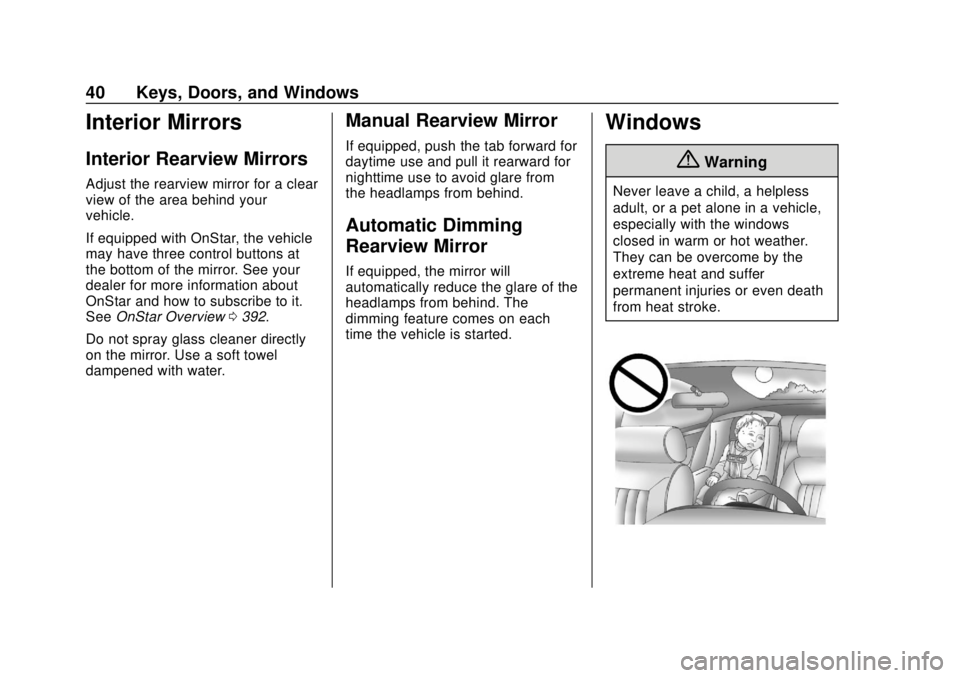
Windows
{Warning
Never leave a child, a helpless
adult, or a pet alone in a vehicle,
especially with the windows
closed in warm or hot weather.
They can be overcome by the
extreme heat and suffer
permanent injuries or even death
from heat stroke.
Page 50 of 417
GMC Canyon/Canyon Denali Owner Manual (GMNA-Localizing-U.S./Canada-
11354423) - 2018 - crc - 10/12/17
Seats and Restraints 49
Warning (Continued)
the seat that insulates against
heat, such as a blanket, cushion,
cover, or similar item. This may
cause the seat heater to
overheat. An overheated seat
heater may cause a burn or may
damage the seat.
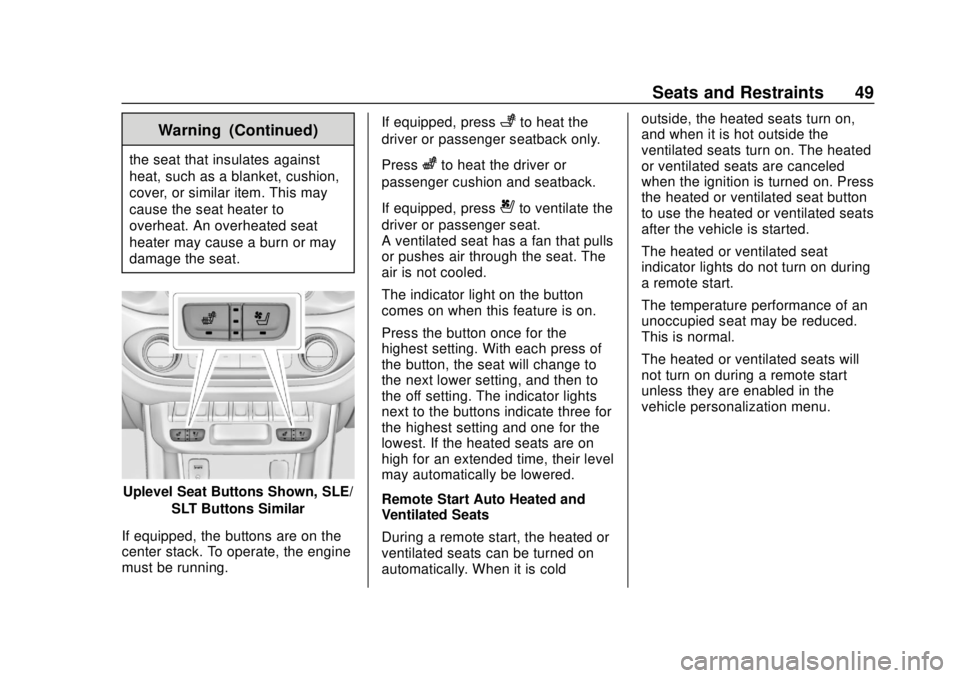
Uplevel Seat Buttons Shown, SLE/SLT Buttons Similar
If equipped, the buttons are on the
center stack. To operate, the engine
must be running. If equipped, press
+to heat the
driver or passenger seatback only.
Press
zto heat the driver or
passenger cushion and seatback.
If equipped, press
{to ventilate the
driver or passenger seat.
A ventilated seat has a fan that pulls
or pushes air through the seat. The
air is not cooled.
The indicator light on the button
comes on when this feature is on.
Press the button once for the
highest setting. With each press of
the button, the seat will change to
the next lower setting, and then to
the off setting. The indicator lights
next to the buttons indicate three for
the highest setting and one for the
lowest. If the heated seats are on
high for an extended time, their level
may automatically be lowered.
Remote Start Auto Heated and
Ventilated Seats
During a remote start, the heated or
ventilated seats can be turned on
automatically. When it is cold outside, the heated seats turn on,
and when it is hot outside the
ventilated seats turn on. The heated
or ventilated seats are canceled
when the ignition is turned on. Press
the heated or ventilated seat button
to use the heated or ventilated seats
after the vehicle is started.
The heated or ventilated seat
indicator lights do not turn on during
a remote start.
The temperature performance of an
unoccupied seat may be reduced.
This is normal.
The heated or ventilated seats will
not turn on during a remote start
unless they are enabled in the
vehicle personalization menu.
Page 93 of 417
GMC Canyon/Canyon Denali Owner Manual (GMNA-Localizing-U.S./Canada-
11354423) - 2018 - crc - 10/12/17
92 Seats and Restraints
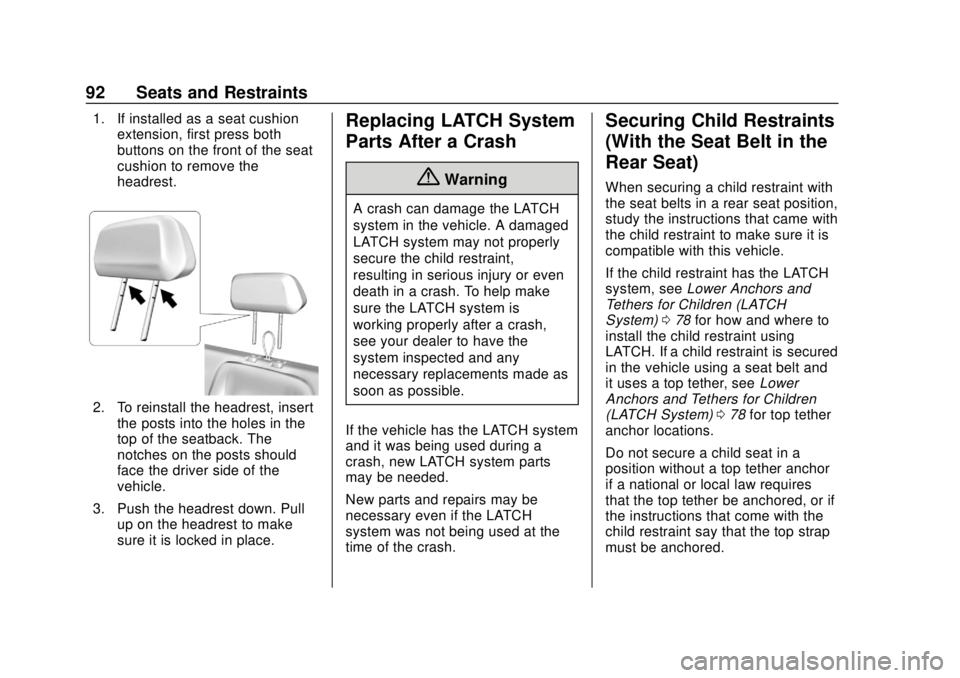
1. If installed as a seat cushionextension, first press both
buttons on the front of the seat
cushion to remove the
headrest.
2. To reinstall the headrest, insert
the posts into the holes in the
top of the seatback. The
notches on the posts should
face the driver side of the
vehicle.
3. Push the headrest down. Pull up on the headrest to make
sure it is locked in place.
Replacing LATCH System
Parts After a Crash
{Warning
A crash can damage the LATCH
system in the vehicle. A damaged
LATCH system may not properly
secure the child restraint,
resulting in serious injury or even
death in a crash. To help make
sure the LATCH system is
working properly after a crash,
see your dealer to have the
system inspected and any
necessary replacements made as
soon as possible.
If the vehicle has the LATCH system
and it was being used during a
crash, new LATCH system parts
may be needed.
New parts and repairs may be
necessary even if the LATCH
system was not being used at the
time of the crash.
Securing Child Restraints
(With the Seat Belt in the
Rear Seat)
When securing a child restraint with
the seat belts in a rear seat position,
study the instructions that came with
the child restraint to make sure it is
compatible with this vehicle.
If the child restraint has the LATCH
system, see Lower Anchors and
Tethers for Children (LATCH
System) 078 for how and where to
install the child restraint using
LATCH. If a child restraint is secured
in the vehicle using a seat belt and
it uses a top tether, see Lower
Anchors and Tethers for Children
(LATCH System) 078 for top tether
anchor locations.
Do not secure a child seat in a
position without a top tether anchor
if a national or local law requires
that the top tether be anchored, or if
the instructions that come with the
child restraint say that the top strap
must be anchored.
Page 130 of 417
GMC Canyon/Canyon Denali Owner Manual (GMNA-Localizing-U.S./Canada-
11354423) - 2018 - crc - 10/12/17
Instruments and Controls 129
Information Displays
Driver Information Center
(DIC) (Base Level)
The DIC displays information about
your vehicle. It also displays
warning messages if a system
problem is detected. SeeVehicle
Messages 0135. All messages
appear in the DIC display in the
center of the instrument cluster.
DIC Operation and Displays
The DIC has different displays
which can be accessed by using the
DIC buttons on the turn signal lever.
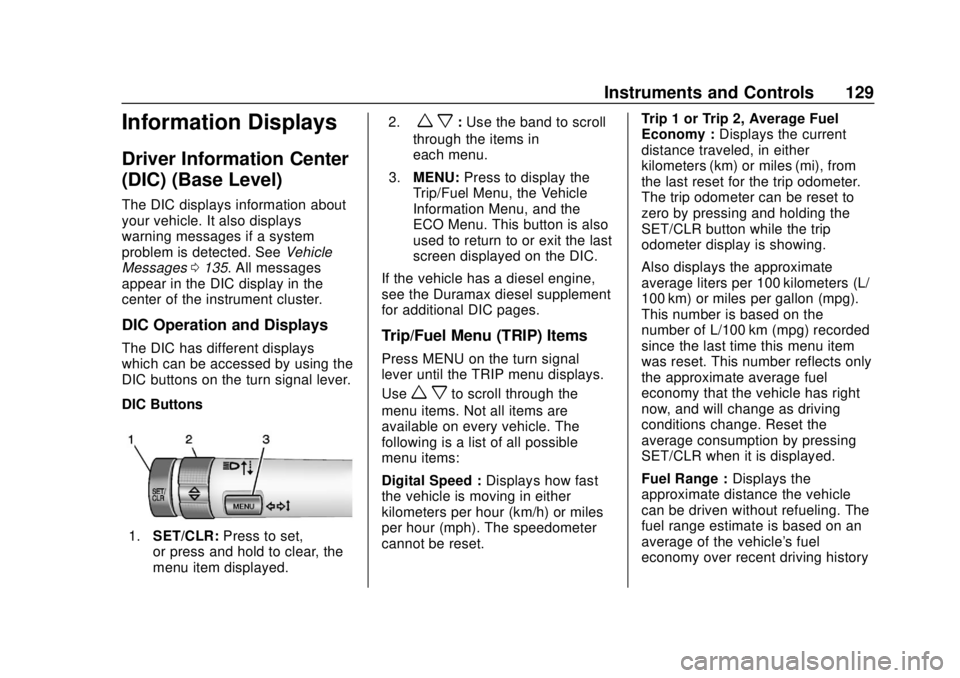
DIC Buttons
1. SET/CLR: Press to set,
or press and hold to clear, the
menu item displayed. 2.
w x:
Use the band to scroll
through the items in
each menu.
3. MENU: Press to display the
Trip/Fuel Menu, the Vehicle
Information Menu, and the
ECO Menu. This button is also
used to return to or exit the last
screen displayed on the DIC.
If the vehicle has a diesel engine,
see the Duramax diesel supplement
for additional DIC pages.
Trip/Fuel Menu (TRIP) Items
Press MENU on the turn signal
lever until the TRIP menu displays.
Use
w xto scroll through the
menu items. Not all items are
available on every vehicle. The
following is a list of all possible
menu items:
Digital Speed : Displays how fast
the vehicle is moving in either
kilometers per hour (km/h) or miles
per hour (mph). The speedometer
cannot be reset. Trip 1 or Trip 2, Average Fuel
Economy :
Displays the current
distance traveled, in either
kilometers (km) or miles (mi), from
the last reset for the trip odometer.
The trip odometer can be reset to
zero by pressing and holding the
SET/CLR button while the trip
odometer display is showing.
Also displays the approximate
average liters per 100 kilometers (L/
100 km) or miles per gallon (mpg).
This number is based on the
number of L/100 km (mpg) recorded
since the last time this menu item
was reset. This number reflects only
the approximate average fuel
economy that the vehicle has right
now, and will change as driving
conditions change. Reset the
average consumption by pressing
SET/CLR when it is displayed.
Fuel Range : Displays the
approximate distance the vehicle
can be driven without refueling. The
fuel range estimate is based on an
average of the vehicle's fuel
economy over recent driving history
Page 155 of 417
GMC Canyon/Canyon Denali Owner Manual (GMNA-Localizing-U.S./Canada-
11354423) - 2018 - crc - 10/12/17
154 Infotainment System
4.6
.Radio: Press and release to
go to the next station or
channel. Press and hold to
fast seek the next strongest
station or channel.
. USB/BT Music/Pictures:
Press and hold to go to the
next content. Press and
hold to fast forward.
5.
#
. Press and release to
access the phone screen,
answer an incoming call,
or access the device home
screen. Press and hold to
access Press to Talk.
Home Page
Infotainment Display Buttons
Infotainment display buttons show
on the screen when available. When
a function is unavailable, the button
may gray out. When a function is
selected, the button may highlight.
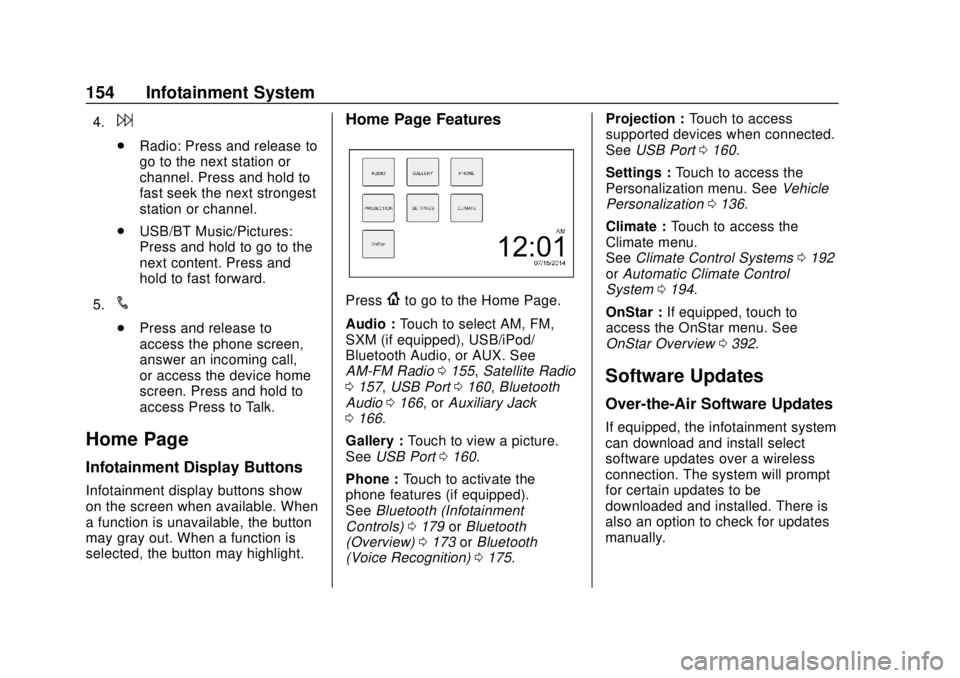
Home Page Features
Press{to go to the Home Page.
Audio : Touch to select AM, FM,
SXM (if equipped), USB/iPod/
Bluetooth Audio, or AUX. See
AM-FM Radio 0155, Satellite Radio
0 157, USB Port 0160, Bluetooth
Audio 0166, or Auxiliary Jack
0 166.
Gallery : Touch to view a picture.
See USB Port 0160.
Phone : Touch to activate the
phone features (if equipped).
See Bluetooth (Infotainment
Controls) 0179 orBluetooth
(Overview) 0173 orBluetooth
(Voice Recognition) 0175. Projection :
Touch to access
supported devices when connected.
See USB Port 0160.
Settings : Touch to access the
Personalization menu. See Vehicle
Personalization 0136.
Climate : Touch to access the
Climate menu.
See Climate Control Systems 0192
or Automatic Climate Control
System 0194.
OnStar : If equipped, touch to
access the OnStar menu. See
OnStar Overview 0392.
Software Updates
Over-the-Air Software Updates
If equipped, the infotainment system
can download and install select
software updates over a wireless
connection. The system will prompt
for certain updates to be
downloaded and installed. There is
also an option to check for updates
manually.
Page 158 of 417
GMC Canyon/Canyon Denali Owner Manual (GMNA-Localizing-U.S./Canada-
11354423) - 2018 - crc - 10/12/17
Infotainment System 157
2. Select Station List.
3. Touch
QorRto scroll through
the list. Touch the station to
select it.
Update Station List 1. From the AM or FM menu, touch MENU, then touch
Update Station List. The
broadcasting list updating will
begin.
2. During the AM or FM broadcasting list update, touch
Cancel to stop the updates.
Storing a Station as a Favorite
Stations from all bands can be
stored in any order in the favorite
pages.
Up to 25 stations can be stored.
Storing Stations
To store the station to a position in
the list, touch the corresponding
button 1−5 until a beep is heard.
1. Select the desired station. 2. Touch
SorTto select the
desired page of saved
favorites.
3. Touch and hold any of the preset buttons to save the
current radio station to that
button of the selected
favorites page.
To change a preset button, tune to
the new desired radio station and
touch and hold the preset button.
Satellite Radio
SiriusXM Satellite Radio
Service
Vehicles with an SXM Satellite
Radio tuner and a valid SiriusXM
Satellite Radio subscription can
receive SiriusXM programming.
SiriusXM is a satellite radio service
based in the 48 contiguous United
States and 10 Canadian provinces.
SiriusXM Satellite Radio has a wide
variety of programming and
commercial-free music, coast to
coast, and in digital-quality sound.
A service fee is required to receive the SiriusXM service. See
www.siriusxm.com or call
1-888-601-6296 (U.S.); or see
www.siriusxm.ca or call
1-877-438-9677 (Canada).
When SiriusXM is active, the
channel name and number,
category name, song title, and artist
display on the screen.
Listening to SiriusXM Radio
1. Press{.
2. Touch AUDIO.
3. Touch Source.
4. Touch SXM and the most recent listened to SiriusXM
channel will display.
Touch
0to return to the
HOME menu.
Selecting a Category
From Menu, touch Categories, then
touch the desired category or from
Categories, touch
QorRto find the
desired channel. Touch the channel
to select it.
Page 159 of 417
GMC Canyon/Canyon Denali Owner Manual (GMNA-Localizing-U.S./Canada-
11354423) - 2018 - crc - 10/12/17
158 Infotainment System
Selecting a Channel
Touchuortand the previous or
next channel will be selected.
Touch and hold
uortto jump
four channels backward or forward,
then release the button at the
desired channel.
Using the Preset Buttons
Up to seven favorites pages can be
saved, and each page can store up
to five channels.
To change a preset button, tune to
the new desired channel and hold
the button.
Listening to Preset Channels
1. Continue touching
SorTto
select the desired
favorites page.
2. Touch the preset button to listen to the channel saved to
that button.
Using the SiriusXM Menu
Operation
1. Touch MENU on the SXM infotainment display.
2. Touch the menu to select the desired item or to display the
detail menu item.
3. Touch
0to return to the
previous menu.
Channel List 1. Touch SXM Channel List from the SXM menu. The channel
list is displayed.
2. Touch
QorRto find the
desired channel. Tune to the
channel by selecting it.
Tone Settings
From the tone settings menu, the
sound features can be set up for
SiriusXM audio and each audio
player ’s functions.
1. Touch Tone Settings. The tone settings screen is displayed.
See “Tone Settings” inAM-FM
Radio 0155. 2. Touch OK.
Auto Volume 1. Touch Auto Volume. See “Auto
Volume” inAM-FM Radio
0 155.
2. Touch OK.
Categories 1. Touch Categories.
2. Touch
QorRto find the
desired category. Touch the
category to select it.
Explicit Content Filter
When on, only a filtered list of
channels will be received. When off,
all regular SXM programming
subscribed to will be received. 1. Touch SXM Explicit Filter.
2. Select On or Off.
Page 168 of 417
GMC Canyon/Canyon Denali Owner Manual (GMNA-Localizing-U.S./Canada-
11354423) - 2018 - crc - 10/12/17
Infotainment System 167
All devices launch audio differently.
When selecting Bluetooth Audio as
a source, the radio may show as
paused on the screen. Press play
on the device or touch
ron the
infotainment display to begin
playback.
Some phones support sending
Bluetooth music information to
display on the radio. When the radio
receives this information, it will
check to see if any is available and
display it. For more information
about supported Bluetooth features,
see www.gm.com/bluetooth in the
U.S. and Canada only.
Voice Recognition
If equipped, voice recognition allows
for hands-free operation within the
audio and phone applications. This
feature can be started by pressing
gon the steering wheel or by
selecting
gon the infotainment
display.
However, not all features within
these areas are supported by voice
commands. Generally, only complex
tasks that require multiple manual
interactions to complete are
supported by voice commands.
For example, tasks that take more
than one or two button presses such
as selecting a song or artist to play
from a media device would be
supported by voice commands.
Other tasks, like adjusting the
volume or seeking up or down are
audio features that are easily
performed by pressing one or two
buttons, and are not supported by
voice commands. In general there are flexible ways to
speak commands for completing the
tasks. Most of them, except
destination entry and voice keypad,
can be completed in a single
command. If the task takes more
than one command to complete, the
first command would be to indicate
the kind of task that is to be
performed. The system replies with
prompts that lead through a dialog
to enter the necessary information.
Voice recognition can be used when
the ignition is on or when Retained
Accessory Power (RAP) is active.
See
Retained Accessory Power
(RAP) 0221.
Using Voice Recognition
Voice recognition becomes available
once the system has been
initialized. This begins when the
ignition is turned on. Initialization
may take a few moments.