air GMC CANYON 2018 Repair Manual
[x] Cancel search | Manufacturer: GMC, Model Year: 2018, Model line: CANYON, Model: GMC CANYON 2018Pages: 417, PDF Size: 5.47 MB
Page 194 of 417
GMC Canyon/Canyon Denali Owner Manual (GMNA-Localizing-U.S./Canada-
11354423) - 2018 - crc - 10/12/17
Climate Controls 193
Air Delivery Mode Control :PressY,\,[, or-to change the
direction of the airflow. An indicator
light comes on in the selected mode
button.
Y: Air is directed to the instrument
panel outlets.
\: Air is divided between the
instrument panel and floor outlets.
[: Air is directed to the floor
outlets, with some air directed to the
windshield, outboard instrument
panel, and side window outlets.
-: This mode clears the windows
of fog or moisture. Air is directed to
the windshield, with some air
directed to the floor, outboard
instrument panel outlets, and side
window outlets.
0: Press to clear the windshield
of fog or frost more quickly. Air is
directed to the windshield and side
window vents, with some air
directed to the outboard instrument
panel. The system automatically
forces outside air into the vehicle and the air conditioning compressor
will run, unless the outside
temperature is close to freezing.
Do not drive the vehicle until all the
windows are clear.
See
Air Vents 0196.
@:Press to turn on recirculation.
An indicator light comes on. Air is
recirculated to quickly cool the
inside of the vehicle. It can also be
used to help reduce outside air and
odors that enter the vehicle.
8: If equipped, press to turn on
outside air. An indicator light comes
on. Outside air is circulated
throughout the vehicle.
A/C : Press to turn the air
conditioning system on or off. An
indicator light comes on to show
that the air conditioning is enabled.
If the fan is turned off, the air
conditioner will not run. The A/C
light will stay on even if the outside
temperatures are below freezing.
Rear Window Defogger
K: If equipped, press to turn the
rear window defogger on or off. An
indicator light on the button comes
on to show that the rear window
defogger is on.
The rear window defogger only
works when the ignition is on. The
defogger also turns off if the ignition
is turned to off or ACC/
ACCESSORY.
Caution
Using a razor blade or sharp
object to clear the inside rear
window can damage the rear
window defogger. Repairs would
not be covered by the vehicle
warranty. Do not clear the inside
rear window with sharp objects.
Heated Mirrors : If equipped with
heated outside mirrors, the mirrors
heat to help clear fog or frost from
the surface of the mirror when the
rear window defog button is
pressed. See Heated Mirrors 038.
Page 195 of 417

GMC Canyon/Canyon Denali Owner Manual (GMNA-Localizing-U.S./Canada-
11354423) - 2018 - crc - 10/12/17
194 Climate Controls
Automatic Climate Control System
With this system the heating, cooling, and ventilation in the vehicle can be
controlled.
1. Fan Control
2. A/C (Air Conditioning)
3. Air Delivery Mode Controls
4. Defrost
5. Temperature Control
6. AUTO (Automatic Operation)
7. Rear Window Defogger
8. Air Recirculation
9. Power ButtonAutomatic Operation
The system automatically heats or
cools the vehicle to the desired
temperature:
.
Fan Speed
. Air Delivery Mode
. Air Conditioning
. Recirculation When AUTO is lit, all functions
operate automatically. Each function
can also be manually set. Functions
not manually set will continue to be
automatically controlled.
To place the system in full automatic
operation:
1. Press AUTO.
2. Set the temperature. To find your comfort setting,
start with 22 °C (72 °F) and
allow the system time to
stabilize. Then adjust the
temperature as needed for best
comfort.
To improve fuel efficiency and to
cool the vehicle faster, recirculation
may be automatically selected in
warm weather.
The recirculation light will not come
on when automatically controlled.
Press
@to manually select
recirculation; press it again to select
outside air.
Page 196 of 417

GMC Canyon/Canyon Denali Owner Manual (GMNA-Localizing-U.S./Canada-
11354423) - 2018 - crc - 10/12/17
Climate Controls 195
Do not cover the solar sensor on the
top of the instrument panel near the
windshield. This sensor regulates
air temperature based on sun load.
See“Sensors” later in this section.
Manual Operation
O:Press to turn the climate control
system on or off. When the system
is turned off, air will stop flowing into
the cabin. Press
Oagain or adjust
any of the climate controls to turn
the system back on and the airflow
will continue based on the selected
climate control settings.
A: Turn clockwise or
counterclockwise to increase or
decrease the fan speed. There is
about a five second delay when the
fan is turned on. Press the knob to
turn the fan off. Press AUTO to
return to automatic operation.
Temperature Control : Turn the
knob clockwise or counterclockwise
to increase or decrease temperature
setting. Air Delivery Mode Controls :
Press
Y,\,[, or-to change
the direction of the airflow. An
indicator light comes on in the
selected mode button.
Changing the mode cancels the
automatic operation and the system
goes into manual mode.
Press AUTO to return to automatic
operation.
Y: Air is directed to the instrument
panel outlets.
\: Air is divided between the
instrument panel and floor outlets.
[: Air is directed to the floor
outlets, with some to the windshield,
outboard instrument panel outlets,
side window outlets, and second
row floor outlets.
-: This mode clears the windows
of fog or moisture. Air is directed to
the windshield, floor outlets,
outboard instrument panel outlets,
and side window outlets. The
system automatically forces outside
air into the vehicle and the air conditioning compressor will run,
unless the outside temperature is
close to freezing.
0:
Press to clear the windshield
of fog or frost more quickly. Air is
directed to the windshield and the
side window vents, with some air
directed to the outboard instrument
panel outlets. The system
automatically forces outside air into
the vehicle and the air conditioning
compressor will run, unless the
outside temperature is below
freezing.
Do not drive the vehicle until all
windows are clear.
See Air Vents 0196.
A/C : Press to turn the air
conditioning system on or off. An
indicator light comes on to show
that the air conditioning is enabled.
The A/C light will stay on even if the
outside temperatures are below
freezing. If the fan is turned off, the
air conditioner will not run. Press
AUTO to return to automatic
operation.
Page 197 of 417
GMC Canyon/Canyon Denali Owner Manual (GMNA-Localizing-U.S./Canada-
11354423) - 2018 - crc - 10/12/17
196 Climate Controls
@:Press to turn on recirculation.
An indicator light comes on. Air is
recirculated to quickly cool the
inside of the vehicle. It can also be
used to help reduce outside air and
odors that enter the vehicle. The air
conditioning compressor also comes
on when this mode is activated.
Press AUTO to return to automatic
operation.
Auto Defog : The climate control
system may have a sensor to
automatically detect high humidity
inside the vehicle. When high
humidity is detected, the climate
control system may adjust air
delivery modes, outside air supply,
and turn on the air conditioner. If the
climate control system does not
detect possible window fogging, it
returns to normal operation. To turn
Auto Defog off or on, see “Climate
and Air Quality” underVehicle
Personalization 0136.
Rear Window Defogger
The rear window defogger uses a
warming grid to remove fog from the
rear window.
K:Press to turn the rear window
defogger on or off. An indicator light
on the button comes on to show that
the rear window defogger is on.
The rear window defogger only
works when the ignition is on. The
defogger also turns off if the ignition
is turned to off or ACC/
ACCESSORY.
Caution
Using a razor blade or sharp
object to clear the inside rear
window can damage the rear
window defogger. Repairs would
not be covered by the vehicle
warranty. Do not clear the inside
rear window with sharp objects.
Heated Mirrors : If equipped with
heated outside mirrors, the mirrors
heat to help clear fog or frost from
the surface of the mirror when the
rear window defog button is
pressed. See Heated Mirrors 038.
Air Vents
Adjustable air vents are in the
center and on the side of the
instrument panel. Use the sliding
knobs on the air vents to change
the direction of the airflow. Slide the
knob up or down to open or close
off the airflow.
Air vents blow warm air on the side
windows in cold weather. If Floor,
Defog, or Defrost modes are
selected, a small amount of air will
come from the vents close to the
window. If the airflow is shut off
using the sliding knobs, warm air
will be directed to the other
instrument panel vents. This is
normal operation.
Use the sliding knobs to turn vent
airflow on or off based on the mode
selected.
Operation Tips
.
Clear away any ice, snow,
or leaves from air inlets at the
base of the windshield that could
block the flow of air into the
vehicle.
Page 198 of 417
GMC Canyon/Canyon Denali Owner Manual (GMNA-Localizing-U.S./Canada-
11354423) - 2018 - crc - 10/12/17
Climate Controls 197
.Clear snow off the hood to
improve visibility and help
decrease moisture drawn into
the vehicle.
. Keep the path under the front
seats clear of objects to help
circulate the air inside of the
vehicle more effectively.
. Use of non-GM approved hood
deflectors can adversely affect
the performance of the system.
Check with your dealer before
adding equipment to the outside
of the vehicle.Maintenance
Passenger Compartment
Air Filter
The passenger compartment air
filter reduces dust, pollen, and other
airborne irritants from outside air
that is pulled into the vehicle. The
filter will need to be replaced
periodically. See Maintenance
Schedule 0361.
Using the climate control system
without an air filter installed is not
recommended. Water or other
debris could enter the system and
result in leaks or noises. Always
install a new filter when removing
the old filter.
For more information on filter
replacement, see your dealer.
Page 201 of 417
GMC Canyon/Canyon Denali Owner Manual (GMNA-Localizing-U.S./Canada-
11354423) - 2018 - crc - 10/12/17
200 Driving and Operating
{Warning
Taking your eyes off the road too
long or too often could cause a
crash resulting in injury or death.
Focus your attention on driving.
Refer to the infotainment section for
more information on using that
system and the navigation system,
if equipped, including pairing and
using a cell phone.
Defensive Driving
Defensive driving means “always
expect the unexpected.” The first
step in driving defensively is to wear
the seat belt. See Seat Belts052.
. Assume that other road users
(pedestrians, bicyclists, and
other drivers) are going to be
careless and make mistakes.
Anticipate what they might do
and be ready.
. Allow enough following distance
between you and the driver in
front of you. .
Focus on the task of driving.
Drunk Driving
Death and injury associated with
drinking and driving is a global
tragedy.
{Warning
Drinking and then driving is very
dangerous. Your reflexes,
perceptions, attentiveness, and
judgment can be affected by even
a small amount of alcohol. You
can have a serious —or even
fatal —collision if you drive after
drinking.
Do not drink and drive or ride with
a driver who has been drinking.
Ride home in a cab; or if you are
with a group, designate a driver
who will not drink.
Control of a Vehicle
Braking, steering, and accelerating
are important factors in helping to
control a vehicle while driving.
Braking
Braking action involves perception
time and reaction time. Deciding to
push the brake pedal is perception
time. Actually doing it is
reaction time.
Average driver reaction time is
about three-quarters of a second. In
that time, a vehicle moving at
100 km/h (60 mph) travels 20 m
(66 ft), which could be a lot of
distance in an emergency.
Helpful braking tips to keep in mind
include:
. Keep enough distance between
you and the vehicle in front
of you.
. Avoid needless heavy braking.
. Keep pace with traffic.
If the engine ever stops while the
vehicle is being driven, brake
normally but do not pump the
brakes. Doing so could make the
pedal harder to push down. If the
engine stops, there will be some
power brake assist but it will be
used when the brake is applied.
Page 204 of 417
GMC Canyon/Canyon Denali Owner Manual (GMNA-Localizing-U.S./Canada-
11354423) - 2018 - crc - 10/12/17
Driving and Operating 203
Before Driving Off-Road
.Have all necessary maintenance
and service work completed.
. Fuel the vehicle, fill fluid levels,
and check inflation pressure in
all tires, including the spare,
if equipped.
. Read all the information about
four-wheel-drive vehicles in this
manual.
. Remove any underbody air
deflector, if equipped. Re-attach
the air deflector after off-road
driving.
. Know the local laws that apply to
off-road driving.
To gain more ground clearance if
needed, it may be necessary to
remove the front fascia lower air
dam, if equipped. However, driving
without the air dam reduces fuel
economy.Caution
Operating the vehicle for
extended periods without the front
fascia lower air dam installed can
cause improper airflow to the
engine. Reattach the front fascia
air dam after off-road driving.
Loading the Vehicle for
Off-Road Driving
{Warning
. Unsecured cargo on the
load floor can be tossed
about when driving over
rough terrain. You or your
passengers can be struck
by flying objects. Secure the
cargo properly.
. Keep cargo in the cargo
area as far forward and as
low as possible. The
(Continued)
Warning (Continued)
heaviest things should be
on the floor, forward of the
rear axle.
. Heavy loads on the roof
raise the vehicle's center of
gravity, making it more likely
to roll over. You can be
seriously or fatally injured if
the vehicle rolls over. Put
heavy loads inside the
cargo area, not on the roof.
For more information about loading
the vehicle, see Vehicle Load Limits
0 211 and Tires 0309.
Environmental Concerns
.
Always use established trails,
roads, and areas that have been
set aside for public off-road
recreational driving and obey all
posted regulations.
. Do not damage shrubs, flowers,
trees, or grasses or disturb
wildlife.
Page 210 of 417

GMC Canyon/Canyon Denali Owner Manual (GMNA-Localizing-U.S./Canada-
11354423) - 2018 - crc - 10/12/17
Driving and Operating 209
.Allow greater following distance
and watch for slippery spots. Icy
patches can occur on otherwise
clear roads in shaded areas.
The surface of a curve or an
overpass can remain icy when
the surrounding roads are clear.
Avoid sudden steering
maneuvers and braking while
on ice.
. Turn off cruise control.
Blizzard Conditions
Stop the vehicle in a safe place and
signal for help. Stay with the vehicle
unless there is help nearby.
If possible, use Roadside
Assistance. See Roadside
Assistance Program 0382. To get
help and keep everyone in the
vehicle safe:
. Turn on the hazard warning
flashers.
. Tie a red cloth to an outside
mirror.
{Warning
Snow can trap engine exhaust
under the vehicle. This may
cause exhaust gases to get
inside. Engine exhaust contains
carbon monoxide (CO), which
cannot be seen or smelled. It can
cause unconsciousness and even
death.
If the vehicle is stuck in snow:
. Clear snow from the base of
the vehicle, especially any
blocking the exhaust pipe.
. Open a window about 5 cm
(2 in) on the vehicle side
that is away from the wind,
to bring in fresh air.
. Fully open the air outlets on
or under the instrument
panel.
. Adjust the climate control
system to circulate the air
inside the vehicle and set
(Continued)
Warning (Continued)
the fan speed to the highest
setting. See“Climate
Control Systems.”
For more information about CO,
see Engine Exhaust 0224.
To save fuel, run the engine for
short periods to warm the vehicle
and then shut the engine off and
partially close the window. Moving
about to keep warm also helps.
If it takes time for help to arrive,
when running the engine, push the
accelerator pedal slightly so the
engine runs faster than the idle
speed. This keeps the battery
charged to restart the vehicle and to
signal for help with the headlamps.
Do this as little as possible, to
save fuel.
Page 215 of 417
GMC Canyon/Canyon Denali Owner Manual (GMNA-Localizing-U.S./Canada-
11354423) - 2018 - crc - 10/12/17
214 Driving and Operating
of the driver, passengers, and
cargo should never exceed the
vehicle's capacity weight.
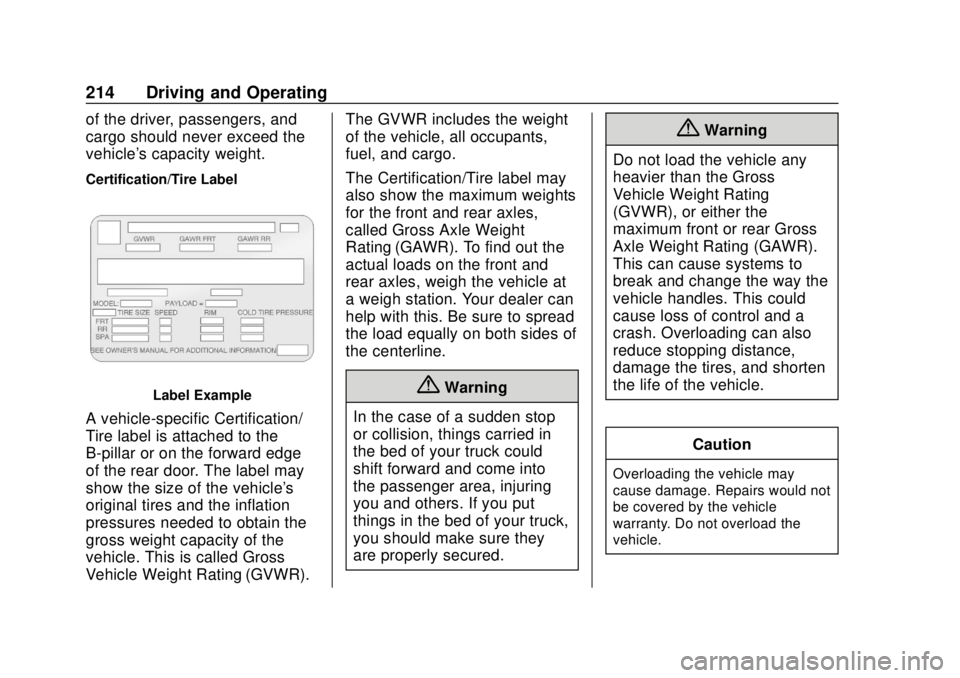
Certification/Tire Label
Label Example
A vehicle-specific Certification/
Tire label is attached to the
B-pillar or on the forward edge
of the rear door. The label may
show the size of the vehicle's
original tires and the inflation
pressures needed to obtain the
gross weight capacity of the
vehicle. This is called Gross
Vehicle Weight Rating (GVWR).The GVWR includes the weight
of the vehicle, all occupants,
fuel, and cargo.
The Certification/Tire label may
also show the maximum weights
for the front and rear axles,
called Gross Axle Weight
Rating (GAWR). To find out the
actual loads on the front and
rear axles, weigh the vehicle at
a weigh station. Your dealer can
help with this. Be sure to spread
the load equally on both sides of
the centerline.
{Warning
In the case of a sudden stop
or collision, things carried in
the bed of your truck could
shift forward and come into
the passenger area, injuring
you and others. If you put
things in the bed of your truck,
you should make sure they
are properly secured.
{Warning
Do not load the vehicle any
heavier than the Gross
Vehicle Weight Rating
(GVWR), or either the
maximum front or rear Gross
Axle Weight Rating (GAWR).
This can cause systems to
break and change the way the
vehicle handles. This could
cause loss of control and a
crash. Overloading can also
reduce stopping distance,
damage the tires, and shorten
the life of the vehicle.
Caution
Overloading the vehicle may
cause damage. Repairs would not
be covered by the vehicle
warranty. Do not overload the
vehicle.
Page 217 of 417

GMC Canyon/Canyon Denali Owner Manual (GMNA-Localizing-U.S./Canada-
11354423) - 2018 - crc - 10/12/17
216 Driving and Operating
be necessary. Be sure to weigh
the vehicle before buying and
installing the new equipment.Caution
Overloading the vehicle may
cause damage. Repairs would not
be covered by the vehicle
warranty. Do not overload the
vehicle.
Remember not to exceed the
Gross Axle Weight
Rating (GAWR) of the front or
rear axle.
* Equipment Maximum
Weight
Ladder Rack
and Cargo 340 kg (750 lb)
Cross Toolbox
and Cargo 181 kg (400 lb)
Side Boxes
and Cargo 113 kg per
side (250 lb
per side) * Equipment
Maximum
Weight
* The combined weight for all
rail-mounted equipment should
not exceed 454 kg (1,000 lb).
Loading Points
1. Primary Load Points
2. Secondary Load Areas
3. GM Approved Accessory Mounting Points
Structural members (1) and (2) are
included in the pickup box design.
Additional accessories should use these load points. Depending on the
accessory design, use a spacer
under the accessory at the load
points to remove gap. The holes for
GM approved accessories (3) are
not intended for aftermarket
equipment. See www.gmupfitter.com
for additional pickup box load
bearing structural information.
Truck-Camper Loading
Information
The vehicle was neither
designed nor intended to carry a
slide-in camper.
Caution
Adding a slide-in camper or
similar equipment to the vehicle
can damage it, and the repairs
would not be covered by the
vehicle warranty. Do not install a
slide-in camper or similar
equipment on the vehicle.