air GMC CANYON 2019 Manual Online
[x] Cancel search | Manufacturer: GMC, Model Year: 2019, Model line: CANYON, Model: GMC CANYON 2019Pages: 381, PDF Size: 5.59 MB
Page 247 of 381
GMC Canyon/Canyon Denali Owner Manual (GMNA-Localizing-U.S./Canada-
12461766) - 2019 - crc - 10/2/18
246 Vehicle Care
cap. SeeEngine Compartment
Overview 0238 for reservoir
location.
How to Check and Add Fluid
Visually check the brake/clutch fluid
reservoir to make sure the fluid level
is at the MIN (minimum) line on the
front of the reservoir. The brake/
hydraulic clutch fluid system should
be closed and sealed.
Do not remove the cap to check the
fluid level or to top-off the fluid level.
Remove the cap only when
necessary to add the proper fluid
until the level reaches the MIN line.
Engine Air Cleaner/Filter
The engine air cleaner/filter is in the
engine compartment on the
passenger side of the vehicle. See
Engine Compartment Overview
0 238.
When to Inspect the Engine Air
Cleaner/Filter
For intervals on changing and
inspecting the engine air cleaner/
filter, see Maintenance Schedule
0 325.
How to Inspect the Engine Air
Cleaner/Filter
Do not start the engine or have the
engine running with the engine air
cleaner/filter housing open. Before
removing the engine air cleaner/
filter, make sure that the engine air
cleaner/filter housing and nearby
components are free of dirt and
debris. Remove the engine air
cleaner/filter. Lightly tap and shake
the engine air cleaner/filter (away
from the vehicle), to release loose
dust and dirt. Inspect the engine air
cleaner/filter for damage, and
replace if damaged. Do not clean
the engine air cleaner/filter or
components with water or
compressed air.
To inspect or replace the air cleaner/
filter:
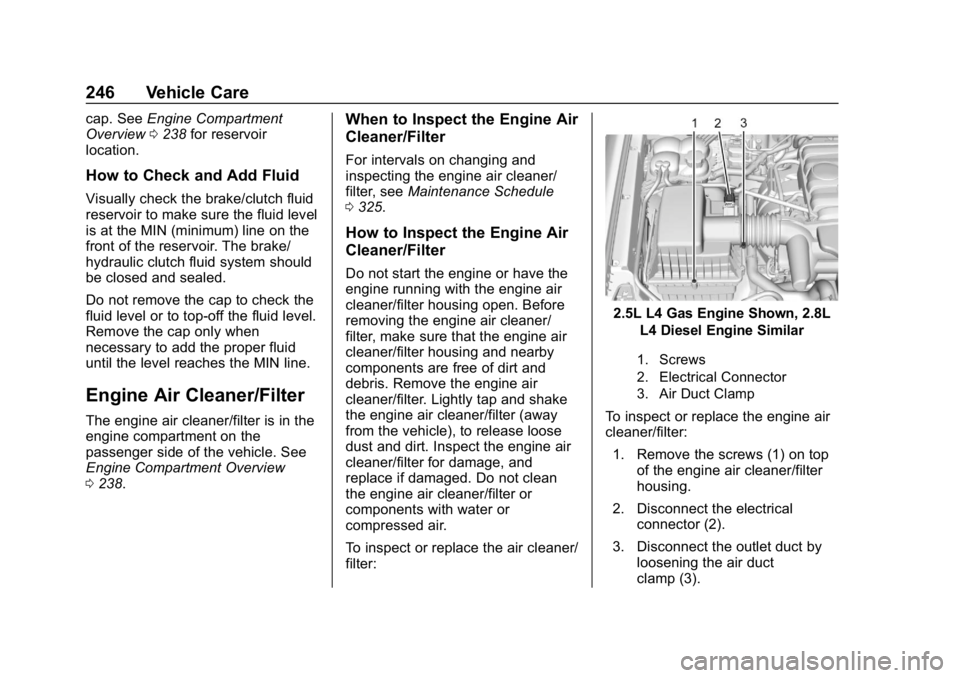
2.5L L4 Gas Engine Shown, 2.8L
L4 Diesel Engine Similar
1. Screws
2. Electrical Connector
3. Air Duct Clamp
To inspect or replace the engine air
cleaner/filter:
1. Remove the screws (1) on top of the engine air cleaner/filter
housing.
2. Disconnect the electrical connector (2).
3. Disconnect the outlet duct by loosening the air duct
clamp (3).
Page 248 of 381
GMC Canyon/Canyon Denali Owner Manual (GMNA-Localizing-U.S./Canada-
12461766) - 2019 - crc - 10/2/18
Vehicle Care 247
4. Lift the filter cover housingaway from the engine air
cleaner/filter housing.
5. Pull out the filter.
6. Inspect or replace the engine air cleaner/filter.
7. Reverse Steps 2–5 to reinstall the filter cover housing.
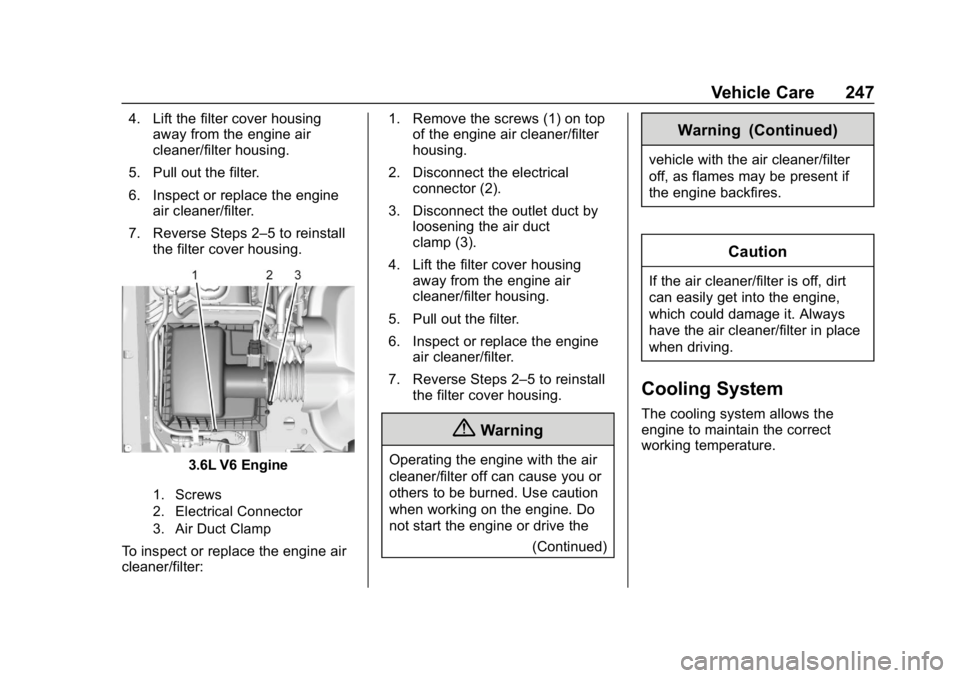
3.6L V6 Engine
1. Screws
2. Electrical Connector
3. Air Duct Clamp
To inspect or replace the engine air
cleaner/filter: 1. Remove the screws (1) on top
of the engine air cleaner/filter
housing.
2. Disconnect the electrical connector (2).
3. Disconnect the outlet duct by loosening the air duct
clamp (3).
4. Lift the filter cover housing away from the engine air
cleaner/filter housing.
5. Pull out the filter.
6. Inspect or replace the engine air cleaner/filter.
7. Reverse Steps 2–5 to reinstall the filter cover housing.
{Warning
Operating the engine with the air
cleaner/filter off can cause you or
others to be burned. Use caution
when working on the engine. Do
not start the engine or drive the
(Continued)
Warning (Continued)
vehicle with the air cleaner/filter
off, as flames may be present if
the engine backfires.
Caution
If the air cleaner/filter is off, dirt
can easily get into the engine,
which could damage it. Always
have the air cleaner/filter in place
when driving.
Cooling System
The cooling system allows the
engine to maintain the correct
working temperature.
Page 253 of 381
GMC Canyon/Canyon Denali Owner Manual (GMNA-Localizing-U.S./Canada-
12461766) - 2019 - crc - 10/2/18
252 Vehicle Care
Warning (Continued)
including the pressure cap, is hot.
Wait for the cooling system and
pressure cap to cool.
If No Steam Is Coming from
the Engine Compartment
If an engine overheat warning is
displayed but no steam can be seen
or heard, the problem may not be
too serious. Sometimes the engine
can get a little too hot when the
vehicle:
.Climbs a long hill on a hot day.
. Stops after high-speed driving.
. Idles for long periods in traffic.
If the overheat warning is displayed
with no sign of steam: 1. Turn the air conditioning off.
2. Turn the heater on to the highest temperature and to the
highest fan speed. Open the
windows as necessary. 3. When it is safe to do so, pull off
the road, shift to P (Park) or
N (Neutral), and let the
engine idle.
If the engine coolant temperature
gauge is no longer in the overheat
zone, the vehicle can be driven.
Continue to drive the vehicle slowly
for about 10 minutes. Keep a safe
distance from the vehicle in front.
If the warning does not come back
on, continue to drive normally and
have the cooling system checked
for proper fill and function.
If the warning continues, pull over,
stop, and park the vehicle
right away.
If there is no sign of steam, idle the
engine for three minutes while
parked. If the warning is still
displayed, turn off the engine until it
cools down.
Engine Fan
If the vehicle has a clutched engine
cooling fan, when the clutch is
engaged, the fan spins faster to
provide more air to cool the engine. In most everyday driving conditions,
the fan is spinning slower and the
clutch is not fully engaged. This
improves fuel economy and reduces
fan noise. Under heavy vehicle
loading, trailer towing, and/or high
outside temperatures, the fan speed
increases as the clutch more fully
engages, so an increase in fan
noise may be heard. This is normal
and should not be mistaken as the
transmission slipping or making
extra shifts. It is merely the cooling
system functioning properly. The fan
will slow down when additional
cooling is not required and the
clutch disengages.
This fan noise may also be heard
when starting the engine. It will go
away as the fan clutch partially
disengages.
If the vehicle has electric cooling
fan(s), the fans may be heard
spinning at low speed during most
everyday driving. The fans may turn
off if no cooling is required. Under
heavy vehicle loading, trailer towing,
high outside temperatures,
or operation of the air conditioning
Page 255 of 381
GMC Canyon/Canyon Denali Owner Manual (GMNA-Localizing-U.S./Canada-
12461766) - 2019 - crc - 10/2/18
254 Vehicle Care
heard all the time the vehicle is
moving, except when applying the
brake pedal firmly.
{Warning
The brake wear warning sound
means that soon the brakes will
not work well. That could lead to
a crash. When the brake wear
warning sound is heard, have the
vehicle serviced.
Caution
Continuing to drive with worn-out
brake pads could result in costly
brake repair.
Some driving conditions or climates
can cause a brake squeal when the
brakes are first applied or lightly
applied. This does not mean
something is wrong with the brakes.
Properly torqued wheel nuts are
necessary to help prevent brake
pulsation. When tires are rotated, inspect brake pads for wear and
evenly tighten wheel nuts in the
proper sequence to torque
specifications in
Capacities and
Specifications 0340.
Brake linings should always be
replaced as complete axle sets.
Brake Pedal Travel
See your dealer if the brake pedal
does not return to normal height,
or if there is a rapid increase in
pedal travel. This could be a sign
that brake service may be required.
Replacing Brake System Parts
Always replace brake system parts
with new, approved replacement
parts. If this is not done, the brakes
may not work properly. The braking
performance expected can change
in many other ways if the wrong
replacement brake parts are
installed or parts are improperly
installed.
Brake Fluid
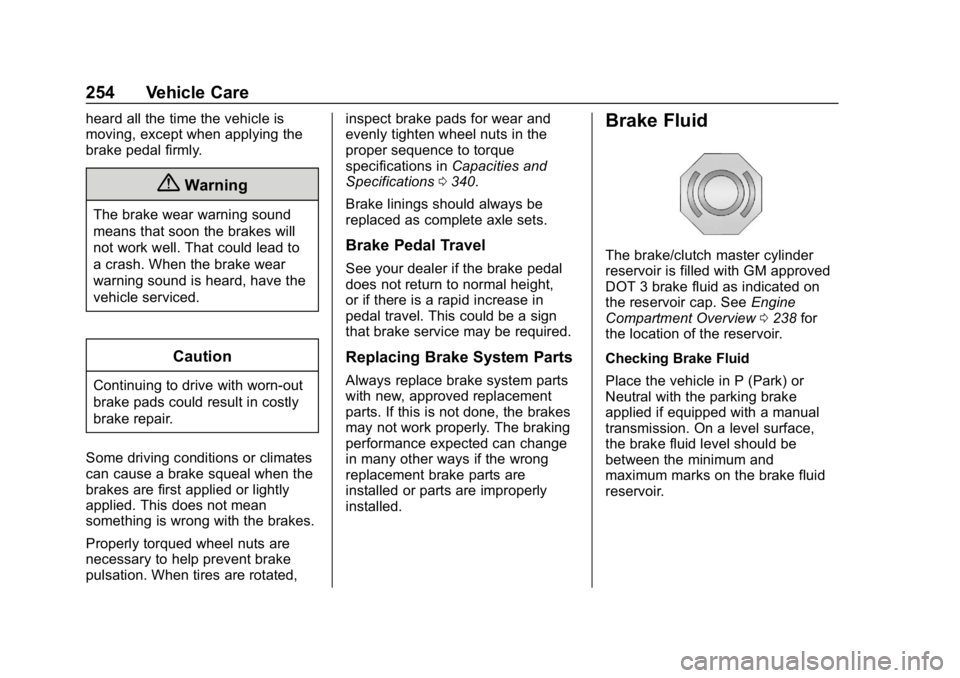
The brake/clutch master cylinder
reservoir is filled with GM approved
DOT 3 brake fluid as indicated on
the reservoir cap. See Engine
Compartment Overview 0238 for
the location of the reservoir.
Checking Brake Fluid
Place the vehicle in P (Park) or
Neutral with the parking brake
applied if equipped with a manual
transmission. On a level surface,
the brake fluid level should be
between the minimum and
maximum marks on the brake fluid
reservoir.
Page 258 of 381
GMC Canyon/Canyon Denali Owner Manual (GMNA-Localizing-U.S./Canada-
12461766) - 2019 - crc - 10/2/18
Vehicle Care 257
When to Change Lubricant
Refer toMaintenance Schedule
0 325 to determine how often to
change the lubricant.
What to Use
Refer to Recommended Fluids and
Lubricants 0335 to determine what
kind of lubricant to use.
Front Axle
When to Check and Change
Lubricant
It is not necessary to regularly
check front axle fluid unless a leak
is suspected, or an unusual noise is
heard. A fluid loss could indicate a
problem. Have it inspected and
repaired. How to Check Lubricant
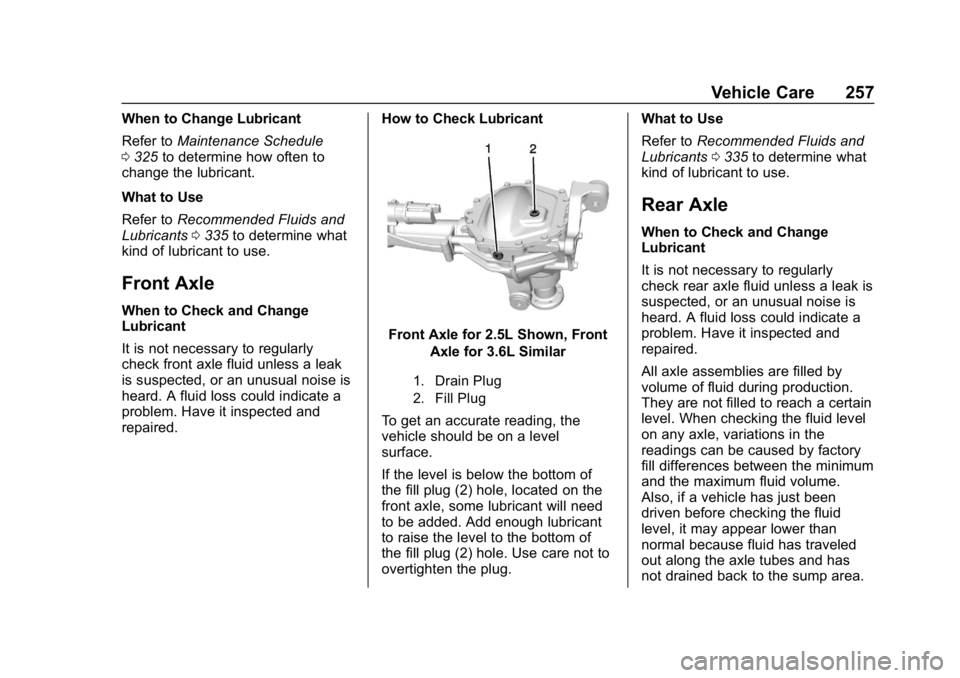
Front Axle for 2.5L Shown, Front
Axle for 3.6L Similar
1. Drain Plug
2. Fill Plug
To get an accurate reading, the
vehicle should be on a level
surface.
If the level is below the bottom of
the fill plug (2) hole, located on the
front axle, some lubricant will need
to be added. Add enough lubricant
to raise the level to the bottom of
the fill plug (2) hole. Use care not to
overtighten the plug. What to Use
Refer to
Recommended Fluids and
Lubricants 0335 to determine what
kind of lubricant to use.
Rear Axle
When to Check and Change
Lubricant
It is not necessary to regularly
check rear axle fluid unless a leak is
suspected, or an unusual noise is
heard. A fluid loss could indicate a
problem. Have it inspected and
repaired.
All axle assemblies are filled by
volume of fluid during production.
They are not filled to reach a certain
level. When checking the fluid level
on any axle, variations in the
readings can be caused by factory
fill differences between the minimum
and the maximum fluid volume.
Also, if a vehicle has just been
driven before checking the fluid
level, it may appear lower than
normal because fluid has traveled
out along the axle tubes and has
not drained back to the sump area.
Page 260 of 381
GMC Canyon/Canyon Denali Owner Manual (GMNA-Localizing-U.S./Canada-
12461766) - 2019 - crc - 10/2/18
Vehicle Care 259
Automatic Transmission
Shift Lock Control
Function Check
{Warning
When you are doing this
inspection, the vehicle could
move suddenly. If the vehicle
moves, you or others could be
injured.
1. Before starting this check, be sure there is enough room
around the vehicle. It should be
parked on a level surface.
2. Apply the parking brake. Be ready to apply the regular
brake immediately if the vehicle
begins to move.
3. With the engine off, turn the ignition on, but do not start the
engine. Without applying the
regular brake, try to move the
shift lever out of P (Park) with normal effort. If the shift lever
moves out of P (Park), contact
your dealer for service.
Ignition Transmission
Lock Check
While parked, and with the parking
brake set, try to turn the ignition off
in each shift lever position.
.
For automatic transmission
vehicles, the ignition should turn
to off only when the shift lever is
in P (Park).
. For manual transmission
vehicles, the ignition should turn
off only when you press the key
release button.
On all vehicles, the ignition key
should come out only when the
ignition is off.
Contact your dealer if service is
required.
Park Brake and P (Park)
Mechanism Check
{Warning
When you are doing this check,
the vehicle could begin to move.
You or others could be injured
and property could be damaged.
Make sure there is room in front
of the vehicle in case it begins to
roll. Be ready to apply the regular
brake at once should the vehicle
begin to move.
Park on a fairly steep hill, with the
vehicle facing downhill. Keeping
your foot on the regular brake, set
the parking brake.
. To check the parking brake's
holding ability: With the engine
running and the transmission in
N (Neutral), slowly remove foot
pressure from the regular brake
pedal. Do this until the vehicle is
held by the parking brake only.
Page 269 of 381
GMC Canyon/Canyon Denali Owner Manual (GMNA-Localizing-U.S./Canada-
12461766) - 2019 - crc - 10/2/18
268 Vehicle Care
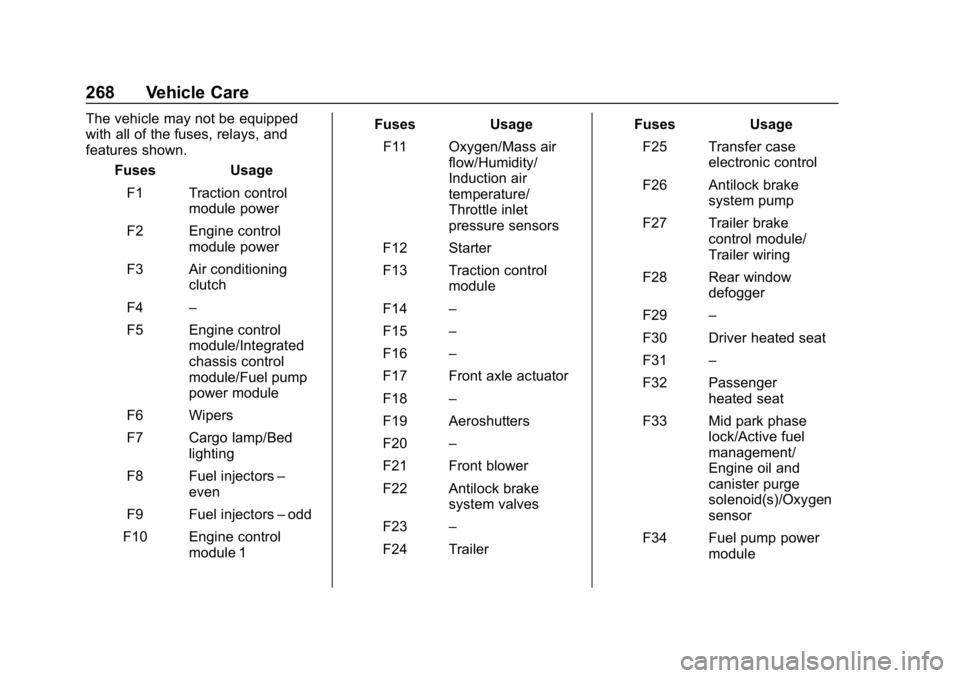
The vehicle may not be equipped
with all of the fuses, relays, and
features shown.Fuses Usage
F1 Traction control module power
F2 Engine control module power
F3 Air conditioning clutch
F4 –
F5 Engine control module/Integrated
chassis control
module/Fuel pump
power module
F6 Wipers
F7 Cargo lamp/Bed lighting
F8 Fuel injectors –
even
F9 Fuel injectors –odd
F10 Engine control module 1 Fuses Usage
F11 Oxygen/Mass air flow/Humidity/
Induction air
temperature/
Throttle inlet
pressure sensors
F12 Starter
F13 Traction control module
F14 –
F15 –
F16 –
F17 Front axle actuator
F18 –
F19 Aeroshutters
F20 –
F21 Front blower
F22 Antilock brake system valves
F23 –
F24 Trailer Fuses Usage
F25 Transfer case electronic control
F26 Antilock brake system pump
F27 Trailer brake control module/
Trailer wiring
F28 Rear window defogger
F29 –
F30 Driver heated seat
F31 –
F32 Passenger heated seat
F33 Mid park phase lock/Active fuel
management/
Engine oil and
canister purge
solenoid(s)/Oxygen
sensor
F34 Fuel pump power module
Page 271 of 381
GMC Canyon/Canyon Denali Owner Manual (GMNA-Localizing-U.S./Canada-
12461766) - 2019 - crc - 10/2/18
270 Vehicle Care
RelaysUsage
K1 Air conditioning clutch
K2 Starter
K3 –
K4 Wipers speed
K5 Wipers control
K6 Cargo lamp/Bed lighting
K7 Powertrain
K8 –
K9 –
K10 –
K11 Center high-mounted
stoplamp
K12 –
K13 Vacuum pump
K14 Trailer parking lamps
K15 Run/Crank
K16 – Relays
Usage
K17 Rear window defogger
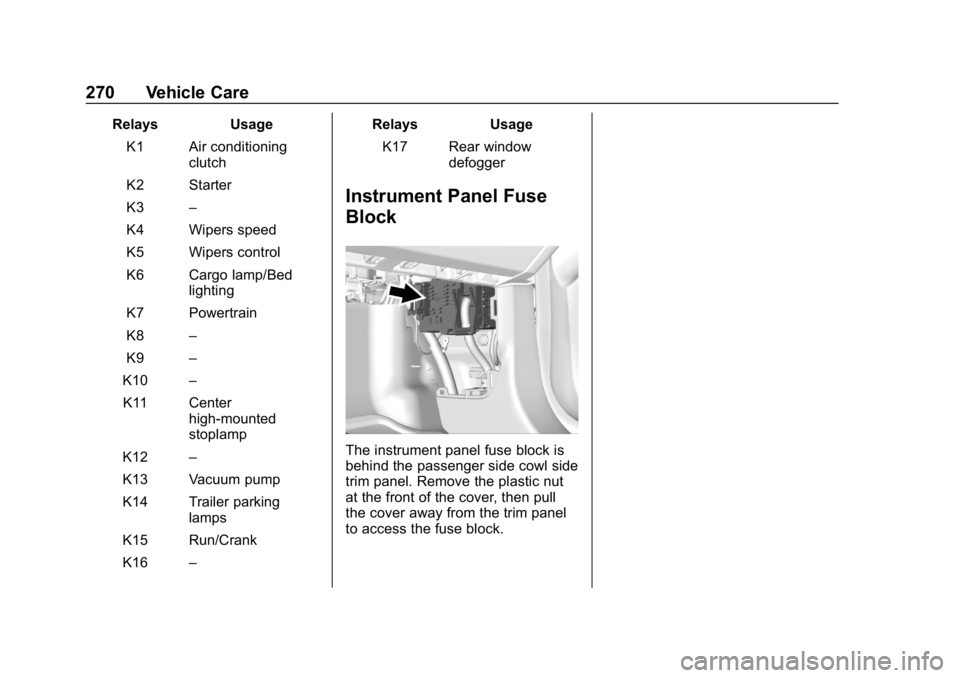
Instrument Panel Fuse
Block
The instrument panel fuse block is
behind the passenger side cowl side
trim panel. Remove the plastic nut
at the front of the cover, then pull
the cover away from the trim panel
to access the fuse block.
Page 273 of 381
GMC Canyon/Canyon Denali Owner Manual (GMNA-Localizing-U.S./Canada-
12461766) - 2019 - crc - 10/2/18
272 Vehicle Care
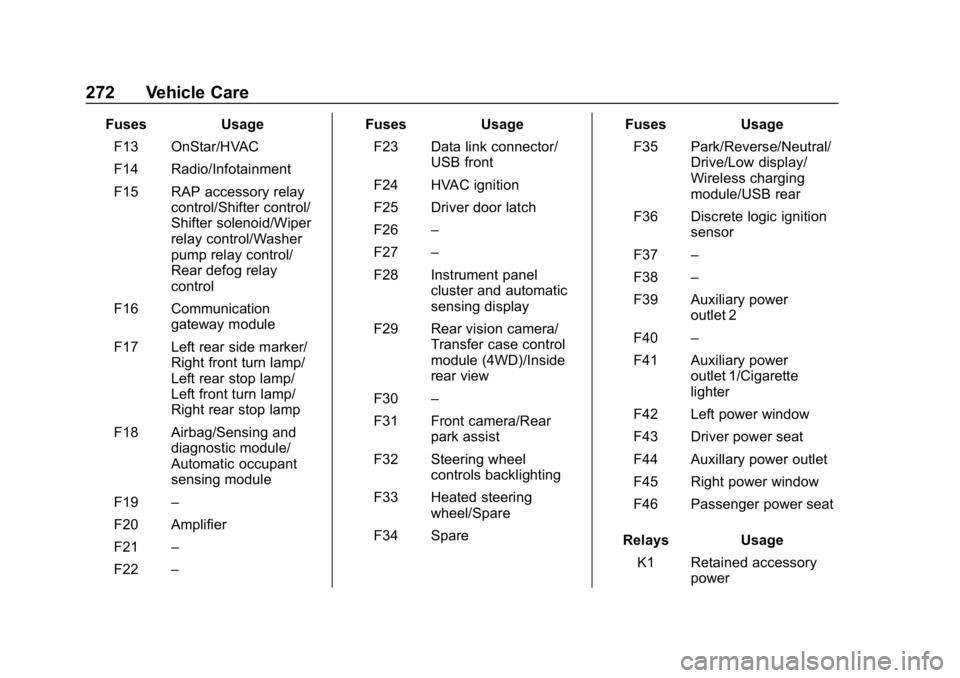
FusesUsage
F13 OnStar/HVAC
F14 Radio/Infotainment
F15 RAP accessory relay control/Shifter control/
Shifter solenoid/Wiper
relay control/Washer
pump relay control/
Rear defog relay
control
F16 Communication gateway module
F17 Left rear side marker/ Right front turn lamp/
Left rear stop lamp/
Left front turn lamp/
Right rear stop lamp
F18 Airbag/Sensing and diagnostic module/
Automatic occupant
sensing module
F19 –
F20 Amplifier
F21 –
F22 – Fuses
Usage
F23 Data link connector/ USB front
F24 HVAC ignition
F25 Driver door latch
F26 –
F27 –
F28 Instrument panel cluster and automatic
sensing display
F29 Rear vision camera/ Transfer case control
module (4WD)/Inside
rear view
F30 –
F31 Front camera/Rear park assist
F32 Steering wheel controls backlighting
F33 Heated steering wheel/Spare
F34 Spare Fuses
Usage
F35 Park/Reverse/Neutral/ Drive/Low display/
Wireless charging
module/USB rear
F36 Discrete logic ignition sensor
F37 –
F38 –
F39 Auxiliary power outlet 2
F40 –
F41 Auxiliary power outlet 1/Cigarette
lighter
F42 Left power window
F43 Driver power seat
F44 Auxillary power outlet
F45 Right power window
F46 Passenger power seat
Relays Usage
K1 Retained accessory power
Page 275 of 381
GMC Canyon/Canyon Denali Owner Manual (GMNA-Localizing-U.S./Canada-
12461766) - 2019 - crc - 10/2/18
274 Vehicle Care
Warning (Continued)
.Replace any tires that
have been damaged by
impacts with potholes,
curbs, etc.
.Improperly repaired tires
can cause a crash. Only
the dealer or an
authorized tire service
center should repair,
replace, dismount, and
mount the tires.
.Do not spin the tires in
excess of 56 km/h
(35 mph) on slippery
surfaces such as snow,
mud, ice, etc. Excessive
spinning may cause the
tires to explode.
All-Season Tires
This vehicle may come with
all-season tires. These tires are
designed to provide good overallperformance on most road surfaces
and weather conditions. Original
equipment tires designed to GM's
specific tire performance criteria
have a TPC specification code
molded onto the sidewall. Original
equipment all-season tires can be
identified by the last two characters
of this TPC code, which will
be
“MS.”
Consider installing winter tires on
the vehicle if frequent driving on
snow or ice-covered roads is
expected. All-season tires provide
adequate performance for most
winter driving conditions, but they
may not offer the same level of
traction or performance as winter
tires on snow or ice-covered roads.
See Winter Tires 0274.
Winter Tires
This vehicle was not originally
equipped with winter tires. Winter
tires are designed for increased
traction on snow and ice-covered
roads. Consider installing winter
tires on the vehicle if frequent
driving on ice or snow covered roads is expected. See your dealer
for details regarding winter tire
availability and proper tire selection.
Also, see
Buying New Tires 0288.
With winter tires, there may be
decreased dry road traction,
increased road noise, and shorter
tread life. After changing to winter
tires, be alert for changes in vehicle
handling and braking.
If using winter tires:
. Use tires of the same brand and
tread type on all four wheel
positions.
. Use only radial ply tires of the
same size, load range, and
speed rating as the original
equipment tires.
Winter tires with the same speed
rating as the original equipment tires
may not be available for H, V, W, Y,
and ZR speed rated tires. If winter
tires with a lower speed rating are
chosen, never exceed the tire's
maximum speed capability.