change wheel GMC CANYON 2020 Owner's Manual
[x] Cancel search | Manufacturer: GMC, Model Year: 2020, Model line: CANYON, Model: GMC CANYON 2020Pages: 364, PDF Size: 5.59 MB
Page 7 of 364

GMC Canyon/Canyon Denali Owner Manual (GMNA-Localizing-U.S./Canada-
13566643) - 2020 - CRC - 10/4/19
6 Introduction
1.Air Vents 0139.
2. Turn Signal Lever. See Turn
and Lane-Change Signals
0 128.
Driver Information Center (DIC)
(Base Level) Controls (If
Equipped). See Driver
Information Center (DIC) (Base
Level) 0115 or
Driver Information Center (DIC)
(Uplevel) 0117.
3. Instrument Cluster (Base
Level) 098 or
Instrument Cluster (Uplevel)
0 100.
4. Windshield Wiper/Washer 092.
5. Light Sensor. See Automatic
Headlamp System 0127.
Vehicle Alarm System Indicator
(If Equipped). See Vehicle
Alarm System 019.
6. Infotainment 0133.
7. Climate Control Systems 0134
(If Equipped).
Automatic Climate Control
System 0136 (If Equipped). 8.
Heated and Ventilated Front
Seats 032 (If Equipped).
9. Power Outlets 093 (If
Equipped).
10. Shift Lever. See Automatic
Transmission 0169 or
Manual Mode 0172.
11. Auxiliary Jack. See the infotainment manual.
USB Port. See the infotainment
manual.
12. Hazard Warning Flashers
0128.
Traction Control/Electronic
Stability Control 0183.
Exterior Cargo Lamps 0130.
Lane Departure Warning
(LDW) 0194 (If Equipped).
Hill Descent Control (HDC)
0 184 (If Equipped).
Tow/Haul Mode 0174 (If
Equipped). 13.
Steering Wheel Controls 091
(If Equipped).
Driver Information Center (DIC)
(Uplevel) Controls (If
Equipped). See Driver
Information Center (DIC) (Base
Level) 0115 or
Driver Information Center (DIC)
(Uplevel) 0117.
14. Horn 092.
15. Steering Wheel Adjustment
091 (Out of View).
16. Cruise Control 0186.
Forward Collision Alert (FCA)
System 0192 (If Equipped).
17. Transfer Case Knob (If Equipped). See Four-Wheel
Drive 0174.
18. Hood Release. See Hood
0 222.
19. Parking Brake 0181.
Page 11 of 364
GMC Canyon/Canyon Denali Owner Manual (GMNA-Localizing-U.S./Canada-
13566643) - 2020 - CRC - 10/4/19
10 Keys, Doors, and Windows
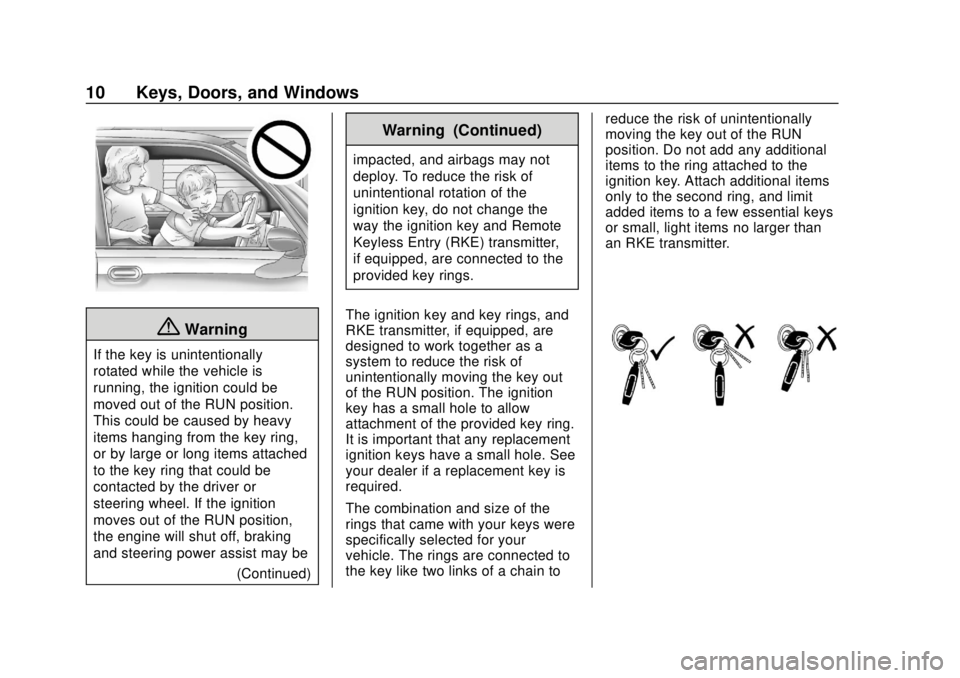
{Warning
If the key is unintentionally
rotated while the vehicle is
running, the ignition could be
moved out of the RUN position.
This could be caused by heavy
items hanging from the key ring,
or by large or long items attached
to the key ring that could be
contacted by the driver or
steering wheel. If the ignition
moves out of the RUN position,
the engine will shut off, braking
and steering power assist may be(Continued)
Warning (Continued)
impacted, and airbags may not
deploy. To reduce the risk of
unintentional rotation of the
ignition key, do not change the
way the ignition key and Remote
Keyless Entry (RKE) transmitter,
if equipped, are connected to the
provided key rings.
The ignition key and key rings, and
RKE transmitter, if equipped, are
designed to work together as a
system to reduce the risk of
unintentionally moving the key out
of the RUN position. The ignition
key has a small hole to allow
attachment of the provided key ring.
It is important that any replacement
ignition keys have a small hole. See
your dealer if a replacement key is
required.
The combination and size of the
rings that came with your keys were
specifically selected for your
vehicle. The rings are connected to
the key like two links of a chain to reduce the risk of unintentionally
moving the key out of the RUN
position. Do not add any additional
items to the ring attached to the
ignition key. Attach additional items
only to the second ring, and limit
added items to a few essential keys
or small, light items no larger than
an RKE transmitter.
Page 56 of 364
GMC Canyon/Canyon Denali Owner Manual (GMNA-Localizing-U.S./Canada-
13566643) - 2020 - CRC - 10/4/19
Seats and Restraints 55
Adding accessories that change the
vehicle's frame, bumper system,
height, front end, or side sheet
metal may keep the airbag system
from working properly.
The operation of the airbag system
can also be affected by changing
any parts of the front seats, seat
belts, airbag sensing and diagnostic
module, steering wheel, instrument
panel, inner door seals including the
speakers, any of the airbag
modules, ceiling or pillar garnish
trim, overhead console, front
sensors, side impact sensors,
or airbag wiring.
Your dealer and the service manual
have information about the location
of the airbag sensors, sensing and
diagnostic module, and airbag
wiring.
In addition, the vehicle has a
passenger sensing system for the
front outboard passenger position,
which includes sensors that are part
of the passenger seat. The
passenger sensing system may not
operate properly if the original seat
trim is replaced with non-GMcovers, upholstery, or trim; or with
GM covers, upholstery, or trim
designed for a different vehicle. Any
object, such as an aftermarket seat
heater or a comfort-enhancing pad
or device, installed under or on top
of the seat fabric, could also
interfere with the operation of the
passenger sensing system. This
could either prevent proper
deployment of the passenger
airbag(s) or prevent the passenger
sensing system from properly
turning off the passenger airbag(s).
See
Passenger Sensing System
0 50.
If the vehicle has rollover roof-rail
airbags, see Different Size Tires
and Wheels 0274 for additional
important information.
If the vehicle must be modified
because you have a disability and
have questions about whether the
modifications will affect the vehicle's
airbag system, or if you have
questions about whether the airbag
system will be affected if the vehicle is modified for any other reason, call
Customer Assistance. See
Customer Assistance Offices
0331.
Airbag System Check
The airbag system does not need
regularly scheduled maintenance or
replacement. Make sure the airbag
readiness light is working. See
Airbag Readiness Light 0105.
Caution
If an airbag covering is damaged,
opened, or broken, the airbag
may not work properly. Do not
open or break the airbag
coverings. If there are any
opened or broken airbag
coverings, have the airbag
covering and/or airbag module
replaced. For the location of the
airbags, see Where Are the
Airbags? 045. See your dealer
for service.
Page 102 of 364
GMC Canyon/Canyon Denali Owner Manual (GMNA-Localizing-U.S./Canada-
13566643) - 2020 - CRC - 10/4/19
Instruments and Controls 101
If the vehicle has a diesel engine,
see the Duramax diesel supplement
for more information.
Uplevel Cluster Menu
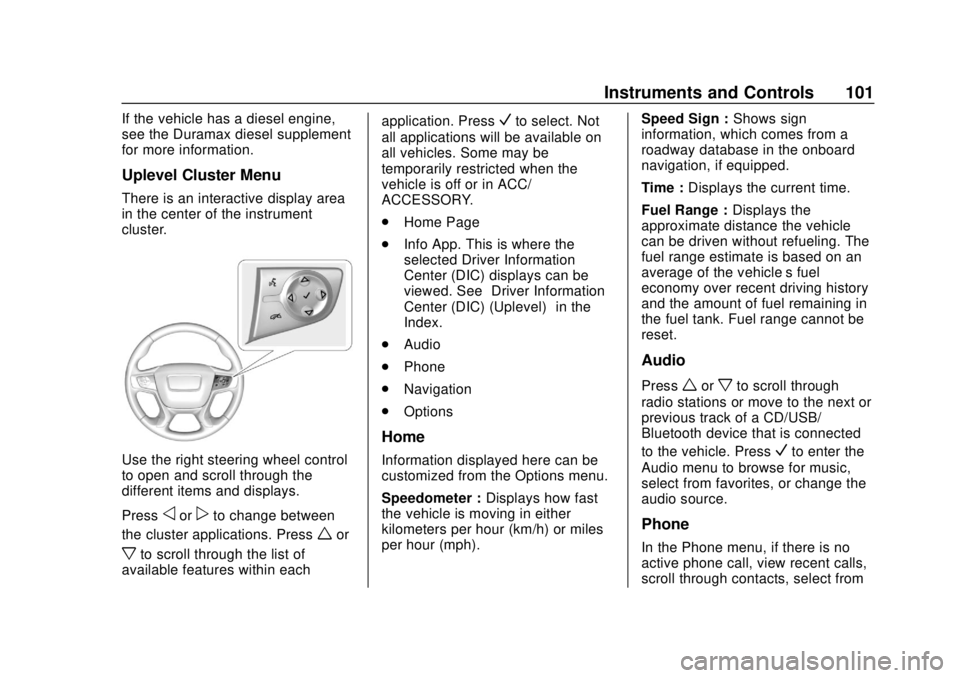
There is an interactive display area
in the center of the instrument
cluster.
Use the right steering wheel control
to open and scroll through the
different items and displays.
Press
oorpto change between
the cluster applications. Press
wor
xto scroll through the list of
available features within each application. Press
Vto select. Not
all applications will be available on
all vehicles. Some may be
temporarily restricted when the
vehicle is off or in ACC/
ACCESSORY.
. Home Page
. Info App. This is where the
selected Driver Information
Center (DIC) displays can be
viewed. See “Driver Information
Center (DIC) (Uplevel)” in the
Index.
. Audio
. Phone
. Navigation
. Options
Home
Information displayed here can be
customized from the Options menu.
Speedometer : Displays how fast
the vehicle is moving in either
kilometers per hour (km/h) or miles
per hour (mph). Speed Sign :
Shows sign
information, which comes from a
roadway database in the onboard
navigation, if equipped.
Time : Displays the current time.
Fuel Range : Displays the
approximate distance the vehicle
can be driven without refueling. The
fuel range estimate is based on an
average of the vehicle’s fuel
economy over recent driving history
and the amount of fuel remaining in
the fuel tank. Fuel range cannot be
reset.
Audio
Pressworxto scroll through
radio stations or move to the next or
previous track of a CD/USB/
Bluetooth device that is connected
to the vehicle. Press
Vto enter the
Audio menu to browse for music,
select from favorites, or change the
audio source.
Phone
In the Phone menu, if there is no
active phone call, view recent calls,
scroll through contacts, select from
Page 109 of 364
GMC Canyon/Canyon Denali Owner Manual (GMNA-Localizing-U.S./Canada-
13566643) - 2020 - CRC - 10/4/19
108 Instruments and Controls
previous guidelines and see your
dealer for service as soon as
possible.
If the light is on steady :A
malfunction has been detected.
Diagnosis and service may be
required.
Check the following:
. If fuel has been added to the
vehicle using the capless funnel
adapter, make sure that it has
been removed. See “Filling the
Tank with a Portable Gas Can”
under Filling the Tank 0197.
The diagnostic system can
detect if the adapter has been
left installed in the vehicle,
allowing fuel to evaporate into
the atmosphere. A few driving
trips with the adapter removed
may turn off the light.
. Poor fuel quality can cause
inefficient engine operation and
poor driveability, which may go
away once the engine is warmed
up. If this occurs, change the
fuel brand. It may require at least one full tank of the proper
fuel to turn the light off. See
Recommended Fuel
0196.
If the light remains on, see your
dealer.
Emissions Inspection and
Maintenance Programs
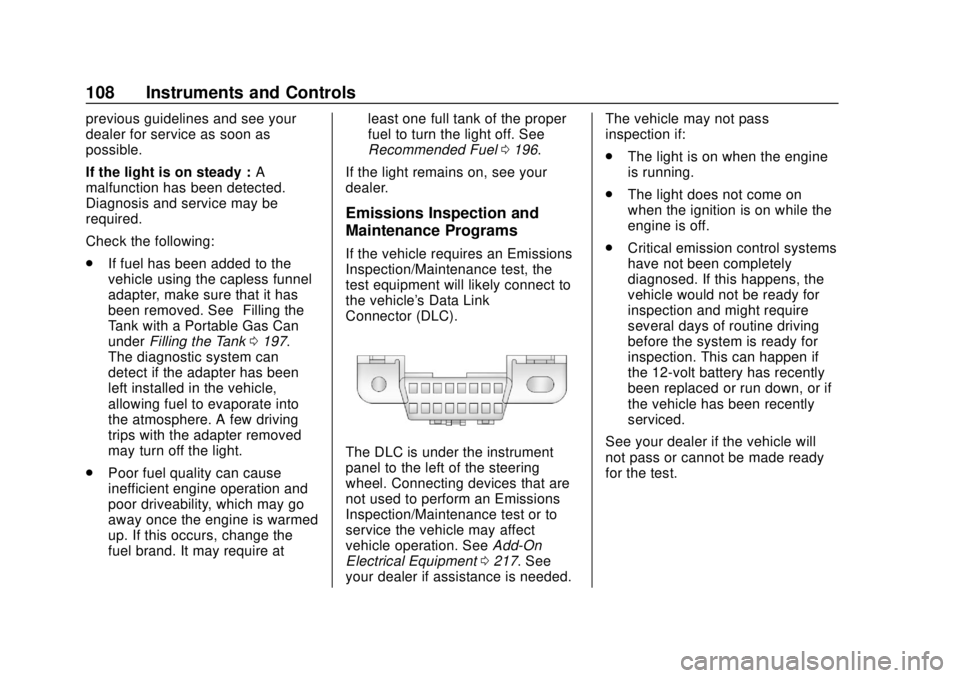
If the vehicle requires an Emissions
Inspection/Maintenance test, the
test equipment will likely connect to
the vehicle's Data Link
Connector (DLC).
The DLC is under the instrument
panel to the left of the steering
wheel. Connecting devices that are
not used to perform an Emissions
Inspection/Maintenance test or to
service the vehicle may affect
vehicle operation. See Add-On
Electrical Equipment 0217. See
your dealer if assistance is needed. The vehicle may not pass
inspection if:
.
The light is on when the engine
is running.
. The light does not come on
when the ignition is on while the
engine is off.
. Critical emission control systems
have not been completely
diagnosed. If this happens, the
vehicle would not be ready for
inspection and might require
several days of routine driving
before the system is ready for
inspection. This can happen if
the 12-volt battery has recently
been replaced or run down, or if
the vehicle has been recently
serviced.
See your dealer if the vehicle will
not pass or cannot be made ready
for the test.
Page 118 of 364
GMC Canyon/Canyon Denali Owner Manual (GMNA-Localizing-U.S./Canada-
13566643) - 2020 - CRC - 10/4/19
Instruments and Controls 117
Engine Hours :Shows the total
number of hours the engine has run.
Transmission Fluid
Temperature : Shows the
temperature of the automatic
transmission fluid in either degrees
Celsius (°C) or degrees
Fahrenheit (°F).
Trailer Brake (If Equipped) :
TRAILER GAIN shows the trailer
gain setting. This setting can be
adjusted from 0.0 to 10.0 with either
a trailer connected or disconnected.
OUTPUT shows the power output to
the trailer anytime a trailer with
electric brakes is connected. Output
is displayed as a bar graph. Dashes
may appear in the OUTPUT display
if a trailer is not connected.
Units : Move
w xto change
between Metric or US when the Unit
display is active. Press SET/CLR to
confirm the setting. This will change
the displays on the DIC to the type
of measurements you select.
ECO Drive Assist Menu (ECO)
Items
This menu is only available on some
vehicles. Press MENU on the turn
signal lever until the ECO menu is
displayed. Use
w xto scroll
through the menu items. Not all
items are available on every vehicle.
The following is a list of all possible
menu items:
Best Average Fuel Economy : The
bottom displays the best average
fuel economy (AFE) that is achieved
for a selected distance. The top
displays a running average of fuel
economy for the most recently
traveled selected distance. The
center bar graph displays the
instantaneous fuel economy.
Quickly press the SET/CLR button
to change the settings for the
distance options.
When viewing best AFE, a several
second press and hold of SET/CLR
will reset the best value. The best
value will show “- - -“until the
selected distance has been
traveled. The display provides feedback on
how current driving behavior in the
bar graph affects the running
average in the top display and how
well recent driving compares to the
best that has been achieved.
Driver Information Center
(DIC) (Uplevel)
The DIC displays are shown in the
center of the instrument cluster in
the Info app. See
Instrument Cluster
(Base Level) 098 or
Instrument Cluster (Uplevel) 0100.
The displays show the status of
many vehicle systems. The controls
for the DIC are on the right steering
wheel control.
Page 126 of 364
GMC Canyon/Canyon Denali Owner Manual (GMNA-Localizing-U.S./Canada-
13566643) - 2020 - CRC - 10/4/19
Lighting 125
Lighting
Exterior Lighting
Exterior Lamp Controls . . . . . . . 125
Exterior Lamps OffReminder . . . . . . . . . . . . . . . . . . . 126
Headlamp High/Low-Beam Changer . . . . . . . . . . . . . . . . . . . . 126
Flash-to-Pass . . . . . . . . . . . . . . . . 126
Daytime Running Lamps (DRL) . . . . . . . . . . . . . . . 127
Automatic Headlamp System . . . . . . . . . . . . . . . . . . . . . . 127
Hazard Warning Flashers . . . . . 128
Turn and Lane-Change Signals . . . . . . . . . . . . . . . . . . . . . . 128
Fog Lamps . . . . . . . . . . . . . . . . . . . 129
Exterior Cargo Lamps . . . . . . . . 130
Interior Lighting
Instrument Panel Illumination Control . . . . . . . . . . . . . . . . . . . . . . 130
Dome Lamps . . . . . . . . . . . . . . . . . 130
Reading Lamps . . . . . . . . . . . . . . 131
Lighting Features
Entry Lighting . . . . . . . . . . . . . . . . 131
Exit Lighting . . . . . . . . . . . . . . . . . . 131
Battery Load Management . . . 131
Battery Power Protection . . . . . 132
Exterior Lighting Battery Saver . . . . . . . . . . . . . . . . . . . . . . . 132Exterior Lighting
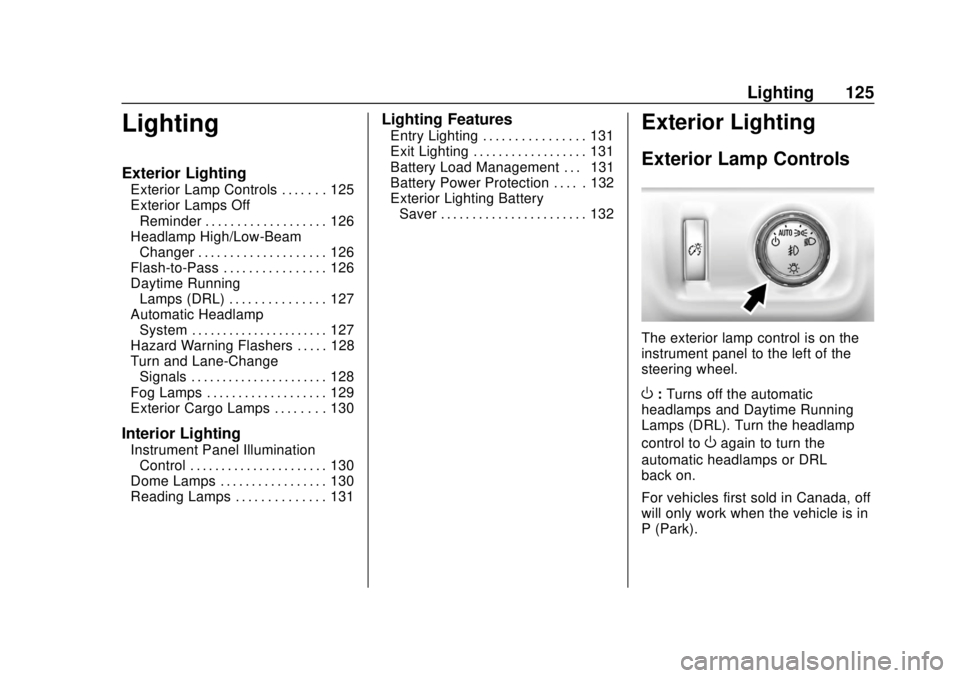
Exterior Lamp Controls
The exterior lamp control is on the
instrument panel to the left of the
steering wheel.
O: Turns off the automatic
headlamps and Daytime Running
Lamps (DRL). Turn the headlamp
control to
Oagain to turn the
automatic headlamps or DRL
back on.
For vehicles first sold in Canada, off
will only work when the vehicle is in
P (Park).
Page 147 of 364
GMC Canyon/Canyon Denali Owner Manual (GMNA-Localizing-U.S./Canada-
13566643) - 2020 - CRC - 10/4/19
146 Driving and Operating
Defensive drivers avoid most skids
by taking reasonable care suited to
existing conditions, and by not
overdriving those conditions. But
skids are always possible.
If the vehicle starts to slide, follow
these suggestions:
.Ease your foot off the
accelerator pedal and steer the
way you want the vehicle to go.
The vehicle may straighten out.
Be ready for a second skid if it
occurs.
. Slow down and adjust your
driving according to weather
conditions. Stopping distance
can be longer and vehicle
control can be affected when
traction is reduced by water,
snow, ice, gravel, or other
material on the road. Learn to
recognize warning clues —such
as enough water, ice, or packed
snow on the road to make a
mirrored surface —and slow
down when you have any doubt.
. Try to avoid sudden steering,
acceleration, or braking,
including reducing vehicle speed by shifting to a lower gear. Any
sudden changes could cause
the tires to slide.
Remember: Antilock brakes help
avoid only the braking skid.
Off-Road Driving
Four-wheel-drive vehicles can be
used for off-road driving. Vehicles
without four-wheel drive and
vehicles not equipped with All
Terrain (AT) or On-Off Road (OOR)
tires must not be driven off-road
except on a level, solid surface. For
contact information about the
original equipment tires, see the
warranty manual.
One of the best ways for successful
off-road driving is to control the
speed.
{Warning
When driving off-road, bouncing
and quick changes in direction
can easily throw you out of
position. This could cause you to (Continued)
Warning (Continued)
lose control and crash. You and
your passengers should always
wear seat belts.
Before Driving Off-Road
.Have all necessary maintenance
and service work completed.
. Fuel the vehicle, fill fluid levels,
and check inflation pressure in
all tires, including the spare,
if equipped.
. Read all the information about
four-wheel-drive vehicles in this
manual.
. Remove any underbody air
deflector, if equipped. Re-attach
the air deflector after off-road
driving.
. Know the local laws that apply to
off-road driving.
To gain more ground clearance if
needed, it may be necessary to
remove the front fascia lower air
Page 150 of 364
GMC Canyon/Canyon Denali Owner Manual (GMNA-Localizing-U.S./Canada-
13566643) - 2020 - CRC - 10/4/19
Driving and Operating 149
.Never try to turn the vehicle
around. If the hill is steep
enough to stall the vehicle,
it is steep enough to cause
it to roll over.
. If you cannot make it up the
hill, back straight down
the hill.
. Never back down a hill in
N (Neutral) using only the
brake. The vehicle can roll
backward quickly and you
could lose control.
. If driving downhill when the
vehicle stalls, shift to a
lower gear, release the
parking brake, and drive
straight down the hill.
3. If the vehicle cannot be restarted after stalling, set the
parking brake, shift into
P (Park), and turn the
vehicle off.
3.1. Leave the vehicle and seek help.
3.2. Stay clear of the path the vehicle would take if it
rolled downhill. .
Avoid turns that take the vehicle
across the incline of the hill.
A hill that can be driven straight
up or down might be too steep to
drive across. Driving across an
incline puts more weight on the
downhill wheels, which could
cause a downhill slide or a
rollover.
. Surface conditions can be a
problem. Loose gravel, muddy
spots, or even wet grass can
cause the tires to slip sideways,
downhill. If the vehicle slips
sideways, it can hit something
that will trip it —a rock, a rut,
etc. —and roll over.
. Hidden obstacles can make the
steepness of the incline more
severe. If a rock is driven across
with the uphill wheels, or if the
downhill wheels drop into a rut
or depression, the vehicle can tilt
even more.
. If an incline must be driven
across, and the vehicle starts to
slide, turn downhill. This should
help straighten out the vehicle
and prevent the side slipping.
{Warning
Getting out of the vehicle on the
downhill side when stopped
across an incline is dangerous.
If the vehicle rolls over, you could
be crushed or killed. Always get
out on the uphill side of the
vehicle and stay well clear of the
rollover path.
Driving in Mud, Sand, Snow,
or Ice
Use a low gear when driving in mud
—the deeper the mud, the lower
the gear. Keep the vehicle moving
to avoid getting stuck.
Traction changes when driving on
sand. On loose sand, such as on
beaches or sand dunes, the tires
tend to sink into the sand. This
affects steering, accelerating, and
braking. Drive at a reduced speed
and avoid sharp turns or abrupt
maneuvers.
Page 186 of 364
GMC Canyon/Canyon Denali Owner Manual (GMNA-Localizing-U.S./Canada-
13566643) - 2020 - CRC - 10/4/19
Driving and Operating 185
The HDC light displays on the
instrument cluster when enabled.
HDC can maintain vehicle speeds
between 4 and 30 km/h (3 and
19 mph) on an incline greater than
or equal to a 10% grade. A blinking
HDC light indicates that the system
is actively applying the brakes to
maintain vehicle speed.
When HDC is set, that is the initial
set speed. It can be increased or
decreased by applying the
accelerator or brake pedal. Smaller
HDC speed control adjustments are
accomplished using the cruise up or
down buttons. Each tap of the
+RES will increase the set speed by
0.8 km/h (0.5 mph), while each tap
of the SET–will decrease the set
speed by 0.8 km/h (0.5 mph). This
adjusted speed becomes the new
set speed. HDC will remain enabled between
30 and 60 km/h (19 and 37 mph),
however vehicle speed cannot be
set or maintained in this range.
It will automatically disable if the
vehicle speed is above 80 km/h
(50 mph) or above 60 km/h
(37 mph) for at least 30 seconds.5
must be pressed again to
re-enable HDC.
When enabled, if the vehicle is at a
speed above 30 km/h (19 mph) and
less than 60 km/h (37 mph), a DIC
message will display instructing the
driver to reduce speed for HDC
operation.
Cruise control will not function while
HDC is enabled and vehicle speed
is below 40 km/h (25 mph).
Limited-Slip Differential
If equipped, the limited-slip
differential can give more traction on
snow, mud, ice, sand, or gravel.
It works like a standard axle most of
the time, but when traction is low,
this feature allows the drive wheel
with the most traction to move the
vehicle. For vehicles with the
limited-slip differential, driven under
severe conditions, the rear axle fluid
should be changed. See
Maintenance Schedule
0311.