low oil pressure GMC CANYON 2022 Owners Manual
[x] Cancel search | Manufacturer: GMC, Model Year: 2022, Model line: CANYON, Model: GMC CANYON 2022Pages: 361, PDF Size: 6.48 MB
Page 13 of 361
GMC Canyon/Canyon Denali Owner Manual (GMNA-Localizing-U.S./Canada-
15275607) - 2022 - CRC - 11/2/21
Keys, Doors, and Windows 11
2. Press and slide the battery down towardthe pocket of the transmitter in the
direction of the key ring. Do not use a
metal object.
3. Remove the battery.
4. Insert the new battery, positive side facing up. Replace with a CR2032 or
equivalent battery.
5. Push together the transmitter back cover top side first, and then the bottom
toward the key ring.
Remote Vehicle Start
If equipped, the engine can be started from
outside of the vehicle. The climate controls
and rear window defogger may also
come on.
If the vehicle has heated and ventilated
seats and the feature is turned on in vehicle
personalization, the heated or ventilated
seats will turn on during cold or hot outside
temperatures and will shut off when the
ignition is turned on. See Heated and
Ventilated Front Seats 025.
Laws in some communities may restrict the
use of remote starters. Check local
regulations for any requirements on remote
starting of vehicles. If your vehicle is low on fuel, do not use the
remote start feature. The vehicle may run
out of fuel.
The vehicle cannot be remote started if:
.The key is in the ignition.
.The hood is not closed.
.There is an emission control system
malfunction and the malfunction indicator
lamp is on.
.The hazard warning flashers are on.
.Two remote vehicle starts, or a single
remote start with an extension, have
already been used.
.The vehicle is not in P (Park).
The engine will turn off during a remote
vehicle start if:
.The coolant temperature gets too high.
.The oil pressure gets low.
The RKE transmitter range may be less while
the vehicle is running.
Other conditions can affect the performance
of the transmitter. See Remote Keyless Entry
(RKE) System 08or
Vehicle Personalization 099. Starting the Engine Using Remote Start
1. Press and release
Q.
2. Immediately press and hold
/until the
turn signal lamps flash or for at least
four seconds.
When the vehicle starts, the parking
lamps will turn on. The doors will be
locked and the climate control system
may come on.
The engine will continue to run for
15 minutes. Repeat the steps for one
15-minute time extension. Turn the ignition
on to operate the vehicle.
Extending Engine Run Time
The engine run time can be extended by
15 minutes, for a total of 30 minutes,
if during the first 15 minutes Steps 1 and 2
are repeated while the engine is still
running. An extension can be requested
30 seconds after starting.
A maximum of two remote starts, or a
single start with an extension, is allowed
between ignition cycles.
The ignition must be turned on and then
back off to use remote start again.
Page 77 of 361
GMC Canyon/Canyon Denali Owner Manual (GMNA-Localizing-U.S./Canada-
15275607) - 2022 - CRC - 11/2/21
Instruments and Controls 75
Instruments and Controls
Controls
Steering Wheel Adjustment . . . . . . . . . . . . 76
Steering Wheel Controls . . . . . . . . . . . . . . . . 76
Heated Steering Wheel . . . . . . . . . . . . . . . . . 76
Horn . . . . . . . . . . . . . . . . . . . . . . . . . . . . . . . . . . . . 77
Windshield Wiper/Washer . . . . . . . . . . . . . . 77
Compass . . . . . . . . . . . . . . . . . . . . . . . . . . . . . . . . 78
Clock . . . . . . . . . . . . . . . . . . . . . . . . . . . . . . . . . . . 78
Power Outlets . . . . . . . . . . . . . . . . . . . . . . . . . . 78
Wireless Charging . . . . . . . . . . . . . . . . . . . . . . 79
Warning Lights, Gauges, and Indicators
Warning Lights, Gauges, andIndicators . . . . . . . . . . . . . . . . . . . . . . . . . . . . . 81
Instrument Cluster . . . . . . . . . . . . . . . . . . . . . . 81
Speedometer . . . . . . . . . . . . . . . . . . . . . . . . . . . 84
Odometer . . . . . . . . . . . . . . . . . . . . . . . . . . . . . . 84
Trip Odometer . . . . . . . . . . . . . . . . . . . . . . . . . 84
Tachometer . . . . . . . . . . . . . . . . . . . . . . . . . . . . 84
Fuel Gauge . . . . . . . . . . . . . . . . . . . . . . . . . . . . . 84
Engine Coolant Temperature Gauge . . . . 85
Seat Belt Reminders . . . . . . . . . . . . . . . . . . . . 85
Airbag Readiness Light . . . . . . . . . . . . . . . . . 86
Passenger Airbag Status Indicator . . . . . . 86
Charging System Light . . . . . . . . . . . . . . . . . 87 Malfunction Indicator Lamp (Check
Engine Light) . . . . . . . . . . . . . . . . . . . . . . . . . 87
Brake System Warning Light . . . . . . . . . . . 88
Antilock Brake System (ABS) Warning Light . . . . . . . . . . . . . . . . . . . . . . . . . . . . . . . . . 89
Four-Wheel-Drive Light . . . . . . . . . . . . . . . . . 89
Tow/Haul Mode Light . . . . . . . . . . . . . . . . . . 90
Hill Descent Control Light . . . . . . . . . . . . . . 90
Lane Departure Warning (LDW) Light . . . . . . . . . . . . . . . . . . . . . . . . . . . . . . . . . 90
Vehicle Ahead Indicator . . . . . . . . . . . . . . . . 90
Traction Off Light . . . . . . . . . . . . . . . . . . . . . . 90
StabiliTrak OFF Light . . . . . . . . . . . . . . . . . . . . 91
Traction Control System (TCS)/StabiliTrak Light . . . . . . . . . . . . . . . . . . . . . . . . . . . . . . . . . . 91
Tire Pressure Light . . . . . . . . . . . . . . . . . . . . . . 91
Engine Oil Pressure Light . . . . . . . . . . . . . . . 92
Low Fuel Warning Light . . . . . . . . . . . . . . . . 92
Security Light . . . . . . . . . . . . . . . . . . . . . . . . . . 92
High-Beam On Light . . . . . . . . . . . . . . . . . . . . 93
Front Fog Lamp Light . . . . . . . . . . . . . . . . . . . 93
Lamps On Reminder . . . . . . . . . . . . . . . . . . . . 93
Cruise Control Light . . . . . . . . . . . . . . . . . . . . 93
Door Ajar Light (Uplevel Cluster) . . . . . . . 93
Information Displays
Driver Information Center (DIC) (Base Level) . . . . . . . . . . . . . . . . . . . . . . . . . . . . . . . . . 93
Driver Information Center (DIC) (Uplevel) . . . . . . . . . . . . . . . . . . . . . . . . . . . . . 96
Vehicle Messages
Vehicle Messages . . . . . . . . . . . . . . . . . . . . . . 98
Engine Power Messages . . . . . . . . . . . . . . . . 99
Vehicle Speed Messages . . . . . . . . . . . . . . . 99
Vehicle Personalization
Vehicle Personalization . . . . . . . . . . . . . . . . . 99
Page 94 of 361
GMC Canyon/Canyon Denali Owner Manual (GMNA-Localizing-U.S./Canada-
15275607) - 2022 - CRC - 11/2/21
92 Instruments and Controls
the light will come on at every ignition
cycle. SeeTire Pressure Monitor Operation
0 274.
Engine Oil Pressure Light
Caution
Lack of proper engine oil maintenance
can damage the engine. Driving with the
engine oil low can also damage the
engine. The repairs would not be covered
by the vehicle warranty. Check the oil
level as soon as possible. Add oil if
required, but if the oil level is within the
operating range and the oil pressure is
still low, have the vehicle serviced.
Always follow the maintenance schedule
for changing engine oil.
This light should come on briefly as the
engine is started. If it does not come on,
have the vehicle serviced by your dealer. If the light comes on and stays on, it means
that oil is not flowing through the engine
properly. The vehicle could be low on oil
and might have some other system
problem. See your dealer.
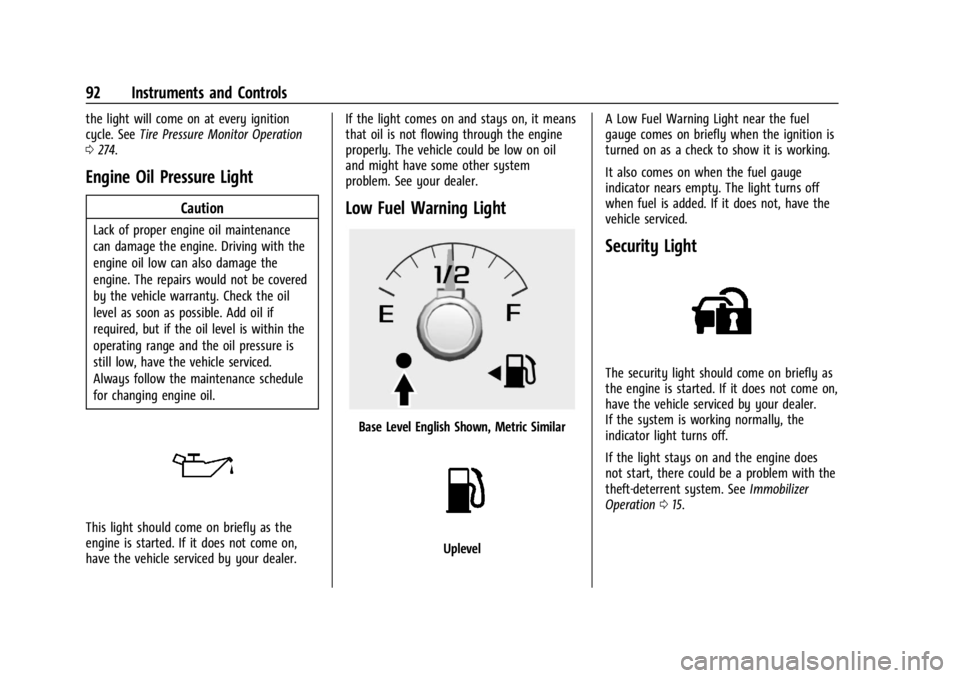
Low Fuel Warning Light
Base Level English Shown, Metric Similar
Uplevel
A Low Fuel Warning Light near the fuel
gauge comes on briefly when the ignition is
turned on as a check to show it is working.
It also comes on when the fuel gauge
indicator nears empty. The light turns off
when fuel is added. If it does not, have the
vehicle serviced.
Security Light
The security light should come on briefly as
the engine is started. If it does not come on,
have the vehicle serviced by your dealer.
If the system is working normally, the
indicator light turns off.
If the light stays on and the engine does
not start, there could be a problem with the
theft-deterrent system. See
Immobilizer
Operation 015.
Page 97 of 361
GMC Canyon/Canyon Denali Owner Manual (GMNA-Localizing-U.S./Canada-
15275607) - 2022 - CRC - 11/2/21
Instruments and Controls 95
Vehicle Information Menu (VEHICLE)
Items
Press MENU on the turn signal lever until
the VEHICLE menu is displayed. Use
w x
to scroll through the menu items. Not all
items are available on every vehicle. The
following is a list of all possible menu items:
Remaining Oil Life :Displays an estimate of
the oil's remaining useful life. If REMAINING
OIL LIFE 99% is displayed, that means 99%
of the current oil life remains.
When the remaining oil life is low, the
CHANGE ENGINE OIL SOON message will
appear on the display. The oil should be
changed as soon as possible. See Engine Oil
0 238. In addition to the engine oil life
system monitoring the oil life, additional
maintenance is recommended in the
Maintenance Schedule in this manual. See
Maintenance Schedule 0311.
The Oil Life display must be reset after each
oil change. Do not reset the Oil Life display
accidentally at any time other than when
the oil has just been changed. It cannot be
reset accurately until the next oil change. To
reset the engine oil life system, see Engine
Oil Life System 0240. Oil Pressure :
Oil pressure is displayed in
either kilopascal (kPa) or in pounds per
square inch (psi).
Tire Pressure : Displays a vehicle with the
approximate pressures of all four tires. Tire
pressure is displayed in either
kilopascal (kPa) or in pounds per square
inch (psi). See Tire Pressure Monitor System
0 274 and
Tire Pressure Monitor Operation 0274.
Battery Voltage : Displays the current
battery voltage, if equipped. Battery voltage
changes are normal while driving. See
Charging System Light 087. If there is a
problem with the battery charging system,
the DIC will display a message.
Engine Hours : Shows the total number of
hours the engine has run.
Transmission Fluid Temperature : Shows the
temperature of the automatic transmission
fluid in either degrees Celsius (°C) or degrees
Fahrenheit (°F).
Trailer Brake (If Equipped) : TRAILER GAIN
shows the trailer gain setting. This setting
can be adjusted from 0.0 to 10.0 with either
a trailer connected or disconnected. OUTPUT shows the power output to the
trailer anytime a trailer with electric brakes
is connected. Output is displayed as a bar
graph. Dashes may appear in the OUTPUT
display if a trailer is not connected.
Units :
Movew xto change between
Metric or US when the Unit display is active.
Press SET/CLR to confirm the setting. This
will change the displays on the DIC to the
type of measurements you select.
ECO Drive Assist Menu (ECO) Items
This menu is only available on some
vehicles. Press MENU on the turn signal
lever until the ECO menu is displayed. Use
w xto scroll through the menu items.
Not all items are available on every vehicle.
The following is a list of all possible menu
items:
Best Average Fuel Economy : The bottom
displays the best average fuel economy
(AFE) that is achieved for a selected
distance. The top displays a running average
of fuel economy for the most recently
traveled selected distance. The center bar
graph displays the instantaneous fuel
economy. Quickly press the SET/CLR button
to change the settings for the distance
options.
Page 99 of 361
GMC Canyon/Canyon Denali Owner Manual (GMNA-Localizing-U.S./Canada-
15275607) - 2022 - CRC - 11/2/21
Instruments and Controls 97
Trip 1 or Trip 2 :Shows the current distance
traveled, in either kilometers (km) or
miles (mi), since the trip odometer was last
reset.
This also shows the approximate average
liters per 100 kilometers (L/100 km) or miles
per gallon (mpg). This number is calculated
based on the number of L/100 km (mpg)
recorded since the last time this menu item
was reset. This number reflects only the
approximate average fuel economy that the
vehicle has right now, and will change as
driving conditions change.
Press and hold
Vwhile this display is active
to reset the trip odometer and the average
fuel economy. Trip 1 and Trip 2 can also be
reset by pressing
Vand choosing reset.
Fuel Range : Shows the approximate
distance the vehicle can be driven without
refueling. LOW will be displayed when the
vehicle is low on fuel. The fuel range
estimate is based on an average of the
vehicle's fuel economy over recent driving
history and the amount of fuel remaining in
the fuel tank. Oil Life :
Shows an estimate of the oil's
remaining useful life. If REMAINING OIL LIFE
99% is displayed, that means 99% of the
current oil life remains.
When the remaining oil life is low, the
CHANGE ENGINE OIL SOON message will
appear on the display. The oil should be
changed as soon as possible. See Engine Oil
0 238. In addition to the engine oil life
system monitoring the oil life, additional
maintenance is recommended. See
Maintenance Schedule 0311.
The Oil Life display must be reset after each
oil change. It will not reset itself. Do not to
reset the Oil Life display at any time other
than when the oil has just been changed.
It cannot be reset accurately until the next
oil change. To reset the engine oil life
system, press and hold
Vfor several
seconds while the Oil Life display is active.
See Engine Oil Life System 0240.
Tire Pressure : Shows the approximate
pressures of all four tires. Tire pressure is
displayed in either kilopascal (kPa) or in
pounds per square inch (psi). If the pressure
is low, the value for that tire is shown in
amber. See Tire Pressure Monitor System
0 274 and
Tire Pressure Monitor Operation 0274. Instantaneous Fuel Economy :
Displays the
current fuel economy in liters per
100 kilometers (L/100 km) or miles per
gallon (mpg). This number reflects only the
approximate fuel economy that the vehicle
has right now and changes frequently as
driving conditions change. This display
cannot be reset.
Average Vehicle Speed : Displays the
average vehicle speed of the vehicle in
kilometers per hour (km/h) or miles per
hour (mph). This average is based on the
various vehicle speeds recorded since the
last reset. Reset the average speed by
pressing
Vwhen it is displayed.
Fuel Economy : The center displays the
approximate instantaneous fuel economy as
a number and bar graph. Displayed above
the bar graph is a running average of fuel
economy for the most recently traveled
selected distance. Displayed below the bar
graph is the best average fuel economy that
has been achieved for the selected distance.
The selected distance is displayed at the top
of the page as “last xxx mi/km.”
Press
Vto select the distance or reset best
value. Use
wandxto choose the
distance and press
V. Presswandxto
Page 100 of 361
GMC Canyon/Canyon Denali Owner Manual (GMNA-Localizing-U.S./Canada-
15275607) - 2022 - CRC - 11/2/21
98 Instruments and Controls
select“Reset Best Score.” PressVto reset
the best average fuel economy. After reset,
the best value displays “-,-”until the
selected distance has been traveled.
The display provides information on how
current driving behavior affects the running
average and how well recent driving
compares to the best that has been
achieved for the selected distance.
Engine Hours (Hourmeter) : Shows the total
number of hours the engine has run. This
display also shows the engine idle hours.
Timer : This display can be used as a timer.
To start the timer, press
Vwhile this
display is active. The display will show the
amount of time that has passed since the
timer was last reset. To stop the timer,
press
Vbriefly while this display is active
and the timer is running. To reset the timer
to zero, press and hold
Vwhile this display
is active.
Battery Voltage : Displays the current
battery voltage, if equipped. Battery voltage
changes are normal while driving. See
Charging System Light 087. If there is a
problem with the battery charging system,
the DIC will display a message. Oil Pressure :
Oil pressure is displayed in
either kilopascal (kPa) or in pounds per
square inch (psi).
Engine Hours : Shows the total number of
hours the engine has run.
Transmission Fluid Temperature : Shows the
temperature of the automatic transmission
fluid in either degrees Celsius (°C) or degrees
Fahrenheit (°F).
Trailer Brake (If Equipped) : TRAILER GAIN
shows the trailer gain setting. This setting
can be adjusted from 0.0 to 10.0 with either
a trailer connected or disconnected.
OUTPUT shows the power output to the
trailer anytime a trailer with electric brakes
is connected. Output is displayed as a bar
graph. Dashes may appear in the OUTPUT
display if a trailer is not connected.
Blank Page : Shows no information.
Vehicle Messages
Messages displayed on the DIC indicate the
status of the vehicle or some action that
may be needed to correct a condition.
Multiple messages may appear one after
another. The messages that do not require
immediate action can be acknowledged and
cleared by pressing
V. The messages that
require immediate action cannot be cleared
until that action is performed.
All messages should be taken seriously;
clearing the message does not correct the
problem.
If a SERVICE message appears, see your
dealer.
Follow the instructions given in the
messages. The system displays messages
regarding the following topics:
.Service Messages
.Fluid Levels
.Vehicle Security
.Brakes
.Steering
.Ride Control Systems
.Driver Assistance Systems
.Cruise Control
.Lighting and Bulb Replacement
.Wiper/Washer Systems
.Doors and Windows
.Seat Belts
.Airbag Systems
Page 240 of 361
GMC Canyon/Canyon Denali Owner Manual (GMNA-Localizing-U.S./Canada-
15275607) - 2022 - CRC - 11/2/21
238 Vehicle Care
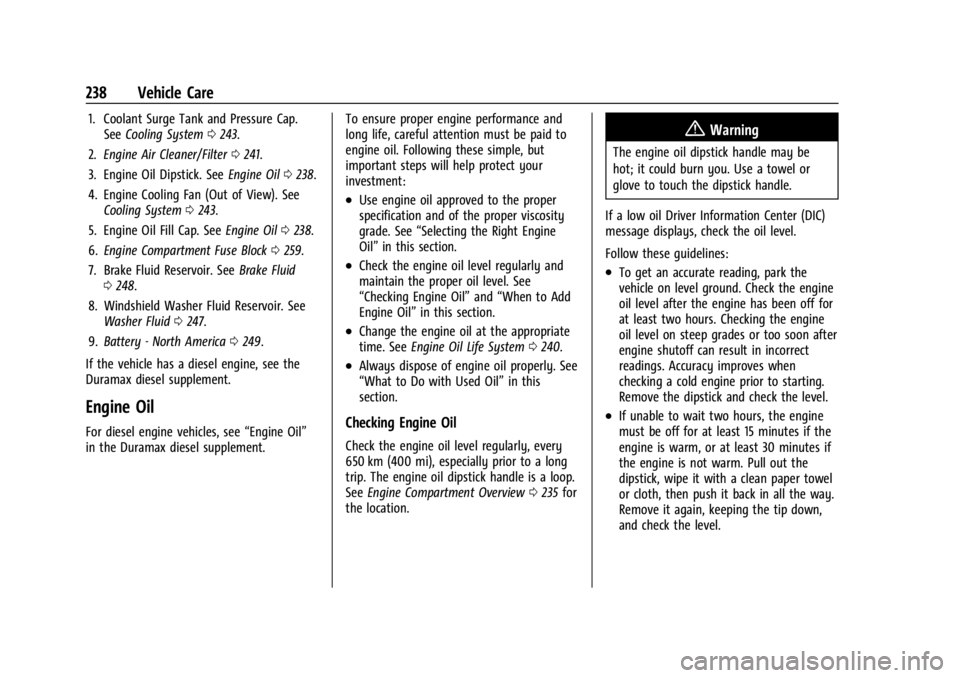
1. Coolant Surge Tank and Pressure Cap.See Cooling System 0243.
2. Engine Air Cleaner/Filter 0241.
3. Engine Oil Dipstick. See Engine Oil0238.
4. Engine Cooling Fan (Out of View). See Cooling System 0243.
5. Engine Oil Fill Cap. See Engine Oil0238.
6. Engine Compartment Fuse Block 0259.
7. Brake Fluid Reservoir. See Brake Fluid
0 248.
8. Windshield Washer Fluid Reservoir. See Washer Fluid 0247.
9. Battery - North America 0249.
If the vehicle has a diesel engine, see the
Duramax diesel supplement.
Engine Oil
For diesel engine vehicles, see “Engine Oil”
in the Duramax diesel supplement. To ensure proper engine performance and
long life, careful attention must be paid to
engine oil. Following these simple, but
important steps will help protect your
investment:
.Use engine oil approved to the proper
specification and of the proper viscosity
grade. See
“Selecting the Right Engine
Oil” in this section.
.Check the engine oil level regularly and
maintain the proper oil level. See
“Checking Engine Oil” and“When to Add
Engine Oil” in this section.
.Change the engine oil at the appropriate
time. SeeEngine Oil Life System 0240.
.Always dispose of engine oil properly. See
“What to Do with Used Oil” in this
section.
Checking Engine Oil
Check the engine oil level regularly, every
650 km (400 mi), especially prior to a long
trip. The engine oil dipstick handle is a loop.
See Engine Compartment Overview 0235 for
the location.
{Warning
The engine oil dipstick handle may be
hot; it could burn you. Use a towel or
glove to touch the dipstick handle.
If a low oil Driver Information Center (DIC)
message displays, check the oil level.
Follow these guidelines:
.To get an accurate reading, park the
vehicle on level ground. Check the engine
oil level after the engine has been off for
at least two hours. Checking the engine
oil level on steep grades or too soon after
engine shutoff can result in incorrect
readings. Accuracy improves when
checking a cold engine prior to starting.
Remove the dipstick and check the level.
.If unable to wait two hours, the engine
must be off for at least 15 minutes if the
engine is warm, or at least 30 minutes if
the engine is not warm. Pull out the
dipstick, wipe it with a clean paper towel
or cloth, then push it back in all the way.
Remove it again, keeping the tip down,
and check the level.
Page 247 of 361
GMC Canyon/Canyon Denali Owner Manual (GMNA-Localizing-U.S./Canada-
15275607) - 2022 - CRC - 11/2/21
Vehicle Care 245
If coolant is visible but the coolant level is
not at or above the mark pointed to, add a
50/50 mixture of clean, drinkable water and
DEX-COOL coolant.
Be sure the cooling system is cool before
this is done.
If no coolant is visible in the coolant surge
tank, add coolant as follows:
How to Add Coolant to the Coolant
Surge Tank
{Warning
Spilling coolant on hot engine parts can
burn you. Coolant contains ethylene
glycol and it will burn if the engine parts
are hot enough.
{Warning
Plain water, or other liquids such as
alcohol, can boil before the proper
coolant mixture will. With plain water or
the wrong mixture, the engine could get
too hot but there would not be an
overheat warning. The engine could catch
fire and you or others could be burned.
{Warning
Steam and scalding liquids from a hot
cooling system are under pressure.
Turning the pressure cap, even a little,
can cause them to come out at high
speed and you could be burned. Never
turn the cap when the cooling system,
including the pressure cap, is hot. Wait
for the cooling system and pressure cap
to cool.
Caution
Failure to follow the specific coolant fill
procedure could cause the engine to
overheat and could cause system
damage. If coolant is not visible in the
surge tank, contact your dealer.
The coolant surge tank pressure cap can be
removed when the cooling system, including
the surge tank pressure cap and upper
radiator hose, is no longer hot.
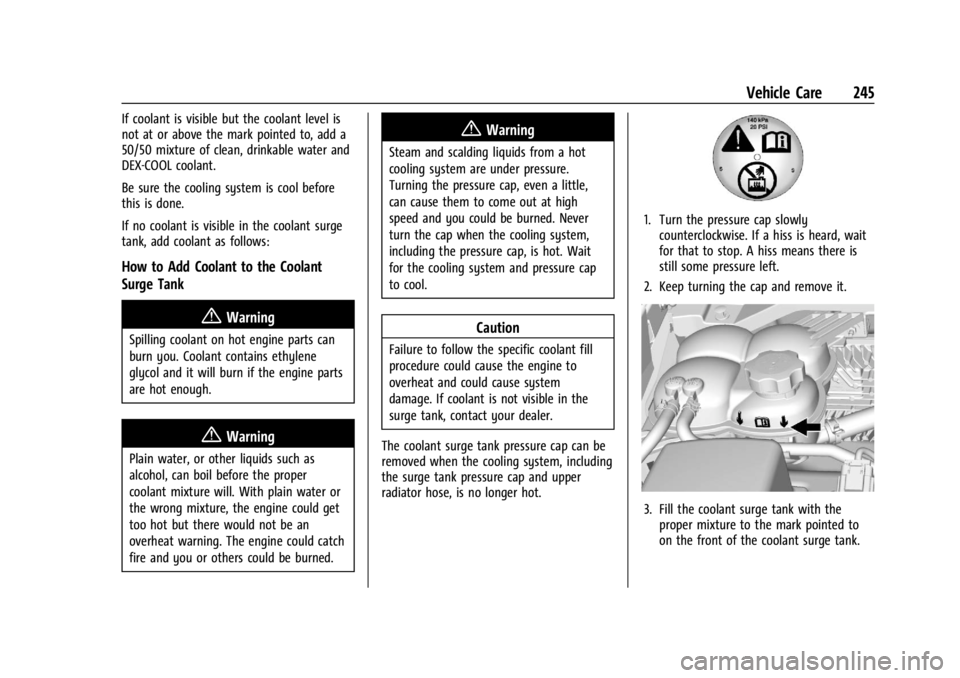
1. Turn the pressure cap slowly counterclockwise. If a hiss is heard, wait
for that to stop. A hiss means there is
still some pressure left.
2. Keep turning the cap and remove it.
3. Fill the coolant surge tank with the proper mixture to the mark pointed to
on the front of the coolant surge tank.
Page 304 of 361
GMC Canyon/Canyon Denali Owner Manual (GMNA-Localizing-U.S./Canada-
15275607) - 2022 - CRC - 11/2/21
302 Vehicle Care
Caution
Avoid using high-pressure washes closer
than 30 cm (12 in) to the surface of the
vehicle. Use of power washers exceeding
8 274 kPa (1,200 psi) can result in
damage or removal of paint and decals.
If using an automatic car wash, follow with
the car wash instructions. The windshield
wiper and rear window wiper, if equipped,
must be off. Remove any accessories that
may be damaged or interfere with the car
wash equipment.
Rinse the vehicle well, before washing and
after, to remove all cleaning agents
completely. If they are allowed to dry on
the surface, they could stain.
Dry the finish with a soft, clean chamois or
an all-cotton towel to avoid surface
scratches and water spotting.
Cleaning Underhood Components
Caution
Do not power wash any component
under the hood that has this
e
symbol.(Continued)
Caution (Continued)
This could cause damage that would not
be covered by the vehicle warranty.
Solvents or aggressive cleaners may harm
underhood components. The usages of these
chemicals should be avoided.
Recommend water only.
A pressure washer may be used, but care
must be utilized. The following criteria must
be followed:
.Water pressure must be kept below
14,000 KPa (2,000 PSI).
.Water temperature must be below 80 °C
(180 °F).
.Spray nozzle with a 40 degree wide angle
spray pattern or wider must be used.
.Nozzle must be kept at least 30 cm (1 ft)
away from all surfaces.
Finish Care
Application of aftermarket clearcoat sealant/
wax materials is not recommended.
If painted surfaces are damaged, see your
dealer to have the damage assessed and
repaired. Foreign materials such as calcium
chloride and other salts, ice melting agents,
road oil and tar, tree sap, bird droppings, chemicals from industrial chimneys, etc., can
damage the vehicle's finish if they remain
on painted surfaces. Wash the vehicle as
soon as possible. If necessary, use
non-abrasive cleaners that are marked safe
for painted surfaces to remove foreign
matter.
Occasional hand waxing or mild polishing
should be done to remove residue from the
paint finish. See your dealer for approved
cleaning products.
Do not apply waxes or polishes to uncoated
plastic, vinyl, rubber, decals, simulated
wood, or flat paint as damage can occur.
Caution
Machine compounding or aggressive
polishing on a basecoat/clearcoat paint
finish may damage it. Use only
non-abrasive waxes and polishes that are
made for a basecoat/clearcoat paint finish
on the vehicle.
To keep the paint finish looking new, keep
the vehicle garaged or covered whenever
possible.
Page 308 of 361
GMC Canyon/Canyon Denali Owner Manual (GMNA-Localizing-U.S./Canada-
15275607) - 2022 - CRC - 11/2/21
306 Vehicle Care
When using liquid soap cleaners, follow the
directions on the specific cleaner or soap
solution for dilution instructions.
Caution
To prevent damage:
.Never use a razor or any other sharp
object to remove soil from any interior
surface
.Never use a brush with stiff bristles.
.Never rub any surface aggressively or
with too much pressure.
.Do not get any exposed electrical
components wet.
.Do not use laundry detergents or
dishwashing soaps with degreasers. Do
not use solutions that contain strong
or caustic soap.
.Do not heavily saturate the upholstery
when cleaning.
.Do not use solvents or cleaners
containing solvents.
.Do not use disinfecting wipes that are
scented or contain bleach. Do not use
wipes or cleaners that show a color
(Continued)
Caution (Continued)
transfer to the wipe or change the
appearance of the interior surface
when used.
.Do not use scented or gel-type hand
sanitizers. If hand sanitizer comes in
contact with interior surfaces of the
vehicle, blot immediately and clean
with a soft cloth dampened with a
mild soap and water solution.
Interior Glass
To clean, use a microfiber cloth fabric
dampened with water. Wipe droplets left
behind with a clean dry cloth. If necessary,
use a commercial glass cleaner after
cleaning with plain water.
Caution
To prevent scratching, never use abrasive
cleaners on automotive glass. Abrasive
cleaners or aggressive cleaning may
damage the rear window defogger.
Cleaning the windshield with water during
the first three to six months of ownership
will reduce tendency to fog.
Speaker Covers
Vacuum around a speaker cover gently, so
that the speaker will not be damaged. Clean
spots with water and mild soap.
Coated Moldings
Coated moldings should be cleaned.
.When lightly soiled, wipe with a sponge
or soft, lint-free cloth dampened with
water.
.When heavily soiled, use warm soapy
water.
Vinyl/Rubber
If equipped with vinyl floor and rubber floor
mats, use a soft cloth and/or brush
dampened with water to remove dust and
loose dirt. For more thorough cleaning, use
a mild soap and water solution.
{Warning
Do not use cleaners that contain silicone,
wax-based products, or cleaners that
increase gloss on vinyl/rubber floor and
mats. These cleaners can permanently
change the appearance and feel of the
vinyl/rubber and can make the floor (Continued)