torque GMC CANYON 2023 Owners Manual
[x] Cancel search | Manufacturer: GMC, Model Year: 2023, Model line: CANYON, Model: GMC CANYON 2023Pages: 371, PDF Size: 7.41 MB
Page 174 of 371
GMC Canyon/Canyon Denali Owner Manual (GMNA-Localizing-U.S./Canada/
Mexico-16510661) - 2023 - CRC - 11/29/22
Driving and Operating 173
If you have to leave the vehicle with the
engine running, be sure the vehicle is in
P (Park) and the parking brake is firmly set
before you leave it. After you move the
shift lever into P (Park), hold the regular
brake pedal down. Then, see if you can
move the shift lever away from P (Park)
without pressing the button on the shift
lever. If you can, it means that the shift
lever was not fully locked into P (Park).
Torque Lock
If you are parking on a hill and you do not
shift the transmission into P (Park) properly,
the weight of the vehicle may put too much
force on the parking pawl in the
transmission. You may find it difficult to pull
the shift lever out of P (Park). This is called
torque lock. To prevent torque lock, set the
parking brake and then shift into P (Park)
properly before you leave the driver seat. To
find out how, seeShifting Into Park0172.
When you are ready to drive, move the
shift lever out of P (Park) before you release
the parking brake.
If torque lock does occur, you may need to
have another vehicle push yours a little
uphill to take some of the pressure from the parking pawl in the transmission. You will
then be able to pull the shift lever out of
P (Park).
Shifting out of Park
This vehicle is equipped with an electronic
shift lock release system. The shift lock
release is designed to prevent movement of
the shift lever out of P (Park), unless the
ignition is on and the brake pedal is applied.
The shift lock release is always functional
except in the case of an uncharged or low
voltage (less than 9 volt) battery.
If the vehicle has an uncharged battery or a
battery with low voltage, try charging or
jump starting the battery. See
Jump Starting
- North America 0312 for more information.
To shift out of P (Park): 1. Apply the brake pedal.
2. Release the parking brake. See Electric
Parking Brake 0183.
3. Press the shift lever button.
4. Move the shift lever.
If unable to shift out of P (Park): 1. Fully release the shift lever button. 2. While holding down the brake pedal,
press the shift lever button again.
3. Move the shift lever.
If equipped, the Buckle to Drive feature may
prevent shifting from P (Park). See Buckle To
Drive 034.
If the shift lever will not move from P (Park),
consult your dealer or a professional towing
service.
Parking over Things That Burn
{Warning
Things that can burn could touch hot
exhaust parts under the vehicle and
ignite. Do not park over papers, leaves,
dry grass, or other things that can burn.
Active Fuel Management
This vehicle's engine may be equipped with
Active Fuel Management, which allows the
engine to operate on either all of its
cylinders, or in reduced cylinder operation
mode, depending on the driving conditions.
When less power is required, such as
cruising at a constant vehicle speed, the
system will operate in reduced cylinder
operation mode, allowing the vehicle to
Page 176 of 371
GMC Canyon/Canyon Denali Owner Manual (GMNA-Localizing-U.S./Canada/
Mexico-16510661) - 2023 - CRC - 11/29/22
Driving and Operating 175
Automatic Transmission
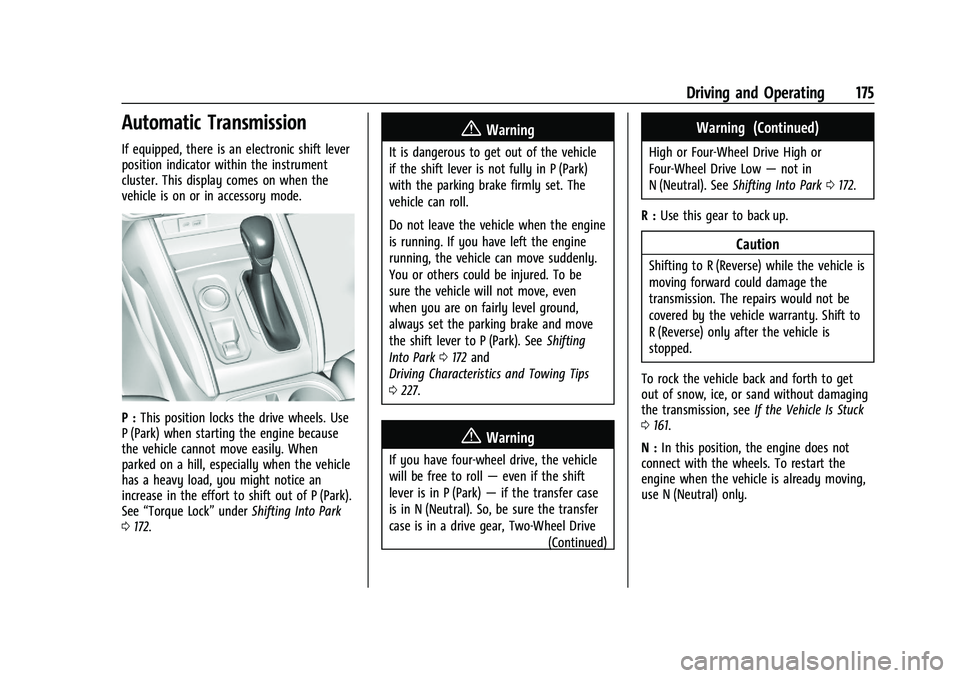
If equipped, there is an electronic shift lever
position indicator within the instrument
cluster. This display comes on when the
vehicle is on or in accessory mode.
P :This position locks the drive wheels. Use
P (Park) when starting the engine because
the vehicle cannot move easily. When
parked on a hill, especially when the vehicle
has a heavy load, you might notice an
increase in the effort to shift out of P (Park).
See “Torque Lock” underShifting Into Park
0 172.
{Warning
It is dangerous to get out of the vehicle
if the shift lever is not fully in P (Park)
with the parking brake firmly set. The
vehicle can roll.
Do not leave the vehicle when the engine
is running. If you have left the engine
running, the vehicle can move suddenly.
You or others could be injured. To be
sure the vehicle will not move, even
when you are on fairly level ground,
always set the parking brake and move
the shift lever to P (Park). See Shifting
Into Park 0172 and
Driving Characteristics and Towing Tips
0 227.
{Warning
If you have four-wheel drive, the vehicle
will be free to roll —even if the shift
lever is in P (Park) —if the transfer case
is in N (Neutral). So, be sure the transfer
case is in a drive gear, Two-Wheel Drive (Continued)
Warning (Continued)
High or Four-Wheel Drive High or
Four-Wheel Drive Low—not in
N (Neutral). See Shifting Into Park 0172.
R : Use this gear to back up.
Caution
Shifting to R (Reverse) while the vehicle is
moving forward could damage the
transmission. The repairs would not be
covered by the vehicle warranty. Shift to
R (Reverse) only after the vehicle is
stopped.
To rock the vehicle back and forth to get
out of snow, ice, or sand without damaging
the transmission, see If the Vehicle Is Stuck
0 161.
N : In this position, the engine does not
connect with the wheels. To restart the
engine when the vehicle is already moving,
use N (Neutral) only.
Page 179 of 371
GMC Canyon/Canyon Denali Owner Manual (GMNA-Localizing-U.S./Canada/
Mexico-16510661) - 2023 - CRC - 11/29/22
178 Driving and Operating
8-Speed Automatic TransmissionGear before shifting
from D (Drive) to
L (Manual Mode) 8th 7th 6th 5th 4th 3rd 2nd 1st
Range after shifting
from D (Drive) to
L (Manual Mode) –
Tow/Haul not engaged L6 L6 L5 L4 L3 L3 L2 L1
Range after shifting
from D (Drive) to
L (Manual Mode) –
Tow/Haul engaged L6 L5 L4 L3 L3 L3 L2 L1
Grade Braking is not available when Range
Selection Mode is active. See Tow/Haul
Mode 0178.
While using Range Selection Mode, cruise
control and the Tow/Haul Mode can
be used.
Caution
Spinning the tires or holding the vehicle
in one place on a hill using only the
accelerator pedal may damage the
transmission. The repair will not be
(Continued)
Caution (Continued)
covered by the vehicle warranty. If the
vehicle is stuck, do not spin the tires.
When stopping on a hill, use the brakes
to hold the vehicle in place.
Low Traction Mode
If equipped, Low Traction Mode assists in
vehicle acceleration when road conditions
are slippery, such as with ice or snow. While
the vehicle is at a stop, select L2 using Range Selection Mode. This will limit torque
to the wheels and help to prevent the tires
from spinning.
Tow/Haul Mode
If equipped, Tow/Haul Mode adjusts the
transmission shift pattern to reduce shift
cycling. While towing heavy loads, this
mode provides increased performance and
vehicle control.
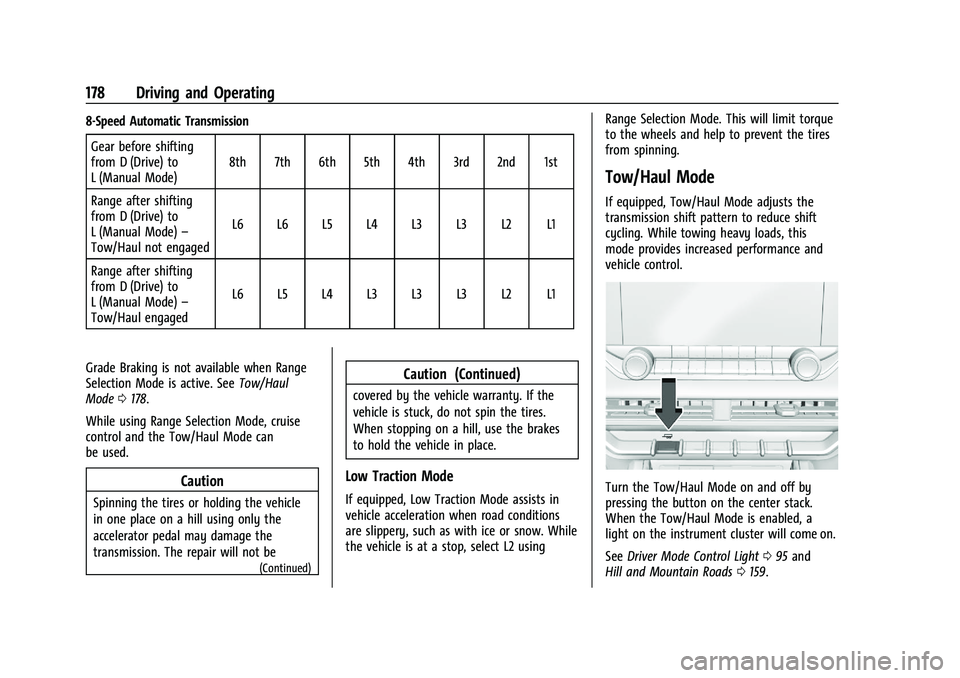
Turn the Tow/Haul Mode on and off by
pressing the button on the center stack.
When the Tow/Haul Mode is enabled, a
light on the instrument cluster will come on.
See
Driver Mode Control Light 095 and
Hill and Mountain Roads 0159.
Page 181 of 371
GMC Canyon/Canyon Denali Owner Manual (GMNA-Localizing-U.S./Canada/
Mexico-16510661) - 2023 - CRC - 11/29/22
180 Driving and Operating
The settings are:
N (Neutral) :Use only when the vehicle
needs to be towed. See Recreational Vehicle
Towing 0316 or
Transporting a Disabled Vehicle 0314.
2
m(Two-Wheel Drive High) : Use for driving
on most streets and highways. The front
axle is not engaged. This setting provides
the best fuel economy.
AUTO (Automatic Four-Wheel Drive) : Use
when road surface conditions are variable.
When driving in AUTO, the front axle is
engaged, and the vehicle's power is sent to
the front and rear wheels automatically
based on driving conditions. This setting
provides slightly lower fuel economy
than 2
m.
4
m(Four-Wheel Drive High) : Use this
setting when extra traction is needed, such
as when driving on snowy or icy roads,
when off-roading, or when plowing snow.
4
n(Four-Wheel Drive Low) : This setting
engages the front axle and delivers extra
torque. Choose 4
nwhen driving off-road in
deep sand, deep mud, or deep snow, and while climbing or descending steep hills.
While driving in 4
n, keep vehicle speed
below 72 km/h (45 mph).
Shifting into 4
nwill turn Traction Control
and StabiliTrak/ESC off. See Traction Control/
Electronic Stability Control 0185.
Shifts between 2
m, 4m, and AUTO
Any of these shifts can be made at normal
driving speed.
The actual 4x4 shift request is only made
after the button is released. The 4x4 graphic
will remain flashing until the shift request
has completed. A DIC message displays to
indicate that the 4x4 transfer case has been
requested to shift to the new desired state.
Once the 4x4 shift has completed, the DIC
message disappears, the 4x4 graphic stops
flashing, and the current setting is indicated.
When a shift to 2
mis completed successfully
while in P (Park), the parking brake will
engage. To resume driving, shift the
transmission to the desired gear and
manually release the parking brake or press
the accelerator pedal to begin driving. See
Electric Parking Brake 0183. If equipped, use 4
n, AUTO, or 4mto provide
additional traction when parking on a steep
grade with poor traction such as ice, snow,
mud, or gravel.
Shifting Into 4
n
1. The ignition must be on and the vehicle must be stopped or moving less than
5 km/h (3 mph) with the transmission in
N (Neutral). It is best for the vehicle to
be moving 1.6 to 3.2 km/h (1 to 2 mph).
2. Press 4
n. The actual 4x4 shift request is
only made after the button is released.
The 4x4 graphic will remain flashing
until the shift request has completed.
A DIC message displays to indicate that
the 4x4 transfer case has been requested
to shift to the new desired state.
Once the 4x4 shift has completed, the
DIC message disappears, the 4x4 graphic
stops flashing and the current setting is
indicated.
If vehicle speed is higher when shift request
occurs, a DIC message displays. Reduce
vehicle speed.
If the transmission is not in N (Neutral)
when shift request occurs, a DIC message
displays. The vehicle will allow 20 seconds
Page 189 of 371
GMC Canyon/Canyon Denali Owner Manual (GMNA-Localizing-U.S./Canada/
Mexico-16510661) - 2023 - CRC - 11/29/22
188 Driving and Operating
Mode Activation
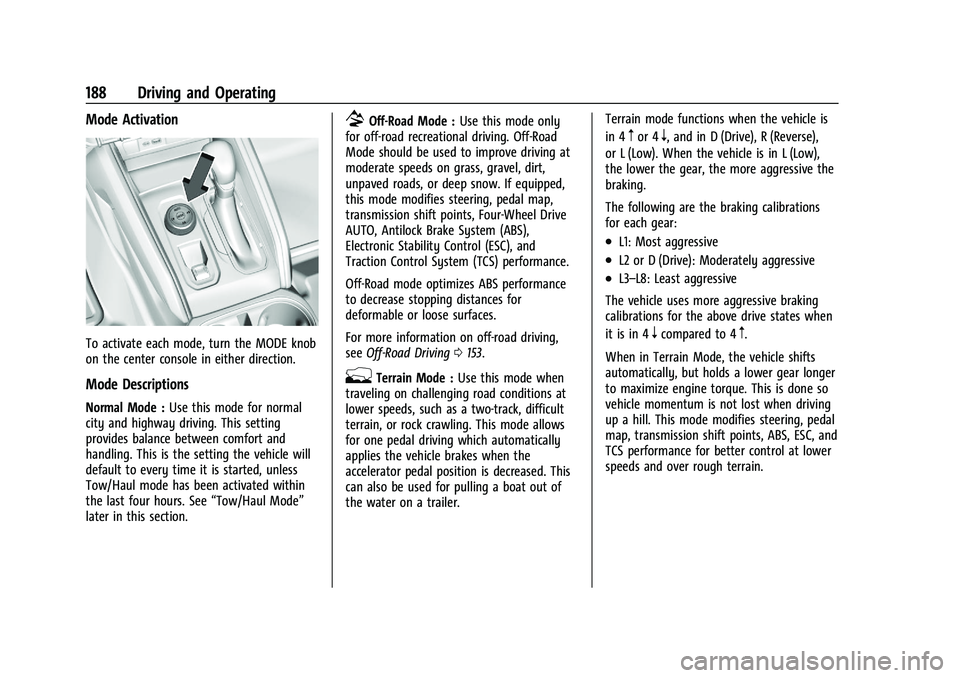
To activate each mode, turn the MODE knob
on the center console in either direction.
Mode Descriptions
Normal Mode :Use this mode for normal
city and highway driving. This setting
provides balance between comfort and
handling. This is the setting the vehicle will
default to every time it is started, unless
Tow/Haul mode has been activated within
the last four hours. See “Tow/Haul Mode”
later in this section.
7Off-Road Mode : Use this mode only
for off-road recreational driving. Off-Road
Mode should be used to improve driving at
moderate speeds on grass, gravel, dirt,
unpaved roads, or deep snow. If equipped,
this mode modifies steering, pedal map,
transmission shift points, Four-Wheel Drive
AUTO, Antilock Brake System (ABS),
Electronic Stability Control (ESC), and
Traction Control System (TCS) performance.
Off-Road mode optimizes ABS performance
to decrease stopping distances for
deformable or loose surfaces.
For more information on off-road driving,
see Off-Road Driving 0153.
gTerrain Mode : Use this mode when
traveling on challenging road conditions at
lower speeds, such as a two-track, difficult
terrain, or rock crawling. This mode allows
for one pedal driving which automatically
applies the vehicle brakes when the
accelerator pedal position is decreased. This
can also be used for pulling a boat out of
the water on a trailer. Terrain mode functions when the vehicle is
in 4
mor 4n, and in D (Drive), R (Reverse),
or L (Low). When the vehicle is in L (Low),
the lower the gear, the more aggressive the
braking.
The following are the braking calibrations
for each gear:
.L1: Most aggressive
.L2 or D (Drive): Moderately aggressive
.L3–L8: Least aggressive
The vehicle uses more aggressive braking
calibrations for the above drive states when
it is in 4
ncompared to 4m.
When in Terrain Mode, the vehicle shifts
automatically, but holds a lower gear longer
to maximize engine torque. This is done so
vehicle momentum is not lost when driving
up a hill. This mode modifies steering, pedal
map, transmission shift points, ABS, ESC, and
TCS performance for better control at lower
speeds and over rough terrain.
Page 193 of 371
GMC Canyon/Canyon Denali Owner Manual (GMNA-Localizing-U.S./Canada/
Mexico-16510661) - 2023 - CRC - 11/29/22
192 Driving and Operating
Caution
If you try to lock the axle while the
vehicle is stuck and the tires are spinning,
the vehicle’s drivetrain could be damaged.
The repairs would not be covered by the
vehicle warranty. Always lock the axle
before attempting situations and/or
navigating terrain that could cause the
vehicle to become stuck.
Caution
If the vehicle’s axle is locked while driving
on pavement, the drivetrain could be
damaged. Repairs would not be covered
by the vehicle warranty. Do not use the
locking axle on pavement.
Before the front axle can be locked, the rear
axle must be locked and the transfer case
must be in 4
n.
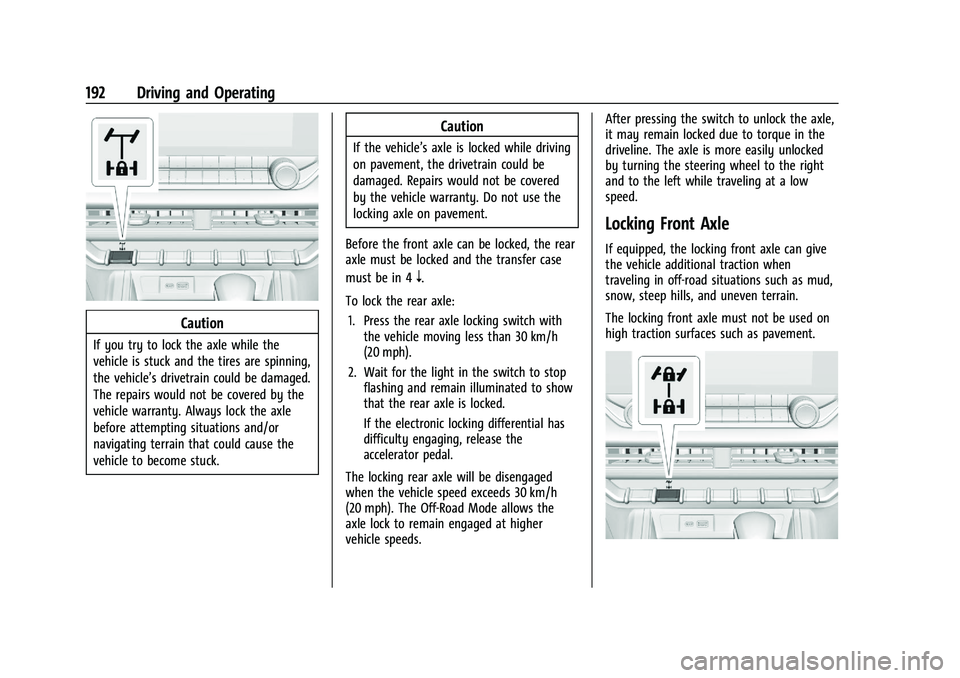
To lock the rear axle: 1. Press the rear axle locking switch with the vehicle moving less than 30 km/h
(20 mph).
2. Wait for the light in the switch to stop flashing and remain illuminated to show
that the rear axle is locked.
If the electronic locking differential has
difficulty engaging, release the
accelerator pedal.
The locking rear axle will be disengaged
when the vehicle speed exceeds 30 km/h
(20 mph). The Off-Road Mode allows the
axle lock to remain engaged at higher
vehicle speeds. After pressing the switch to unlock the axle,
it may remain locked due to torque in the
driveline. The axle is more easily unlocked
by turning the steering wheel to the right
and to the left while traveling at a low
speed.
Locking Front Axle
If equipped, the locking front axle can give
the vehicle additional traction when
traveling in off-road situations such as mud,
snow, steep hills, and uneven terrain.
The locking front axle must not be used on
high traction surfaces such as pavement.
Page 195 of 371
GMC Canyon/Canyon Denali Owner Manual (GMNA-Localizing-U.S./Canada/
Mexico-16510661) - 2023 - CRC - 11/29/22
194 Driving and Operating
that ABS is off, which may result in the
wheels locking during deceleration. See
Driver Mode Control0187.
If HDC was enabled prior to axle lock, it will
be automatically enabled when the locking
front axle is disengaged.
After pressing the switch to unlock the axle,
it may remain locked due to torque in the
driveline. The axle is more easily unlocked
by turning the steering wheel to the right
and to the left while traveling at a low
speed.
Cruise Control
With cruise control a speed of about
40 km/h (25 mph) or more can be
maintained without keeping your foot on
the accelerator. Cruise control does not work
at speeds below about 40 km/h (25 mph).
{Warning
Cruise control can be dangerous where
you cannot drive safely at a steady
speed. Do not use cruise control on
winding roads or in heavy traffic. (Continued)
Warning (Continued)
Cruise control can be dangerous on
slippery roads. On such roads, fast
changes in tire traction can cause
excessive wheel slip, and you could lose
control. Do not use cruise control on
slippery roads.
If the cruise control is being used and the
Traction Control (TCS) system or StabiliTrak/
Electronic Stability Control (ESC) begins to
limit wheel spin, the cruise control will
automatically disengage. See Traction
Control/Electronic Stability Control 0185. If a
collision alert occurs when cruise control is
activated, cruise control is disengaged. See
Forward Collision Alert (FCA) System 0215.
When road conditions allow you to safely
use it again, cruise control can be turned
back on.
If equipped with Hill Descent Control (HDC),
cruise control will disengage if HDC is Active.
If the brakes are applied, the cruise control
disengages.
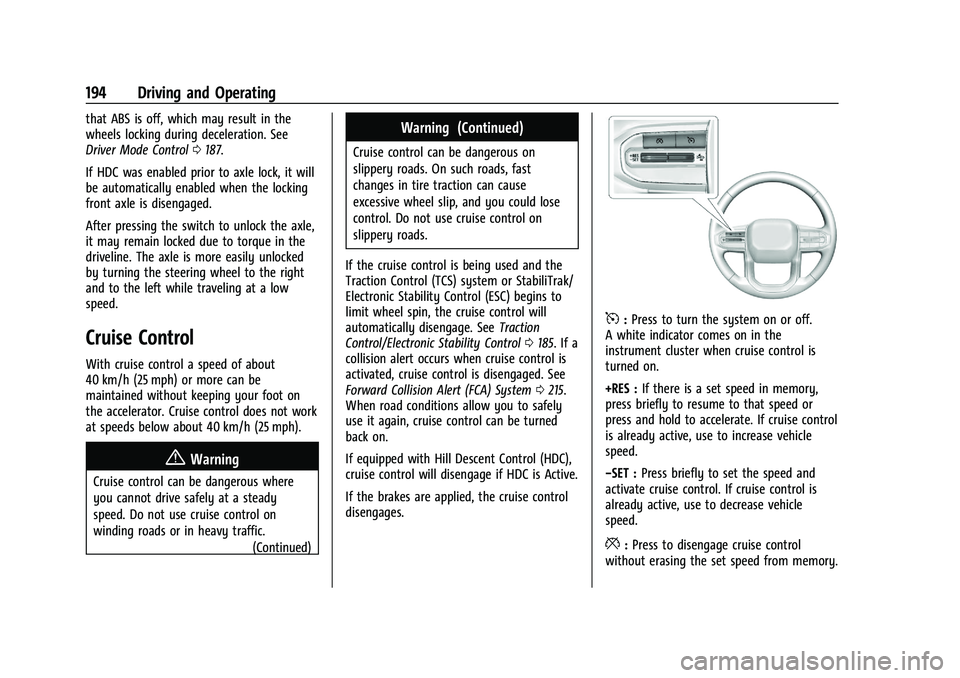
5: Press to turn the system on or off.
A white indicator comes on in the
instrument cluster when cruise control is
turned on.
+RES : If there is a set speed in memory,
press briefly to resume to that speed or
press and hold to accelerate. If cruise control
is already active, use to increase vehicle
speed.
−SET : Press briefly to set the speed and
activate cruise control. If cruise control is
already active, use to decrease vehicle
speed.
*: Press to disengage cruise control
without erasing the set speed from memory.
Page 243 of 371
GMC Canyon/Canyon Denali Owner Manual (GMNA-Localizing-U.S./Canada/
Mexico-16510661) - 2023 - CRC - 11/29/22
242 Driving and Operating
Trailer Sway Control (TSC)
Vehicles with StabiliTrak/Electronic Stability
Control (ESC) have a Trailer Sway Control
(TSC) feature. Trailer sway is unintended
side-to-side motion of a trailer while towing.
If the vehicle is towing a trailer and the TSC
detects that sway is increasing, the vehicle
brakes are selectively applied at each wheel,
to help reduce excessive trailer sway.
If equipped with the Integrated Trailer Brake
Control (ITBC) system, and the trailer has an
electric brake system, StabiliTrak/ESC may
also apply the trailer brakes.
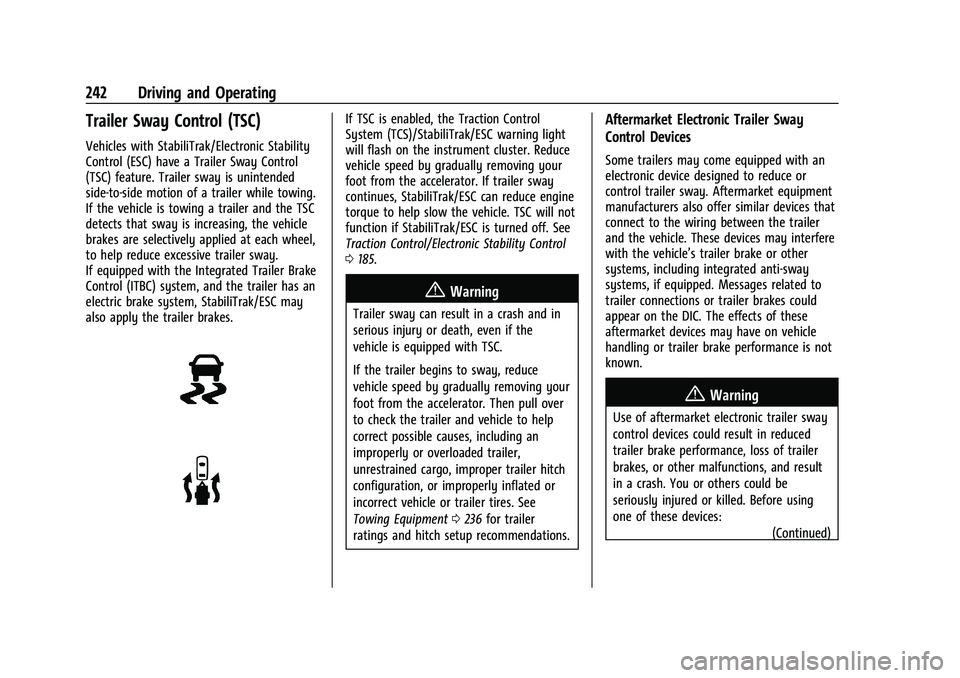
If TSC is enabled, the Traction Control
System (TCS)/StabiliTrak/ESC warning light
will flash on the instrument cluster. Reduce
vehicle speed by gradually removing your
foot from the accelerator. If trailer sway
continues, StabiliTrak/ESC can reduce engine
torque to help slow the vehicle. TSC will not
function if StabiliTrak/ESC is turned off. See
Traction Control/Electronic Stability Control
0185.
{Warning
Trailer sway can result in a crash and in
serious injury or death, even if the
vehicle is equipped with TSC.
If the trailer begins to sway, reduce
vehicle speed by gradually removing your
foot from the accelerator. Then pull over
to check the trailer and vehicle to help
correct possible causes, including an
improperly or overloaded trailer,
unrestrained cargo, improper trailer hitch
configuration, or improperly inflated or
incorrect vehicle or trailer tires. See
Towing Equipment 0236 for trailer
ratings and hitch setup recommendations.
Aftermarket Electronic Trailer Sway
Control Devices
Some trailers may come equipped with an
electronic device designed to reduce or
control trailer sway. Aftermarket equipment
manufacturers also offer similar devices that
connect to the wiring between the trailer
and the vehicle. These devices may interfere
with the vehicle’s trailer brake or other
systems, including integrated anti-sway
systems, if equipped. Messages related to
trailer connections or trailer brakes could
appear on the DIC. The effects of these
aftermarket devices may have on vehicle
handling or trailer brake performance is not
known.
{Warning
Use of aftermarket electronic trailer sway
control devices could result in reduced
trailer brake performance, loss of trailer
brakes, or other malfunctions, and result
in a crash. You or others could be
seriously injured or killed. Before using
one of these devices: (Continued)
Page 268 of 371
GMC Canyon/Canyon Denali Owner Manual (GMNA-Localizing-U.S./Canada/
Mexico-16510661) - 2023 - CRC - 11/29/22
Vehicle Care 267
{Warning
The brake wear warning sound means
that soon the brakes will not work well.
That could lead to a crash. When the
brake wear warning sound is heard, have
the vehicle serviced.
Caution
Continuing to drive with worn-out brake
linings could result in costly brake
repairs.
Some driving conditions or climates can
cause a brake squeal when the brakes are
first applied, clearing up following several
applications. This does not mean something
is wrong with the brakes.
Properly torqued wheel nuts are necessary
to help prevent brake pulsation. When tires
are rotated, inspect brake linings for wear
and evenly tighten wheel nuts in the proper
sequence to torque specifications. See
Capacities and Specifications 0336.
Brake pads should be replaced as complete
axle sets.
Brake Pedal Travel
See your dealer if the brake pedal does not
return to normal height, or if there is a
rapid increase in pedal travel. This could be
a sign that brake service may be required.
Replacing Brake System Parts
Always replace brake system parts with
new, approved replacement parts. If this is
not done, the brakes may not work
properly. The braking performance can
change in many ways if the wrong brake
parts are installed or if parts are improperly
installed.
Brake Pad Life System
When to Change Brake Pads
This vehicle has a system that estimates the
remaining life of the front and rear brake
pads. Brake pad life is displayed in the
Driver Information Center (DIC), along with
a percentage for each axle. The system must
be reset every time the brake pads are
changed.
When the system has determined that the
brake pads need to be replaced, a message
will display, which may include mileage
remaining. Brake pads should always be replaced as
complete axle sets.
How to Reset the Brake Pad Life System
The system will automatically detect when
significantly worn brake pads are replaced.
When the ignition is turned on after new
pads and wear sensors are installed, a
message will display. Follow the prompts to
reset the system.
The brake pad life system can also be
manually reset:
1. Display Brake Pad Life on the DIC. See Driver Information Center (DIC) (Base
Level) 098 or
Driver Information Center (DIC) (Uplevel)
0 100.
2. Press the thumbwheel or the trip odometer reset stem if the vehicle does
not have DIC buttons. Select front or rear
pads as appropriate.
3. Select YES on the confirmation message, or press the trip odometer reset stem on
a base level DIC. Repeat for pads on the
other axle if they were also replaced.
Page 298 of 371
GMC Canyon/Canyon Denali Owner Manual (GMNA-Localizing-U.S./Canada/
Mexico-16510661) - 2023 - CRC - 11/29/22
Vehicle Care 297
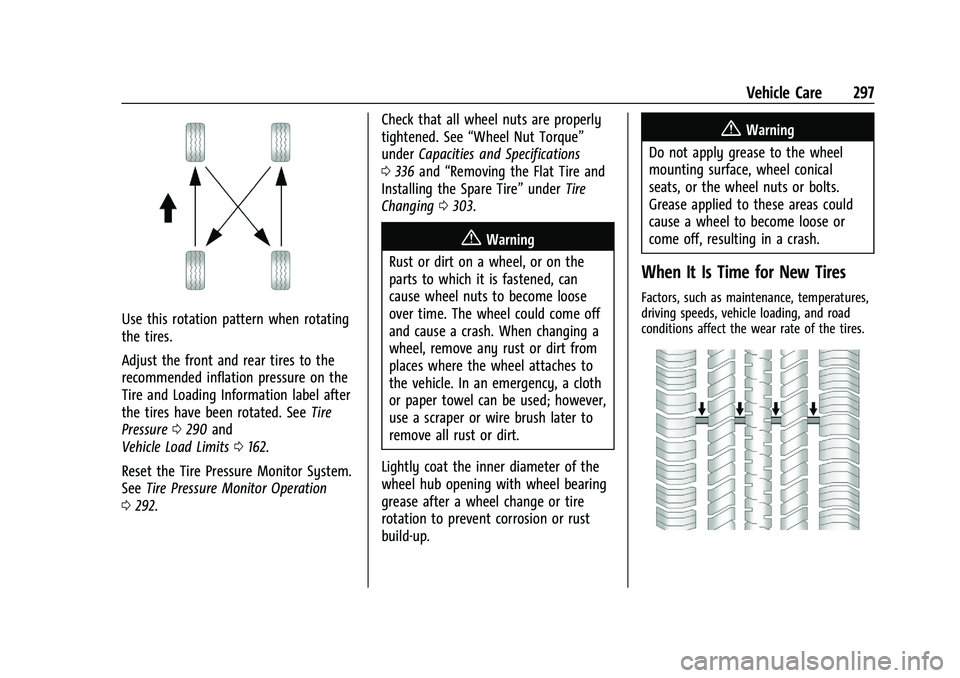
Use this rotation pattern when rotating
the tires.
Adjust the front and rear tires to the
recommended inflation pressure on the
Tire and Loading Information label after
the tires have been rotated. SeeTire
Pressure 0290 and
Vehicle Load Limits 0162.
Reset the Tire Pressure Monitor System.
See Tire Pressure Monitor Operation
0 292. Check that all wheel nuts are properly
tightened. See
“Wheel Nut Torque”
under Capacities and Specifications
0 336 and “Removing the Flat Tire and
Installing the Spare Tire” underTire
Changing 0303.
{Warning
Rust or dirt on a wheel, or on the
parts to which it is fastened, can
cause wheel nuts to become loose
over time. The wheel could come off
and cause a crash. When changing a
wheel, remove any rust or dirt from
places where the wheel attaches to
the vehicle. In an emergency, a cloth
or paper towel can be used; however,
use a scraper or wire brush later to
remove all rust or dirt.
Lightly coat the inner diameter of the
wheel hub opening with wheel bearing
grease after a wheel change or tire
rotation to prevent corrosion or rust
build-up.
{Warning
Do not apply grease to the wheel
mounting surface, wheel conical
seats, or the wheel nuts or bolts.
Grease applied to these areas could
cause a wheel to become loose or
come off, resulting in a crash.
When It Is Time for New Tires
Factors, such as maintenance, temperatures,
driving speeds, vehicle loading, and road
conditions affect the wear rate of the tires.