Driver door GMC ENVOY 2003 Owner's Guide
[x] Cancel search | Manufacturer: GMC, Model Year: 2003, Model line: ENVOY, Model: GMC ENVOY 2003Pages: 442, PDF Size: 3.1 MB
Page 136 of 442
There is a delay in the transition between the daytime
and nighttime operation of the Daytime Running
Lamps (DRL) and the automatic headlamp systems, so
that driving under bridges or bright overhead street
lights does not affect the system. The DRL and
automatic headlamp system will only be affected when
the light sensor sees a change in lighting lasting
longer than the delay.
If you start your vehicle in a dark garage, the automatic
headlamp system will come on immediately. Once
you leave the garage, it will take about one minute for
the automatic headlamp system to change to DRL if it is
light outside. During that delay, your instrument panel
cluster may not be as bright as usual. Make sure
your instrument panel brightness control is in the full
bright position.
To idle your vehicle with the automatic headlamp
system off, set the parking brake while the ignition is off.
Then start your vehicle. The automatic headlamp
system will stay off until you release the parking brake,
shift out of park or turn the exterior lamp control to
the off position as described in ªExterior Lampsº listed
previously.
Lamps On Reminder
A reminder tone will sound when your headlamps or
parking lamps are manually turned on, the driver's door
is open and your ignition is in LOCK or ACCESSORY.To turn the tone off, turn the knob all the way
counterclockwise. In the automatic mode, the headlamps
turn off once the ignition key is in LOCK.
Daytime Running Lamps (DRL)
Daytime Running Lamps (DRL) can make it easier for
others to see the front of your vehicle during the
day. DRL can be helpful in many different driving
conditions, but they can be especially helpful in the short
periods after dawn and before sunset. Fully functional
daytime running lamps are required on all vehicles
®rst sold in Canada.
The DRL system will make your headlamps come on
at reduced brightness when the following conditions
are met:
·The ignition is on,
·the exterior lamps knob is in automatic headlamp
mode,
·the light sensor detects daytime light, and
·the transmission is not in PARK (P).
When the DRL are on, only your headlamps will be on.
The taillamps, sidemarker and other lamps won't be
on. The instrument panel won't be lit up either.
When it begins to get dark, the headlamps will
automatically switch from DRL to the regular headlamps.
3-16
Page 153 of 442

Steering Wheel Climate Controls
You can adjust the fan
speed and temperature of
the front climate control
system by using the
buttons located on your
steering wheel.
9(Fan):Press the up or down arrow on this switch to
increase or decrease the fan speed.
B(Temperature):Press the up or down arrow on this
switch to increase or decrease the temperature of
the air ¯owing through the system.
Climate Controls Personalization
If your vehicle is equipped with the Driver Information
Center (DIC), you can store and recall the climate
control settings for temperature, air delivery mode and
fan speed for two different drivers. The personal
choice settings recalled are determined by the
transmitter used to enter the vehicle. After the button
with the unlock symbol on a remote keyless entry
transmitter is pressed, the climate control will adjust to
the last settings of the identi®ed driver. The settings
can also be changed by pressing one of the memory
buttons (1 or 2) located on the driver's door. When
adjustments are made, the new settings are
automatically saved for the driver.
3-33
Page 173 of 442

Always reset the engine oil life after an oil change. To
reset the Oil Life System press and hold the select
button while ENGINE OIL LIFE is displayed.
The oil change reminder does not measure how much
oil you have in your engine. So, be sure to check your oil
level often. For more information, see
Engine Oil on
page 5-15.
Personalization
You can program certain features to a preferred setting
for up to two people. Press the personalization button
to scroll through the following personalization features.
All of the personalization options may not be available
on your vehicle. Only the options available will be
displayed on your DIC.
·ALARM WARNING TYPE
·AUTOMATIC LOCKING
·AUTOMATIC UNLOCKING
·SEAT POSITION RECALL
·PERIMETER LIGHTING
·REMOTE LOCK FEEDBACK
·REMOTE UNLOCK FEEDBACK
·HEADLAMPS ON AT EXIT
·MIRROR CURB VIEW ASSIST
·EASY EXIT DRIVER SEAT
·DISPLAY UNITS (E/M)
·DISPLAY LANGUAGE
The driver's preferences are recalled by pressing the
unlock button on the remote keyless entry transmitter or
by pressing the appropriate memory button 1 or 2
located on the driver's door.
Alarm Warning Type
Press the personalization button until ALARM
WARNING TYPE appears in the display. To select your
personalization for alarm warning type, press the
select button while ALARM WARNING TYPE is
displayed on the DIC. Pressing the select button will
scroll through the following choices:
·ALARM WARNING: BOTH (default)
·ALARM WARNING: OFF
·ALARM WARNING: HORN
·ALARM WARNING: LAMPS
If you choose BOTH, the headlamps will ¯ash and the
horn will chirp when the alarm is active.
If you choose OFF, there will be no alarm warning on
activation.
If you choose HORN, the horn will chirp when the alarm
is active.
3-53
Page 174 of 442

If you choose LAMPS, the headlamps will ¯ash when
the alarm is active.
Choose one of the four options and press the
personalization button while it is displayed on the DIC to
select it and move on to the next feature. For more
information on alarm warning type, see
Content
Theft-Deterrent on page 2-17.
Automatic Locking
Press the select button while AUTOMATIC LOCKING is
displayed on the DIC to scroll through the following
choices:
·LOCK DOORS OUT OF PARK (default)
·LOCK DOORS MANUALLY
·LOCK DOORS WITH SPEED
If you choose for the doors to lock out of park, the
doors will lock when the vehicle is shifted out of
PARK (P).
If you choose for the doors to lock manually, the doors
will not be locked automatically.
If you choose for the doors to lock with speed, the
doors will lock when the vehicle speed is above 8 mph
(13 km/h) for three seconds.Press the personalization button while your choice is
displayed on the DIC to select it and move on to the next
feature. For more information on automatic door locks
see
Programmable Automatic Door Locks on page 2-10.
Automatic Unlocking
Press the personalization button until AUTOMATIC
UNLOCKING appears in the display. To select
your personalization for automatic unlocking, press the
select button while AUTOMATIC UNLOCKING is
displayed on the DIC. Pressing the select button will
scroll through the following choices:
·UNLOCK ALL IN PARK (default)
·UNLOCK ALL AT KEY OUT
·UNLOCK DOORS MANUALLY
·UNLOCK DRIVER IN PARK
If you choose for all the doors to unlock in park, all of
the doors will unlock when the vehicle is shifted
into PARK (P).
If you choose for all the doors to unlock at key out, all
of the doors will unlock when the key is taken out of the
ignition.
If you choose for the doors to unlock manually, the
doors will not be unlocked automatically.
3-54
Page 175 of 442

If you choose for the driver's door to unlock in park, the
driver's door will be unlocked when the vehicle is
shifted into PARK (P).
Choose one of the four options and press the
personalization button while it is displayed on the DIC to
select it and move on to the next feature. For more
information on automatic door locks see
Programmable
Automatic Door Locks on page 2-10.
Seat Position Recall
Press the personalization button until SEAT POSITION
RECALL appears in the display. To select your
personalization for seat position recall, press the select
button while SEAT POSITION RECALL is displayed
on the DIC. Pressing the select button will scroll through
the following choices:
·SEAT POSITION RECALL OFF (default)
·SEAT POSITION RECALL AT KEY IN
·SEAT POSITION RECALL ON REMOTE
If you choose seat recall off, the memory seat position
you saved will only be recalled when the memory
button 1 or 2 is pressed.
If you choose seat recall at key in, the memory seat
position you saved will be recalled when you put the key
in the ignition.If you choose seat recall on remote, the memory seat
position you saved will be recalled when you unlock the
vehicle with the remote keyless entry transmitter.
Choose one of the three options and press the
personalization button while it is displayed on the DIC to
select it and move on to the next feature.
Perimeter Lighting
Press the personalization button until PERIMETER
LIGHTING appears in the display. To select your
personalization for perimeter lighting, press the select
button while PERIMETER LIGHTING is displayed on the
DIC. Pressing the select button will scroll through the
following choices:
·PERIMETER LIGHTING ON (default)
·PERIMETER LIGHTING OFF
If you choose for perimeter lighting to be on, the
headlamps and back-up lamps will come on for
40 seconds, if it is dark enough outside, when you
unlock the vehicle with the remote keyless entry
transmitter.
Choose one of the two options and press the
personalization button while it is displayed on the DIC to
select it and move on to the next feature.
3-55
Page 182 of 442
ICE POSSIBLE
If the outside temperature reaches a level where ice
could form on the roadway, this message may appear
on the DIC. If the temperature rises to a safe level,
the message will clear. Pressing the select button will
acknowledge this message and clear it from the
DIC display.
DRIVER DOOR AJAR
If the driver's door is not fully closed, this message will
appear on the display and you will hear a chime.
Stop and turn off the vehicle, check the door for
obstacles, and close the door again. Check to see if the
message still appears on the DIC. Pressing the select
button will acknowledge this message and clear it
from the DIC display.
PASSENGER DOOR AJAR
If the passenger's door is not fully closed, this message
will appear on the display and you will hear a chime.
Stop and turn off the vehicle, check the door for
obstacles, and close the door again. Check to see if the
message still appears on the DIC. Pressing the select
button will acknowledge this message and clear it
from the DIC display.
LEFT REAR DOOR AJAR
If the driver's side rear door is not fully closed this
message will appear on the display and you will hear a
chime. Stop and turn off the vehicle, check the door
for obstacles, and close the door again. Check to see if
the message still appears on the DIC. Pressing the
select button will acknowledge this message and clear it
from the DIC display.
RIGHT REAR DOOR AJAR
If the passenger's side rear door is not fully closed this
message will appear on the display and you will
hear a chime. Stop and turn off the vehicle, check the
door for obstacles, and close the door again. Check
to see if the message still appears on the DIC. Pressing
the select button will acknowledge this message and
clear it from the DIC display.
RFA # BATTERY LOW
If a remote keyless entry transmitter battery is low, this
message will appear on the DIC. The battery needs
to be replaced in the transmitter. Pressing the select
button will acknowledge this message and clear it from
the DIC display.
3-62
Page 275 of 442
4. Shift the transfer case to NEUTRAL (N). See
ªFour-Wheel Driveº in the Index for the proper
procedure to select the NEUTRAL position for your
vehicle.
5. Release the parking brake only after the vehicle
being towed is ®rmly attached to the towing
vehicle.
6. Turn the ignition off and remove the key. If the key
is not removed, the battery will drain.
{CAUTION:
Shifting a four-wheel-drive vehicle's transfer
case into NEUTRAL can cause your vehicle to
roll even if the transmission is in Park (P). You
or others could be injured. Make sure the
parking brake is ®rmly set before you shift the
transfer case to NEUTRAL.
Dolly Towing
Your vehicle was not designed to be dolly towed. If you
need to tow your vehicle, see ªDinghy Towingº earlier
in this section.
Loading Your Vehicle
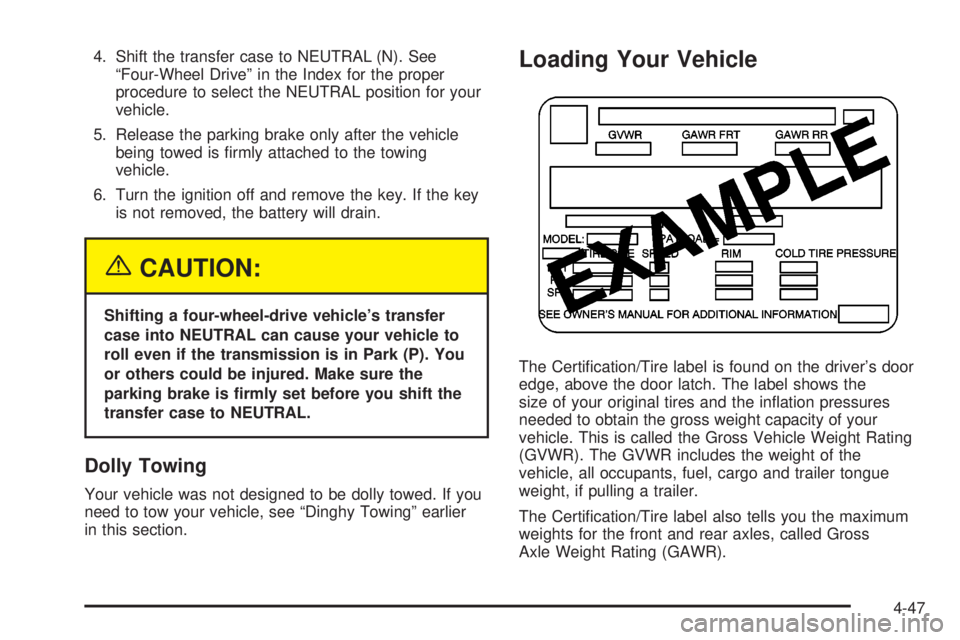
The Certi®cation/Tire label is found on the driver's door
edge, above the door latch. The label shows the
size of your original tires and the in¯ation pressures
needed to obtain the gross weight capacity of your
vehicle. This is called the Gross Vehicle Weight Rating
(GVWR). The GVWR includes the weight of the
vehicle, all occupants, fuel, cargo and trailer tongue
weight, if pulling a trailer.
The Certi®cation/Tire label also tells you the maximum
weights for the front and rear axles, called Gross
Axle Weight Rating (GAWR).
4-47
Page 282 of 442
Weight of the Trailer Tongue
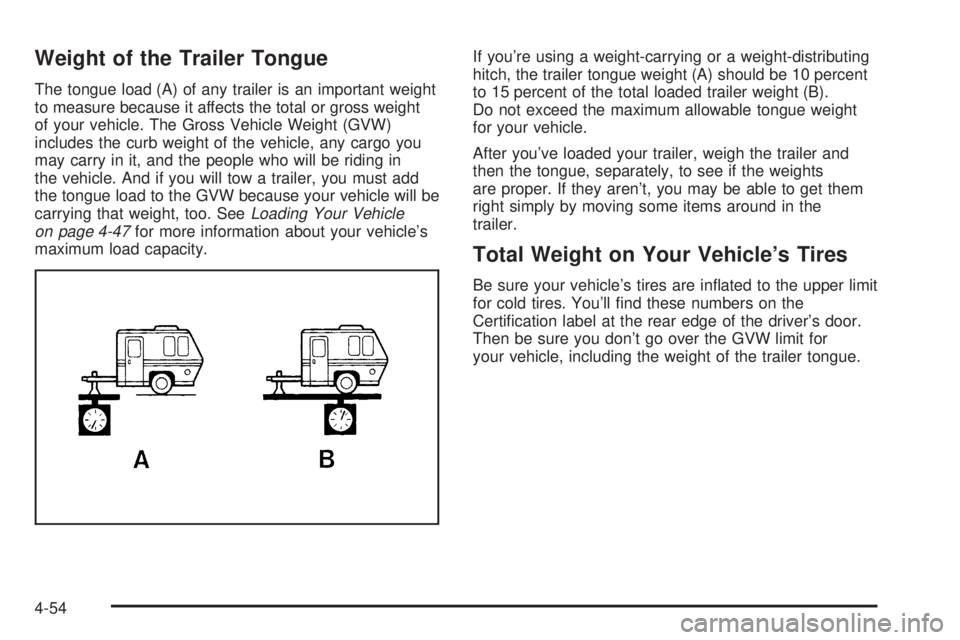
The tongue load (A) of any trailer is an important weight
to measure because it affects the total or gross weight
of your vehicle. The Gross Vehicle Weight (GVW)
includes the curb weight of the vehicle, any cargo you
may carry in it, and the people who will be riding in
the vehicle. And if you will tow a trailer, you must add
the tongue load to the GVW because your vehicle will be
carrying that weight, too. See
Loading Your Vehicle
on page 4-47for more information about your vehicle's
maximum load capacity.If you're using a weight-carrying or a weight-distributing
hitch, the trailer tongue weight (A) should be 10 percent
to 15 percent of the total loaded trailer weight (B).
Do not exceed the maximum allowable tongue weight
for your vehicle.
After you've loaded your trailer, weigh the trailer and
then the tongue, separately, to see if the weights
are proper. If they aren't, you may be able to get them
right simply by moving some items around in the
trailer.
Total Weight on Your Vehicle's Tires
Be sure your vehicle's tires are in¯ated to the upper limit
for cold tires. You'll ®nd these numbers on the
Certi®cation label at the rear edge of the driver's door.
Then be sure you don't go over the GVW limit for
your vehicle, including the weight of the trailer tongue.
4-54
Page 295 of 442
Fuels in Foreign Countries
If you plan on driving in another country outside the
United States or Canada, the proper fuel may be hard
to ®nd. Never use leaded gasoline or any other fuel
not recommended in the previous text on fuel. Costly
repairs caused by use of improper fuel wouldn't be
covered by your warranty.
To check the fuel availability, ask an auto club, or
contact a major oil company that does business in the
country where you'll be driving.
Filling Your Tank
{CAUTION:
Fuel vapor is highly ¯ammable. It burns
violently, and that can cause very bad injuries.
Don't smoke if you're near fuel or refueling
your vehicle. Keep sparks, ¯ames and smoking
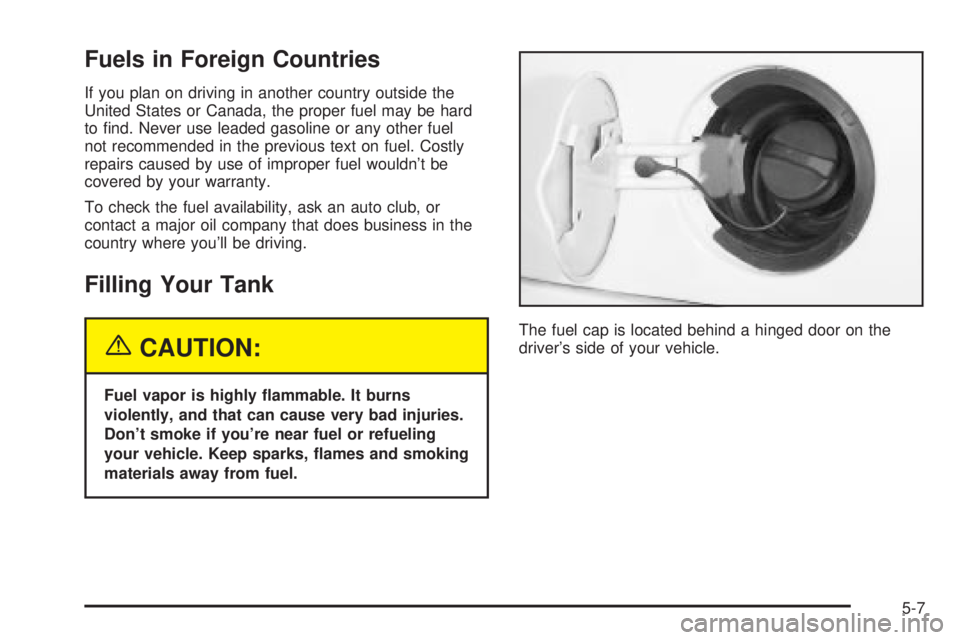
materials away from fuel.The fuel cap is located behind a hinged door on the
driver's side of your vehicle.
5-7
Page 343 of 442

In¯ation -- Tire Pressure
The Certi®cation/Tire label, which is on the driver's door
edge, above the door latch, shows the correct in¯ation
pressures for your tires when they're cold. ªColdº means
your vehicle has been sitting for at least three hours
or driven no more than 1 mile (1.6 km).
Notice:Don't let anyone tell you that underin¯ation
or overin¯ation is all right. It's not. If your tires
don't have enough air (underin¯ation), you can get
the following:
·Too much ¯exing
·Too much heat
·Tire overloading
·Bad wear
·Bad handling
·Bad fuel economy
If your tires have too much air (overin¯ation), you
can get the following:
·Unusual wear
·Bad handling
·Rough ride
·Needless damage from road hazards
When to Check
Check your tires once a month or more.
Also, check the tire pressure of the spare tire.
How to Check
Use a good quality pocket-type gage to check tire
pressure. You can't tell if your tires are properly in¯ated
simply by looking at them. Radial tires may look
properly in¯ated even when they're underin¯ated.
Be sure to put the valve caps back on the valve stems.
They help prevent leaks by keeping out dirt and
moisture.
Tire Inspection and Rotation
Tires should be rotated every 7,500 miles (12 500 km).
Any time you notice unusual wear, rotate your tires
as soon as possible and check wheel alignment. Also
check for damaged tires or wheels. See
When It Is Time
for New Tires on page 5-57andWheel Replacement
on page 5-60for more information.
Make sure the spare tire is stored securely. Push, pull,
and then try to rotate or turn the tire. If it moves,
use the wheel wrench to tighten the cable. See
Changing a Flat Tire on page 5-64.
5-55