Service GMC ENVOY 2003 Owner's Guide
[x] Cancel search | Manufacturer: GMC, Model Year: 2003, Model line: ENVOY, Model: GMC ENVOY 2003Pages: 442, PDF Size: 3.1 MB
Page 167 of 442

Cruise Control Light
Your vehicle may have this feature. The CRUISE light
appears whenever you set your cruise control.
Reduced Engine Power Light
This light is displayed when a noticeable reduction in
the vehicle's performance may occur. The vehicle may
be driven at a reduced speed when the reduced
engine power light is on but acceleration and speed
may be reduced. The performance may be reduced until
the next time you drive your vehicle. If this light stays
on, see your dealer as soon as possible for diagnosis
and repair.
This light may also come on if there is a problem with
the Electronic Throttle Control (ETC) system. If this
happens, take the vehicle in for service as soon
as possible. United States
CanadaUnited StatesCanada
3-47
Page 168 of 442
Service Four-Wheel Drive
Warning Light
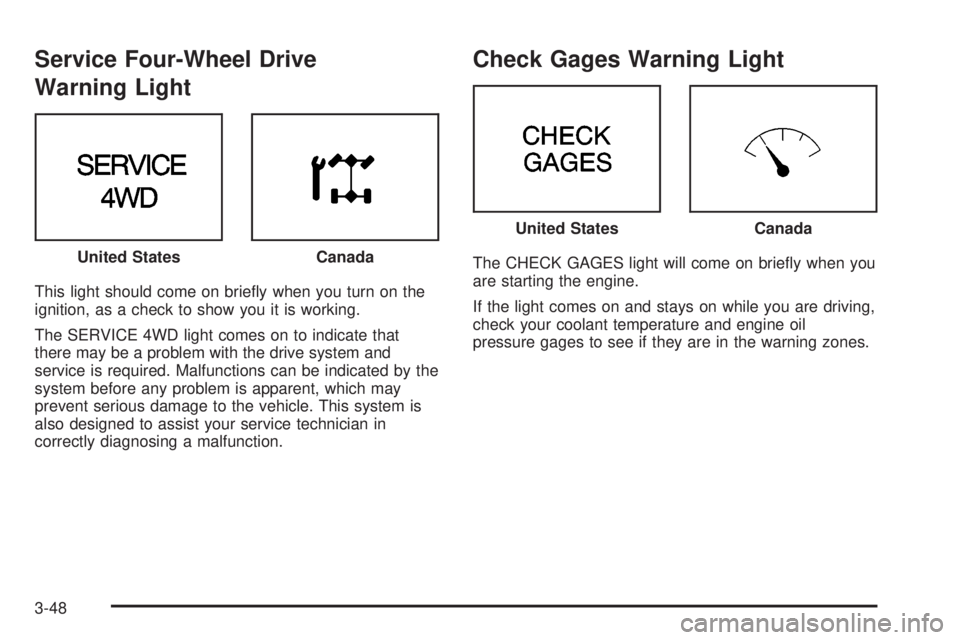
This light should come on brie¯y when you turn on the
ignition, as a check to show you it is working.
The SERVICE 4WD light comes on to indicate that
there may be a problem with the drive system and
service is required. Malfunctions can be indicated by the
system before any problem is apparent, which may
prevent serious damage to the vehicle. This system is
also designed to assist your service technician in
correctly diagnosing a malfunction.
Check Gages Warning Light
The CHECK GAGES light will come on brie¯y when you
are starting the engine.
If the light comes on and stays on while you are driving,
check your coolant temperature and engine oil
pressure gages to see if they are in the warning zones. United StatesCanada
United StatesCanada
3-48
Page 171 of 442
C.Personalization:Press this button to change
personal settings for some of the options on your
vehicle.
D.Select:Press this button to reset certain functions
and turn off or acknowledge messages on the DIC.
DIC Operation and Displays
The DIC comes on when the ignition is on. After a short
delay the DIC will display the current driver and the
information that was last displayed before the engine
was turned off.
If a problem is detected, a warning message will appear
on the display. Pressing the select button will
acknowledge any current warning or service messages.
The DIC has different modes which can be accessed
by pressing the four buttons on the DIC. These buttons
are trip information, fuel information, personalization
and select. The button functions are detailed in
the following.
Trip Information
Use the trip information button to scroll through the
odometer, TRIP A, TRIP B and TIMER.
Odometer
Press the trip information button until the odometer
appears on the display. This shows the total distance
the vehicle has been driven in either miles or kilometers.
Pressing the reset stem located on the instrument
cluster with the vehicle off will also display the odometer.
Trip A and Trip B
Press the trip information button until TRIP A or TRIP B
is displayed. This shows the current distance traveled
since the last reset for each trip odometer in either miles
or kilometers. Both odometers can be used at the same
time.
Each trip odometer can be reset to zero separately by
pressing select while the desired trip odometer is
displayed. You can also reset the trip odometers with
the reset stem on the cluster. If you press and hold the
reset stem for four seconds, the display will show the
distance traveled since the last ignition cycle.
Timer
The DIC can be used as a stopwatch. Press the select
button while TIMER is displayed to start the timer.
The display will show the amount of time that has
passed since the timer was last reset (not including time
the ignition is off).
3-51
Page 180 of 442
DIC Warnings and Messages
Warning messages are displayed on the DIC to notify
the driver that the status of the vehicle has changed and
that some action may be needed by the driver to
correct the condition. More than one message may
appear at one time. They will appear one behind
the other. Some messages may not require immediate
action but you should press the select button to
acknowledge that you received the message and clear it
from the display. Some messages cannot be cleared
from the display because they are more urgent. These
messages require action before they can be removed
from the DIC display. The following are the possible
messages that can be displayed and some information
about them.
ENGINE COOLANT HOT/IDLE ENGINE
If the cooling system temperature gets hot, this
message will appear in the DIC and you will hear a
chime. Stop the vehicle and let the engine idle in
PARK (P) to allow the coolant to reach a safe
temperature. This message will clear when the coolant
temperature drops to a safe operating temperature.
OIL PRESSURE LOW/STOP ENGINE
If low oil pressure levels occur, this message will
be displayed on the DIC. Stop the vehicle as soon as
safely possible and do not operate it until the cause
of the low oil pressure has been corrected. Check your
oil as soon as possible and have your vehicle
serviced.
BATTERY NOT CHARGING
If the battery is not charging during operation, this
message will appear on the DIC. Driving with this
problem could drain your battery. Have the electrical
system checked as soon as possible. Pressing the
select button will acknowledge this message and clear it
from the DIC display.
SERVICE AIR BAG
If there is a problem with the air bag system this
message will be displayed on the DIC. Have a quali®ed
technician inspect the system for problems. Pressing
the select button will acknowledge this message
and clear it from the DIC display.
3-60
Page 181 of 442
SERVICE BRAKE SYSTEM
If a problem occurs with the brake system this message
will appear on the DIC. If this message appears, stop
as soon as possible and turn off the vehicle. Restart the
vehicle and check for the message on the DIC display.
If the message is still displayed, or appears again when
you begin driving, the brake system needs service.
TURN SIGNAL ON
If a turn signal is left on for 3/4 of a mile (1.2 km), this
message will appear on the display and you will
hear a chime. Move the turn signal/multifunction lever to
the off position. Pressing the select button will
acknowledge this message and clear it from the DIC
display.
REAR ACCESS OPEN
If the liftgate or liftglass is open while the ignition is in
RUN, this message will appear on the DIC and you will
hear a chime. Turn off the vehicle and check the
liftgate and liftglass. Restart the vehicle and check for
the message on the DIC display. Pressing the select
button will acknowledge this message and clear it from
the DIC display.
FUEL LEVEL LOW
If the fuel level is low in the vehicle's gas tank this
message will appear on the DIC and you will hear a
chime. Refuel as soon as possible. Pressing the select
button will acknowledge this message and clear it
from the DIC display.
CHECK WASHER FLUID
If the washer ¯uid level is low, this message will appear
on the DIC. Adding washer ¯uid will clear the message.
Pressing the select button will acknowledge this
message and clear it from the DIC display.
TRANS HOT IDLE ENGINE
If the transmission ¯uid in the vehicle gets hot, this
message will appear on the DIC. Driving with the
transmission ¯uid temperature high can cause damage
to the vehicle. Stop the vehicle and let it idle to allow
the transmission to cool. This message will clear when
the ¯uid temperature reaches a safe level.
3-61
Page 189 of 442
Radio Messages
CAL ERR (Calibration Error):This message is
displayed when the radio has not been calibrated
properly for the vehicle. You must return to the
dealership for service.
LOCKED:This message is displayed when the
THEFTLOCK
žsystem has locked up. You must return
to the dealership for service.
Playing a Compact Disc
Insert a disc partway into the slot, label side up. The
player will pull it in and the disc should begin playing.
The display will show the CD symbol. If you want
to insert a compact disc with the ignition off, ®rst press
TUNE or EJT.
The integral CD player can play the smaller 8 cm single
discs with an adapter ring. Full-size compact discs
and the smaller discs are loaded in the same manner.
If playing a CD-R the sound quality may be reduced due
to CD-R quality, the method of recording, the quality
of the music that has been recorded and the way
the CD-R has been handled. You may experience an
increase in skipping, difficulty in ®nding tracks and/or
difficulty in loading and ejecting. If these problems occur
try a known good CD.Do not add paper labels to discs, they could get caught
in the CD player.
Do not play 3 inch discs without a standard adapter
disc.
If an error appears on the display, see ªCompact Disc
Messagesº later in this section.
1 PREV (Previous):Press this pushbutton to go to the
previous track if the current track has been playing
for less than eight seconds. If pressed when the current
track has been playing for more than eight seconds,
it will go to the beginning of the current track. TRACK
and the track number will appear on the display. If
you hold this pushbutton or press it more than once, the
player will continue moving back through the disc.
2 NEXT:Press this pushbutton to go to the next track.
TRACK and the track number will appear on the
display. If you hold this pushbutton or press it more than
once, the player will continue moving forward through
the disc.
3 REV (Reverse):Press and hold this pushbutton to
reverse quickly within a track. Press and hold this
pushbutton for less than two seconds to reverse at six
times the normal playing speed. Press and hold it
for more than two seconds to reverse at 17 times the
normal playing speed. Release it to play the passage.
The display will show ET and the elapsed time.
3-69
Page 196 of 442

INFO (Information):If the current station has a
message, the information symbol will appear on the
display. Press this button to see the message. The
message may display the artist and song title, call in
phone numbers, etc.
If the whole message is not displayed, parts of it will
appear every three seconds. To scroll through the
message at your own speed, press the INFO button
repeatedly. A new group of words will appear on
the display with each press. Once the complete
message has been displayed, the information symbol
will disappear from the display until another new
message is received. The old message can be displayed
by pressing the INFO button until a new message is
received or a different station is tuned to.
When a message is not available from a station, NO
INFO will be displayed.
TRAF (Traffic):If TRAF appears on the display, the
tuned station broadcasts traffic announcements
and when a traffic announcement comes on the tuned
radio station you will hear it.If the current tuned station does not broadcast traffic
announcements, press this button and the radio
will seek to a station that does. When the radio ®nds a
station that broadcasts tra®ic announcements, it will
stop and TRAF will be displayed. When a traffic
announcement comes on the tuned radio station you
will hear it. If no station is found, NO TRAF will appear
on the display.
If TRAF is on the display you can press the TRAF
button to turn of the traffic announcements.
Your radio will play the traffic announcement even if the
volume is muted or interrupt the play of a cassette
tape or CD if the last tuned station broadcasts traffic
announcements.
Radio Messages
CAL ERR (Calibration Error):This message is
displayed when the radio has not been calibrated
properly for the vehicle. You must return to the
dealership for service.
LOCKED:This message is displayed when the
THEFTLOCK
žsystem has locked up. You must return
to the dealership for service.
3-76
Page 226 of 442
Care of Your Cassette Tape Player
A tape player that is not cleaned regularly can cause
reduced sound quality, ruined cassettes or a damaged
mechanism. Cassette tapes should be stored in their
cases away from contaminants, direct sunlight and
extreme heat. If they aren't, they may not operate
properly or may cause failure of the tape player.
Your tape player should be cleaned regularly after every
50 hours of use. Your radio may display CLEAN to
indicate that you have used your tape player for
50 hours without resetting the tape clean timer. If this
message appears on the display, your cassette
tape player needs to be cleaned. It will still play tapes,
but you should clean it as soon as possible to
prevent damage to your tapes and player. If you notice
a reduction in sound quality, try a known good
cassette to see if the tape or the tape player is at fault.
If this other cassette has no improvement in sound
quality, clean the tape player.
For best results, use a scrubbing action, non-abrasive
cleaning cassette with pads which scrub the tape
head as the hubs of the cleaner cassette turn. The
recommended cleaning cassette is available through
your dealership.
The broken tape detection feature of your cassette tape
player may identify the cleaning cassette as a
damaged tape, in error.To prevent the cleaning cassette from being ejected,
use the following steps:
1. Turn the ignition on.
2. Turn the radio off.
3. Press and hold the TAPE CD button for ®ve
seconds. READY will appear on the display and a
cassette symbol will ¯ash for ®ve seconds.
4. Insert the scrubbing action cleaning cassette.
5. Eject the cleaning cassette after the manufacturer's
recommended cleaning time.
After the cleaning cassette is ejected, the broken tape
detection feature will be active again.
You may also choose a non-scrubbing action, wet-type
cleaner which uses a cassette with a fabric belt to
clean the tape head. This type of cleaning cassette will
not eject on its own. A non-scrubbing action cleaner
may not clean as thoroughly as the scrubbing type
cleaner. The use of a non-scrubbing action, dry-type
cleaning cassette is not recommended.
After you clean the player, press and hold the EJT
button for ®ve seconds to reset the CLEAN indicator.
The radio will display CLEANED to show the indicator
was reset.
Cassettes are subject to wear and the sound quality
may degrade over time. Always make sure the cassette
tape is in good condition before you have your tape
player serviced.
3-106
Page 234 of 442
Avoid needless heavy braking. Some people drive
in spurts Ð heavy acceleration followed by heavy
braking Ð rather than keeping pace with traffic. This is
a mistake. Your brakes may not have time to cool
between hard stops. Your brakes will wear out much
faster if you do a lot of heavy braking. If you keep pace
with the traffic and allow realistic following distances,
you will eliminate a lot of unnecessary braking.
That means better braking and longer brake life.
If your engine ever stops while you're driving, brake
normally but don't pump your brakes. If you do,
the pedal may get harder to push down. If your engine
stops, you will still have some power brake assist.
But you will use it when you brake. Once the power
assist is used up, it may take longer to stop and
the brake pedal will be harder to push.Anti-lock Brake System
Your vehicle has anti-lock brakes. ABS is an advanced
electronic braking system that will help prevent a
braking skid.
When you start your engine and begin to drive away,
your anti-lock brake system will check itself. You
may hear a momentary motor or clicking noise while
this test is going on. This is normal.
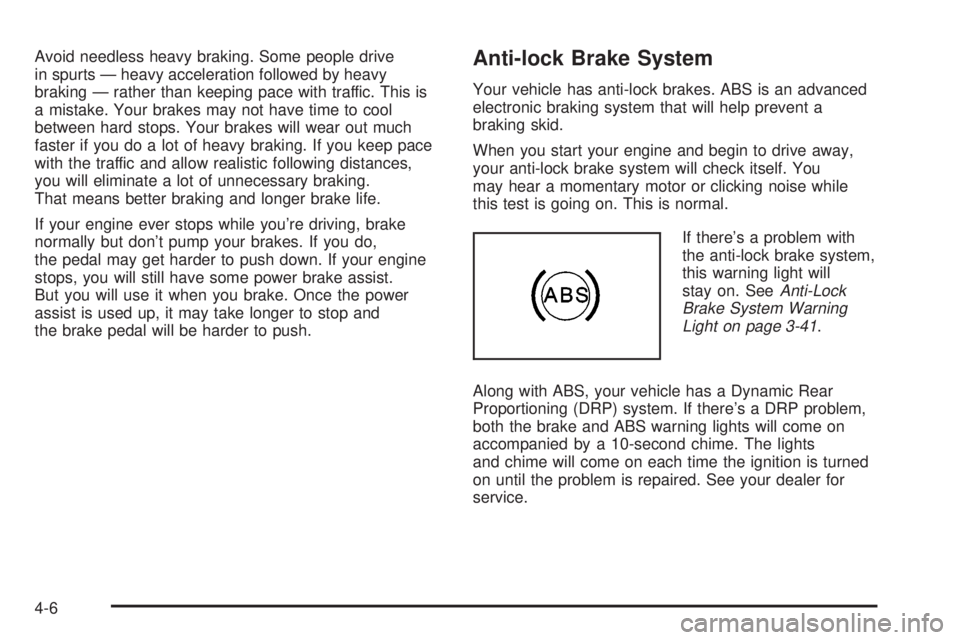
If there's a problem with
the anti-lock brake system,
this warning light will
stay on. See
Anti-Lock
Brake System Warning
Light on page 3-41
.
Along with ABS, your vehicle has a Dynamic Rear
Proportioning (DRP) system. If there's a DRP problem,
both the brake and ABS warning lights will come on
accompanied by a 10-second chime. The lights
and chime will come on each time the ignition is turned
on until the problem is repaired. See your dealer for
service.
4-6
Page 237 of 442

The traction control off symbol on the button will come
on under the following conditions:
·The Traction Assist System is turned off, either by
pressing the TAS on/off button or by turning off
the automatic engagement feature of the TAS.
·The transmission is in FIRST (1) gear; TAS will not
operate in this gear. This is normal.
·The vehicle is driven on an extremely rough road.
When the vehicle leaves the rough surface, slows
down or stops, the light will go off and TAS will
be on again. This is normal.
·A Traction Assist System, Anti-Lock Brake System
or engine-related problem has been detected and
the vehicle needs service.
The Traction Assist System, as delivered from the
factory, will automatically come on whenever you start
your vehicle. To limit wheel spin, especially in
slippery road conditions, you should always leave the
system on. But you can turn the TAS off if you ever need
to. You should turn the TAS off if your vehicle ever
gets stuck in sand, mud or snow and rocking the vehicle
is required.To turn the system on or off, press the TAS button
located near the shift lever. If you used the button to turn
the system off, the traction control off symbol on the
button will come on and stay on.
You can turn the system back on at any time by
pressing the button again. The traction control off symbol
on the button should go off.
If desired, you can change the TAS automatic
engagement feature so that the system will not come on
automatically when the engine is started. To do so:
1. Turn the ignition to RUN.
2. Move the shift lever to NEUTRAL.
3. Apply the brake pedal and press the accelerator
pedal to the ¯oor.
4. Press and hold the TAS button for at least six
seconds.
5. Release the TAS button and both pedals.
6. Start the engine and wait a few seconds.
The next time you start your vehicle, the TAS will not
automatically come on. You can restore the automatic
feature by using the same procedure. Whether the TAS
is set to come on automatically or not, you can always
turn the system on or off by pressing the TAS button.
4-9