climate control panel GMC ENVOY 2003 Owner's Manual
[x] Cancel search | Manufacturer: GMC, Model Year: 2003, Model line: ENVOY, Model: GMC ENVOY 2003Pages: 442, PDF Size: 3.1 MB
Page 1 of 442
Seats and Restraint Systems........................... 1-1
Front Seats
............................................... 1-2
Rear Seats
............................................... 1-6
Safety Belts
.............................................. 1-9
Child Restraints
.......................................1-30
Air Bag Systems
......................................1-51
Restraint System Check
............................1-60
Features and Controls..................................... 2-1
Keys
........................................................ 2-3
Doors and Locks
....................................... 2-8
Windows
.................................................2-14
Theft-Deterrent Systems
............................2-17
Starting and Operating Your Vehicle
...........2-19
Mirrors
....................................................2-35
OnStar
žSystem
......................................2-39
HomeLinkžTransmitter
.............................2-40
Storage Areas
.........................................2-44
Sunroof
..................................................2-51
Vehicle Personalization
.............................2-51
Instrument Panel............................................. 3-1
Instrument Panel Overview
.......................... 3-4
Climate Controls
......................................3-21
Warning Lights, Gages and Indicators
.........3-34
Driver Information Center (DIC)
..................3-50
Audio System(s)
.......................................3-63Driving Your Vehicle....................................... 4-1
Your Driving, the Road, and Your Vehicle
..... 4-2
Towing
...................................................4-45
Service and Appearance Care.......................... 5-1
Service
..................................................... 5-3
Fuel
......................................................... 5-4
Checking Things Under the Hood
...............5-10
Rear Axle
...............................................5-48
Four-Wheel Drive
.....................................5-48
Bulb Replacement
....................................5-50
Windshield Wiper Blade Replacement
.........5-52
Tires
......................................................5-54
Appearance Care
.....................................5-80
Vehicle Identi®cation
.................................5-88
Electrical System
......................................5-89
Capacities and Speci®cations
...................5-102
Normal Maintenance Replacement Parts
....5-104
Maintenance Schedule..................................... 6-1
Maintenance Schedule
................................ 6-2
Customer Assistance Information.................... 7-1
Customer Assistance Information
.................. 7-2
Reporting Safety Defects
............................ 7-9
INDEX................................................................1
2003 GMC Envoy/Envoy XL Owner ManualM
Page 4 of 442
Vehicle Damage Warnings
Also, in this book you will ®nd these notices:
Notice:These mean there is something that could
damage your vehicle.
A notice will tell you about something that can damage
your vehicle. Many times, this damage would not be
covered by your warranty, and it could be costly. But the
notice will tell you what to do to help avoid the
damage.
When you read other manuals, you might see CAUTION
and NOTICE warnings in different colors or in different
words.
You'll also see warning labels on your vehicle. They use
the same words, CAUTION or NOTICE.
Vehicle Symbols
Your vehicle has components and labels that use
symbols instead of text. Symbols, used on your vehicle,
are shown along with the text describing the operation
or information relating to a speci®c component, control,
message, gage or indicator.
If you need help ®guring out a speci®c name of a
component, gage or indicator, reference the following
topics:
·Seats and Restraint Systems in Section 1
·Features and Controls in Section 2
·Instrument Panel Overview in Section 3
·Climate Controls in Section 3
·Warning Lights, Gages and Indicators in Section 3
·Audio System(s) in Section 3
·Engine Compartment Overview in Section 5
iv
Page 81 of 442

Liftgate/Liftglass
{CAUTION:
It can be dangerous to drive with the liftgate or
liftglass open because carbon monoxide (CO)
gas can come into your vehicle. You can't see
or smell CO. It can cause unconsciousness
and even death. If you must drive with the
liftgate open or if electrical wiring or other
cable connections must pass through the seal
between the body and the liftgate or liftglass:
·Make sure all other windows are shut.
·Turn the fan on your heating or cooling
system to its highest speed and select the
control setting that will force outside air
into your vehicle. See ªClimate Control
Systemº in the Index.
·If you have air outlets on or under the
instrument panel, open them all the way.
See ªEngine Exhaustº in the Index.
Liftgate Release
To unlock the liftgate, you may use the power door
locks or the keyless entry system described earlier.
On some vehicles the liftglass will also unlock when the
liftgate is unlocked. Press the pushbutton on the
liftglass to open it.
To open the entire liftgate, lift the handle located in the
center of the liftgate. If you open the liftgate, the
liftgate module will lock the liftglass after a one to two
second delay.
Emergency Release for Opening
Liftgate
1. Remove the trim plug to expose the access hole in
the trim panel.
2. Use a tool to reach through the access hole in the
trim panel.
3. Pry the left release lever up to the unlock position.
Pry the right release lever up to unlatch the liftgate.
4. Reattach the trim plug.
2-13
Page 121 of 442
Instrument Panel Overview...............................3-4
Hazard Warning Flashers................................3-6
Other Warning Devices...................................3-6
Horn.............................................................3-7
Tilt Wheel.....................................................3-7
Turn Signal/Multifunction Lever.........................3-7
Exterior Lamps.............................................3-15
Interior Lamps..............................................3-17
Accessory Power Outlets...............................3-19
Ashtrays and Cigarette Lighter........................3-20
Climate Controls............................................3-21
Dual Climate Control System..........................3-21
Dual Automatic Climate Control System...........3-24
Rear Climate Control System.........................3-29
Steering Wheel Climate Controls.....................3-33
Climate Controls Personalization.....................3-33
Warning Lights, Gages and Indicators.............3-34
Instrument Panel Cluster................................3-35
Speedometer and Odometer...........................3-36
Tachometer.................................................3-36
Safety Belt Reminder Light.............................3-37Air Bag Readiness Light................................3-37
Charging System Light..................................3-38
Voltmeter Gage............................................3-39
Brake System Warning Light..........................3-39
Anti-Lock Brake System Warning Light.............3-41
Engine Coolant Temperature Gage..................3-41
Malfunction Indicator Lamp.............................3-42
Oil Pressure Gage........................................3-45
Change Engine Oil Light................................3-46
Security Light...............................................3-46
Cruise Control Light......................................3-47
Reduced Engine Power Light.........................3-47
Service Four-Wheel Drive Warning Light..........3-48
Check Gages Warning Light...........................3-48
Gate Ajar Light.............................................3-49
Fuel Gage...................................................3-49
Low Fuel Warning Light.................................3-50
Driver Information Center (DIC).......................3-50
DIC Operation and Displays...........................3-51
DIC Warnings and Messages.........................3-60
Section 3 Instrument Panel
3-1
Page 125 of 442
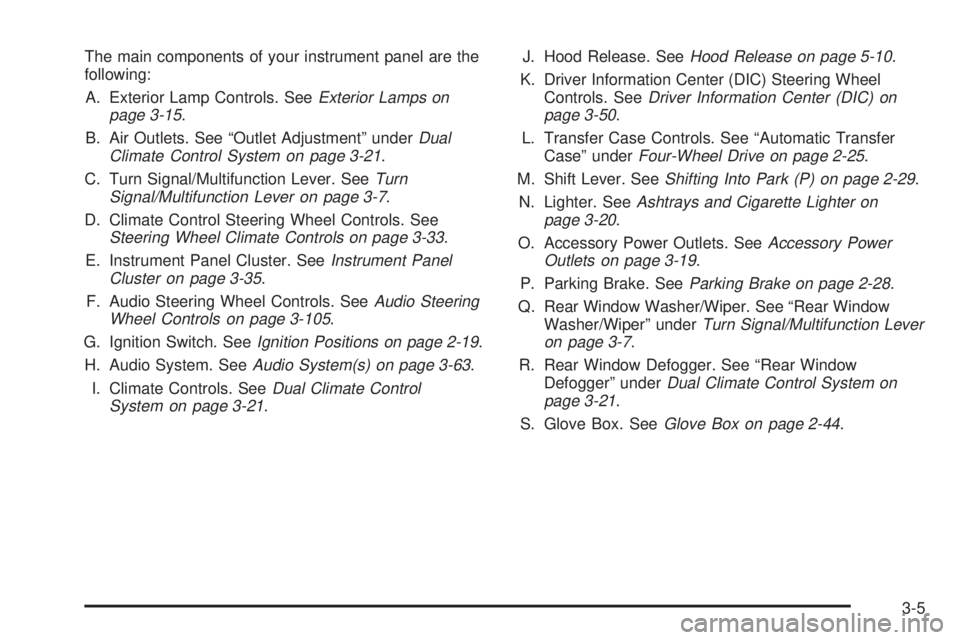
The main components of your instrument panel are the
following:
A. Exterior Lamp Controls. See
Exterior Lamps on
page 3-15.
B. Air Outlets. See ªOutlet Adjustmentº under
Dual
Climate Control System on page 3-21.
C. Turn Signal/Multifunction Lever. See
Turn
Signal/Multifunction Lever on page 3-7.
D. Climate Control Steering Wheel Controls. See
Steering Wheel Climate Controls on page 3-33.
E. Instrument Panel Cluster. See
Instrument Panel
Cluster on page 3-35.
F. Audio Steering Wheel Controls. See
Audio Steering
Wheel Controls on page 3-105.
G. Ignition Switch. See
Ignition Positions on page 2-19.
H. Audio System. See
Audio System(s) on page 3-63.
I. Climate Controls. See
Dual Climate Control
System on page 3-21.J. Hood Release. See
Hood Release on page 5-10.
K. Driver Information Center (DIC) Steering Wheel
Controls. See
Driver Information Center (DIC) on
page 3-50.
L. Transfer Case Controls. See ªAutomatic Transfer
Caseº under
Four-Wheel Drive on page 2-25.
M. Shift Lever. See
Shifting Into Park (P) on page 2-29.
N. Lighter. See
Ashtrays and Cigarette Lighter on
page 3-20.
O. Accessory Power Outlets. See
Accessory Power
Outlets on page 3-19.
P. Parking Brake. See
Parking Brake on page 2-28.
Q. Rear Window Washer/Wiper. See ªRear Window
Washer/Wiperº under
Turn Signal/Multifunction Lever
on page 3-7.
R. Rear Window Defogger. See ªRear Window
Defoggerº under
Dual Climate Control System on
page 3-21.
S. Glove Box. See
Glove Box on page 2-44.
3-5
Page 141 of 442
Climate Controls
Dual Climate Control System
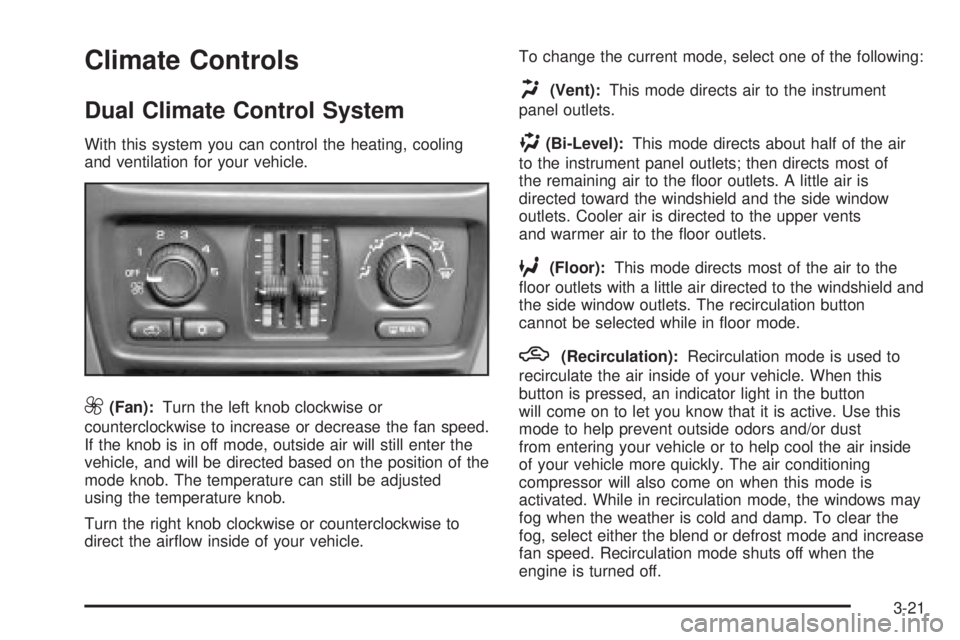
With this system you can control the heating, cooling
and ventilation for your vehicle.
9(Fan):Turn the left knob clockwise or
counterclockwise to increase or decrease the fan speed.
If the knob is in off mode, outside air will still enter the
vehicle, and will be directed based on the position of the
mode knob. The temperature can still be adjusted
using the temperature knob.
Turn the right knob clockwise or counterclockwise to
direct the air¯ow inside of your vehicle.To change the current mode, select one of the following:
H(Vent):This mode directs air to the instrument
panel outlets.
)(Bi-Level):This mode directs about half of the air
to the instrument panel outlets; then directs most of
the remaining air to the ¯oor outlets. A little air is
directed toward the windshield and the side window
outlets. Cooler air is directed to the upper vents
and warmer air to the ¯oor outlets.
6(Floor):This mode directs most of the air to the
¯oor outlets with a little air directed to the windshield and
the side window outlets. The recirculation button
cannot be selected while in ¯oor mode.
h(Recirculation):Recirculation mode is used to
recirculate the air inside of your vehicle. When this
button is pressed, an indicator light in the button
will come on to let you know that it is active. Use this
mode to help prevent outside odors and/or dust
from entering your vehicle or to help cool the air inside
of your vehicle more quickly. The air conditioning
compressor will also come on when this mode is
activated. While in recirculation mode, the windows may
fog when the weather is cold and damp. To clear the
fog, select either the blend or defrost mode and increase
fan speed. Recirculation mode shuts off when the
engine is turned off.
3-21
Page 142 of 442

Temperature Control
Driver's Side:The lever on the left side of the climate
control panel is used to raise or lower the temperature
on the driver's side of the vehicle. Slide the lever
up or down to adjust the temperature.
Passenger's Side:The lever on the right side of the
climate control panel is used to raise or lower the
temperature on the passenger's side of the vehicle.
Slide the lever up or down to adjust the temperature.
This lever also adjusts the temperature to the rear seat
outlets.
When the temperature outside is 0ÉF (-18ÉC) or lower,
use the engine coolant heater, if equipped, to provide
warmer air, faster to your vehicle.
#(Air Conditioning):Press this button to turn the
air-conditioning system on or off. When the button
is pressed, an indicator light will come on and the
system will begin to cool and dehumidify the air inside
of your vehicle. You may notice a slight change in
engine performance when the air conditioning
compressor shuts off and turns on again. This is
normal.
Defogging and Defrosting
Fog on the inside of windows is a result of high humidity
(moisture) condensing on the cool window glass. This
can be minimized if the climate control system is
used properly. There are two modes to choose from to
clear fog or frost from your windshield. Use the
defog mode to clear the windows of fog or moisture and
warm the passengers. Use the defrost mode to
remove fog or frost from the windshield more quickly.
Turn the right knob clockwise or counterclockwise
to select one of the following modes:
-(Defog):This mode directs the air to the ¯oor
outlets, windshield and side window outlets. The
recirculation button cannot be selected while in defog
mode.
1(Defrost):This mode directs most of the air to the
windshield and the side window outlets, with only a
little air directed to the ¯oor outlets. The air conditioning
compressor may run to dehumidify the air to prevent
window fogging. The recirculation button cannot
be selected while in defrost mode. Do not drive the
vehicle until all the windows are clear.
3-22
Page 152 of 442

Turn the knobs on the control panel to choose a fan
speed, temperature and direction of air¯ow.
Selecting panel mode will deliver air to the four headliner
outlets. Selecting bi-level mode will deliver warmer air
to the third seat ¯oor outlet and cooler air to the
headliner outlets. Selecting ¯oor mode will deliver air to
the ¯oor outlet located in the third seat area.Press the buttons at the bottom of the audio control
panel to adjust the fan speed, mode and temperature for
the rear passengers. The selections will be shown on
the display.
Press the rear fan control button with the arrow pointing
right to turn the rear climate control on. Toggle this
button to adjust the air ¯ow speed. To turn the
rear system off, toggle the left arrow until the display
turns off. Envoy XL
Envoy XL
3-32
Page 429 of 442

Charging System Light....................................3-38
CHECK WASHER FLUID.................................3-61
Checking Brake Fluid......................................5-39
Checking Coolant............................................5-25
Checking Engine Oil........................................5-15
Checking Things Under the Hood......................5-10
Checking Your Restraint Systems......................1-60
Check...........................................................3-42
Engine Light...............................................3-42
Gages Warning Light...................................3-48
Chemical Paint Spotting...................................5-86
Child Restraints..............................................1-36
Child Restraint Systems...............................1-36
Infants and Young Children...........................1-32
Lower Anchorages and Top Tethers for
Children (LATCH System)..........................1-42
Older Children.............................................1-30
Securing a Child Restraint Designed for
the LATCH System...................................1-44
Securing a Child Restraint in a Rear
Outside Seat Position...............................1-45
Securing a Child Restraint in the Center
Seat Position...........................................1-48
Securing a Child Restraint in the Right
Front Seat Position...................................1-48
Top Strap Anchor Location............................1-41
Top Strap...................................................1-40
Where to Put the Restraint...........................1-39
Chime Level Adjustment.................................3-107
Cigarette Lighter.............................................3-20Cleaning Aluminum Wheels..............................5-85
Cleaning Exterior Lamps/Lenses.......................5-84
Cleaning Fabric/Carpet....................................5-80
Cleaning Glass Surfaces..................................5-82
Cleaning Interior Plastic Components.................5-82
Cleaning Leather............................................5-82
Cleaning the Top of the
Instrument Panel.........................................5-82
Cleaning the Windshield, Backglass and
Wiper Blades..............................................5-85
Cleaning Tires................................................5-85
Cleaning Vinyl................................................5-82
Cleaning........................................................5-80
Inside of Your Vehicle..................................5-80
Outside of Your Vehicle................................5-83
Underbody Maintenance...............................5-86
Video Screen............................................3-107
Weatherstrips..............................................5-83
Climate Control System...................................3-33
Climate Controls Personalization....................3-33
Dual Automatic............................................3-24
Dual..........................................................3-21
Rear..........................................................3-29
Steering Wheel Controls...............................3-33
Compact Disc Messages.................3-70, 3-80, 3-92
Compass Calibration.......................................2-35
Compass Operation.........................................2-35
Compass Variance..........................................2-36
Content Theft-Deferrent....................................2-17
Control of a Vehicle.......................................... 4-5
3
Page 438 of 442
Radios (cont.)
Rear Seat Audio........................................3-103
Setting the Time..........................................3-63
Theft-Deterrent..........................................3-104
Understanding Reception............................3-105
RainsenseŸ Wipers........................................3-10
RDS Messages..............................3-68, 3-75, 3-86
Reading Lamps..............................................3-19
REAR ACCESS OPEN....................................3-61
Rear Axle......................................................5-48
Locking......................................................4-10
Rear Climate Control System............................3-29
Rear Compartment Storage Panel/Cover............2-46
Rear Door Security Locks................................2-12
Rear Floor Storage Lid....................................2-49
Rear Safety Belt Comfort Guides......................1-26
Rear Seat Audio (RSA)..................................3-103
Rear Seat Entertainment System.......................3-92
Rear Seat Operation......................................... 1-6
Rear Seat Passenger Positions.........................1-23
Rear Seat Passengers, Safety Belts..................1-23
Rear Seats (Envoy XL)..................................... 1-7
Rear Underseat Fuse Block..............................5-97
Rear Window Defogger............................3-23, 3-27
Rearview Mirror, Automatic Dimming with
OnStar
žand Compass.................................2-35
Reclining Seatbacks, Power............................... 1-4
Recreational Vehicle Towing.............................4-45
Reduced Engine Power Light............................3-47Remote Control..............................................3-97
Remote Keyless Entry System, Operation............ 2-6
Remote Keyless Entry System............................ 2-5
Removing the Flat Tire and Installing the
Spare Tire..................................................5-72
Removing the Spare Tire and Tools...................5-66
Replacement Bulbs.........................................5-52
Replacing Brake System Parts..........................5-41
Replacing Restraint System Parts
After a Crash..............................................1-61
Reporting Safety Defects................................... 7-9
Canadian Government................................... 7-9
General Motors...........................................7-10
United States Government.............................. 7-9
Reprogramming a Single HomeLink
žButton.......2-43
Resetting Defaults...........................................2-44
Restraint System Check...................................6-12
Checking Your Restraint Systems...................1-60
Replacing Restraint System Parts
After a Crash..........................................1-61
Restraint Systems...........................................1-60
Checking....................................................1-60
Replacing Parts...........................................1-61
Retained Accessory Power (RAP)......................2-20
RFA # BATTERY LOW....................................3-62
Right Front Passenger Position, Safety Belts......1-22
RIGHT REAR DOOR AJAR..............................3-62
Roadside......................................................... 7-5
Assistance Program....................................... 7-5
12