power steering GMC ENVOY 2003 Owner's Manual
[x] Cancel search | Manufacturer: GMC, Model Year: 2003, Model line: ENVOY, Model: GMC ENVOY 2003Pages: 442, PDF Size: 3.1 MB
Page 65 of 442
CAUTION: (Continued)
breathing trouble. To avoid this, everyone in
the vehicle should get out as soon as it is safe
to do so. If you have breathing problems but
can't get out of the vehicle after an air bag
in¯ates, then get fresh air by opening a
window or a door. If you experience breathing
problems following an air bag deployment, you
should seek medical attention.
Your vehicle has a feature that will automatically unlock
the doors and turn the interior lamps on when the air
bags in¯ate (if battery power is available). You can lock
the doors again and turn the interior lamps off by
using the door lock and interior lamp controls.
In many crashes severe enough to in¯ate an air bag,
windshields are broken by vehicle deformation.
Additional windshield breakage may also occur from the
right front passenger air bag.
·Air bags are designed to in¯ate only once. After an
air bag in¯ates, you'll need some new parts for
your air bag system. If you don't get them, the air
bag system won't be there to help protect you
in another crash. A new system will include air bagmodules and possibly other parts. The service
manual for your vehicle covers the need to replace
other parts.
·Your vehicle is equipped with an electronic frontal
sensor, which helps the sensing system distinguish
between a moderate frontal impact and a more
severe frontal impact. Your vehicle is also equipped
with a crash sensing and diagnostic module,
which records information about the frontal air bag
system. The module records information about
the readiness of the system, when the system
commands air bag in¯ation and driver's safety belt
usage at deployment. The module also records
speed, engine rpm, brake and throttle data.
·Let only quali®ed technicians work on your air bag
systems. Improper service can mean that an air bag
system won't work properly. See your dealer for
service.
Notice:If you damage the covering for the driver's
or the right front passenger's air bag, or the air
bag covering on the driver's and right front
passenger's seatback, the bag may not work
properly. You may have to replace the air bag
module in the steering wheel, both the air bag
module and the instrument panel for the right front
passenger's air bag, or both the air bag module
and seatback for the driver's and right front
passenger's side impact air bag. Do not open or
break the air bag coverings.
1-59
Page 93 of 442
FIRST (1):This position gives you even more power
but lower fuel economy than SECOND (2). You can use
it on very steep hills, or in deep snow or mud. If the
selector lever is put in FIRST (1) while the vehicle
is moving forward, the transmission won't shift into ®rst
gear until the vehicle is going slowly enough.
Notice:If your wheels won't turn, don't try to drive.
This might happen if you were stuck in very deep
sand or mud or were up against a solid object. You
could damage your transmission. Also, if you
stop when going uphill, don't hold your vehicle there
with only the accelerator pedal. This could overheat
and damage the transmission. Use your brakes
or shift into PARK (P) to hold your vehicle in
position on a hill.
Four-Wheel Drive
If your vehicle has four-wheel drive, you can send your
engine's driving power to all four wheels for extra
traction. To get the most satisfaction out of four-wheel
drive, you must be familiar with its operation. Read
the part that follows before using four-wheel drive. You
should use two-wheel drive high (2HI) for most
normal driving conditions.
Notice:Driving in the 4-WHEEL HIGH (4HI) or
4-WHEEL LOW (4LO) positions for a long time on
dry or wet pavement could shorten the life of
your vehicle's drivetrain.
Automatic Transfer Case
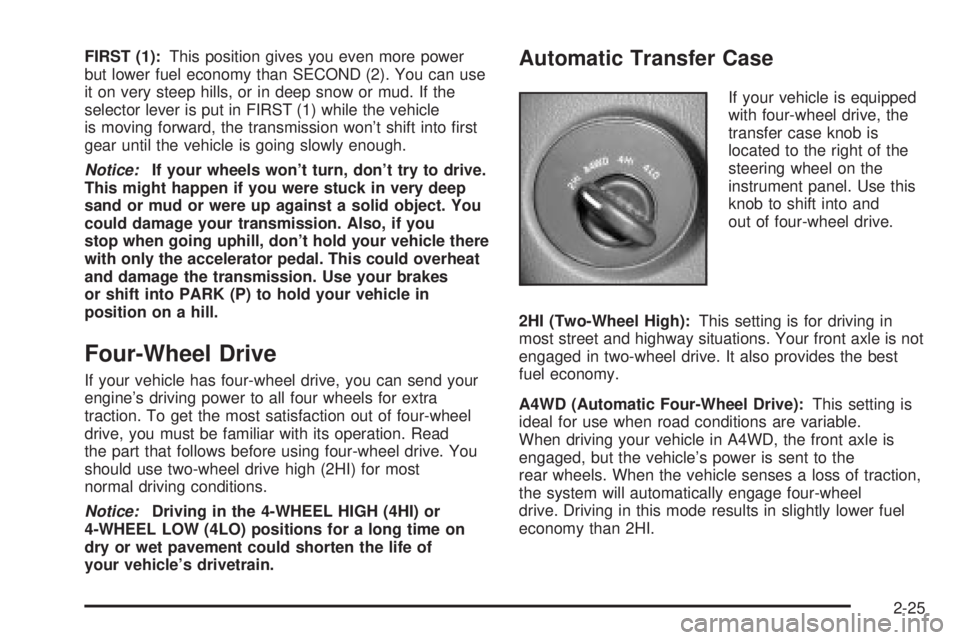
If your vehicle is equipped
with four-wheel drive, the
transfer case knob is
located to the right of the
steering wheel on the
instrument panel. Use this
knob to shift into and
out of four-wheel drive.
2HI (Two-Wheel High):This setting is for driving in
most street and highway situations. Your front axle is not
engaged in two-wheel drive. It also provides the best
fuel economy.
A4WD (Automatic Four-Wheel Drive):This setting is
ideal for use when road conditions are variable.
When driving your vehicle in A4WD, the front axle is
engaged, but the vehicle's power is sent to the
rear wheels. When the vehicle senses a loss of traction,
the system will automatically engage four-wheel
drive. Driving in this mode results in slightly lower fuel
economy than 2HI.
2-25
Page 121 of 442
Instrument Panel Overview...............................3-4
Hazard Warning Flashers................................3-6
Other Warning Devices...................................3-6
Horn.............................................................3-7
Tilt Wheel.....................................................3-7
Turn Signal/Multifunction Lever.........................3-7
Exterior Lamps.............................................3-15
Interior Lamps..............................................3-17
Accessory Power Outlets...............................3-19
Ashtrays and Cigarette Lighter........................3-20
Climate Controls............................................3-21
Dual Climate Control System..........................3-21
Dual Automatic Climate Control System...........3-24
Rear Climate Control System.........................3-29
Steering Wheel Climate Controls.....................3-33
Climate Controls Personalization.....................3-33
Warning Lights, Gages and Indicators.............3-34
Instrument Panel Cluster................................3-35
Speedometer and Odometer...........................3-36
Tachometer.................................................3-36
Safety Belt Reminder Light.............................3-37Air Bag Readiness Light................................3-37
Charging System Light..................................3-38
Voltmeter Gage............................................3-39
Brake System Warning Light..........................3-39
Anti-Lock Brake System Warning Light.............3-41
Engine Coolant Temperature Gage..................3-41
Malfunction Indicator Lamp.............................3-42
Oil Pressure Gage........................................3-45
Change Engine Oil Light................................3-46
Security Light...............................................3-46
Cruise Control Light......................................3-47
Reduced Engine Power Light.........................3-47
Service Four-Wheel Drive Warning Light..........3-48
Check Gages Warning Light...........................3-48
Gate Ajar Light.............................................3-49
Fuel Gage...................................................3-49
Low Fuel Warning Light.................................3-50
Driver Information Center (DIC).......................3-50
DIC Operation and Displays...........................3-51
DIC Warnings and Messages.........................3-60
Section 3 Instrument Panel
3-1
Page 125 of 442
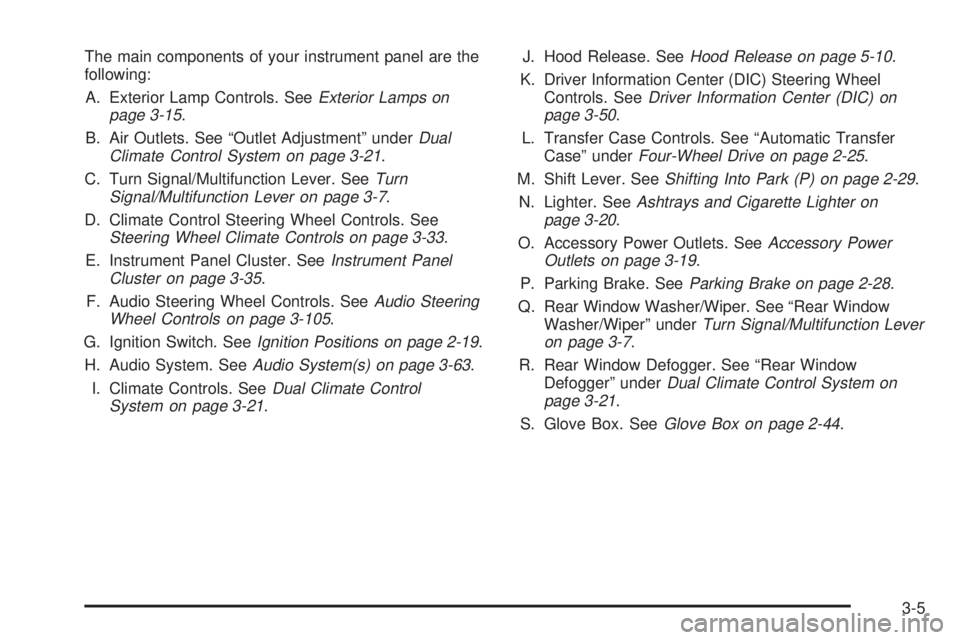
The main components of your instrument panel are the
following:
A. Exterior Lamp Controls. See
Exterior Lamps on
page 3-15.
B. Air Outlets. See ªOutlet Adjustmentº under
Dual
Climate Control System on page 3-21.
C. Turn Signal/Multifunction Lever. See
Turn
Signal/Multifunction Lever on page 3-7.
D. Climate Control Steering Wheel Controls. See
Steering Wheel Climate Controls on page 3-33.
E. Instrument Panel Cluster. See
Instrument Panel
Cluster on page 3-35.
F. Audio Steering Wheel Controls. See
Audio Steering
Wheel Controls on page 3-105.
G. Ignition Switch. See
Ignition Positions on page 2-19.
H. Audio System. See
Audio System(s) on page 3-63.
I. Climate Controls. See
Dual Climate Control
System on page 3-21.J. Hood Release. See
Hood Release on page 5-10.
K. Driver Information Center (DIC) Steering Wheel
Controls. See
Driver Information Center (DIC) on
page 3-50.
L. Transfer Case Controls. See ªAutomatic Transfer
Caseº under
Four-Wheel Drive on page 2-25.
M. Shift Lever. See
Shifting Into Park (P) on page 2-29.
N. Lighter. See
Ashtrays and Cigarette Lighter on
page 3-20.
O. Accessory Power Outlets. See
Accessory Power
Outlets on page 3-19.
P. Parking Brake. See
Parking Brake on page 2-28.
Q. Rear Window Washer/Wiper. See ªRear Window
Washer/Wiperº under
Turn Signal/Multifunction Lever
on page 3-7.
R. Rear Window Defogger. See ªRear Window
Defoggerº under
Dual Climate Control System on
page 3-21.
S. Glove Box. See
Glove Box on page 2-44.
3-5
Page 225 of 442

Audio Steering Wheel Controls
If your vehicle has this
feature, certain radio
functions can be operated
by using the controls
on your steering wheel.
AM/FM:Press this button to switch between AM, FM1
and FM2. When playing a cassette tape or compact
disc, press this button to listen to the radio.
n(Program):Press this button to tune to the next
preset radio station. When playing a cassette tape,
press this button to play the other side of the tape. When
using the CD changer, this button will seek to the
next track.
u(Volume):Press the up or the down arrow to
increase or to decrease volume.
DVD Distortion
You may experience audio distortion in the
IR headphones when operating cellular phones,
scanners, CB radios, Global Positioning Systems
(GPS)*, two-way radios, mobile fax, or walkie talkies.
It may be necessary to turn off the DVD player
when operating one of these devices in or near the
vehicle.
* Excludes the OnStar
žSystem.
Understanding Radio Reception
AM
The range for most AM stations is greater than for FM,
especially at night. The longer range, however, can
cause stations to interfere with each other. AM can pick
up noise from things like storms and power lines. Try
reducing the treble to reduce this noise if you ever get it.
FM
FM stereo will give you the best sound, but FM signals
will reach only about 10 to 40 miles (16 to 65 km).
Tall buildings or hills can interfere with FM signals,
causing the sound to come and go.
3-105
Page 236 of 442

Remember: Anti-lock doesn't change the time you need
to get your foot up to the brake pedal or always
decrease stopping distance. If you get too close to the
vehicle in front of you, you won't have time to apply
your brakes if that vehicle suddenly slows or stops.
Always leave enough room up ahead to stop, even
though you have anti-lock brakes.
Using Anti-Lock
Don't pump the brakes. Just hold the brake pedal down
®rmly and let anti-lock work for you. You may feel
the brakes vibrate, or you may notice some noise, but
this is normal.
Braking in Emergencies
With anti-lock, you can steer and brake at the same
time. In many emergencies, steering can help you more
than even the very best braking.
Traction Assist System (TAS)
Your two-wheel drive vehicle may have a Traction
Assist System (TAS) that limits wheel spin. This
is especially useful in slippery road conditions. The
system operates only if it senses that one or both of the
rear wheels are spinning or beginning to lose traction.
When this happens, the system reduces engine
power to limit wheel spin.
The low traction symbol next to the button will come on
when the TAS is limiting wheel spin. You may feel or
hear the system working, but this is normal.
The Traction Assist System may operate on dry roads
under some conditions. When this happens, you
may notice a reduction in acceleration. This is normal
and doesn't mean there's a problem with your vehicle.
Examples of these conditions include a hard
acceleration in a turn, an abrupt upshift or downshift of
the transmission or driving on rough roads.
If your vehicle is in cruise control when the TAS begins
to limit wheel spin, the cruise control will automatically
disengage. When road conditions allow you to safely
use it again, you may re-engage the cruise control. See
ªCruise Controlº under
Turn Signal/Multifunction
Lever on page 3-7. When the traction control off symbol
on the button is on, the TAS is off and will not limit
wheel spin. Adjust your driving accordingly.
4-8
Page 238 of 442

Locking Rear Axle
If your vehicle has this feature, your locking rear axle
can give you additional traction on snow, mud, ice, sand
or gravel. It works like a standard axle most of the
time, but when one of the rear wheels has no traction
and the other does, this feature will allow the wheel with
traction to move the vehicle.
Steering
Power Steering
If you lose power steering assist because the engine
stops or the system is not functioning, you can steer but
it will take much more effort.
Steering Tips
Driving on Curves
It's important to take curves at a reasonable speed.
A lot of the ªdriver lost controlº accidents mentioned on
the news happen on curves. Here's why:
Experienced driver or beginner, each of us is subject to
the same laws of physics when driving on curves.
The traction of the tires against the road surface makes
it possible for the vehicle to change its path whenyou turn the front wheels. If there's no traction, inertia
will keep the vehicle going in the same direction. If
you've ever tried to steer a vehicle on wet ice, you'll
understand this.
The traction you can get in a curve depends on the
condition of your tires and the road surface, the angle at
which the curve is banked, and your speed. While
you're in a curve, speed is the one factor you can
control.
Suppose you're steering through a sharp curve.
Then you suddenly accelerate. Both control
systems Ð steering and acceleration Ð have to do their
work where the tires meet the road. Adding the
sudden acceleration can demand too much of those
places. You can lose control. See
Traction Assist
System (TAS) on page 4-8.
What should you do if this ever happens? Ease up on
the accelerator pedal, steer the vehicle the way you
want it to go, and slow down.
Speed limit signs near curves warn that you should
adjust your speed. Of course, the posted speeds
are based on good weather and road conditions. Under
less favorable conditions you'll want to go slower.
4-10
Page 248 of 442
Approaching a Hill
When you approach a hill, you need to decide if it's one
of those hills that's just too steep to climb, descend
or cross. Steepness can be hard to judge. On a very
small hill, for example, there may be a smooth, constant
incline with only a small change in elevation where
you can easily see all the way to the top. On a large hill,
the incline may get steeper as you near the top, but
you may not see this because the crest of the hill
is hidden by bushes, grass or shrubs.
Here are some other things to consider as you approach
a hill.
·Is there a constant incline, or does the hill get
sharply steeper in places?
·Is there good traction on the hillside, or will the
surface cause tire slipping?
·Is there a straight path up or down the hill so you
won't have to make turning maneuvers?
·Are there obstructions on the hill that can block
your path (boulders, trees, logs or ruts)?
·What's beyond the hill? Is there a cliff, an
embankment, a drop-off, a fence? Get out and walk
the hill if you don't know. It's the smart way to
®nd out.
·Is the hill simply too rough? Steep hills often have
ruts, gullies, troughs and exposed rocks because
they are more susceptible to the effects of erosion.
Driving Uphill
Once you decide you can safely drive up the hill, you
need to take some special steps.
·Use a low gear and get a ®rm grip on the steering
wheel.
·Get a smooth start up the hill and try to maintain
your speed. Don't use more power than you
need, because you don't want your wheels to start
spinning or sliding.
·Try to drive straight up the hill if at all possible. If
the path twists and turns, you might want to ®nd
another route.
{CAUTION:
Turning or driving across steep hills can be
dangerous. You could lose traction, slide
sideways, and possibly roll over. You could be
seriously injured or killed. When driving up
hills, always try to go straight up.
4-20
Page 289 of 442
Service............................................................5-3
Doing Your Own Service Work.........................5-3
Adding Equipment to the Outside of Your
Vehicle......................................................5-4
Fuel................................................................5-4
Gasoline Octane............................................5-4
Gasoline Speci®cations....................................5-5
California Fuel...............................................5-5
Additives.......................................................5-6
Fuels in Foreign Countries...............................5-7
Filling Your Tank............................................5-7
Filling a Portable Fuel Container.......................5-9
Checking Things Under the Hood....................5-10
Hood Release..............................................5-10
Engine Compartment Overview.......................5-12
Engine Oil...................................................5-15
Engine Air Cleaner/Filter................................5-20
Automatic Transmission Fluid.........................5-21
Engine Coolant.............................................5-24
Radiator Pressure Cap..................................5-26
Engine Overheating.......................................5-27
Cooling System............................................5-29
Engine Fan Noise.........................................5-35
Power Steering Fluid.....................................5-36
Windshield Washer Fluid................................5-37Brakes........................................................5-38
Battery........................................................5-41
Jump Starting...............................................5-42
Rear Axle.......................................................5-48
Four-Wheel Drive............................................5-48
Bulb Replacement..........................................5-50
Halogen Bulbs..............................................5-50
Headlamps..................................................5-50
Front Turn Signal and Sidemarker Lamps........5-51
Taillamps and Turn Signal Lamps...................5-51
Replacement Bulbs.......................................5-52
Windshield Wiper Blade Replacement..............5-52
Tires..............................................................5-54
In¯ation -- Tire Pressure................................5-55
Tire Inspection and Rotation...........................5-55
When It Is Time for New Tires.......................5-57
Buying New Tires.........................................5-58
Uniform Tire Quality Grading..........................5-59
Wheel Alignment and Tire Balance..................5-60
Wheel Replacement......................................5-60
Tire Chains..................................................5-62
Accessory In¯ator.........................................5-62
If a Tire Goes Flat........................................5-64
Changing a Flat Tire.....................................5-64
Section 5 Service and Appearance Care
5-1
Page 301 of 442
A. Coolant Recovery Tank. SeeEngine Coolant on
page 5-24.
B. Engine Air Cleaner/Filter. See
Engine Air
Cleaner/Filter on page 5-20.
C. Windshield Washer Fluid Reservoir. See
Windshield
Washer Fluid on page 5-37.
D. Power Steering Fluid Reservoir. See
Power Steering
Fluid on page 5-36.
E. Automatic Transmission Dipstick. See
Automatic
Transmission Fluid on page 5-21.
F. Engine Oil Dipstick. See
Engine Oil on page 5-15.G. Radiator Pressure Cap. See
Radiator Pressure Cap
on page 5-26.
H. Engine Oil Fill Cap. See
Engine Oil on page 5-15.
I. Remote Negative (-) Terminal Marked GND.
See
Jump Starting on page 5-42.
J. Brake Master Cylinder. See
Brakes on page 5-38.
K. Battery. See
Battery on page 5-41.
L. Engine Compartment Fuse Block. See ªEngine
Compartment Fuse Blockº under
Fuses and Circuit
Breakers on page 5-90.
5-13