wheel GMC ENVOY 2004 Owner's Guide
[x] Cancel search | Manufacturer: GMC, Model Year: 2004, Model line: ENVOY, Model: GMC ENVOY 2004Pages: 474, PDF Size: 4.83 MB
Page 129 of 474
Horn
To sound the horn, press the horn symbols on the
steering wheel pad.
Tilt Wheel
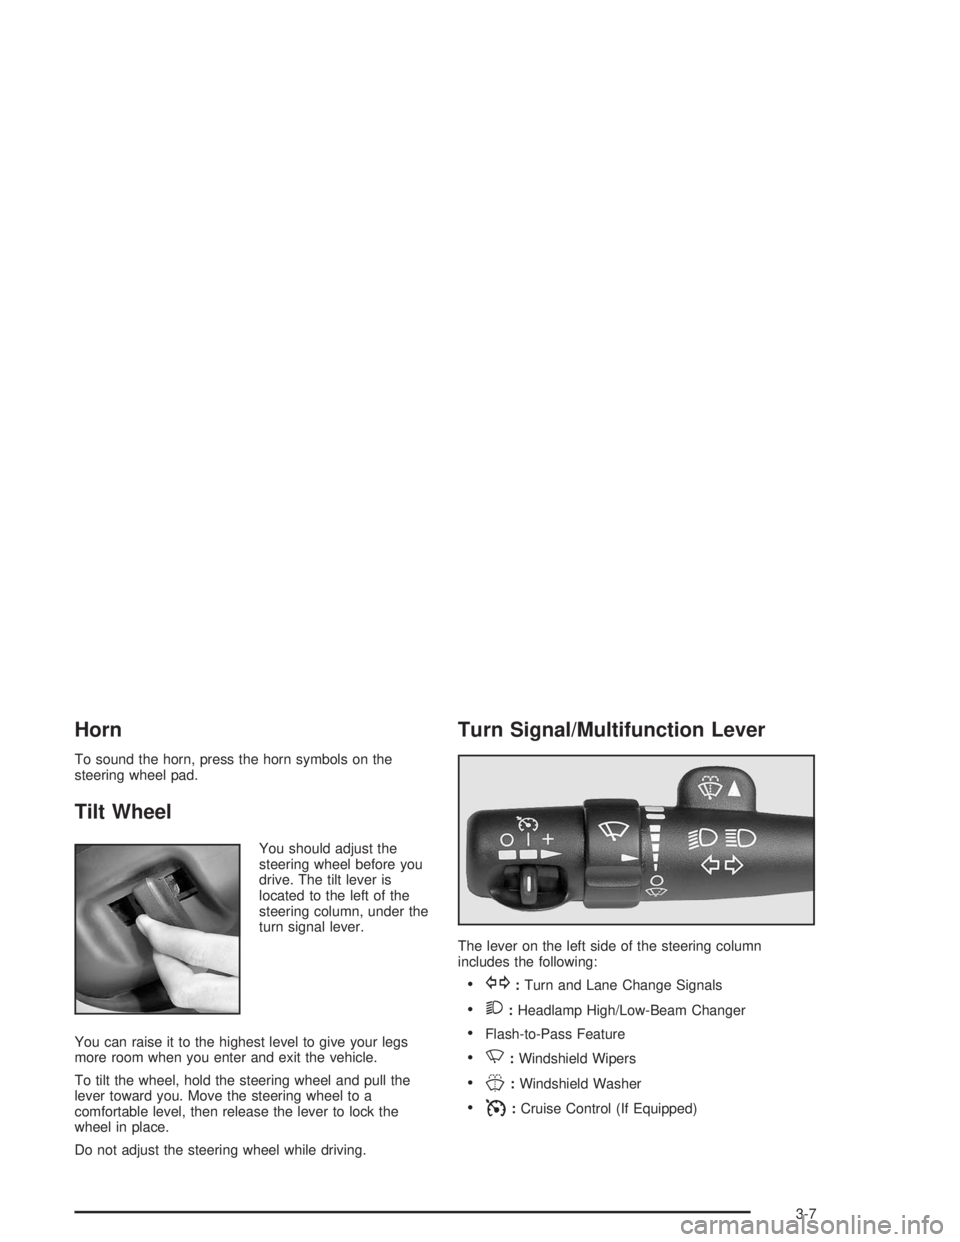
You should adjust the
steering wheel before you
drive. The tilt lever is
located to the left of the
steering column, under the
turn signal lever.
You can raise it to the highest level to give your legs
more room when you enter and exit the vehicle.
To tilt the wheel, hold the steering wheel and pull the
lever toward you. Move the steering wheel to a
comfortable level, then release the lever to lock the
wheel in place.
Do not adjust the steering wheel while driving.
Turn Signal/Multifunction Lever
The lever on the left side of the steering column
includes the following:
G:Turn and Lane Change Signals
2:Headlamp High/Low-Beam Changer
Flash-to-Pass Feature
N:Windshield Wipers
J:Windshield Washer
I:Cruise Control (If Equipped)
3-7
Page 133 of 474

Rear Window Washer/Wiper
This control is located to
the right of the steering
wheel on the instrument
panel.
To turn the rear wiper on, turn the control to either 1, 2,
or 3. For delayed wiping, turn the control to 1 or 2.
For steady wiping, turn the control to 3. To turn the wiper
off, turn the control to 0.
To wash the rear window, press the washer symbol
located in the center of the control.
The rear window washer uses the same �uid bottle as
the windshield washer. However, the rear window
washer will run out of �uid before the windshield washer.
If you can wash your windshield but not your rear
window, check the �uid level.
Headlamp Washer
Your vehicle may be
equipped with a headlamp
washer system. The
button to operate this
feature is located on the
instrument panel and
functions separately from
your other washer
systems.
To wash your headlamps, press the headlamp washer
button brie�y and release to activate the system.
Two pressurized bursts of washer �uid will then be
applied to the headlamps.
3-11
Page 134 of 474
Cruise Control
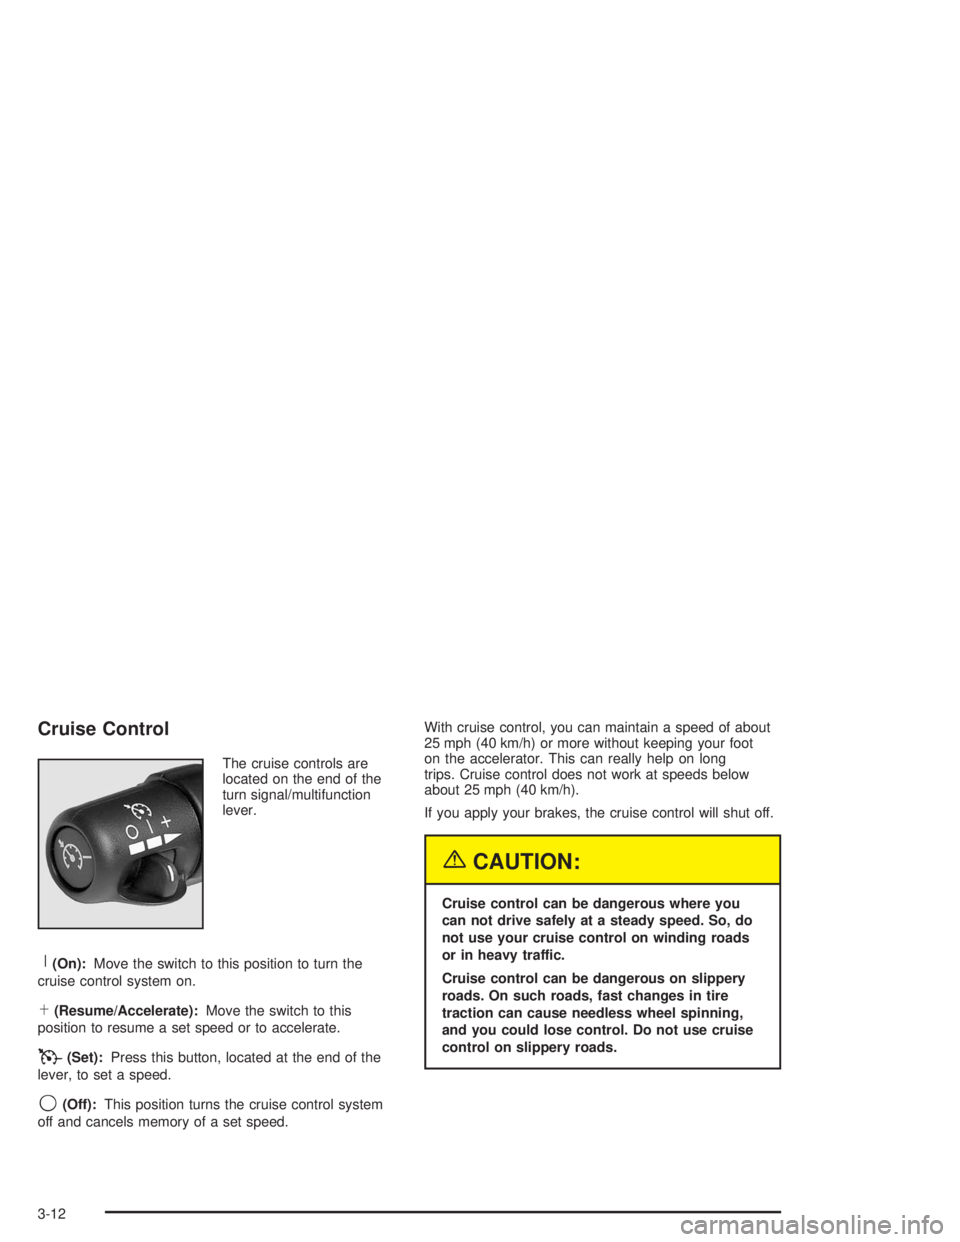
The cruise controls are
located on the end of the
turn signal/multifunction
lever.
R(On):Move the switch to this position to turn the
cruise control system on.
S(Resume/Accelerate):Move the switch to this
position to resume a set speed or to accelerate.
T(Set):Press this button, located at the end of the
lever, to set a speed.
9(Off):This position turns the cruise control system
off and cancels memory of a set speed.With cruise control, you can maintain a speed of about
25 mph (40 km/h) or more without keeping your foot
on the accelerator. This can really help on long
trips. Cruise control does not work at speeds below
about 25 mph (40 km/h).
If you apply your brakes, the cruise control will shut off.
{CAUTION:
Cruise control can be dangerous where you
can not drive safely at a steady speed. So, do
not use your cruise control on winding roads
or in heavy traffic.
Cruise control can be dangerous on slippery
roads. On such roads, fast changes in tire
traction can cause needless wheel spinning,
and you could lose control. Do not use cruise
control on slippery roads.
3-12
Page 137 of 474
Exterior Lamps
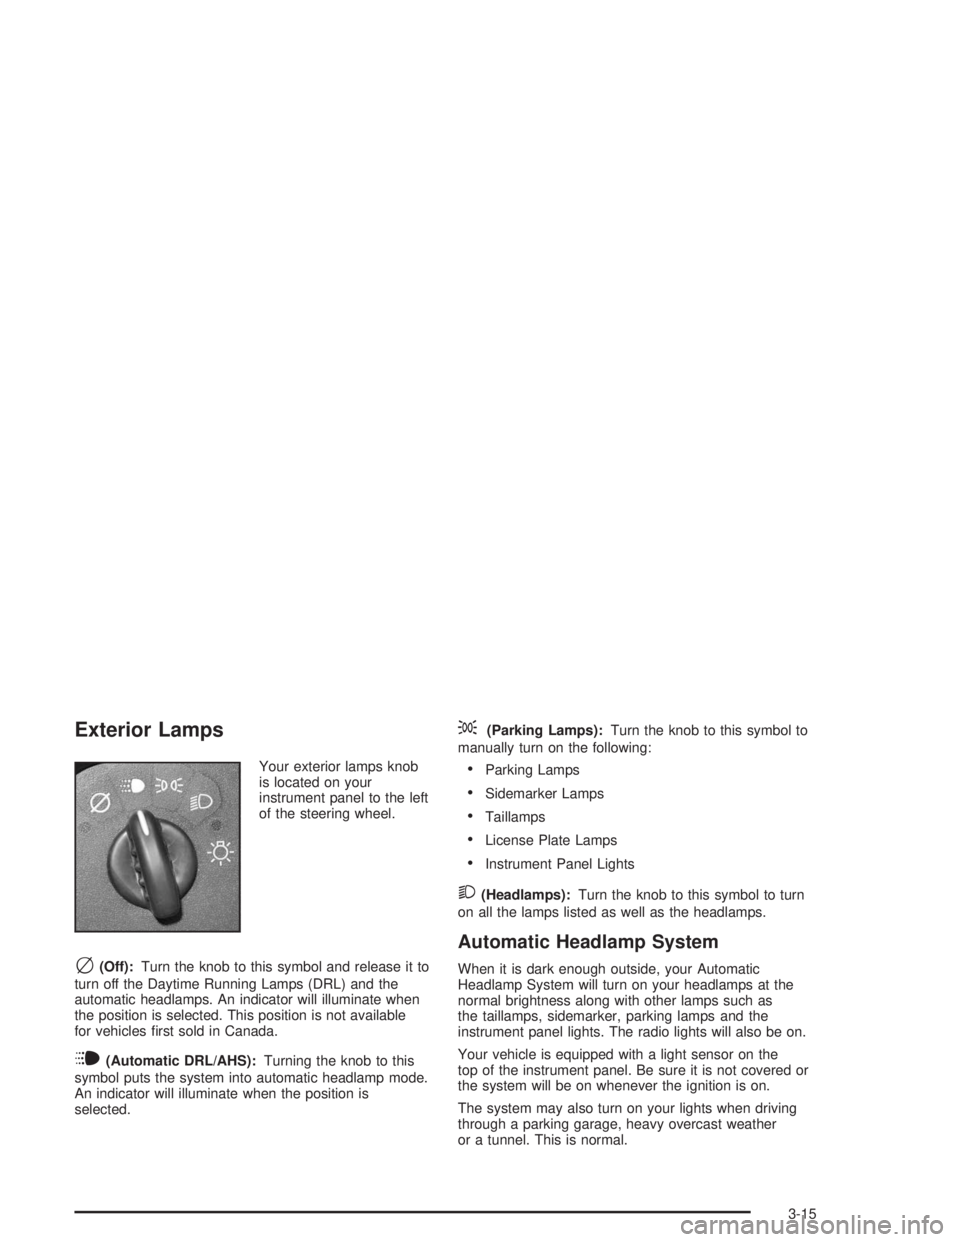
Your exterior lamps knob
is located on your
instrument panel to the left
of the steering wheel.
c(Off):Turn the knob to this symbol and release it to
turn off the Daytime Running Lamps (DRL) and the
automatic headlamps. An indicator will illuminate when
the position is selected. This position is not available
for vehicles �rst sold in Canada.
i(Automatic DRL/AHS):Turning the knob to this
symbol puts the system into automatic headlamp mode.
An indicator will illuminate when the position is
selected.
;(Parking Lamps):Turn the knob to this symbol to
manually turn on the following:
Parking Lamps
Sidemarker Lamps
Taillamps
License Plate Lamps
Instrument Panel Lights
2(Headlamps):Turn the knob to this symbol to turn
on all the lamps listed as well as the headlamps.
Automatic Headlamp System
When it is dark enough outside, your Automatic
Headlamp System will turn on your headlamps at the
normal brightness along with other lamps such as
the taillamps, sidemarker, parking lamps and the
instrument panel lights. The radio lights will also be on.
Your vehicle is equipped with a light sensor on the
top of the instrument panel. Be sure it is not covered or
the system will be on whenever the ignition is on.
The system may also turn on your lights when driving
through a parking garage, heavy overcast weather
or a tunnel. This is normal.
3-15
Page 141 of 474
You can also turn the dome lamps on by turning the
thumbwheel, located next to the exterior lamps knob, all
the way up to the top detent position. In this position,
the dome lamps will remain on until they are turned off.
Battery Run-Down Protection
This feature shuts off the dome, courtesy, vanity, and
reading lamps if they are left on for more than
20 minutes when the ignition is off. This will keep your
battery from running down.
If the battery run-down protection shuts off the interior
lamps, it may be necessary to do one of the following to
return to normal operation:
Shut off all lamps and close all doors, or
turn the ignition key to RUN.
This feature will also turn off the parking lamps and
headlamps under most circumstances, if they are left on.
If you would like to turn them back on, turn the exterior
lamps knob.
Accessory Power Outlets
Your vehicle may have accessory power outlets. With
the accessory power outlets, you can plug in auxiliary
electrical equipment such as a cellular telephone or
CB radio.The �rst two outlets are located below the cigarette
lighter and the rear wiper switch on the instrument panel.
The third outlet is located on the rear of the center
console.
Remove the cover from the outlet to use the outlet.
Be sure to put the cover back on when not using the
accessory power outlet.
Certain electrical accessories may not be compatible
with the accessory power outlet and could result
in blown vehicle or adaptor fuses. If you experience a
problem, see your dealer for additional information
on the accessory power outlets.
Notice:Adding any electrical equipment to your
vehicle may damage it or keep other components
from working as they should. The repairs would not
be covered by your warranty. Check with your
dealer before adding electrical equipment.
When adding electrical equipment, be sure to follow the
proper installation instructions included with the
equipment.
Notice:Improper use of the power outlet can cause
damage not covered by your warranty. Do not
hang any type of accessory or accessory bracket
from the plug because the power outlets are
designed for accessory power plugs only.
3-19
Page 169 of 474
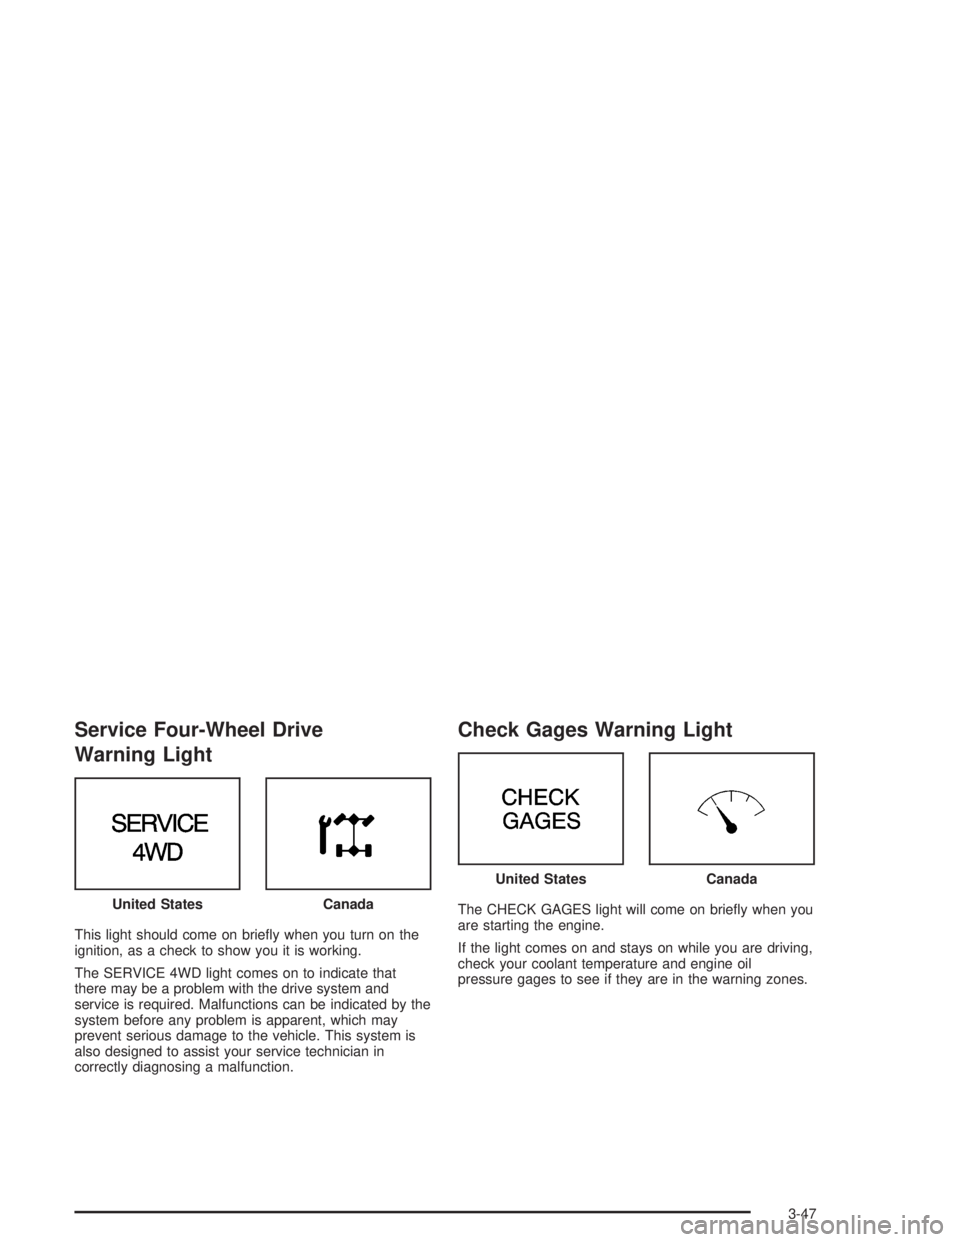
Service Four-Wheel Drive
Warning Light
This light should come on brie�y when you turn on the
ignition, as a check to show you it is working.
The SERVICE 4WD light comes on to indicate that
there may be a problem with the drive system and
service is required. Malfunctions can be indicated by the
system before any problem is apparent, which may
prevent serious damage to the vehicle. This system is
also designed to assist your service technician in
correctly diagnosing a malfunction.
Check Gages Warning Light
The CHECK GAGES light will come on brie�y when you
are starting the engine.
If the light comes on and stays on while you are driving,
check your coolant temperature and engine oil
pressure gages to see if they are in the warning zones. United StatesCanada
United StatesCanada
3-47
Page 172 of 474
Driver Information Center (DIC)
Your vehicle may have this feature. The DIC display
is located on the instrument panel cluster above
the steering wheel. The DIC can display information
such as the trip odometer, fuel economy and
personalization features. The DIC buttons are located
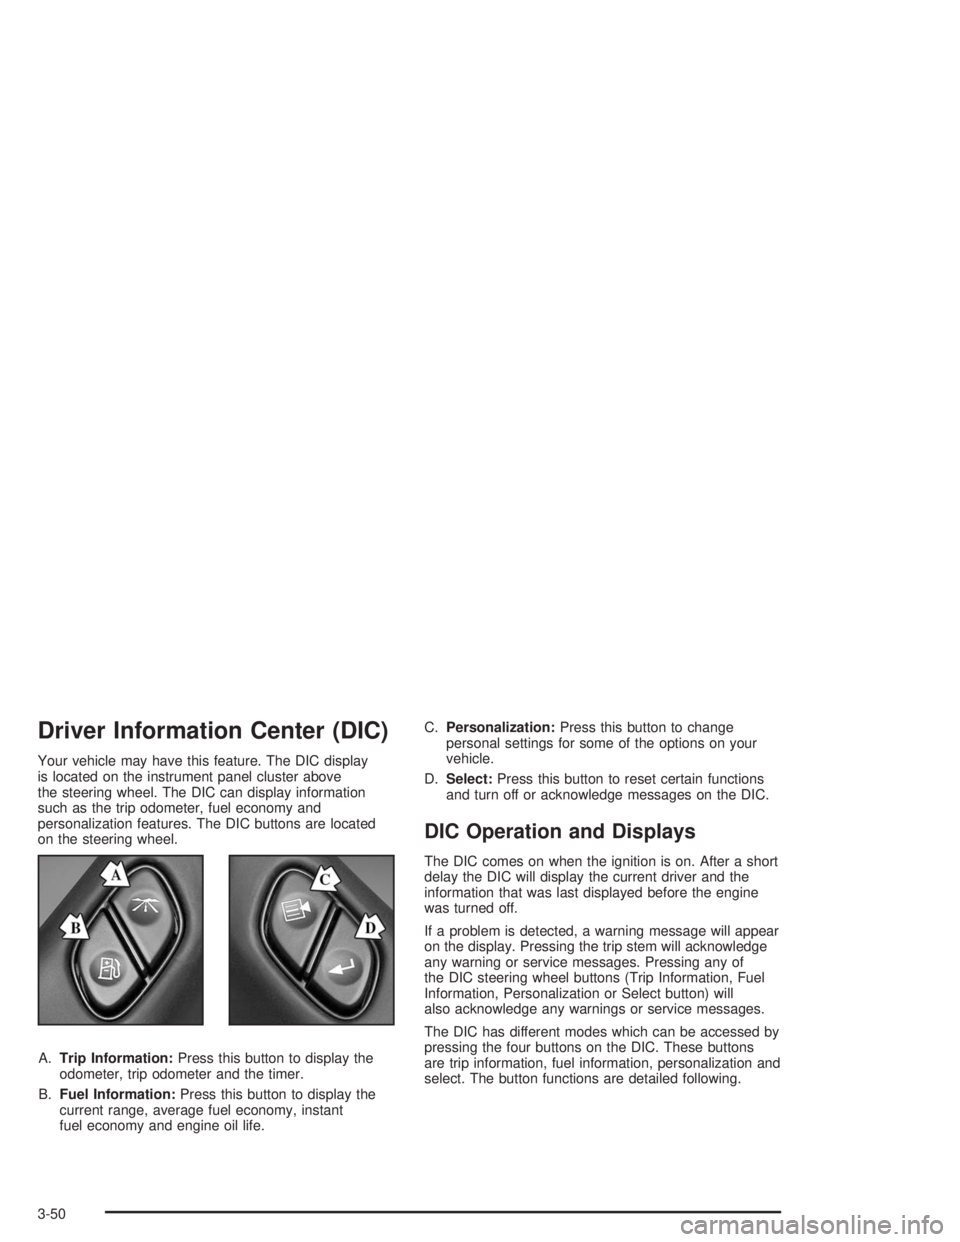
on the steering wheel.
A.Trip Information:Press this button to display the
odometer, trip odometer and the timer.
B.Fuel Information:Press this button to display the
current range, average fuel economy, instant
fuel economy and engine oil life.C.Personalization:Press this button to change
personal settings for some of the options on your
vehicle.
D.Select:Press this button to reset certain functions
and turn off or acknowledge messages on the DIC.
DIC Operation and Displays
The DIC comes on when the ignition is on. After a short
delay the DIC will display the current driver and the
information that was last displayed before the engine
was turned off.
If a problem is detected, a warning message will appear
on the display. Pressing the trip stem will acknowledge
any warning or service messages. Pressing any of
the DIC steering wheel buttons (Trip Information, Fuel
Information, Personalization or Select button) will
also acknowledge any warnings or service messages.
The DIC has different modes which can be accessed by
pressing the four buttons on the DIC. These buttons
are trip information, fuel information, personalization and
select. The button functions are detailed following.
3-50
Page 181 of 474
Display Language
To select your personalization for display language,
press the select button while DISPLAY LANGUAGE is
displayed on the DIC. Pressing the select button
will scroll through the available languages:
Choosing a language will display all of the information
on the DIC in the desired language.
If your vehicle is equipped with an Information Center,
press and hold the trip stem while the odometer is
displayed. While holding down the trip stem button, the
Information Center will begin to list the available
languages. The name of each language will be
displayed in its native language (ENGLISH for English,
FRANCAIS for French and ESPANOL for Spanish).
When you see the language that you would like, release
the trip stem. The Information Center will then display
the information in the language you chose.
If you accidentaly choose a language you do not want
or understand, press and hold the trip information button
and the personalization button at the same time. After
a short time, the display will begin cycling through
the available languages. Release the buttons when you
see a language you would like. This will also reset
all of the current driver’s personalization features to their
factory default settings.
For vehicles with redundant steering wheel controls, see
“Personalization” under the DIC.
Select
The select button is used to reset certain functions and
turn off or acknowledge messages on the DIC display.
The select button also toggles through the options
available in each personalization menu. For example, this
button will reset the trip odometers, turn off the FUEL
LEVEL LOW message, and toggle through the languages
you can select the DIC to display information in.
DIC Warnings and Messages
Messages are displayed on the DIC to notify the driver
that the status of the vehicle has changed and that
some action may be needed by the driver to correct the
condition. More than one message may appear at
one time. They will appear one behind the other. Some
messages may not require immediate action but you
should press the trip stem to acknowledge that you
received the message and clear it from the display.
Pressing any of the DIC steering wheel buttons
(Trip Information, Fuel Information, Personalization or
Select button) will also acknowledge any warnings
or service messages. Some messages cannot be
cleared from the display because they are more urgent.
These messages require action before they can be
removed from the DIC display. The following are
the possible messages that can be displayed and some
information about them.
3-59
Page 184 of 474
LEFT REAR DOOR AJAR
If the driver’s side rear door is not fully closed this
message will appear on the display and you will hear a
chime. Stop and turn off the vehicle, check the door
for obstacles, and close the door again. Check to see if
the message still appears on the DIC. Press the
select button tol acknowledge this message and clear it
from the DIC display.
RIGHT REAR DOOR AJAR
If the passenger’s side rear door is not fully closed this
message will appear on the display and you will
hear a chime. Stop and turn off the vehicle, check the
door for obstacles, and close the door again. Check
to see if the message still appears on the DIC. Press the
select button to acknowledge this message and clear
it from the DIC display.
RFA # BATTERY LOW
If a remote keyless entry transmitter battery is low, this
message will appear on the DIC. The battery needs
to be replaced in the transmitter. Press the select button
to acknowledge this message and clear it from the
DIC display.
CURB VIEW ACTIVATED
The CURB VIEW ACTIVATED message is displayed
when one of the outside rear view mirrors move into the
curb view position. Refer to “Outside Automatic
Dimming Mirror with Curb View Assist” for more
information.
TIGHTEN FUEL CAP
If the vehicle’s fuel cap is not tightened properly, this
message may appear on the DIC and a chime will
sound. Fully reinstall the fuel cap. The diagnostic system
can determine if the fuel cap has been left off or
improperly installed. A loose or missing fuel cap will
allow fuel to evaporate into the atmosphere. The
DIC message will remain on until the message is
cancelled with the return button on the steering wheel.
The DIC message will also be cancelled if the ignition
is turned off.
The DIC message and the Service Engine Soon light
may come on again during a second trip if the fuel cap is
still not tightened properly. SeeMalfunction Indicator
Lamp on page 3-40for more information.
3-62
Page 238 of 474

Theft-Deterrent Feature
(RDS Radios)
THEFTLOCK®is designed to discourage theft of your
radio. The feature works automatically by learning
a portion of the Vehicle Identi�cation Number (VIN). If
the radio is moved to a different vehicle, it will not
operate and LOCKED will appear on the display.
When the radio and vehicle are turned off, the blinking
red light indicates that THEFTLOCK
®is armed.
With THEFTLOCK
®activated, your radio will not operate
if stolen.
Audio Steering Wheel Controls
You can control certain radio functions using the buttons
on your steering wheel.
g(OnStar/Voice Recognition):You can press this
button to interact with the OnStar®system. See the
OnStar®manual provided with your vehicle for more
information.
PROG (Program):Press this button to play a station
you have stored on the radio preset pushbuttons.
If a cassette tape is playing, press this button to play
the other side of the tape.
If a CD is playing, press this button to go to the next
available CD.
3-116