electrical GMC ENVOY 2008 User Guide
[x] Cancel search | Manufacturer: GMC, Model Year: 2008, Model line: ENVOY, Model: GMC ENVOY 2008Pages: 468, PDF Size: 2.64 MB
Page 154 of 468
Accessory Power Outlet(s)
With the accessory power outlets, you can plug in
auxiliary electrical equipment such as a cellular
telephone or CB radio.
Your vehicle has three accessory power outlets.
There are two outlets located below the climate
controls and one outlet is on the rear of the center
�oor console.
Remove the cover from the outlet to use the outlet.
Be sure to put the cover back on when not using the
accessory power outlet.
Certain electrical accessories may not be compatible
with the accessory power outlet and could result
in blown vehicle or adaptor fuses. If you experience
a problem, see your dealer for additional information
on the accessory power outlets.
Notice:Adding any electrical equipment to your
vehicle may damage it or keep other components
from working as they should. The repairs would not
be covered by your warranty. Do not use equipment
exceeding maximum amperage rating of 20 amperes.
Check with your dealer/retailer before adding
electrical equipment.
When adding electrical equipment, be sure to follow
the proper installation instructions included with the
equipment.Notice:Improper use of the power outlet can cause
damage not covered by your warranty. Do not
hang any type of accessory or accessory bracket
from the plug because the power outlets are
designed for accessory power plugs only.
Ashtray(s) and Cigarette Lighter
Your vehicle may have this feature. The ashtray is
removable and �ts into the front cupholder.
Notice:If you put papers, pins, or other �ammable
items in the ashtray, hot cigarettes or other smoking
materials could ignite them and possibly damage
your vehicle. Never put �ammable items in the
ashtray.
To remove the ashtray, pull the covered bin out of the
cupholder.
To use the lighter, press it in all the way, and let go.
When it is ready, it will pop back out by itself.
Notice:Holding a cigarette lighter in while it is
heating will not allow the lighter to back away from
the heating element when it is hot. Damage from
overheating may occur to the lighter or heating
element, or a fuse could be blown. Do not hold a
cigarette lighter in while it is heating. Do not use
equipment exceeding maximum amperage rating
of 20 amperes.
3-20
Page 167 of 468
This chime and light is repeated if the driver remains
unbuckled and the vehicle is in motion. If the driver’s belt
is already buckled, neither the chime nor the light will
come on.
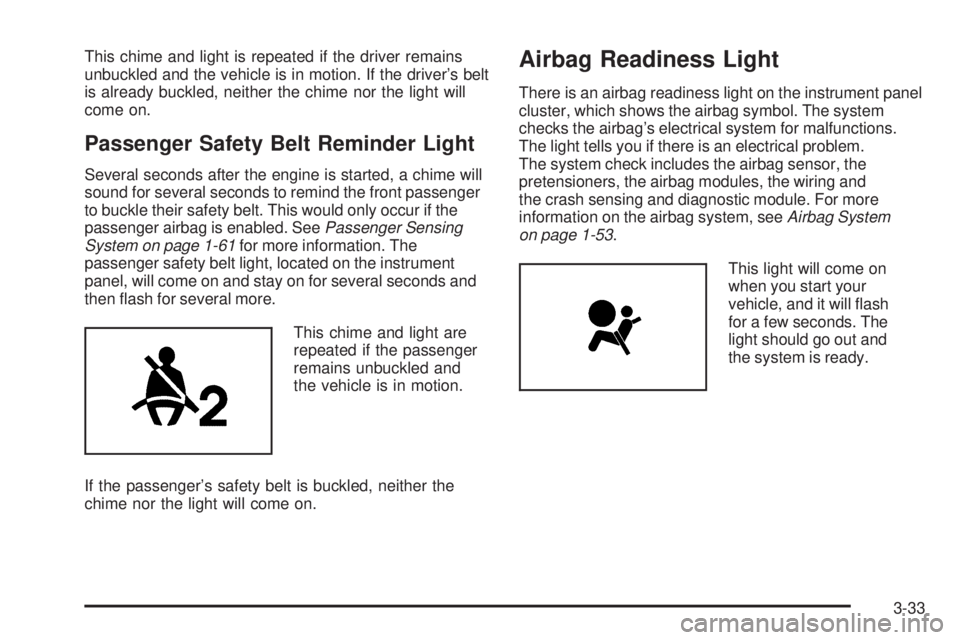
Passenger Safety Belt Reminder Light
Several seconds after the engine is started, a chime will
sound for several seconds to remind the front passenger
to buckle their safety belt. This would only occur if the
passenger airbag is enabled. SeePassenger Sensing
System on page 1-61for more information. The
passenger safety belt light, located on the instrument
panel, will come on and stay on for several seconds and
then �ash for several more.
This chime and light are
repeated if the passenger
remains unbuckled and
the vehicle is in motion.
If the passenger’s safety belt is buckled, neither the
chime nor the light will come on.
Airbag Readiness Light
There is an airbag readiness light on the instrument panel
cluster, which shows the airbag symbol. The system
checks the airbag’s electrical system for malfunctions.
The light tells you if there is an electrical problem.
The system check includes the airbag sensor, the
pretensioners, the airbag modules, the wiring and
the crash sensing and diagnostic module. For more
information on the airbag system, seeAirbag System
on page 1-53.
This light will come on
when you start your
vehicle, and it will �ash
for a few seconds. The
light should go out and
the system is ready.
3-33
Page 170 of 468
If, after several seconds, both status indicator lights
remain on, or if there are no lights at all, there may
be a problem with the lights or the passenger sensing
system. See your dealer/retailer for service.
{CAUTION:
If the airbag readiness light in the instrument
panel cluster ever comes on and stays on,
it means that something may be wrong with
the airbag system. If this ever happens, have
the vehicle serviced promptly, because an
adult-size person sitting in the right front
passenger’s seat may not have the protection
of the airbag(s). SeeAirbag Readiness Light
on page 3-33for more on this, including
important safety information.
Charging System Light
This light will come on
brie�y when you turn on the
ignition key, but the engine
is not running, as a check
to show you it is working.
It should go out once the engine is running. If it stays
on, or comes on while driving, there could be a problem
with the charging system. A charging system Driver
Information Center (DIC) message may also appear.
SeeDIC Warnings and Messages on page 3-53for
more information. This light could indicate that there
are problems with a generator drive belt, or that there is
an electrical problem. Have it checked right away. If you
must drive a short distance with the light on, be certain
to turn off all the accessories, such as the radio and air
conditioner.
3-36
Page 171 of 468
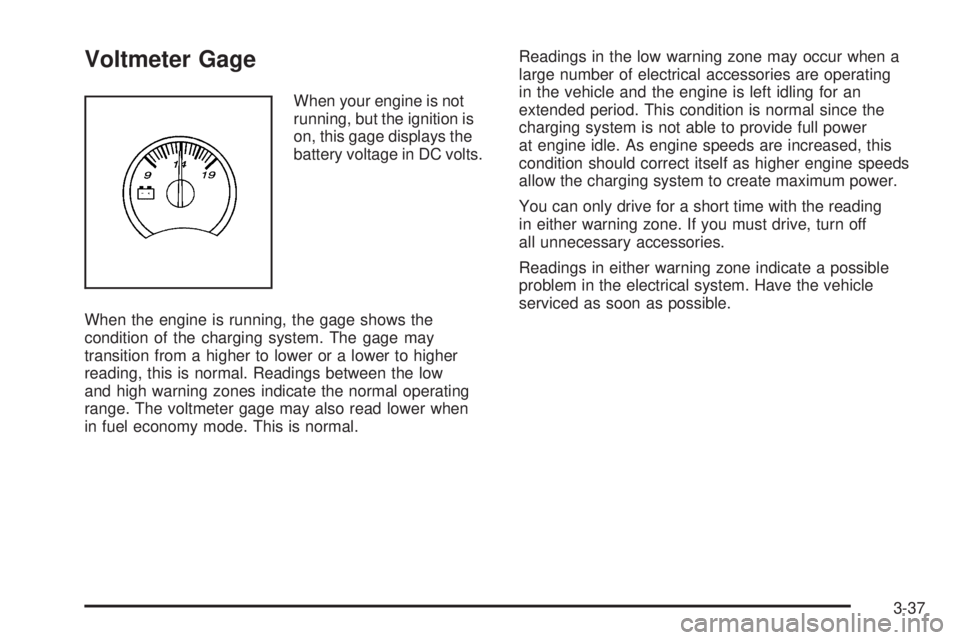
Voltmeter Gage
When your engine is not
running, but the ignition is
on, this gage displays the
battery voltage in DC volts.
When the engine is running, the gage shows the
condition of the charging system. The gage may
transition from a higher to lower or a lower to higher
reading, this is normal. Readings between the low
and high warning zones indicate the normal operating
range. The voltmeter gage may also read lower when
in fuel economy mode. This is normal.Readings in the low warning zone may occur when a
large number of electrical accessories are operating
in the vehicle and the engine is left idling for an
extended period. This condition is normal since the
charging system is not able to provide full power
at engine idle. As engine speeds are increased, this
condition should correct itself as higher engine speeds
allow the charging system to create maximum power.
You can only drive for a short time with the reading
in either warning zone. If you must drive, turn off
all unnecessary accessories.
Readings in either warning zone indicate a possible
problem in the electrical system. Have the vehicle
serviced as soon as possible.
3-37
Page 177 of 468
If the Light is Flashing
The following can prevent more serious damage to your
vehicle:
Reduce vehicle speed.
Avoid hard accelerations.
Avoid steep uphill grades.
If you are towing a trailer, reduce the amount of
cargo being hauled as soon as it is possible.
If the light stops �ashing and remains on steady,
see “If the Light Is On Steady” following.
If the light continues to �ash, when it is safe to do so,
stop the vehicle. Find a safe place to park the vehicle.
Turn the ignition off, wait at least 10 seconds, and restart
the engine. If the light remains on steady, see “If the
Light Is On Steady” following. If the light is still �ashing,
follow the previous steps and see your dealer/retailer
for service as soon as possible.
If the Light Is On Steady
You might be able to correct the emission system
malfunction by considering the following:
Did you recently put fuel into your vehicle?
If so, reinstall the fuel cap, making sure to fully install
the cap. SeeFilling the Tank on page 5-8. The diagnostic
system can determine if the fuel cap has been left off orimproperly installed. A loose or missing fuel cap allows
fuel to evaporate into the atmosphere. A few driving trips
with the cap properly installed should turn the light off.
Did you just drive through a deep puddle of water?
If so, your vehicle’s electrical system might be wet.
The condition is usually corrected when the electrical
system dries out. A few driving trips should turn the
light off.
Have you recently changed brands of fuel?
If so, be sure to fuel your vehicle with quality fuel. See
Gasoline Octane on page 5-6. Poor fuel quality causes
the engine not to run as efficiently as designed. You
might notice this as stalling after start-up, stalling when
you put the vehicle into gear, mis�ring, hesitation on
acceleration, or stumbling on acceleration — these
conditions might go away once the engine is warmed up.
This will be detected by the system and cause the light to
turn on.
If you experience one or more of these conditions,
change the fuel brand you use. It will require at least
one full tank of the proper fuel to turn the light off.
If none of the above steps have made the light turn
off, your dealer/retailer can check the vehicle. Your
dealer/retailer has the proper test equipment and
diagnostic tools to �x any mechanical or electrical
problems that might have developed.
3-43
Page 190 of 468
REAR ACCESS OPEN
This message displays and a chime sounds if the
liftgate or liftglass is open while the ignition is in
ON/RUN. Turn off the vehicle and check the liftgate
and liftglass. SeeLiftgate/Liftglass on page 2-12.
Restart the vehicle and check for the message on
the DIC display.
RIGHT REAR DOOR AJAR
This message displays and a chime sounds if the
passenger side rear door is not fully closed. Stop and
turn off the vehicle, check the door for obstructions,
and close the door again. Check to see if the message
still appears on the DIC.
SERVICE AIR BAG
This message displays if there is a problem with
the airbag system. Have your dealer/retailer inspect
the system for problems. SeeAirbag Readiness Light
on page 3-33andAirbag System on page 1-53for
more information.
SERVICE BRAKE SYSTEM
This message displays if a problem occurs with the
brake system. If this message appears, stop as soon as
possible and turn off the vehicle. Restart the vehicleand check for the message on the DIC display. If the
message is still displayed, or appears again when
you begin driving, the brake system needs service.
See your dealer/retailer.
SERVICE CHARGING SYS (System)
This message displays if there is a problem with the
battery charging system. Under certain conditions, the
charging system light may also turn on in the instrument
panel cluster. SeeCharging System Light on page 3-36.
The battery will not be charging at an optimal rate and
the vehicle will lose the ability to enter the fuel economy
mode. The vehicle is safe to drive, however you should
have the electrical system checked by your
dealer/retailer.
SERVICE STABILITRAK
If this message displays, it means there may be a
problem with the StabiliTrak®system. If this message
appears, try to reset the system by performing the
following: stop; turn off the engine; then start the engine
again. If this message still comes on, it means there is a
problem. You should see your dealer/retailer for service.
The vehicle is safe to drive, however, you do not have the
bene�t of StabiliTrak
®, so reduce your speed and drive
accordingly.
3-56
Page 290 of 468
Driving with a Trailer
{CAUTION:
If you have a rear-most window open and you
pull a trailer with your vehicle, carbon monoxide
(CO) could come into your vehicle. You can not
see or smell CO. It can cause unconsciousness
or death. SeeEngine Exhaust on page 2-37.
To maximize your safety when towing a trailer:
Have your exhaust system inspected for
leaks, and make necessary repairs before
starting on your trip.
Keep the rear-most windows closed.
If exhaust does come into your vehicle
through a window in the rear or another
opening, drive with your front, main heating
or cooling system on and with the fan on
any speed. This will bring fresh, outside air
into your vehicle. Do not use the climate
control setting for maximum air because it
only recirculates the air inside your vehicle.
SeeDual Climate Control System on
page 3-21.Towing a trailer requires a certain amount of
experience. Before setting out for the open road, you’ll
want to get to know your rig. Acquaint yourself with the
feel of handling and braking with the added weight of the
trailer. And always keep in mind that the vehicle you are
driving is now a good deal longer and not nearly as
responsive as your vehicle is by itself.
Before you start, check all trailer hitch parts and
attachments, safety chains, electrical connection, lamps,
tires and mirror adjustment. If the trailer has electric
brakes, start your vehicle and trailer moving and then
apply the trailer brake controller by hand to be sure
the brakes are working. This lets you check your
electrical connection at the same time.
During your trip, check occasionally to be sure that
the load is secure, and that the lamps and any trailer
brakes are still working.
Following Distance
Stay at least twice as far behind the vehicle ahead as
you would when driving your vehicle without a trailer.
This can help you avoid situations that require
heavy braking and sudden turns.
4-52
Page 296 of 468
High-Speed Operation...................................5-66
Tire Pressure Monitor System.........................5-67
Tire Pressure Monitor Operation.....................5-69
Tire Inspection and Rotation...........................5-72
When It Is Time for New Tires.......................5-73
Buying New Tires.........................................5-74
Different Size Tires and Wheels......................5-76
Uniform Tire Quality Grading..........................5-77
Wheel Alignment and Tire Balance..................5-78
Wheel Replacement......................................5-78
Tire Chains..................................................5-80
Accessory In�ator.........................................5-80
If a Tire Goes Flat........................................5-81
Changing a Flat Tire.....................................5-82
Removing the Spare Tire and Tools................5-84
Removing the Flat Tire and Installing the
Spare Tire................................................5-87
Secondary Latch System...............................5-92
Storing a Flat or Spare Tire and Tools............5-96
Spare Tire...................................................5-99
Appearance Care..........................................5-100
Interior Cleaning.........................................5-100
Fabric/Carpet..............................................5-101
Leather......................................................5-102
Instrument Panel, Vinyl, and Other
Plastic Surfaces.......................................5-102Care of Safety Belts....................................5-103
Weatherstrips.............................................5-103
Washing Your Vehicle..................................5-103
Cleaning Exterior Lamps/Lenses....................5-104
Finish Care................................................5-104
Windshield, Backglass, and Wiper Blades.......5-105
Aluminum Wheels.......................................5-105
Tires.........................................................5-106
Sheet Metal Damage...................................5-106
Finish Damage...........................................5-106
Underbody Maintenance...............................5-106
Chemical Paint Spotting...............................5-106
Vehicle Care/Appearance Materials................5-107
Vehicle Identi�cation.....................................5-108
Vehicle Identi�cation Number (VIN)................5-108
Service Parts Identi�cation Label...................5-108
Electrical System..........................................5-109
Add-On Electrical Equipment.........................5-109
Headlamps.................................................5-109
Windshield Wiper Fuses...............................5-109
Power Windows and Other Power Options......5-109
Fuses and Circuit Breakers..........................5-110
Engine Compartment Fuse Block...................5-110
Rear Underseat Fuse Block..........................5-116
Capacities and Speci�cations........................5-120
Section 5 Service and Appearance Care
5-2
Page 336 of 468
Jump Starting
If your vehicle’s battery has run down, you may want to
use another vehicle and some jumper cables to start
your vehicle. Be sure to use the following steps to do it
safely.
{CAUTION:
Batteries can hurt you. They can be dangerous
because:
They contain acid that can burn you.
They contain gas that can explode or
ignite.
They contain enough electricity to
burn you.
If you do not follow these steps exactly, some
or all of these things can hurt you.Notice:Ignoring these steps could result in costly
damage to your vehicle that would not be covered
by your warranty.
Your vehicle cannot be started by pushing or
pulling it, and can be damage by trying it.
1. Check the other vehicle. It must have a 12-volt
battery with a negative ground system.
Notice:If the other vehicle’s system is not a 12-volt
system with a negative ground, both vehicles can
be damaged. Only use vehicles with 12-volt systems
with negative grounds to jump start your vehicle.
2. Get the vehicles close enough so the jumper cables
can reach, but be sure the vehicles are not touching
each other. If they are, it could cause a ground
connection you do not want. You would not be able
to start your vehicle, and the bad grounding could
damage the electrical systems.
To avoid the possibility of the vehicles rolling, set
the parking brake �rmly on both vehicles involved
in the jump start procedure. Put an automatic
transmission in PARK (P) or a manual transmission
in NEUTRAL before setting the parking brake.
If you have a four-wheel-drive vehicle, be sure
the transfer case is not in NEUTRAL.
5-42
Page 340 of 468
Notice:If the jumper cables are connected or
removed in the wrong order, electrical shorting may
occur and damage the vehicle. The repairs would
not be covered by your warranty. Always connect
and remove the jumper cables in the correct order,
making sure that the cables do not touch each other
or other metal.
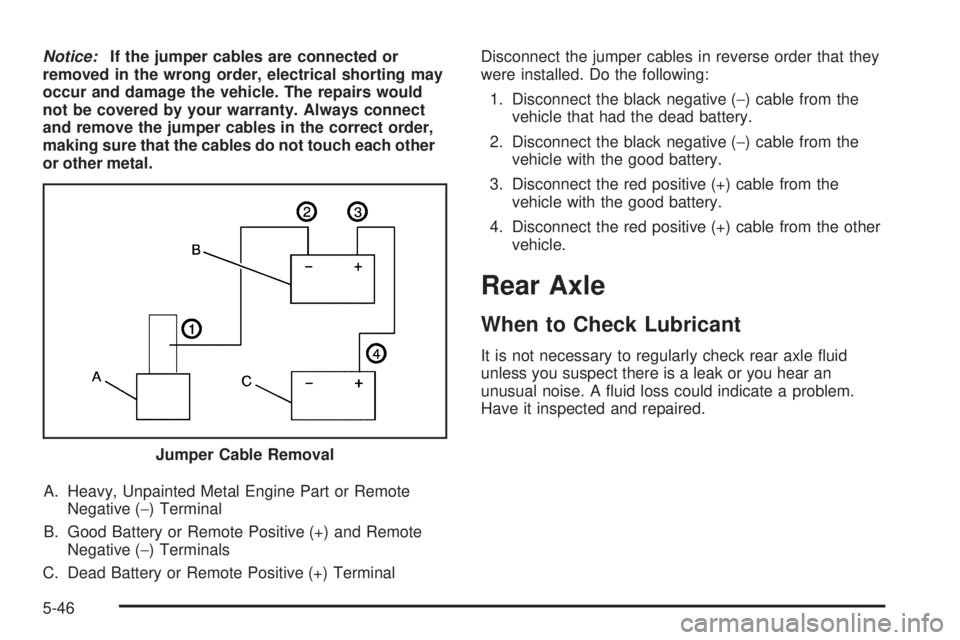
A. Heavy, Unpainted Metal Engine Part or Remote
Negative (−) Terminal
B. Good Battery or Remote Positive (+) and Remote
Negative (−) Terminals
C. Dead Battery or Remote Positive (+) TerminalDisconnect the jumper cables in reverse order that they
were installed. Do the following:
1. Disconnect the black negative (−) cable from the
vehicle that had the dead battery.
2. Disconnect the black negative (−) cable from the
vehicle with the good battery.
3. Disconnect the red positive (+) cable from the
vehicle with the good battery.
4. Disconnect the red positive (+) cable from the other
vehicle.
Rear Axle
When to Check Lubricant
It is not necessary to regularly check rear axle �uid
unless you suspect there is a leak or you hear an
unusual noise. A �uid loss could indicate a problem.
Have it inspected and repaired.
Jumper Cable Removal
5-46