4-40 GMC ENVOY 2008 Owner's Manual
[x] Cancel search | Manufacturer: GMC, Model Year: 2008, Model line: ENVOY, Model: GMC ENVOY 2008Pages: 468, PDF Size: 2.64 MB
Page 1 of 468
Seats and Restraint Systems........................... 1-1
Front Seats
............................................... 1-2
Rear Seats
..............................................1-11
Safety Belts
.............................................1-13
Child Restraints
.......................................1-32
Airbag System
.........................................1-53
Restraint System Check
............................1-68
Features and Controls..................................... 2-1
Keys
........................................................ 2-3
Doors and Locks
....................................... 2-7
Windows
.................................................2-13
Theft-Deterrent Systems
............................2-16
Starting and Operating Your Vehicle
...........2-20
Mirrors
....................................................2-39
OnStar
®System
......................................2-48
Universal Home Remote System
................2-52
Storage Areas
.........................................2-57
Sunroof
..................................................2-60
Instrument Panel............................................. 3-1
Instrument Panel Overview
.......................... 3-4
Climate Controls
......................................3-21
Warning Lights, Gages, and Indicators
........3-30
Driver Information Center (DIC)
..................3-49
Audio System(s)
.......................................3-65Driving Your Vehicle....................................... 4-1
Your Driving, the Road, and Your Vehicle
..... 4-2
Towing
...................................................4-40
Service and Appearance Care.......................... 5-1
Service
..................................................... 5-3
Fuel
......................................................... 5-5
Checking Things Under the Hood
...............5-10
Rear Axle
...............................................5-46
Four-Wheel Drive
.....................................5-47
Front Axle
...............................................5-48
Headlamp Aiming
.....................................5-49
Bulb Replacement
....................................5-49
Windshield Wiper Blade Replacement
.........5-54
Tires
......................................................5-57
Appearance Care
...................................5-100
Vehicle Identi�cation
...............................5-108
Electrical System
....................................5-109
Capacities and Speci�cations
...................5-120
Maintenance Schedule..................................... 6-1
Maintenance Schedule
................................ 6-2
Customer Assistance Information.................... 7-1
Customer Assistance and Information
........... 7-2
Reporting Safety Defects
...........................7-15
Vehicle Data Recording and Privacy
...........7-18
Index................................................................ 1
2008 GMC Envoy and Envoy Denali Owner ManualM
Page 104 of 468
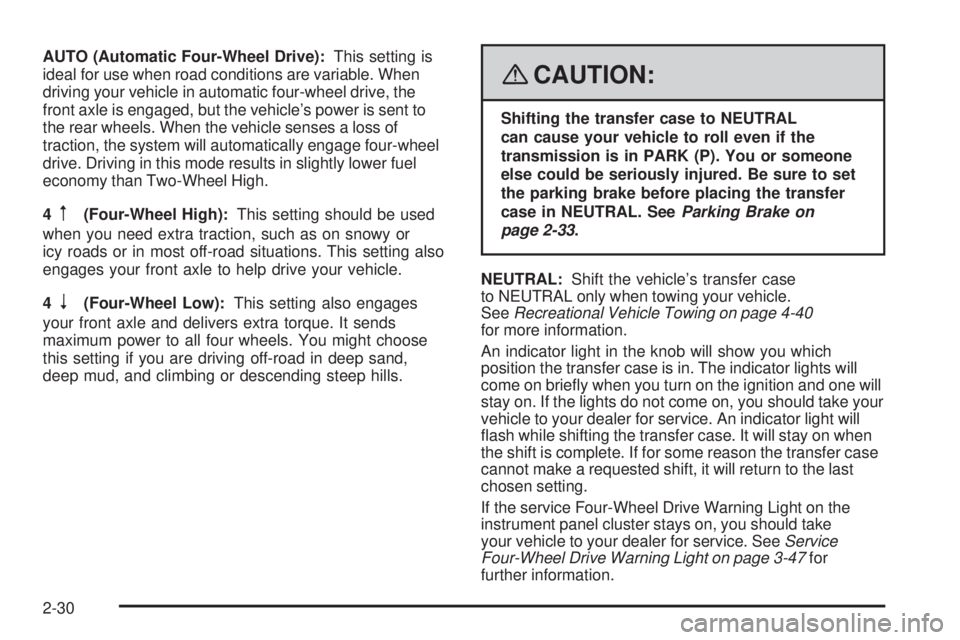
AUTO (Automatic Four-Wheel Drive):This setting is
ideal for use when road conditions are variable. When
driving your vehicle in automatic four-wheel drive, the
front axle is engaged, but the vehicle’s power is sent to
the rear wheels. When the vehicle senses a loss of
traction, the system will automatically engage four-wheel
drive. Driving in this mode results in slightly lower fuel
economy than Two-Wheel High.
4
m(Four-Wheel High):This setting should be used
when you need extra traction, such as on snowy or
icy roads or in most off-road situations. This setting also
engages your front axle to help drive your vehicle.
4
n(Four-Wheel Low):This setting also engages
your front axle and delivers extra torque. It sends
maximum power to all four wheels. You might choose
this setting if you are driving off-road in deep sand,
deep mud, and climbing or descending steep hills.
{CAUTION:
Shifting the transfer case to NEUTRAL
can cause your vehicle to roll even if the
transmission is in PARK (P). You or someone
else could be seriously injured. Be sure to set
the parking brake before placing the transfer
case in NEUTRAL. SeeParking Brake on
page 2-33.
NEUTRAL:Shift the vehicle’s transfer case
to NEUTRAL only when towing your vehicle.
SeeRecreational Vehicle Towing on page 4-40
for more information.
An indicator light in the knob will show you which
position the transfer case is in. The indicator lights will
come on brie�y when you turn on the ignition and one will
stay on. If the lights do not come on, you should take your
vehicle to your dealer for service. An indicator light will
�ash while shifting the transfer case. It will stay on when
the shift is complete. If for some reason the transfer case
cannot make a requested shift, it will return to the last
chosen setting.
If the service Four-Wheel Drive Warning Light on the
instrument panel cluster stays on, you should take
your vehicle to your dealer for service. SeeService
Four-Wheel Drive Warning Light on page 3-47for
further information.
2-30
Page 172 of 468
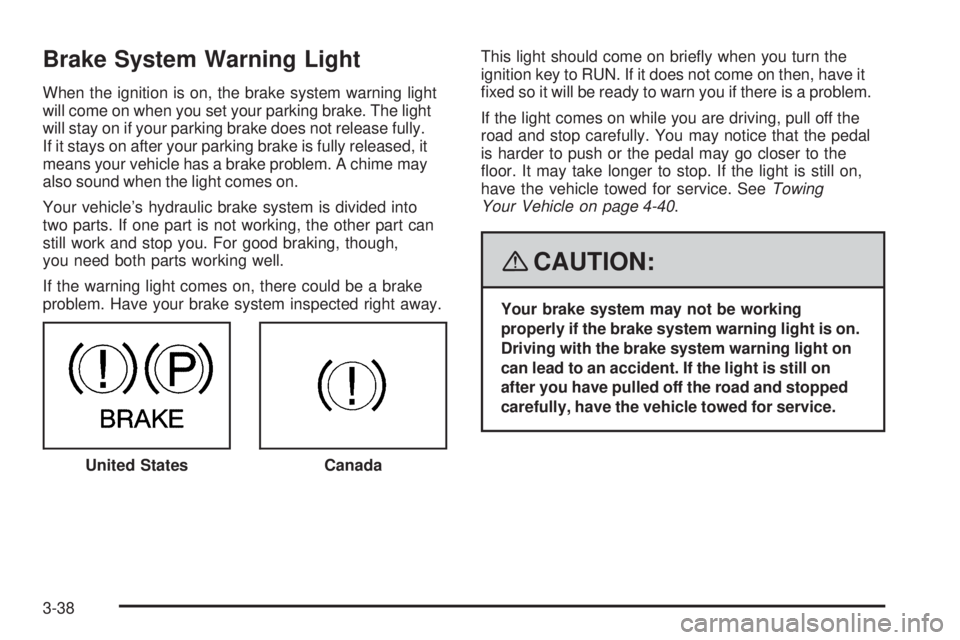
Brake System Warning Light
When the ignition is on, the brake system warning light
will come on when you set your parking brake. The light
will stay on if your parking brake does not release fully.
If it stays on after your parking brake is fully released, it
means your vehicle has a brake problem. A chime may
also sound when the light comes on.
Your vehicle’s hydraulic brake system is divided into
two parts. If one part is not working, the other part can
still work and stop you. For good braking, though,
you need both parts working well.
If the warning light comes on, there could be a brake
problem. Have your brake system inspected right away.This light should come on brie�y when you turn the
ignition key to RUN. If it does not come on then, have it
�xed so it will be ready to warn you if there is a problem.
If the light comes on while you are driving, pull off the
road and stop carefully. You may notice that the pedal
is harder to push or the pedal may go closer to the
�oor. It may take longer to stop. If the light is still on,
have the vehicle towed for service. SeeTowing
Your Vehicle on page 4-40.
{CAUTION:
Your brake system may not be working
properly if the brake system warning light is on.
Driving with the brake system warning light on
can lead to an accident. If the light is still on
after you have pulled off the road and stopped
carefully, have the vehicle towed for service.
United States
Canada
3-38
Page 239 of 468
Your Driving, the Road, and Your Vehicle..........4-2
Defensive Driving...........................................4-2
Drunk Driving.................................................4-2
Control of a Vehicle........................................4-3
Braking.........................................................4-3
Antilock Brake System (ABS)...........................4-4
Braking in Emergencies...................................4-5
Locking Rear Axle..........................................4-5
StabiliTrak
®System........................................4-6
Steering......................................................4-10
Off-Road Recovery.......................................4-12
Passing.......................................................4-12
Loss of Control.............................................4-12
Off-Road Driving...........................................4-13
Driving at Night............................................4-26
Driving in Rain and on Wet Roads..................4-27Before Leaving on a Long Trip.......................4-28
Highway Hypnosis........................................4-28
Hill and Mountain Roads................................4-29
Winter Driving..............................................4-30
If Your Vehicle is Stuck in Sand, Mud,
Ice, or Snow.............................................4-33
Rocking Your Vehicle to Get It Out.................4-34
Loading Your Vehicle....................................4-34
Adding a Snow Plow or Similar Equipment.......4-40
Towing..........................................................4-40
Towing Your Vehicle.....................................4-40
Recreational Vehicle Towing...........................4-40
Electronically Controlled
Air Suspension System..............................4-44
Towing a Trailer...........................................4-45
Section 4 Driving Your Vehicle
4-1
Page 272 of 468
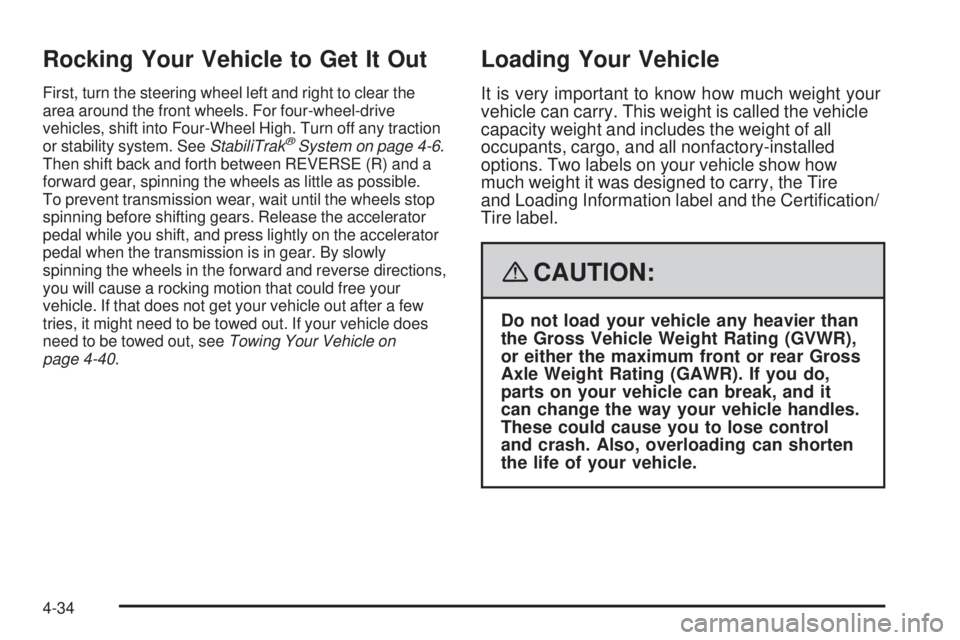
Rocking Your Vehicle to Get It Out
First, turn the steering wheel left and right to clear the
area around the front wheels. For four-wheel-drive
vehicles, shift into Four-Wheel High. Turn off any traction
or stability system. SeeStabiliTrak
®System on page 4-6.
Then shift back and forth between REVERSE (R) and a
forward gear, spinning the wheels as little as possible.
To prevent transmission wear, wait until the wheels stop
spinning before shifting gears. Release the accelerator
pedal while you shift, and press lightly on the accelerator
pedal when the transmission is in gear. By slowly
spinning the wheels in the forward and reverse directions,
you will cause a rocking motion that could free your
vehicle. If that does not get your vehicle out after a few
tries, it might need to be towed out. If your vehicle does
need to be towed out, seeTowing Your Vehicle on
page 4-40.
Loading Your Vehicle
It is very important to know how much weight your
vehicle can carry. This weight is called the vehicle
capacity weight and includes the weight of all
occupants, cargo, and all nonfactory-installed
options. Two labels on your vehicle show how
much weight it was designed to carry, the Tire
and Loading Information label and the Certi�cation/
Tire label.
{CAUTION:
Do not load your vehicle any heavier than
the Gross Vehicle Weight Rating (GVWR),
or either the maximum front or rear Gross
Axle Weight Rating (GAWR). If you do,
parts on your vehicle can break, and it
can change the way your vehicle handles.
These could cause you to lose control
and crash. Also, overloading can shorten
the life of your vehicle.
4-34
Page 278 of 468
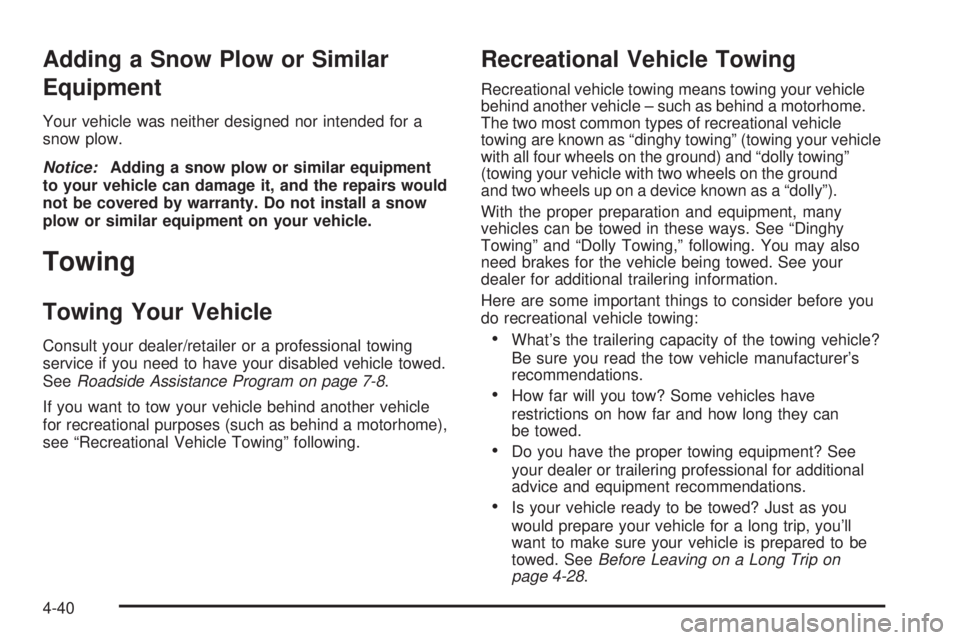
Adding a Snow Plow or Similar
Equipment
Your vehicle was neither designed nor intended for a
snow plow.
Notice:Adding a snow plow or similar equipment
to your vehicle can damage it, and the repairs would
not be covered by warranty. Do not install a snow
plow or similar equipment on your vehicle.
Towing
Towing Your Vehicle
Consult your dealer/retailer or a professional towing
service if you need to have your disabled vehicle towed.
SeeRoadside Assistance Program on page 7-8.
If you want to tow your vehicle behind another vehicle
for recreational purposes (such as behind a motorhome),
see “Recreational Vehicle Towing” following.
Recreational Vehicle Towing
Recreational vehicle towing means towing your vehicle
behind another vehicle – such as behind a motorhome.
The two most common types of recreational vehicle
towing are known as “dinghy towing” (towing your vehicle
with all four wheels on the ground) and “dolly towing”
(towing your vehicle with two wheels on the ground
and two wheels up on a device known as a “dolly”).
With the proper preparation and equipment, many
vehicles can be towed in these ways. See “Dinghy
Towing” and “Dolly Towing,” following. You may also
need brakes for the vehicle being towed. See your
dealer for additional trailering information.
Here are some important things to consider before you
do recreational vehicle towing:
What’s the trailering capacity of the towing vehicle?
Be sure you read the tow vehicle manufacturer’s
recommendations.
How far will you tow? Some vehicles have
restrictions on how far and how long they can
be towed.
Do you have the proper towing equipment? See
your dealer or trailering professional for additional
advice and equipment recommendations.
Is your vehicle ready to be towed? Just as you
would prepare your vehicle for a long trip, you’ll
want to make sure your vehicle is prepared to be
towed. SeeBefore Leaving on a Long Trip on
page 4-28.
4-40
Page 455 of 468
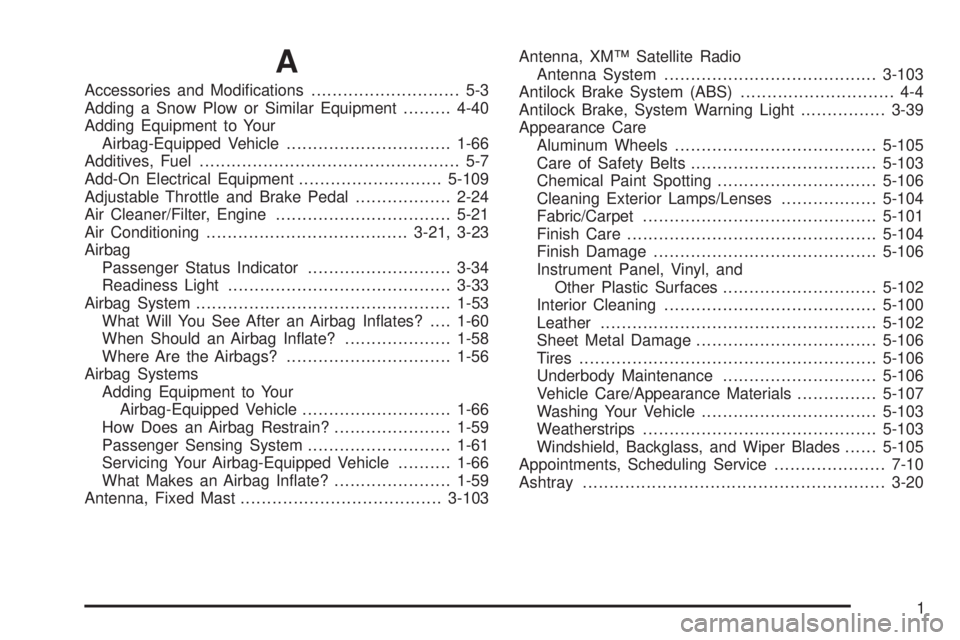
A
Accessories and Modi�cations............................ 5-3
Adding a Snow Plow or Similar Equipment.........4-40
Adding Equipment to Your
Airbag-Equipped Vehicle...............................1-66
Additives, Fuel................................................. 5-7
Add-On Electrical Equipment...........................5-109
Adjustable Throttle and Brake Pedal..................2-24
Air Cleaner/Filter, Engine.................................5-21
Air Conditioning......................................3-21, 3-23
Airbag
Passenger Status Indicator...........................3-34
Readiness Light..........................................3-33
Airbag System................................................1-53
What Will You See After an Airbag In�ates?....1-60
When Should an Airbag In�ate?....................1-58
Where Are the Airbags?...............................1-56
Airbag Systems
Adding Equipment to Your
Airbag-Equipped Vehicle............................1-66
How Does an Airbag Restrain?......................1-59
Passenger Sensing System...........................1-61
Servicing Your Airbag-Equipped Vehicle..........1-66
What Makes an Airbag In�ate?......................1-59
Antenna, Fixed Mast......................................3-103Antenna, XM™ Satellite Radio
Antenna System........................................3-103
Antilock Brake System (ABS)............................. 4-4
Antilock Brake, System Warning Light................3-39
Appearance Care
Aluminum Wheels......................................5-105
Care of Safety Belts...................................5-103
Chemical Paint Spotting..............................5-106
Cleaning Exterior Lamps/Lenses..................5-104
Fabric/Carpet............................................5-101
Finish Care...............................................5-104
Finish Damage..........................................5-106
Instrument Panel, Vinyl, and
Other Plastic Surfaces.............................5-102
Interior Cleaning........................................5-100
Leather....................................................5-102
Sheet Metal Damage..................................5-106
Tires........................................................5-106
Underbody Maintenance.............................5-106
Vehicle Care/Appearance Materials...............5-107
Washing Your Vehicle.................................5-103
Weatherstrips............................................5-103
Windshield, Backglass, and Wiper Blades......5-105
Appointments, Scheduling Service.....................7-10
Ashtray.........................................................3-20
1
Page 464 of 468
Perchlorate Materials Requirements, California...... 5-4
Power
Door Locks.................................................. 2-8
Electrical System.......................................5-109
Lumbar Controls........................................... 1-4
Reduced Engine Light..................................3-46
Retained Accessory (RAP)............................2-22
Seat............................................................ 1-3
Steering Fluid.............................................5-36
Windows....................................................2-14
Privacy..........................................................7-18
Event Data Recorders..................................7-18
Navigation System.......................................7-19
OnStar.......................................................7-19
Radio Frequency Identi�cation.......................7-19
Programmable Automatic Door Locks.................. 2-9
R
Radiator Pressure Cap....................................5-28
Radio Frequency Identi�cation (RFID), Privacy....7-19
Radios..........................................................3-65
Radio(s)........................................................3-66
Radios
Navigation/Radio System, see Navigation
Manual...................................................3-87
Rear Seat Audio........................................3-100
Reception.................................................3-102Radios (cont.)
Setting the Clock.........................................3-66
Theft-Deterrent..........................................3-101
Reading Lamps..............................................3-18
Rear Axle......................................................5-46
Locking........................................................ 4-5
Rear Climate Control System............................3-28
Rear Door Security Locks................................2-11
Rear Floor Storage Lid....................................2-59
Rear Seat Audio (RSA)..................................3-100
Rear Seat Entertainment System.......................3-87
Rear Seat Operation.......................................1-11
Rear Windshield Washer/Wiper.........................3-10
Rearview Mirror, Automatic Dimming with
Compass and Temperature Display................2-44
Rearview Mirror, Automatic Dimming with
OnStar
®and Compass.................................2-39
Rearview Mirror, Automatic Dimming with
OnStar
®, Compass and Temperature Display . . . 2-41
Rearview Mirror with OnStar®...........................2-39
Rearview Mirrors.............................................2-39
Reclining Seatbacks.......................................... 1-7
Recommended Fluids and Lubricants.................6-12
Recreational Vehicle Towing.............................4-40
Reduced Engine Power Light............................3-46
Remote Keyless Entry (RKE) System.................. 2-4
Remote Keyless Entry (RKE) System, Operation . . . 2-5
10
Page 466 of 468
Service (cont.)
Four-Wheel-Drive Warning Light.....................3-47
Publications Ordering Information...................7-16
Service, Scheduling Appointments.....................7-10
Servicing Your Airbag-Equipped Vehicle..............1-66
Sheet Metal Damage.....................................5-106
Shifting Into Park (P).......................................2-34
Shifting Out of Park (P)...................................2-36
Signals, Turn and Lane-Change.......................... 3-7
Snow Plow....................................................4-40
Spare Tire.....................................................5-99
Installing....................................................5-87
Removing...................................................5-84
Storing.......................................................5-96
Speci�cations, Capacities...............................5-120
Speedometer..................................................3-32
StabiliTrak
®System.......................................... 4-6
StabiliTrak®Indicator Light................................3-40
StabiliTrak®Service Light.................................3-39
Starting the Engine.........................................2-22
Steering........................................................4-10
Steering Wheel Controls, Audio.......................3-101
Steering Wheel, Tilt Wheel................................. 3-6
Storage Areas
Center Console Storage Area........................2-57
Convenience Net.........................................2-59Storage Areas (cont.)
Glove Box..................................................2-57
Luggage Carrier..........................................2-58
Overhead Console.......................................2-57
Rear Floor Storage Lid.................................2-59
Stuck in Sand, Mud, Ice, or Snow.....................4-33
Sun Visors.....................................................2-15
Sunroof.........................................................2-60
T
Tachometer....................................................3-32
Taillamps
Turn Signal, and Stoplamps..........................5-51
Theft-Deterrent, Radio....................................3-101
Theft-Deterrent Systems...................................2-16
Content Theft-Deterrent................................2-16
PASS-Key
®III+...........................................2-18
PASS-Key®III+ Operation.............................2-18
Passlock®...................................................2-17
Tilt Wheel........................................................ 3-6
Time, Setting..................................................3-66
Tire
Pressure Light.............................................3-41
12
Page 467 of 468
Tires.............................................................5-57
Aluminum Wheels, Cleaning........................5-105
Buying New Tires........................................5-74
Chains.......................................................5-80
Changing a Flat Tire....................................5-82
Cleaning...................................................5-106
Different Size..............................................5-76
High-Speed Operation..................................5-66
If a Tire Goes Flat.......................................5-81
In�ation - Tire Pressure................................5-64
In�ator,- Accessory.......................................5-80
Inspection and Rotation................................5-72
Installing the Spare Tire................................5-87
Pressure Monitor Operation...........................5-69
Pressure Monitor System..............................5-67
Removing the Flat Tire.................................5-87
Removing the Spare Tire and Tools...............5-84
Secondary Latch System..............................5-92
Spare Tire..................................................5-99
Storing a Flat or Spare Tire and Tools............5-96
Tire Sidewall Labeling..................................5-58
Tire Terminology and De�nitions....................5-61
Uniform Tire Quality Grading.........................5-77
Wheel Alignment and Tire Balance.................5-78
Wheel Replacement.....................................5-78
When It Is Time for New Tires......................5-73Towing
Recreational Vehicle.....................................4-40
Towing a Trailer..........................................4-45
Your Vehicle...............................................4-40
Traction
StabiliTrak
®System....................................... 4-6
Transmission
Fluid, Automatic...........................................5-23
Transmission Operation, Automatic....................2-26
Trip Odometer................................................3-32
Turn and Lane-Change Signals.......................... 3-7
Turn Signal/Multifunction Lever........................... 3-7
U
Uniform Tire Quality Grading............................5-77
Universal Home Remote System.......................2-52
Operation...................................................2-52
Using this Manual............................................... iii
13