start GMC ENVOY DENALI 2005 Owner's Manual
[x] Cancel search | Manufacturer: GMC, Model Year: 2005, Model line: ENVOY DENALI, Model: GMC ENVOY DENALI 2005Pages: 502, PDF Size: 2.66 MB
Page 98 of 502
THIRD (3):This position is also used for normal driving.
However, it offers more power and lower fuel economy
than DRIVE (D).
SECOND (2):This position gives you more power but
lower fuel economy than THIRD (3). You can use
SECOND (2) on hills. It can help control your speed as
you go down steep mountain roads, but then you
would also want to use the brakes off and on.
You can also use SECOND (2) for starting the vehicle
from a stop on slippery road surfaces.
FIRST (1):This position gives you even more power
but lower fuel economy than SECOND (2). You can use
it on very steep hills, or in deep snow or mud. If the
selector lever is put in FIRST (1) while the vehicle
is moving forward, the transmission will not shift into
rst gear until the vehicle is going slowly enough.
Notice:Spinning the tires or holding the vehicle in
one place on a hill using only the accelerator
pedal may damage the transmission. If you are
stuck, do not spin the tires. When stopping on a hill,
use the brakes to hold the vehicle in place.Four-Wheel Drive
If your vehicle has four-wheel drive, you can send your
engine’s driving power to all four wheels for extra
traction. To get the most satisfaction out of four-wheel
drive, you must be familiar with its operation. Read
the part that follows before using four-wheel drive. You
should use two-wheel drive high (2HI) for most
normal driving conditions.
Notice:Driving on clean, dry pavement in
four-wheel drive for an extended period of time may
cause premature wear on your vehicle’s powertrain.
Do not drive on clean, dry pavement in four-wheel
drive for extended periods of time.
2-26
Page 101 of 502
Shifting Out of 4LO
To shift from 4LO to 4HI, A4WD or 2HI your vehicle must
be stopped or moving less than 2 mph (3.2 km/h) with the
transmission in NEUTRAL (N) and the engine running.
The preferred method for shifting out of 4LO is to have
your vehicle moving 1 or 2 mph (1.6 to 3.2 km/h). Turn
the knob to 4HI, A4WD or 2HI. You must wait for the 4HI,
A4WD or 2HI indicator light to stop ashing and remain
illuminated before shifting your transmission into gear.
If the knob is turned to 4HI, A4WD or 2HI when your
vehicle is in gear and/or moving, the 4HI, A4WD or 2HI
indicator light will ash for 30 seconds. It will not complete
the shift unless your vehicle is moving less than 2 mph
(3.2 km/h) with the transmission in NEUTRAL (N).
Shifting into NEUTRAL
Before shifting the transfer case to NEUTRAL, rst
make sure the vehicle is parked so that it will not roll.
1. Set the parking brake.
2. Start the vehicle.
3. Put the transmission in NEUTRAL (N).
4. Turn the transfer case knob all of the way past 4LO
and hold it there for a minimum of 10 seconds. The
neutral indicator light will come on.5. Shift the transmission to REVERSE (R) for
one second, then shift the transmission to
DRIVE (D) for one second.
6. Place the transmission shift lever in PARK (P).
7. Turn the ignition to LOCK.
8. For info on towing your vehicle seeRecreational
Vehicle Towing on page 4-51.
Shifting Out of NEUTRAL
To shift the transfer case out of NEUTRAL,
do the following:
1. Set the parking brake and apply the regular
brake pedal.
2. Start the vehicle with the transmission in PARK (P).
3. Turn the transfer case knob to the desired shift
position (2HI, 4HI or A4WD).
4. Put the transmission in NEUTRAL (N).
5. Release the parking brake.
6. After the transfer case has shifted out of NEUTRAL,
the indicator light will go out. Shift the transmission
lever to the desired position.
A re-engagement sound is normal when shifting
out of NEUTRAL.
2-29
Page 124 of 502
7. Firmly press and release the “Learn” or “Smart”
button. The name and color of the button may
vary by manufacturer.
You will have 30 seconds to start Step 8.
8. Return to the vehicle. Firmly press and hold the
programmed HomeLink
®button for two seconds,
then release. Repeat the press/hold/release
sequence a second time, and depending on the
brand of the garage door opener (or other rolling
code device), repeat this sequence a third time
to complete the programming.
HomeLink
®should now activate your rolling-code
equipped device.
To program the remaining two HomeLink
®buttons,
begin with Step 2 of “Programming HomeLink®.” You do
not want to repeat Step 1, as this will erase all
previous programming.
Gate Operator and Canadian
Programming
Canadian radio-frequency laws require transmitter
signals to “time out” or quit after several seconds of
transmission. This may not be long enough for
HomeLink
®to pick up the signal during programming.
Similarly, some U.S. gate operators are manufactured to
“time out” in the same manner.
If you live in Canada, or you are having difficulty
programming a gate operator by using the
“Programming HomeLink
®” procedures (regardless of
where you live), replace Step 3 under “Programming
HomeLink
®” with the following:
Continue to press and hold the HomeLink
®button while
you press and release every two seconds (cycle)
your hand-held transmitter until the frequency signal has
been successfully accepted by HomeLink
®. The
indicator light will ash slowly at rst and then rapidly.
Proceed with Step 4 under “Programming HomeLink
®”
to complete.
2-52
Page 130 of 502
Rear Floor Storage Lid
{CAUTION:
If any removable convenience item is not
secured properly, it can move around in a
collision or sudden stop. People in the vehicle
could be injured. Be sure to secure any such
item properly.
Your vehicle has a rear cargo area with a removable
storage lid.
To remove the rear oor storage lid, do the following:
1. Press the latch release and lift up the latch handle.
2. Raise the lid slightly to unhook it.
3. Pull the lid toward you to release it from the forward
mounting tabs.
To reinstall the rear oor storage lid, reverse the
previous steps. Make sure the lid is secure by applying
slight pressure to the latch until you hear it click.
Convenience Net
Your vehicle may have this feature. A convenience net
in the rear of your vehicle helps keep small items in
place during sharp turns or quick stops and starts. The
net is not designed to retain these items during
off-road use. The net is not for larger, heavier items.
To use the convenience net, do the following:
1. Attach the upper loops to the retainers on both
sides of the liftgate opening. The label should be
in the upper passenger’s side corner, visible
from the rear of the vehicle.
2. Attach the lower hooks to the rear cargo tie downs
on the oor.
2-58
Page 141 of 502
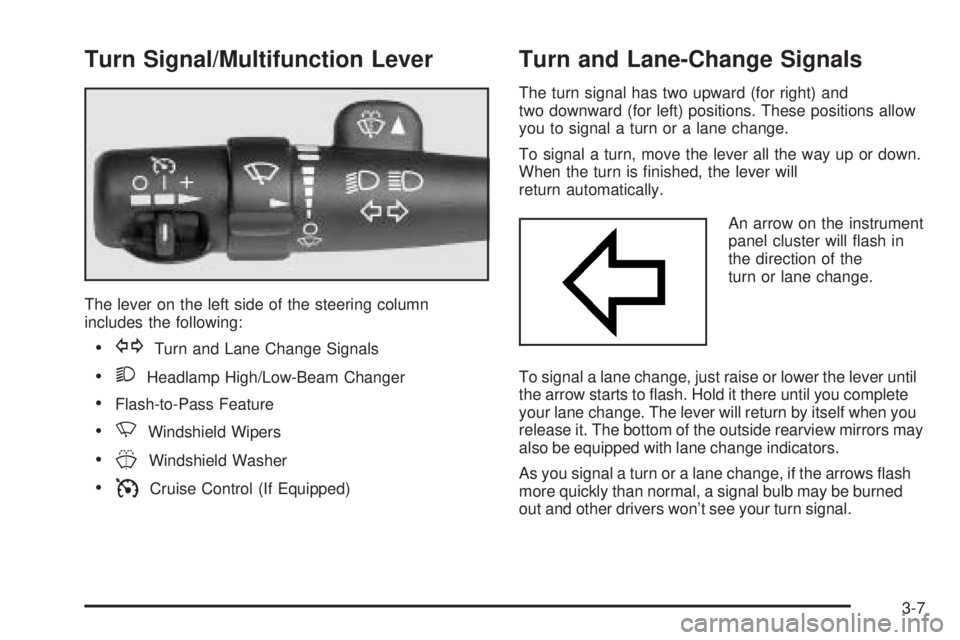
Turn Signal/Multifunction Lever
The lever on the left side of the steering column
includes the following:
GTurn and Lane Change Signals
2Headlamp High/Low-Beam Changer
Flash-to-Pass Feature
NWindshield Wipers
JWindshield Washer
ICruise Control (If Equipped)
Turn and Lane-Change Signals
The turn signal has two upward (for right) and
two downward (for left) positions. These positions allow
you to signal a turn or a lane change.
To signal a turn, move the lever all the way up or down.
When the turn is nished, the lever will
return automatically.
An arrow on the instrument
panel cluster will ash in
the direction of the
turn or lane change.
To signal a lane change, just raise or lower the lever until
the arrow starts to ash. Hold it there until you complete
your lane change. The lever will return by itself when you
release it. The bottom of the outside rearview mirrors may
also be equipped with lane change indicators.
As you signal a turn or a lane change, if the arrows ash
more quickly than normal, a signal bulb may be burned
out and other drivers won’t see your turn signal.
3-7
Page 143 of 502
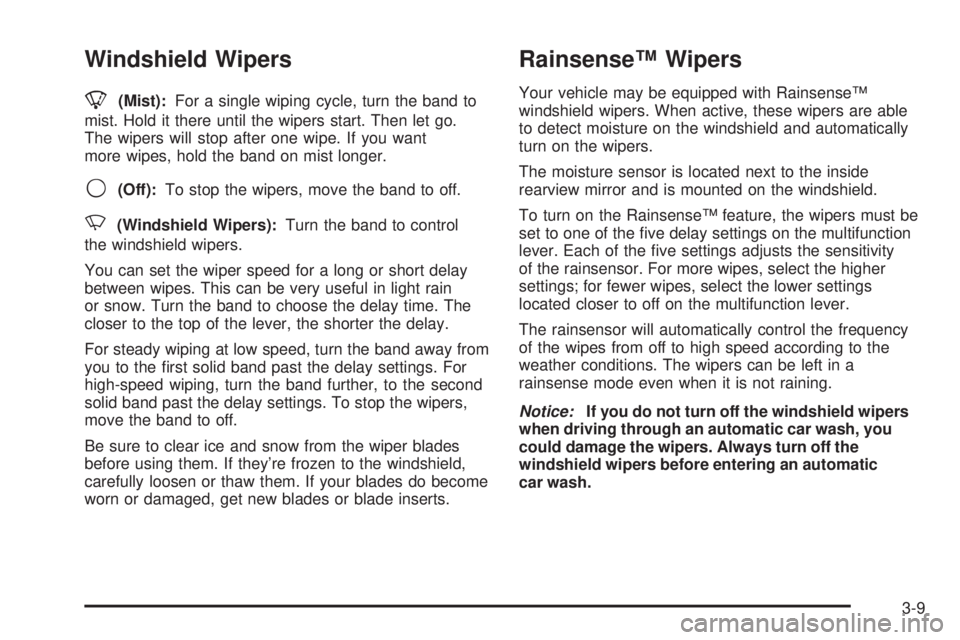
Windshield Wipers
8(Mist):For a single wiping cycle, turn the band to
mist. Hold it there until the wipers start. Then let go.
The wipers will stop after one wipe. If you want
more wipes, hold the band on mist longer.
9(Off):To stop the wipers, move the band to off.
N(Windshield Wipers):Turn the band to control
the windshield wipers.
You can set the wiper speed for a long or short delay
between wipes. This can be very useful in light rain
or snow. Turn the band to choose the delay time. The
closer to the top of the lever, the shorter the delay.
For steady wiping at low speed, turn the band away from
you to the rst solid band past the delay settings. For
high-speed wiping, turn the band further, to the second
solid band past the delay settings. To stop the wipers,
move the band to off.
Be sure to clear ice and snow from the wiper blades
before using them. If they’re frozen to the windshield,
carefully loosen or thaw them. If your blades do become
worn or damaged, get new blades or blade inserts.
Rainsense™ Wipers
Your vehicle may be equipped with Rainsense™
windshield wipers. When active, these wipers are able
to detect moisture on the windshield and automatically
turn on the wipers.
The moisture sensor is located next to the inside
rearview mirror and is mounted on the windshield.
To turn on the Rainsense™ feature, the wipers must be
set to one of the ve delay settings on the multifunction
lever. Each of the ve settings adjusts the sensitivity
of the rainsensor. For more wipes, select the higher
settings; for fewer wipes, select the lower settings
located closer to off on the multifunction lever.
The rainsensor will automatically control the frequency
of the wipes from off to high speed according to the
weather conditions. The wipers can be left in a
rainsense mode even when it is not raining.
Notice:If you do not turn off the windshield wipers
when driving through an automatic car wash, you
could damage the wipers. Always turn off the
windshield wipers before entering an automatic
car wash.
3-9
Page 146 of 502
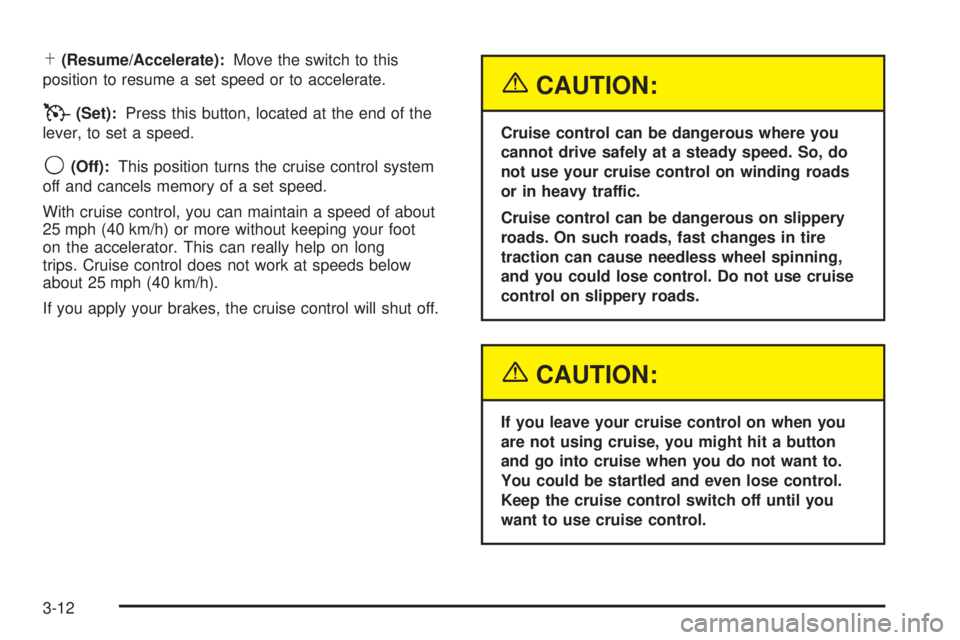
S(Resume/Accelerate):Move the switch to this
position to resume a set speed or to accelerate.
T(Set):Press this button, located at the end of the
lever, to set a speed.
9(Off):This position turns the cruise control system
off and cancels memory of a set speed.
With cruise control, you can maintain a speed of about
25 mph (40 km/h) or more without keeping your foot
on the accelerator. This can really help on long
trips. Cruise control does not work at speeds below
about 25 mph (40 km/h).
If you apply your brakes, the cruise control will shut off.
{CAUTION:
Cruise control can be dangerous where you
cannot drive safely at a steady speed. So, do
not use your cruise control on winding roads
or in heavy traffic.
Cruise control can be dangerous on slippery
roads. On such roads, fast changes in tire
traction can cause needless wheel spinning,
and you could lose control. Do not use cruise
control on slippery roads.
{CAUTION:
If you leave your cruise control on when you
are not using cruise, you might hit a button
and go into cruise when you do not want to.
You could be startled and even lose control.
Keep the cruise control switch off until you
want to use cruise control.
3-12
Page 151 of 502
There is a delay in the transition between the daytime
and nighttime operation of the Daytime Running
Lamps (DRL) and the automatic headlamp systems, so
that driving under bridges or bright overhead street
lights does not affect the system. The DRL and
automatic headlamp system will only be affected when
the light sensor sees a change in lighting lasting
longer than the delay.
If you start your vehicle in a dark garage, the automatic
headlamp system will come on immediately. Once
you leave the garage, it will take about one minute for
the automatic headlamp system to change to DRL if it is
light outside. During that delay, your instrument panel
cluster may not be as bright as usual. Make sure
your instrument panel brightness control is in the full
bright position.
To idle your vehicle with the automatic headlamp system
off, set the parking brake while the ignition is off. Then
start your vehicle. The automatic headlamp system will
stay off until you release the parking brake, shift out of
park or turn the exterior lamp control to the off position as
described in “Exterior Lamps” listed previously.Fog Lamps
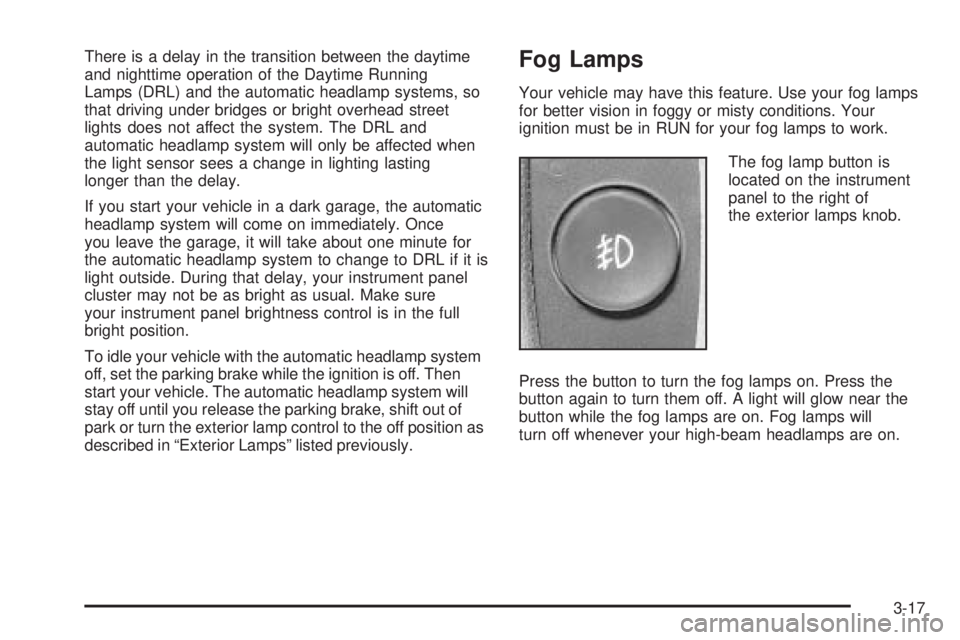
Your vehicle may have this feature. Use your fog lamps
for better vision in foggy or misty conditions. Your
ignition must be in RUN for your fog lamps to work.
The fog lamp button is
located on the instrument
panel to the right of
the exterior lamps knob.
Press the button to turn the fog lamps on. Press the
button again to turn them off. A light will glow near the
button while the fog lamps are on. Fog lamps will
turn off whenever your high-beam headlamps are on.
3-17
Page 157 of 502
Rear Window Defogger
Your vehicle may have this feature. The lines you see
on the rear window warm the glass.
<(Rear):Press this button to turn the rear window
defogger on or off. An indicator light in the button
will come on to let you know that the rear window
defogger is active. The rear window defogger will
automatically turn off approximately ten minutes after
the button is pressed.
If your vehicle is equipped with heated mirrors, this
button will activate them.
Notice:Don’t use anything sharp on the inside of
the rear window. If you do, you could cut or damage
the warming grid, and the repairs wouldn’t be
covered by your warranty. Do not attach a temporary
vehicle license, tape, a decal or anything similar
to the defogger grid.
Dual Automatic Climate
Control System
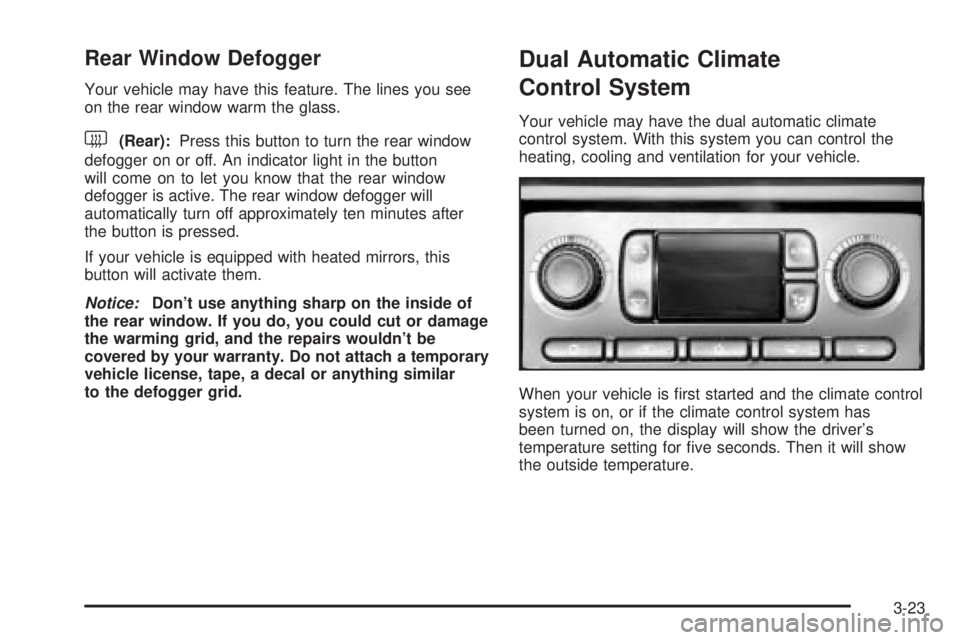
Your vehicle may have the dual automatic climate
control system. With this system you can control the
heating, cooling and ventilation for your vehicle.
When your vehicle is rst started and the climate control
system is on, or if the climate control system has
been turned on, the display will show the driver’s
temperature setting for ve seconds. Then it will show
the outside temperature.
3-23
Page 159 of 502
Automatic Operation
AUTO (Automatic):When automatic operation is
active, the system will control the inside temperature,
the air delivery mode, and the fan speed.
Use the steps below to place the entire system in
automatic mode:
1. Press the AUTO button.
When AUTO is selected, the air conditioning
operation and air inlet mode will be automatically
controlled. The air conditioning compressor will run
when the outside temperature is over approximately
40°F (4°C). The air inlet will normally be set to
outside air. If it’s hot outside, the air inlet will
automatically switch to recirculate inside air to help
quickly cool down your vehicle.
2. Set the driver’s and passenger’s temperature.
To nd your comfort setting, start with a 72°F (22°C)
temperature setting and allow about 20 minutes
for the system to regulate. Turn the driver’s or
passenger’s side temperature knob to adjust the
temperature setting as necessary. If you choose the
temperature setting of 60°F (15°C), the system
will remain at the maximum cooling setting. If you
choose the temperature setting of 90°F (32°C),
the system will remain at the maximum heat setting.
Choosing either maximum setting may not cause
the vehicle to heat or cool any faster.
Manual Operation
To change the current setting, select one of the following:
w9x(Fan):This button allows you to manually
adjust the fan speed. Press the up arrow to increase fan
speed and the down arrow to decrease fan speed. The
display will change to show you the selected fan speed
and the driver’s side temperature setting for ve seconds.
C(Mode):Press this button to manually change the
direction of the airow in your vehicle. Keep pressing the
button until the desired mode appears on the display.
The display will change to show you the selected
air delivery mode and the driver’s temperature setting
for ve seconds.
H(Vent):This mode directs air to the instrument
panel outlets.
)(Bi-Level):This mode directs approximately half of
the air to the instrument panel outlets, then directs
the remaining air to the oor outlets. A little air is
directed toward the windshield and the side window
outlets. Cooler air is directed to the upper outlets and
warmer air to the oor outlets.
3-25