parking GMC ENVOY DENALI 2005 Owners Manual
[x] Cancel search | Manufacturer: GMC, Model Year: 2005, Model line: ENVOY DENALI, Model: GMC ENVOY DENALI 2005Pages: 502, PDF Size: 2.66 MB
Page 73 of 502
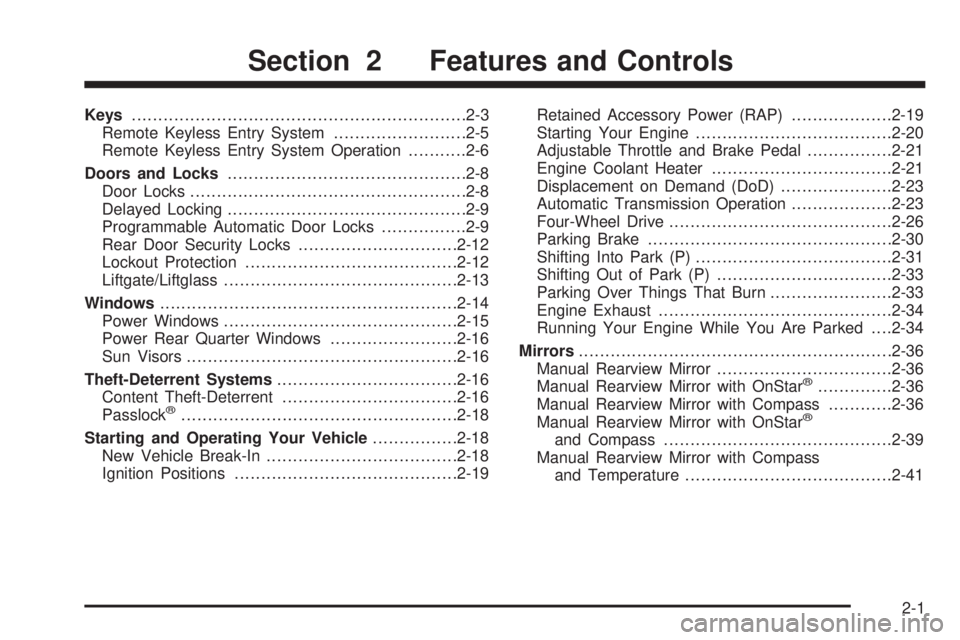
Keys...............................................................2-3
Remote Keyless Entry System.........................2-5
Remote Keyless Entry System Operation...........2-6
Doors and Locks.............................................2-8
Door Locks....................................................2-8
Delayed Locking.............................................2-9
Programmable Automatic Door Locks................2-9
Rear Door Security Locks..............................2-12
Lockout Protection........................................2-12
Liftgate/Liftglass............................................2-13
Windows........................................................2-14
Power Windows............................................2-15
Power Rear Quarter Windows........................2-16
Sun Visors...................................................2-16
Theft-Deterrent Systems..................................2-16
Content Theft-Deterrent.................................2-16
Passlock
®....................................................2-18
Starting and Operating Your Vehicle................2-18
New Vehicle Break-In....................................2-18
Ignition Positions..........................................2-19Retained Accessory Power (RAP)...................2-19
Starting Your Engine.....................................2-20
Adjustable Throttle and Brake Pedal................2-21
Engine Coolant Heater..................................2-21
Displacement on Demand (DoD).....................2-23
Automatic Transmission Operation...................2-23
Four-Wheel Drive..........................................2-26
Parking Brake..............................................2-30
Shifting Into Park (P).....................................2-31
Shifting Out of Park (P).................................2-33
Parking Over Things That Burn.......................2-33
Engine Exhaust............................................2-34
Running Your Engine While You Are Parked. . . .2-34
Mirrors...........................................................2-36
Manual Rearview Mirror.................................2-36
Manual Rearview Mirror with OnStar
®..............2-36
Manual Rearview Mirror with Compass............2-36
Manual Rearview Mirror with OnStar
®
and Compass...........................................2-39
Manual Rearview Mirror with Compass
and Temperature.......................................2-41
Section 2 Features and Controls
2-1
Page 78 of 502
Remote Keyless Entry System
Operation
If your vehicle has this feature, you can lock and unlock
your doors from about 3 feet (1 m) up to 30 feet
(9 m) away using the remote keyless entry transmitter
supplied with your vehicle.
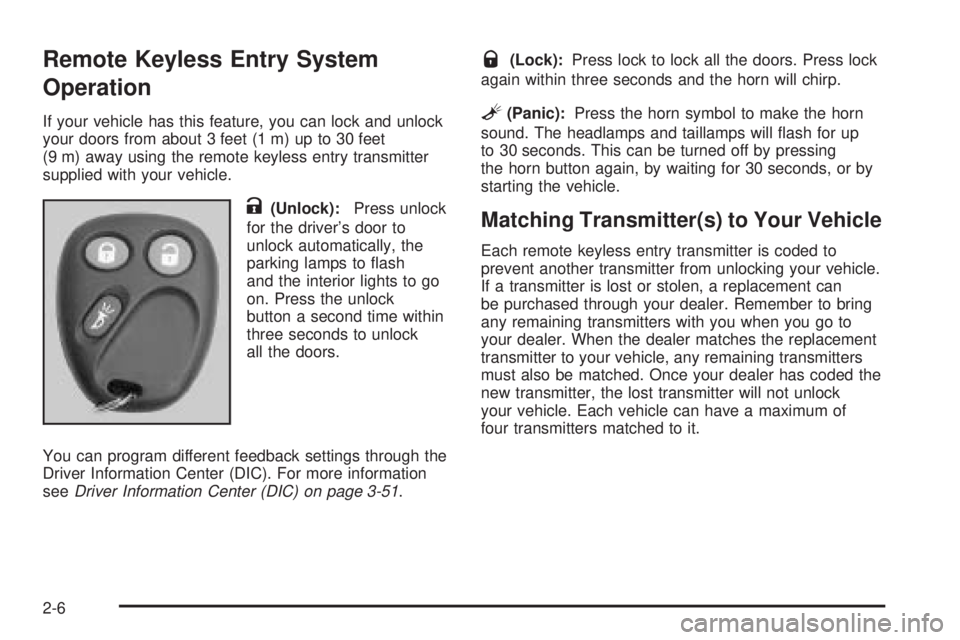
K(Unlock):Press unlock
for the driver’s door to
unlock automatically, the
parking lamps to ash
and the interior lights to go
on. Press the unlock
button a second time within
three seconds to unlock
all the doors.
You can program different feedback settings through the
Driver Information Center (DIC). For more information
seeDriver Information Center (DIC) on page 3-51.
Q(Lock):Press lock to lock all the doors. Press lock
again within three seconds and the horn will chirp.
L(Panic):Press the horn symbol to make the horn
sound. The headlamps and taillamps will ash for up
to 30 seconds. This can be turned off by pressing
the horn button again, by waiting for 30 seconds, or by
starting the vehicle.
Matching Transmitter(s) to Your Vehicle
Each remote keyless entry transmitter is coded to
prevent another transmitter from unlocking your vehicle.
If a transmitter is lost or stolen, a replacement can
be purchased through your dealer. Remember to bring
any remaining transmitters with you when you go to
your dealer. When the dealer matches the replacement
transmitter to your vehicle, any remaining transmitters
must also be matched. Once your dealer has coded the
new transmitter, the lost transmitter will not unlock
your vehicle. Each vehicle can have a maximum of
four transmitters matched to it.
2-6
Page 89 of 502
3. Close all doors. The security light should turn off
after approximately 30 seconds. The alarm is not
armed until the security light turns off.
If a locked door is opened without the key or the remote
keyless entry transmitter, the alarm will go off. The
headlamps and parking lamps will ash for two minutes,
and the horn will sound for 30 seconds, then will turn
off to save the battery power.
Remember, the theft-deterrent system won’t activate if
you lock the doors with a key or use the manual
door lock. It activates only if you use a power door lock
switch with the door open, or with the remote keyless
entry transmitter. You should also remember that
you can start your vehicle with the correct ignition key if
the alarm has been set off.
Here’s how to avoid setting off the alarm by accident:
If you don’t want to activate the theft-deterrent
system, the vehicle should be locked with the door
keyafterthe doors are closed.
Always unlock a door with a key, or use the remote
keyless entry transmitter. Unlocking a door any
other way will set off the alarm.
If you set off the alarm by accident, unlock any door with
the key. You can also turn off the alarm by pressing
unlock on the remote keyless entry transmitter. The alarm
won’t stop if you try to unlock a door any other way.
Testing the Alarm
The alarm can be tested by following these steps:
1. From inside the vehicle, lower the driver’s window
and open the driver’s door.
2. Activate the system by locking the doors with the
power door lock switch while the door is open, or
with the remote keyless entry transmitter.
3. Get out of the vehicle, close the door and wait for
the security light to go out.
4. Then reach in through the window, unlock the door
with the manual door lock and open the door. This
should set off the alarm.
When the alarm is set the power door unlock switch is
not operational.
If the alarm does not sound when it should but the
headlamps ash, check to see if the horn works. The
horn fuse may be blown. To replace the fuse, seeFuses
and Circuit Breakers on page 5-97.
If the alarm does not sound or the headlamps do not
ash, the vehicle should be serviced by your dealer.
2-17
Page 94 of 502
To Use the Engine Coolant Heater
1. Turn off the engine.
2. Open the hood and unwrap the electrical cord.
The cord is located on the driver’s side of the
engine compartment, behind the battery.
3. Plug it into a normal, grounded 110-Volt AC outlet.
{CAUTION:
Plugging the cord into an ungrounded outlet
could cause an electrical shock. Also, the
wrong kind of extension cord could overheat
and cause a re. You could be seriously
injured. Plug the cord into a properly grounded
three-prong 110-volt AC outlet. If the cord will
not reach, use a heavy-duty three-prong
extension cord rated for at least 15 amps.4. Before starting the engine, be sure to unplug and
store the cord as it was before to keep it away
from moving engine parts. If you do not, it could
be damaged.
How long should you keep the coolant heater plugged
in? The answer depends on the outside temperature, the
kind of oil you have, and some other things. Instead
of trying to list everything here, we ask that you contact
your dealer in the area where you will be parking
your vehicle. The dealer can give you the best advice
for that particular area.
2-22
Page 96 of 502
PARK (P):This position locks the rear wheels.
It is the best position to use when you start
the engine because your vehicle cannot move easily.
{CAUTION:
It is dangerous to get out of your vehicle if the
shift lever is not fully in PARK (P) with the
parking brake rmly set. Your vehicle can roll.
Do not leave your vehicle when the engine is
running unless you have to. If you have left the
engine running, the vehicle can move suddenly.
You or others could be injured. To be sure your
vehicle will not move, even when you are on
fairly level ground, always set your parking
brake and move the shift lever to PARK (P). See
Shifting Into Park (P) on page 2-31. If you are
pulling a trailer, seeTowing a Trailer on
page 4-56.
{CAUTION:
If you have four-wheel drive, your vehicle will
be free to roll — even if your shift lever is in
PARK (P) — if your transfer case is in
NEUTRAL. So, be sure the transfer case is in a
drive gear — not in NEUTRAL. SeeFour-Wheel
Drive on page 2-26. SeeShifting Into Park (P)
on page 2-31.
Ensure the shift lever is fully in PARK (P) before starting
the engine. Your vehicle has an automatic transmission
shift lock control system. You have to fully apply the
regular brakes before you can shift from PARK (P) when
the ignition key is in RUN. If you cannot shift out of
PARK (P), ease pressure on the shift lever, press the
button on the shift lever and push the shift lever all
the way into PARK (P) as you maintain brake
application. Move the shift lever into the gear you wish.
SeeShifting Out of Park (P) on page 2-33.
2-24
Page 99 of 502
Automatic Transfer Case
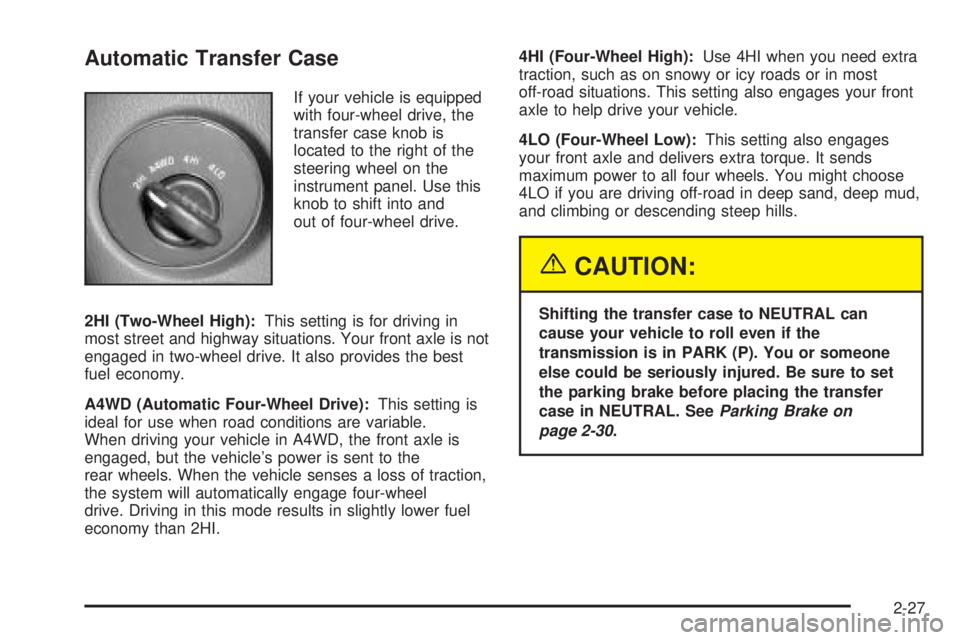
If your vehicle is equipped
with four-wheel drive, the
transfer case knob is
located to the right of the
steering wheel on the
instrument panel. Use this
knob to shift into and
out of four-wheel drive.
2HI (Two-Wheel High):This setting is for driving in
most street and highway situations. Your front axle is not
engaged in two-wheel drive. It also provides the best
fuel economy.
A4WD (Automatic Four-Wheel Drive):This setting is
ideal for use when road conditions are variable.
When driving your vehicle in A4WD, the front axle is
engaged, but the vehicle’s power is sent to the
rear wheels. When the vehicle senses a loss of traction,
the system will automatically engage four-wheel
drive. Driving in this mode results in slightly lower fuel
economy than 2HI.4HI (Four-Wheel High):Use 4HI when you need extra
traction, such as on snowy or icy roads or in most
off-road situations. This setting also engages your front
axle to help drive your vehicle.
4LO (Four-Wheel Low):This setting also engages
your front axle and delivers extra torque. It sends
maximum power to all four wheels. You might choose
4LO if you are driving off-road in deep sand, deep mud,
and climbing or descending steep hills.
{CAUTION:
Shifting the transfer case to NEUTRAL can
cause your vehicle to roll even if the
transmission is in PARK (P). You or someone
else could be seriously injured. Be sure to set
the parking brake before placing the transfer
case in NEUTRAL. SeeParking Brake on
page 2-30.
2-27
Page 101 of 502
Shifting Out of 4LO
To shift from 4LO to 4HI, A4WD or 2HI your vehicle must
be stopped or moving less than 2 mph (3.2 km/h) with the
transmission in NEUTRAL (N) and the engine running.
The preferred method for shifting out of 4LO is to have
your vehicle moving 1 or 2 mph (1.6 to 3.2 km/h). Turn
the knob to 4HI, A4WD or 2HI. You must wait for the 4HI,
A4WD or 2HI indicator light to stop ashing and remain
illuminated before shifting your transmission into gear.
If the knob is turned to 4HI, A4WD or 2HI when your
vehicle is in gear and/or moving, the 4HI, A4WD or 2HI
indicator light will ash for 30 seconds. It will not complete
the shift unless your vehicle is moving less than 2 mph
(3.2 km/h) with the transmission in NEUTRAL (N).
Shifting into NEUTRAL
Before shifting the transfer case to NEUTRAL, rst
make sure the vehicle is parked so that it will not roll.
1. Set the parking brake.
2. Start the vehicle.
3. Put the transmission in NEUTRAL (N).
4. Turn the transfer case knob all of the way past 4LO
and hold it there for a minimum of 10 seconds. The
neutral indicator light will come on.5. Shift the transmission to REVERSE (R) for
one second, then shift the transmission to
DRIVE (D) for one second.
6. Place the transmission shift lever in PARK (P).
7. Turn the ignition to LOCK.
8. For info on towing your vehicle seeRecreational
Vehicle Towing on page 4-51.
Shifting Out of NEUTRAL
To shift the transfer case out of NEUTRAL,
do the following:
1. Set the parking brake and apply the regular
brake pedal.
2. Start the vehicle with the transmission in PARK (P).
3. Turn the transfer case knob to the desired shift
position (2HI, 4HI or A4WD).
4. Put the transmission in NEUTRAL (N).
5. Release the parking brake.
6. After the transfer case has shifted out of NEUTRAL,
the indicator light will go out. Shift the transmission
lever to the desired position.
A re-engagement sound is normal when shifting
out of NEUTRAL.
2-29
Page 102 of 502
Parking Brake
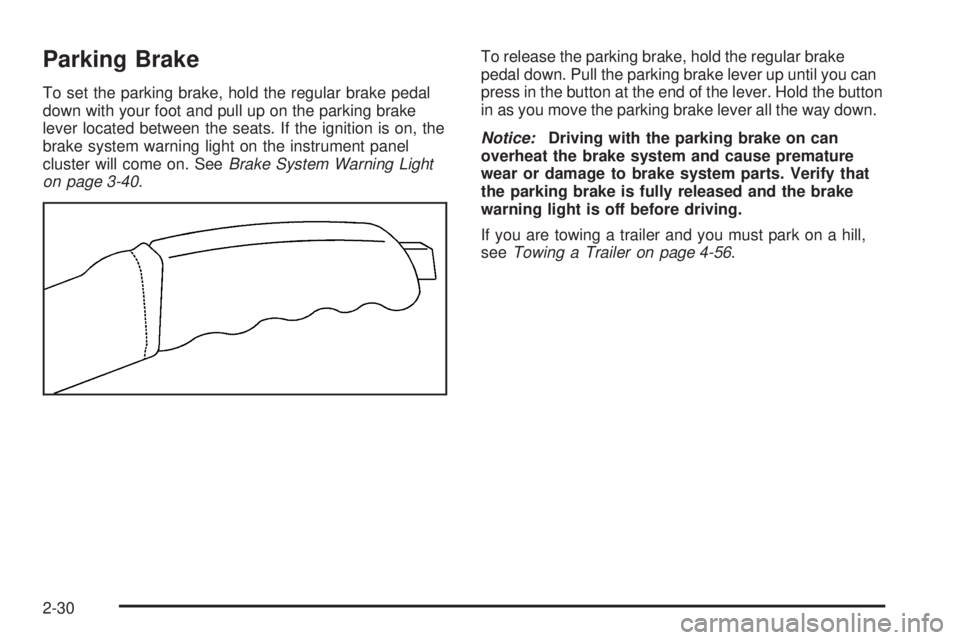
To set the parking brake, hold the regular brake pedal
down with your foot and pull up on the parking brake
lever located between the seats. If the ignition is on, the
brake system warning light on the instrument panel
cluster will come on. SeeBrake System Warning Light
on page 3-40.To release the parking brake, hold the regular brake
pedal down. Pull the parking brake lever up until you can
press in the button at the end of the lever. Hold the button
in as you move the parking brake lever all the way down.
Notice:Driving with the parking brake on can
overheat the brake system and cause premature
wear or damage to brake system parts. Verify that
the parking brake is fully released and the brake
warning light is off before driving.
If you are towing a trailer and you must park on a hill,
seeTowing a Trailer on page 4-56.
2-30
Page 103 of 502
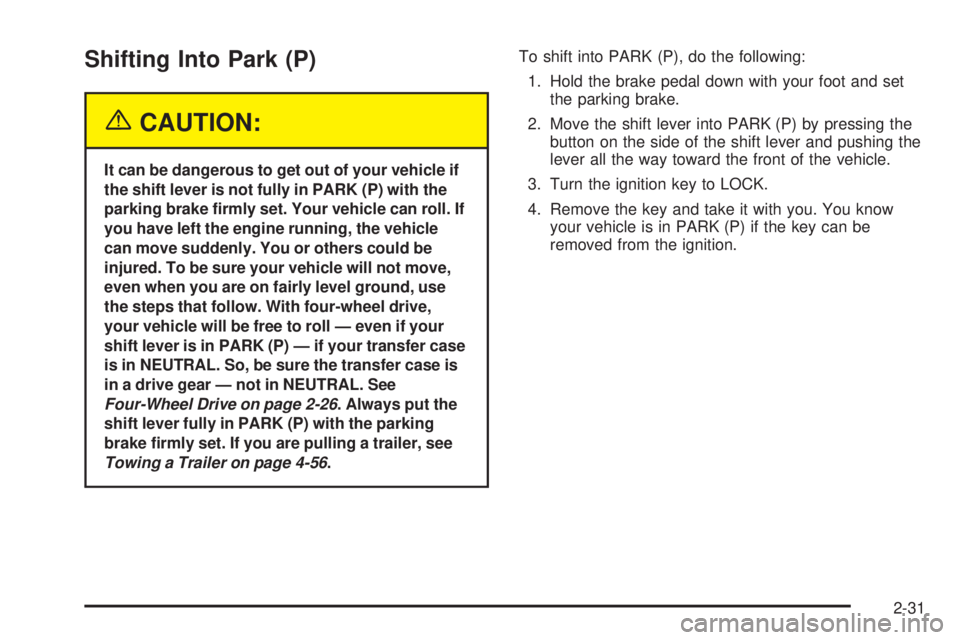
Shifting Into Park (P)
{CAUTION:
It can be dangerous to get out of your vehicle if
the shift lever is not fully in PARK (P) with the
parking brake rmly set. Your vehicle can roll. If
you have left the engine running, the vehicle
can move suddenly. You or others could be
injured. To be sure your vehicle will not move,
even when you are on fairly level ground, use
the steps that follow. With four-wheel drive,
your vehicle will be free to roll — even if your
shift lever is in PARK (P) — if your transfer case
is in NEUTRAL. So, be sure the transfer case is
in a drive gear — not in NEUTRAL. See
Four-Wheel Drive on page 2-26. Always put the
shift lever fully in PARK (P) with the parking
brake rmly set. If you are pulling a trailer, see
Towing a Trailer on page 4-56.To shift into PARK (P), do the following:
1. Hold the brake pedal down with your foot and set
the parking brake.
2. Move the shift lever into PARK (P) by pressing the
button on the side of the shift lever and pushing the
lever all the way toward the front of the vehicle.
3. Turn the ignition key to LOCK.
4. Remove the key and take it with you. You know
your vehicle is in PARK (P) if the key can be
removed from the ignition.
2-31
Page 104 of 502
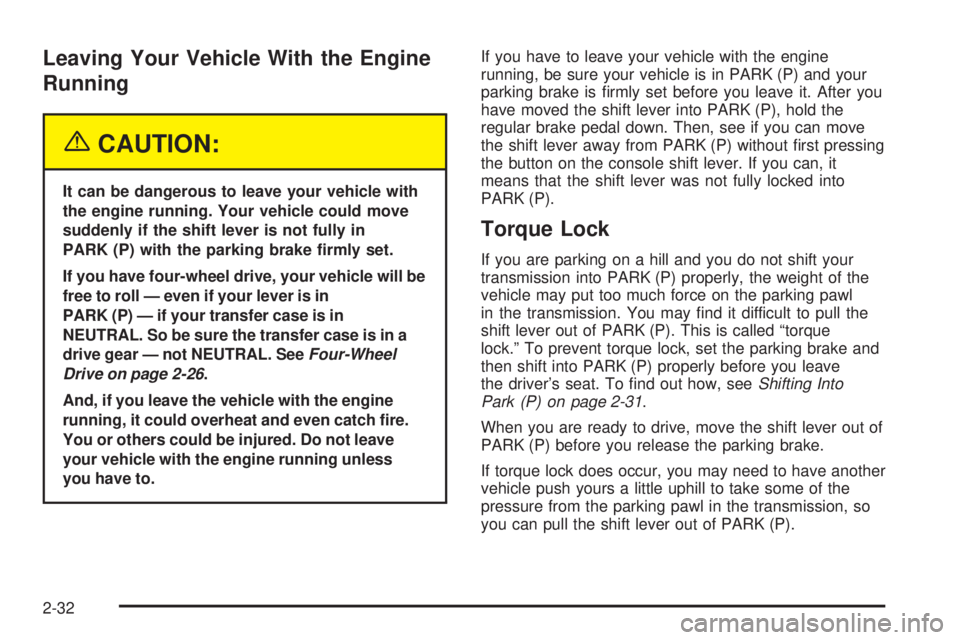
Leaving Your Vehicle With the Engine
Running
{CAUTION:
It can be dangerous to leave your vehicle with
the engine running. Your vehicle could move
suddenly if the shift lever is not fully in
PARK (P) with the parking brake rmly set.
If you have four-wheel drive, your vehicle will be
free to roll — even if your lever is in
PARK (P) — if your transfer case is in
NEUTRAL. So be sure the transfer case is in a
drive gear — not NEUTRAL. SeeFour-Wheel
Drive on page 2-26.
And, if you leave the vehicle with the engine
running, it could overheat and even catch re.
You or others could be injured. Do not leave
your vehicle with the engine running unless
you have to.If you have to leave your vehicle with the engine
running, be sure your vehicle is in PARK (P) and your
parking brake is rmly set before you leave it. After you
have moved the shift lever into PARK (P), hold the
regular brake pedal down. Then, see if you can move
the shift lever away from PARK (P) without rst pressing
the button on the console shift lever. If you can, it
means that the shift lever was not fully locked into
PARK (P).
Torque Lock
If you are parking on a hill and you do not shift your
transmission into PARK (P) properly, the weight of the
vehicle may put too much force on the parking pawl
in the transmission. You may nd it difficult to pull the
shift lever out of PARK (P). This is called “torque
lock.” To prevent torque lock, set the parking brake and
then shift into PARK (P) properly before you leave
the driver’s seat. To nd out how, seeShifting Into
Park (P) on page 2-31.
When you are ready to drive, move the shift lever out of
PARK (P) before you release the parking brake.
If torque lock does occur, you may need to have another
vehicle push yours a little uphill to take some of the
pressure from the parking pawl in the transmission, so
you can pull the shift lever out of PARK (P).
2-32