transmission GMC ENVOY DENALI 2005 Owners Manual
[x] Cancel search | Manufacturer: GMC, Model Year: 2005, Model line: ENVOY DENALI, Model: GMC ENVOY DENALI 2005Pages: 502, PDF Size: 2.66 MB
Page 73 of 502
Keys...............................................................2-3
Remote Keyless Entry System.........................2-5
Remote Keyless Entry System Operation...........2-6
Doors and Locks.............................................2-8
Door Locks....................................................2-8
Delayed Locking.............................................2-9
Programmable Automatic Door Locks................2-9
Rear Door Security Locks..............................2-12
Lockout Protection........................................2-12
Liftgate/Liftglass............................................2-13
Windows........................................................2-14
Power Windows............................................2-15
Power Rear Quarter Windows........................2-16
Sun Visors...................................................2-16
Theft-Deterrent Systems..................................2-16
Content Theft-Deterrent.................................2-16
Passlock
®....................................................2-18
Starting and Operating Your Vehicle................2-18
New Vehicle Break-In....................................2-18
Ignition Positions..........................................2-19Retained Accessory Power (RAP)...................2-19
Starting Your Engine.....................................2-20
Adjustable Throttle and Brake Pedal................2-21
Engine Coolant Heater..................................2-21
Displacement on Demand (DoD).....................2-23
Automatic Transmission Operation...................2-23
Four-Wheel Drive..........................................2-26
Parking Brake..............................................2-30
Shifting Into Park (P).....................................2-31
Shifting Out of Park (P).................................2-33
Parking Over Things That Burn.......................2-33
Engine Exhaust............................................2-34
Running Your Engine While You Are Parked. . . .2-34
Mirrors...........................................................2-36
Manual Rearview Mirror.................................2-36
Manual Rearview Mirror with OnStar
®..............2-36
Manual Rearview Mirror with Compass............2-36
Manual Rearview Mirror with OnStar
®
and Compass...........................................2-39
Manual Rearview Mirror with Compass
and Temperature.......................................2-41
Section 2 Features and Controls
2-1
Page 82 of 502
Programmable Locking Feature
Following are the two locking modes that can be
programmed:
Mode 1:All doors lock when the transmission is shifted
out of PARK (P).
Mode 2:All doors lock when the vehicle speed is
greater than 8 mph (13 km/h).
The automatic door locks were pre-programmed at the
factory to lock all the doors when the transmission
is shifted into gear. The following instructions detail how
to program your door locks differently than the factory
setting. Choose one of the two programming options
listed above before entering the program mode.
To enter the program mode, do the following:
1. Begin with the ignition off. Then pull the turn
signal/multifunction lever toward you and hold
it there while you perform the next step.
2. Turn the key to RUN and LOCK twice. Then, with the
key in LOCK, release the turn signal/multifunction
lever. Once you do this, you will hear the lock switch
lock and unlock, the horn will chirp twice, and a
30 second program timer will begin.3. You are now ready to program the automatic door
locks. Select one of the two programming options
listed above, and press the lock side of the power
door lock switch to cycle through the lock options.
You will have 30 seconds to begin programming. If
you exceed the 30 second limit, the locks will
automatically lock and unlock and the horn will chirp
twice to indicate that you have left the program
mode. If this occurs, repeat the procedure beginning
with Step 1 to re-enter the programming mode.
You can exit the program mode any time by turning the
ignition to RUN. The locks will automatically lock and
unlock and the horn will chirp twice to indicate that you
are leaving the program mode. If the lock/unlock switches
are not pressed while in the programming mode, the
current auto lock/unlock setting will not be modi�ed.
See your dealer for more information.
2-10
Page 83 of 502
Programmable Unlocking Feature
The following is the list of available programming options:
Mode 1:All doors unlock when the transmission is
shifted into PARK (P).
Mode 2:Driver’s door unlocks when the transmission is
shifted into PARK (P).
Mode 3:All doors unlock when the key is removed
from the ignition.
Mode 4:No automatic door unlock.
The automatic door locks were pre-programmed at the
factory to unlock all doors once the transmission is shifted
to PARK (P). The following instructions detail how to
program your door locks differently than the factory
setting. Choose one of the four programming options
listed above before entering the program mode.To enter the program mode you need to do
the following:
1. Begin with the ignition off. Then pull the turn
signal/multifunction lever toward you and hold
it there while you perform the next step.
2. Turn the key to RUN and LOCK twice. Then, with the
key in LOCK, release the turn signal/multifunction
lever. Once you do this, you will hear the lock switch
lock and unlock, the horn will chirp twice, and a
30 second program timer will begin.
3. You are now ready to program the automatic door
locks. Select one of the four programming options
listed above, and press the unlock side of the power
door lock switch to cycle through the unlocking
options. You will have 30 seconds to begin
programming. If you exceed the 30 second limit,
the locks will automatically lock and unlock and the
horn will chirp twice to indicate that you have left
the program mode. If this occurs, repeat the
procedure beginning with Step 1 to re-enter the
programming mode.
You can exit the program mode any time by turning the
ignition to RUN. The locks will automatically lock and
unlock and the horn will chirp twice to indicate that you
are leaving the program mode. If the lock/unlock switches
are not pressed while in the programming mode, the
current auto lock/unlock setting will not be modi�ed.
See your dealer for more information.
2-11
Page 91 of 502
Ignition Positions
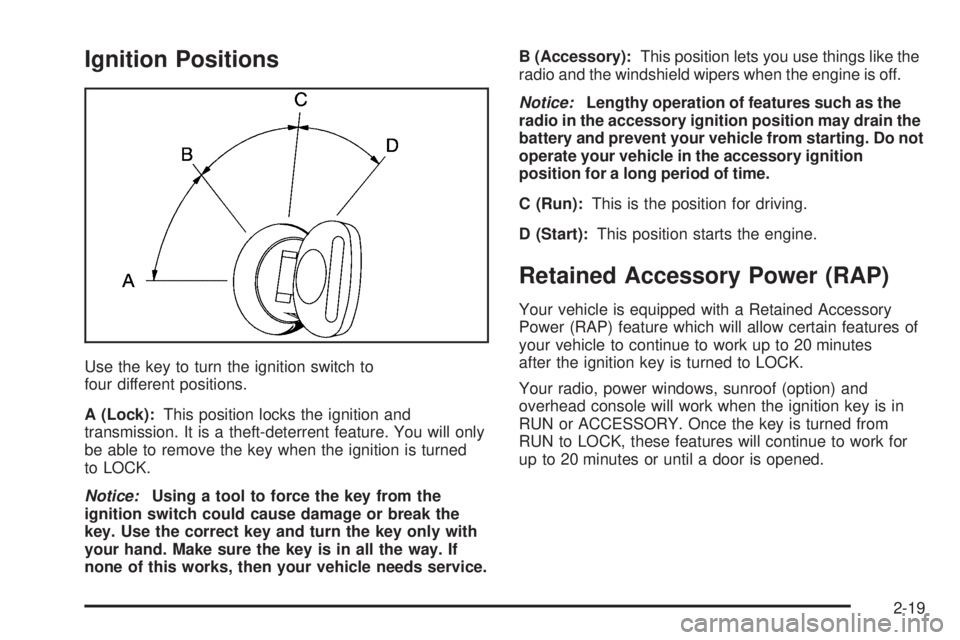
Use the key to turn the ignition switch to
four different positions.
A (Lock):This position locks the ignition and
transmission. It is a theft-deterrent feature. You will only
be able to remove the key when the ignition is turned
to LOCK.
Notice:Using a tool to force the key from the
ignition switch could cause damage or break the
key. Use the correct key and turn the key only with
your hand. Make sure the key is in all the way. If
none of this works, then your vehicle needs service.B (Accessory):This position lets you use things like the
radio and the windshield wipers when the engine is off.
Notice:Lengthy operation of features such as the
radio in the accessory ignition position may drain the
battery and prevent your vehicle from starting. Do not
operate your vehicle in the accessory ignition
position for a long period of time.
C (Run):This is the position for driving.
D (Start):This position starts the engine.
Retained Accessory Power (RAP)
Your vehicle is equipped with a Retained Accessory
Power (RAP) feature which will allow certain features of
your vehicle to continue to work up to 20 minutes
after the ignition key is turned to LOCK.
Your radio, power windows, sunroof (option) and
overhead console will work when the ignition key is in
RUN or ACCESSORY. Once the key is turned from
RUN to LOCK, these features will continue to work for
up to 20 minutes or until a door is opened.
2-19
Page 92 of 502
Starting Your Engine
Move your shift lever to PARK (P) or NEUTRAL (N).
Your engine will not start in any other position — that is
a safety feature. To restart when you are already
moving, use NEUTRAL (N) only.
Notice:Do not try to shift to PARK (P) if your
vehicle is moving. If you do, you could damage the
transmission. Shift to PARK (P) only when your
vehicle is stopped.
1. With your foot off the accelerator pedal, turn the
ignition key to START. When the engine starts,
let go of the key. The idle speed will go down as
your engine gets warm.
Notice:Holding your key in START for longer than
15 seconds at a time will cause your battery to
be drained much sooner. And the excessive heat
can damage your starter motor. Wait about
15 seconds between each try to help avoid draining
your battery or damaging your starter.
2. If it does not start within 10 seconds, push the
accelerator pedal all the way to the �oor, while you
hold the ignition key in START. When the engine
starts, let go of the key and let up on the accelerator
pedal. Wait about 15 seconds between each try.When starting your engine in very cold weather
(below 0°F or−18°C), do this:
1. With your foot off the accelerator pedal, turn the
ignition key to START and hold it there up to
15 seconds. When the engine starts, let go of
the key.
2. If your engine still will not start, or starts but then
stops, it could be �ooded with too much gasoline.
Try pushing your accelerator pedal all the way to the
�oor and holding it there as you hold the key in
START for about three seconds. When the engine
starts, let go of the key and accelerator. If the
vehicle starts brie�y but then stops again, do the
same thing, but this time keep the pedal down
for �ve or six seconds. This clears the extra
gasoline from the engine.
Notice:Your engine is designed to work with the
electronics in your vehicle. If you add electrical
parts or accessories, you could change the way the
engine operates. Before adding electrical equipment,
check with your dealer. If you do not, your engine
might not perform properly.
2-20
Page 95 of 502
Displacement on Demand (DoD)
Your vehicle’s engine may be equipped with
Displacement on Demand (DoD). This system allows
the engine to operate on either four or eight cylinders,
depending on your driving demands.
The system determines when to switch into and out of
the four-cylinder mode by �rst making sure that
certain enabling criteria are met, such as coolant and oil
temperatures, and the transmission being in either
THIRD (3) or FOURTH (4) gear.
When greater power demands are required, such as
accelerating from a stop, passing, or merging onto
a freeway, the system will maintain eight-cylinder
operation. When less power is required, such a cruising
at a constant vehicle speed, the system will
automatically enable the four-cylinder mode, allowing
your vehicle to achieve better fuel economy.
Automatic Transmission Operation
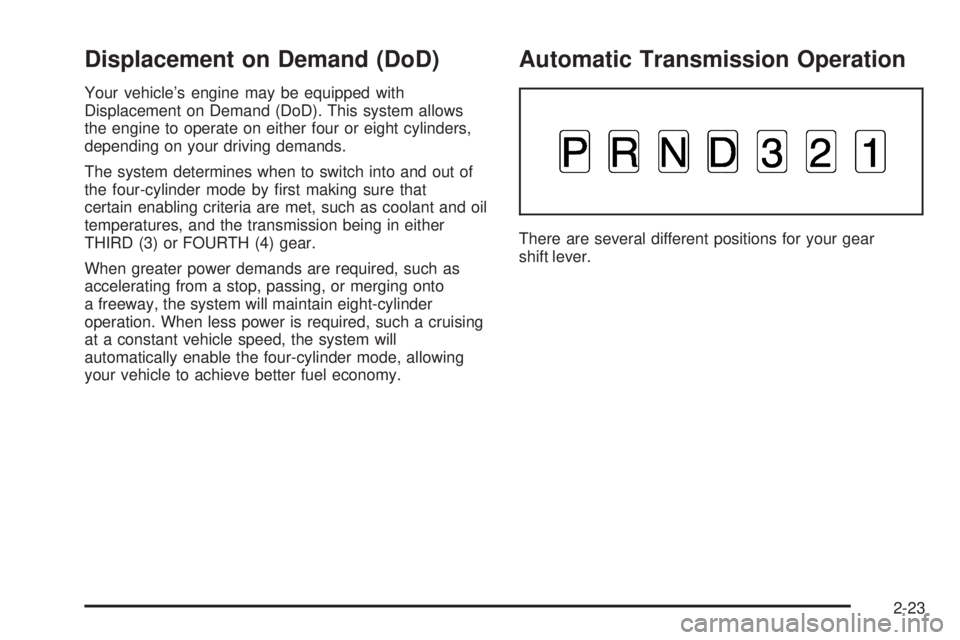
There are several different positions for your gear
shift lever.
2-23
Page 96 of 502
PARK (P):This position locks the rear wheels.
It is the best position to use when you start
the engine because your vehicle cannot move easily.
{CAUTION:
It is dangerous to get out of your vehicle if the
shift lever is not fully in PARK (P) with the
parking brake �rmly set. Your vehicle can roll.
Do not leave your vehicle when the engine is
running unless you have to. If you have left the
engine running, the vehicle can move suddenly.
You or others could be injured. To be sure your
vehicle will not move, even when you are on
fairly level ground, always set your parking
brake and move the shift lever to PARK (P). See
Shifting Into Park (P) on page 2-31. If you are
pulling a trailer, seeTowing a Trailer on
page 4-56.
{CAUTION:
If you have four-wheel drive, your vehicle will
be free to roll — even if your shift lever is in
PARK (P) — if your transfer case is in
NEUTRAL. So, be sure the transfer case is in a
drive gear — not in NEUTRAL. SeeFour-Wheel
Drive on page 2-26. SeeShifting Into Park (P)
on page 2-31.
Ensure the shift lever is fully in PARK (P) before starting
the engine. Your vehicle has an automatic transmission
shift lock control system. You have to fully apply the
regular brakes before you can shift from PARK (P) when
the ignition key is in RUN. If you cannot shift out of
PARK (P), ease pressure on the shift lever, press the
button on the shift lever and push the shift lever all
the way into PARK (P) as you maintain brake
application. Move the shift lever into the gear you wish.
SeeShifting Out of Park (P) on page 2-33.
2-24
Page 97 of 502
REVERSE (R):Use this gear to back up.
Notice:Shifting to REVERSE (R) while your vehicle
is moving forward could damage the transmission.
The repairs would not be covered by your warranty.
Shift to REVERSE (R) only after your vehicle is
stopped.
To rock your vehicle back and forth to get out of snow,
ice or sand without damaging your transmission,
seeIf You Are Stuck: In Sand, Mud, Ice or Snow on
page 4-43.
NEUTRAL (N):In this position, the engine does not
connect with the wheels. To restart when you are
already moving, use NEUTRAL (N) only.
{CAUTION:
Shifting into a drive gear while your engine is
running at high speed is dangerous. Unless
your foot is �rmly on the brake pedal, your
vehicle could move very rapidly. You could
lose control and hit people or objects. Do not
shift into a drive gear while your engine is
running at high speed.Notice:Shifting out of PARK (P) or NEUTRAL (N)
with the engine running at high speed may damage
the transmission. The repairs would not be
covered by your warranty. Be sure the engine is not
running at high speed when shifting your vehicle.
DRIVE (D):This position is for normal driving.
If you need more power for passing, and you are:
Going less than about 35 mph (55 km/h), push the
accelerator pedal about halfway down.
Going about 35 mph (55 km/h) or more, push the
accelerator all the way down.
You will shift down to the next gear and have
more power.
DRIVE (D) can be used when towing a trailer, carrying a
heavy load, driving on steep hills or for off-road
driving. You may want to shift the transmission to
THIRD (3) or, if necessary, a lower gear selection if the
transmission shifts too often.
2-25
Page 98 of 502
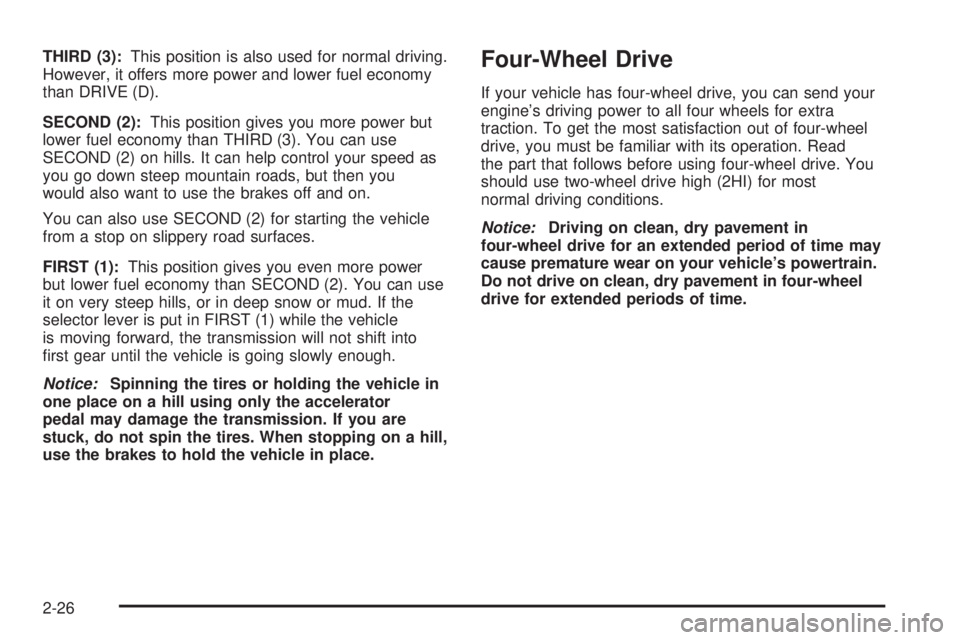
THIRD (3):This position is also used for normal driving.
However, it offers more power and lower fuel economy
than DRIVE (D).
SECOND (2):This position gives you more power but
lower fuel economy than THIRD (3). You can use
SECOND (2) on hills. It can help control your speed as
you go down steep mountain roads, but then you
would also want to use the brakes off and on.
You can also use SECOND (2) for starting the vehicle
from a stop on slippery road surfaces.
FIRST (1):This position gives you even more power
but lower fuel economy than SECOND (2). You can use
it on very steep hills, or in deep snow or mud. If the
selector lever is put in FIRST (1) while the vehicle
is moving forward, the transmission will not shift into
�rst gear until the vehicle is going slowly enough.
Notice:Spinning the tires or holding the vehicle in
one place on a hill using only the accelerator
pedal may damage the transmission. If you are
stuck, do not spin the tires. When stopping on a hill,
use the brakes to hold the vehicle in place.Four-Wheel Drive
If your vehicle has four-wheel drive, you can send your
engine’s driving power to all four wheels for extra
traction. To get the most satisfaction out of four-wheel
drive, you must be familiar with its operation. Read
the part that follows before using four-wheel drive. You
should use two-wheel drive high (2HI) for most
normal driving conditions.
Notice:Driving on clean, dry pavement in
four-wheel drive for an extended period of time may
cause premature wear on your vehicle’s powertrain.
Do not drive on clean, dry pavement in four-wheel
drive for extended periods of time.
2-26
Page 99 of 502
Automatic Transfer Case
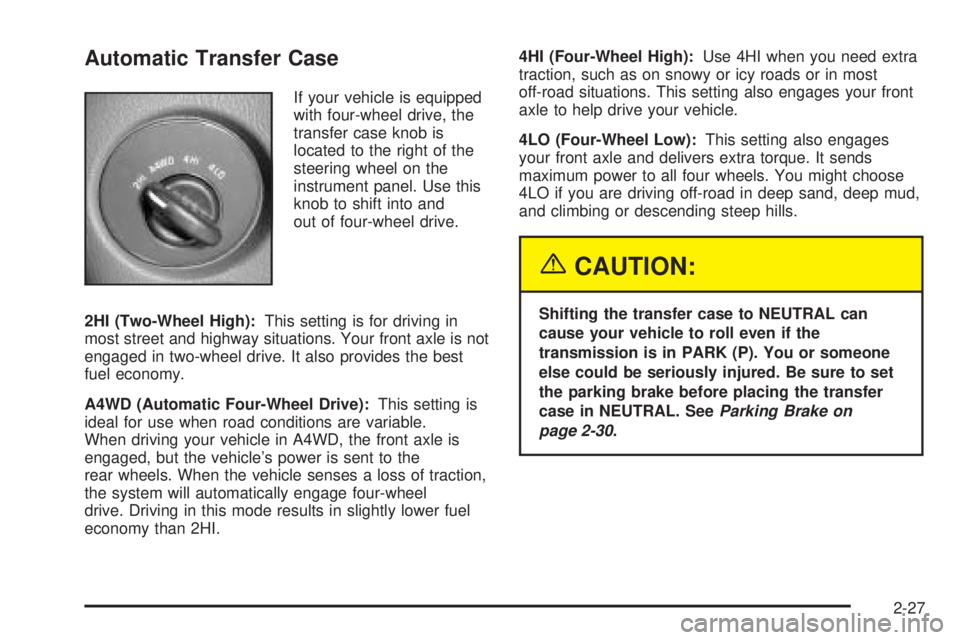
If your vehicle is equipped
with four-wheel drive, the
transfer case knob is
located to the right of the
steering wheel on the
instrument panel. Use this
knob to shift into and
out of four-wheel drive.
2HI (Two-Wheel High):This setting is for driving in
most street and highway situations. Your front axle is not
engaged in two-wheel drive. It also provides the best
fuel economy.
A4WD (Automatic Four-Wheel Drive):This setting is
ideal for use when road conditions are variable.
When driving your vehicle in A4WD, the front axle is
engaged, but the vehicle’s power is sent to the
rear wheels. When the vehicle senses a loss of traction,
the system will automatically engage four-wheel
drive. Driving in this mode results in slightly lower fuel
economy than 2HI.4HI (Four-Wheel High):Use 4HI when you need extra
traction, such as on snowy or icy roads or in most
off-road situations. This setting also engages your front
axle to help drive your vehicle.
4LO (Four-Wheel Low):This setting also engages
your front axle and delivers extra torque. It sends
maximum power to all four wheels. You might choose
4LO if you are driving off-road in deep sand, deep mud,
and climbing or descending steep hills.
{CAUTION:
Shifting the transfer case to NEUTRAL can
cause your vehicle to roll even if the
transmission is in PARK (P). You or someone
else could be seriously injured. Be sure to set
the parking brake before placing the transfer
case in NEUTRAL. SeeParking Brake on
page 2-30.
2-27