stop start GMC ENVOY XL 2005 Owner's Manual
[x] Cancel search | Manufacturer: GMC, Model Year: 2005, Model line: ENVOY XL, Model: GMC ENVOY XL 2005Pages: 480, PDF Size: 11.77 MB
Page 233 of 480
If the cassette tape is not playing correctly, for any other
reason, try a known good cassette.
If any error occurs repeatedly or if an error cannot be
corrected, contact your GM dealer. If the radio displays
an error message, write it down and provide it to
your GM dealer when reporting the problem.
CD Adapter Kits
It is possible to use a portable CD player with the
cassette tape player after activating the bypass feature
on your tape player.
To activate the bypass feature, perform the following
steps:
1. Turn the ignition on.
2. Turn the radio off.
3. Press and hold the TAPE DISC button for
�ve seconds. READY will appear on the display
and the tape symbol on the display will �ash,
indicating the feature is active.
4. Insert the adapter into the cassette tape slot.
It will power up the radio and begin playing.
The override feature will remain active until the eject
button is pressed.
Playing a CD
Insert a CD part way into the slot, label side up. The
player will pull it in and the CD should begin playing.
If you want to insert a CD with the ignition off, �rst press
the eject button or the INFO knob.
If the ignition or radio is turned off with the CD in the
player, it will stay in the player. When the ignition
or radio is turned on, the CD will start playing where it
stopped, if it was the last selected audio source.
When a CD is inserted, the CD symbol will appear on
the display. As each new track starts to play, the
track number will appear on the display.
The CD player can play the smaller 3 inch (8 cm) single
CDs with an adapter ring. Full-size CDs and the
smaller CDs are loaded in the same manner.
If playing a CD-R the sound quality may be reduced
due to CD-R quality, the method of recording, the quality
of the music that has been recorded, and the way the
CD-R has been handled. There may be an increase
in skipping, difficulty in �nding tracks, and/or difficulty in
loading and ejecting. If these problems occur try a
known good CD.
Do not add paper labels to CDs, they could get caught
in the CD player.
If an error appears on the display, see “CD Messages”
later in this section.
3-97
Page 234 of 480
1 PREV (Previous):Press this pushbutton to go to the
beginning of the current track if more than eight seconds
have played. TRACK and the track number will appear on
the display. If this pushbutton is held or pressed more
than once, the player will continue moving backward
through the CD.
2 NEXT:Press this pushbutton to go to the next track.
TRACK and the track number will appear on the
display. If this pushbutton is held or pressed more than
once, the player will continue moving forward through
the CD.
3 REV (Reverse):Press and hold this pushbutton
to quickly reverse within a track. Press and hold this
pushbutton for less than two seconds to reverse at
six times the normal playing speed. Press and hold it
for more than two seconds to reverse at 17 times
the normal playing speed. Release this pushbutton to
play the passage. ET and the elapsed time of the
track will appear on the display.
4 FWD (Forward):Press and hold this pushbutton
to quickly advance within a track. Press and hold this
pushbutton for less than two seconds to advance at
six times the normal playing speed. Press and hold it
for more than two seconds to advance at 17 times
the normal playing speed. Release this pushbutton to
play the passage. ET and the elapsed time of the
track will appear on the display.6 RDM (Random):Press this pushbutton to hear the
tracks in random, rather than sequential, order. RDM ON
will appear on the display. RDM and the track number
will appear on the display when each track starts to play.
Press this pushbutton again to turn off random play.
RDM OFF will appear on the display.
©SEEK¨:Press the left arrow to go to the start of
the current or to the previous track. Press the right
arrow to go to the start of the next track. If either arrow
is pressed more than once, the player will continue
moving backward or forward through the CD.
©SCAN¨:Press and hold either the SCAN or the
TYPE arrows for more than two seconds until SCAN
appears on the display and you hear a beep. The radio
will go to the next track, play for 10 seconds, then go
on to the next track. Press either the SCAN or the TYPE
arrows again, to stop scanning.
INFO (Information):Press this knob to see how long
the current track has been playing. ET and the elapsed
time will appear on the display. To change the default
on the display, track or elapsed time, press the
knob until you see the display you want, then press and
hold the knob for two seconds. The radio will produce
one beep and the selected display will now be the
default.
3-98
Page 244 of 480
Playing a CD
If the ignition or radio is turned off, with a CD in the
player, it will stay in the player. When the ignition
or radio is turned on, the CD will start playing where it
stopped, if it was the last selected audio source.
When a CD is inserted, the CD symbol will appear on
the display. As each new track starts to play, the
track number will appear on the display.
The CD player can play the smaller 3 inch (8 cm) single
CDs with an adapter ring. Full-size CDs and the
smaller CDs are loaded in the same manner.
If playing a CD-R the sound quality may be reduced
due to CD-R quality, the method of recording, the quality
of the music that has been recorded, and the way the
CD-R has been handled. There may be an increase
in skipping, difficulty in �nding tracks, and/or difficulty in
loading and ejecting. If these problems occur try a
known good CD.
Do not add paper labels to CDs, they could get caught
in the CD player.
If an error appears on the display, see “CD Messages”
later in this section.
LOAD:Press this button to load CDs into the CD
player. This CD player will hold up to six CDs.To insert one CD, do the following:
1. Turn the ignition on.
2. Press and release the LOAD button.
3. Wait for the indicator light, located to the right of the
slot, to turn green.
4. Load a CD. Insert the CD part way into the slot,
label side up. The player will pull the CD in.
To insert multiple CDs, do the following:
1. Turn the ignition on.
2. Press and hold the LOAD button for two seconds.
You will hear a beep and the indicator light, located
to the right of the slot, will begin to �ash and
MULTI LOAD # will appear on the display.
3. Once the light stops �ashing and turns green,
INSERT CD # will appear on the display, load
a CD. Insert the CD part way into the slot, label side
up. The player will pull the CD in.
Once the CD is loaded, the indicator light will begin
�ashing again. Once the light stops �ashing and
turns green, you can load another CD. The CD player
takes up to six CDs. Do not try to load more than six.
To load more than one CD but less than six, complete
Steps 1 through 3. When �nished loading CDs,
press the LOAD button to cancel the loading function.
The radio will begin to play the last CD loaded.
If more than one CD has been loaded, a number for
each CD will appear on the display.
3-108
Page 246 of 480
To use repeat, do the following:
To repeat the track you are listening to, press and
release the RPT button. RPT will appear on the
display. Press RPT again to turn off repeat play.
To repeat the CD you are listening to, press and
hold the RPT button for two seconds. RPT will
appear on the display. Press RPT again to turn off
repeat play.
RDM (Random):With random, you can listen to the
tracks in random, rather than sequential, order, on one
CD or on all of the CDs. To use random, do one of
the following:
To play the tracks on the CD you are listening to in
random order, press and release the RDM button.
RANDOM ONE will appear on the display. Press
RDM again to turn off random play.
To play the tracks on all of the CDs that are loaded
in random order, press and hold RDM for more
than two seconds. You will hear a beep and
RANDOM ALL will appear on the display. Press
RDM again to turn off random play.
AUTO EQ (Automatic Equalization):Press AUTO EQ
to select the equalization setting while playing a CD.
The equalization will be stored whenever a CD is played.
For more information on AUTO EQ, see “AUTO EQ”
listed previously in this section.
©SEEK¨:Press the left arrow to go to the start of
the current track, if more than ten seconds have played.
Press the right arrow to go to the next track. If either
arrow is pressed more than once, the player will
continue moving backward or forward through the CD.
©SCAN¨:To scan one CD, press and hold
either SCAN arrow for more than two seconds until
TRACK SCAN appears on the display and you hear a
beep. The radio will go to the next track, play for
10 seconds, then go on to the next track. Press either
SCAN arrow again, to stop scanning.
To scan all loaded CDs, press and hold either SCAN
arrow for more than four seconds until ALL CD
SCAN appears on the display and you hear a beep.
Use this feature to listen to 10 seconds of the �rst track
of each loaded CD. Press either SCAN arrow again,
to stop scanning.
INFO (Information):Press this knob to see how long
the current track has been playing. To change the
default on the display, track or elapsed time, press the
knob until you see the display you want, then press
and hold the knob until you hear a beep. The selected
display will now be the default.
BAND:Press this button to listen to the radio when a
CD is playing. The inactive CD(s) will remain safely
inside the radio for future listening.
3-110
Page 253 of 480

DVD Player Buttons
O(Power):Press this button to turn the RSE system
on and off. The power indicator light will illuminate
when the power is on.
X(Eject):Press this button to eject a DVD or CD.
SRCE (Source):Press this button to switch between
the DVD player and an auxiliary source.
c(Stop):Press this button to stop playing, rewinding,
or fast forwarding a DVD or CD. Press this button
twice to return to the beginning of the DVD.
s(Play/Pause):Press this button to start play of a
DVD or CD. Press this button while a DVD or CD is
playing to pause it. Press this button again to continue
the play of the DVD or CD.
y(Main DVD Menu):Press this button to access
the DVD menu. The DVD menu is different on every
DVD. Use the up, down, left, and right arrow buttons to
move the cursor around the DVD menu. After making
a selection press the enter button. This button only
operates when playing a DVD.
z(Set-up Menu):Press this button to adjust the
color, tint, brightness, contrast, display mode, and
dynamic range compression. The dynamic range
compression feature can be used to reduce loud audio
and increase low audio produced by some DVDs.
To change a feature back to the factory default setting,
press this button to display the feature, then press
and hold this button. The default setting will appear on
the display.
While playing an Audio or DVD disc, press and hold this
button to display and to remove the track and time
information.
n,q,p,o(Menu Navigation Arrows):Use the
arrow buttons to navigate through a menu.
r(Enter):Press this button to select the choices
that are highlighted in any menu.
3-117
Page 254 of 480
Playing a Disc
To play a disc, gently insert the disc with the label side
up into the loading slot. The DVD player will continue
loading the disc and the player will automatically start,
if the vehicle is in RUN, ACCESSORY, or when
RAP is active.
If a disc is already in the player, press the play/pause
button on the DVD player faceplate or on the remote
control.
Some DVDs will not allow fast forwarding or skipping
of the copyright information or the previews. Some
DVDs will begin playing after the previews have �nished.
If the DVD does not begin to play the main title, refer
to the on-screen instructions.
Stopping and Resuming Playback
To stop playing a disc, press and release the stop
button on the DVD player faceplate or the remote
control.
To resume playback, press the play/pause button
on the DVD player faceplate or the remote control. The
movie should resume play from where it was last
stopped, if the disc has not been ejected and the stop
button has not been pressed twice. If the disc has been
ejected or if the stop button has been pressed twice,
the disc will resume play at the beginning.
Ejecting a Disc
Press the eject button on the DVD player faceplate to
eject the disc. There is not an eject button on the remote
control.
If a disc is ejected from the player, but is not removed,
the DVD player will reload the disc after a short
period of time. The disc will be stored in the DVD player.
The DVD player will not resume play of the disc
automatically.
Remote Control
To use the remote control, aim it at the transmitter
window below the video screen and press the desired
button. Direct sunlight or very bright light may affect the
ability of the RSE system to receive signals from the
remote control. If the remote control does not seem to
be working, the batteries may need to be replaced.
See “Battery Replacement” later in this section.
Objects blocking the line of sight may also affect the
function of the remote control.
Notice:Storing the remote control in a hot area or
in direct sunlight may damage it, and the repairs
would not be covered by your warranty. Keep
the remote control stored in a cool, dry place.
To extend the life of the batteries, the remote control
does not have a press and hold feature.
3-118
Page 255 of 480
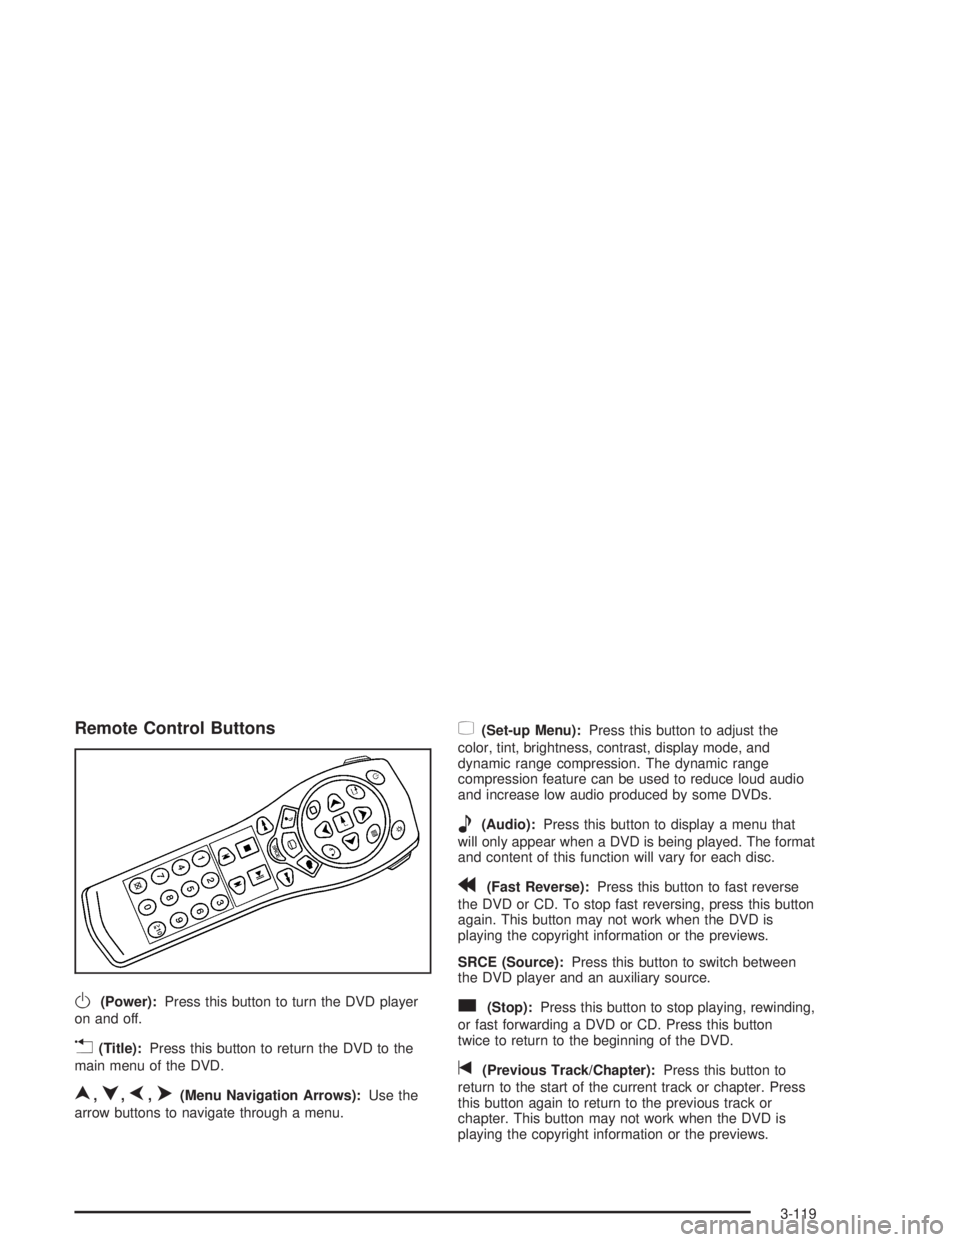
Remote Control Buttons
O(Power):Press this button to turn the DVD player
on and off.
v(Title):Press this button to return the DVD to the
main menu of the DVD.
n,q,p,o(Menu Navigation Arrows):Use the
arrow buttons to navigate through a menu.
z(Set-up Menu):Press this button to adjust the
color, tint, brightness, contrast, display mode, and
dynamic range compression. The dynamic range
compression feature can be used to reduce loud audio
and increase low audio produced by some DVDs.
e(Audio):Press this button to display a menu that
will only appear when a DVD is being played. The format
and content of this function will vary for each disc.
r(Fast Reverse):Press this button to fast reverse
the DVD or CD. To stop fast reversing, press this button
again. This button may not work when the DVD is
playing the copyright information or the previews.
SRCE (Source):Press this button to switch between
the DVD player and an auxiliary source.
c(Stop):Press this button to stop playing, rewinding,
or fast forwarding a DVD or CD. Press this button
twice to return to the beginning of the DVD.
t(Previous Track/Chapter):Press this button to
return to the start of the current track or chapter. Press
this button again to return to the previous track or
chapter. This button may not work when the DVD is
playing the copyright information or the previews.
3-119
Page 256 of 480
1 through 0 (Numeric Keypad):The numeric keypad
provides you with the capability of direct chapter,
title, and track number selection.
}10 (Double Digit Entries):Press this button to
select chapter, title, and track numbers greater than 9.
Press this button before inputting the number.
\(Clear):Press this button within three seconds after
inputting a number to clear the number(s).
P(Illumination):Press this button to turn the remote
control backlight on. The backlight will time out after
about 7 to 10 seconds if no other button is pressed while
the backlight is on.
y(Main DVD Menu):Press this button to access the
DVD menu. The DVD menu is different on every
DVD. Use the up, down, left, and right arrow buttons to
move the cursor around the DVD menu. After making
a selection press the enter button. This button only
operates when playing a DVD.
r(Enter):Press this button to select the choices
that are highlighted in any menu.
q(Return):Press this button to exit the current
active menu and return to the previous menu. This
button will operate only when a DVD is playing and a
menu is active.
|(Camera Angle):Press this button to change
camera angles on DVDs that have this feature when a
DVD is playing. The format and content of this
function will vary for each disc.
{(Subtitle):Press this button to turn on subtitles
and to move through subtitle options when a DVD
is playing. The format and content of this function will
vary for each disc.
[(Fast Forward):Press this button to fast forward
the DVD or CD. To stop fast forwarding, press this
button again. This button may not work when the DVD
is playing the copyright information or the previews.
s(Play/Pause):Press this button to start play of a
DVD or CD. Press this button while a DVD or CD is
playing to pause it. Press this button again to continue
the play of the DVD or CD.
When the DVD is playing, press the pause button then
press the fast forward button. The DVD will continue
playing in a slow play mode. To cancel slow play mode,
press the play/pause button.
u(Next Track/Chapter):Press this button to advance
to the beginning of the next track or chapter. This
button may not work when the DVD is playing the
copyright information or the previews.
3-120
Page 258 of 480
Problem Recommended Action
In auxiliary mode, the
picture moves or scrolls.Check the auxiliary input
connections at both
devices.
Change the Video Format
to PAL or NTSC. See
“Stereo RCA Jacks”
previously for how to
change the video format.
The language in the
audio or on the screen
is wrong.Check the audio or
language selection in
the main DVD menu.
The remote control
does not work.Check to make sure there
is no obstruction between
the remote control and the
transmitter window.
Check the batteries to
make sure they are not
dead or installed
incorrectly.
The parental control
button might have been
turned on. The power
indicator light will �ash.Problem Recommended Action
After stopping the
player, I push Play but
sometimes the DVD
starts where I left off
and sometimes at the
beginning.If the stop button was
pressed one time, the
DVD player will resume
playing where the DVD
was stopped. If the stop
button was pressed two
times the DVD player will
begin to play from the
beginning of the DVD.
The auxiliary source is
running but there is no
picture or sound.Check that the DVD
player is in the auxiliary
source mode.
Check the auxiliary input
connections at both
devices.
My disc is stuck in the
player. The Load/Eject
button does not work.Turn the DVD power off,
then on, then press the
load/eject button on the
DVD player.
Do not attempt to forcibly
remove the disc from the
DVD player. This could
permanently damage the
disc and DVD player.
3-122
Page 272 of 480
Avoid needless heavy braking. Some people drive
in spurts — heavy acceleration followed by heavy
braking — rather than keeping pace with traffic. This is
a mistake. Your brakes may not have time to cool
between hard stops. Your brakes will wear out much
faster if you do a lot of heavy braking. If you keep pace
with the traffic and allow realistic following distances,
you will eliminate a lot of unnecessary braking.
That means better braking and longer brake life.
If your engine ever stops while you are driving, brake
normally but do not pump your brakes. If you do,
the pedal may get harder to push down. If your engine
stops, you will still have some power brake assist.
But you will use it when you brake. Once the power
assist is used up, it may take longer to stop and
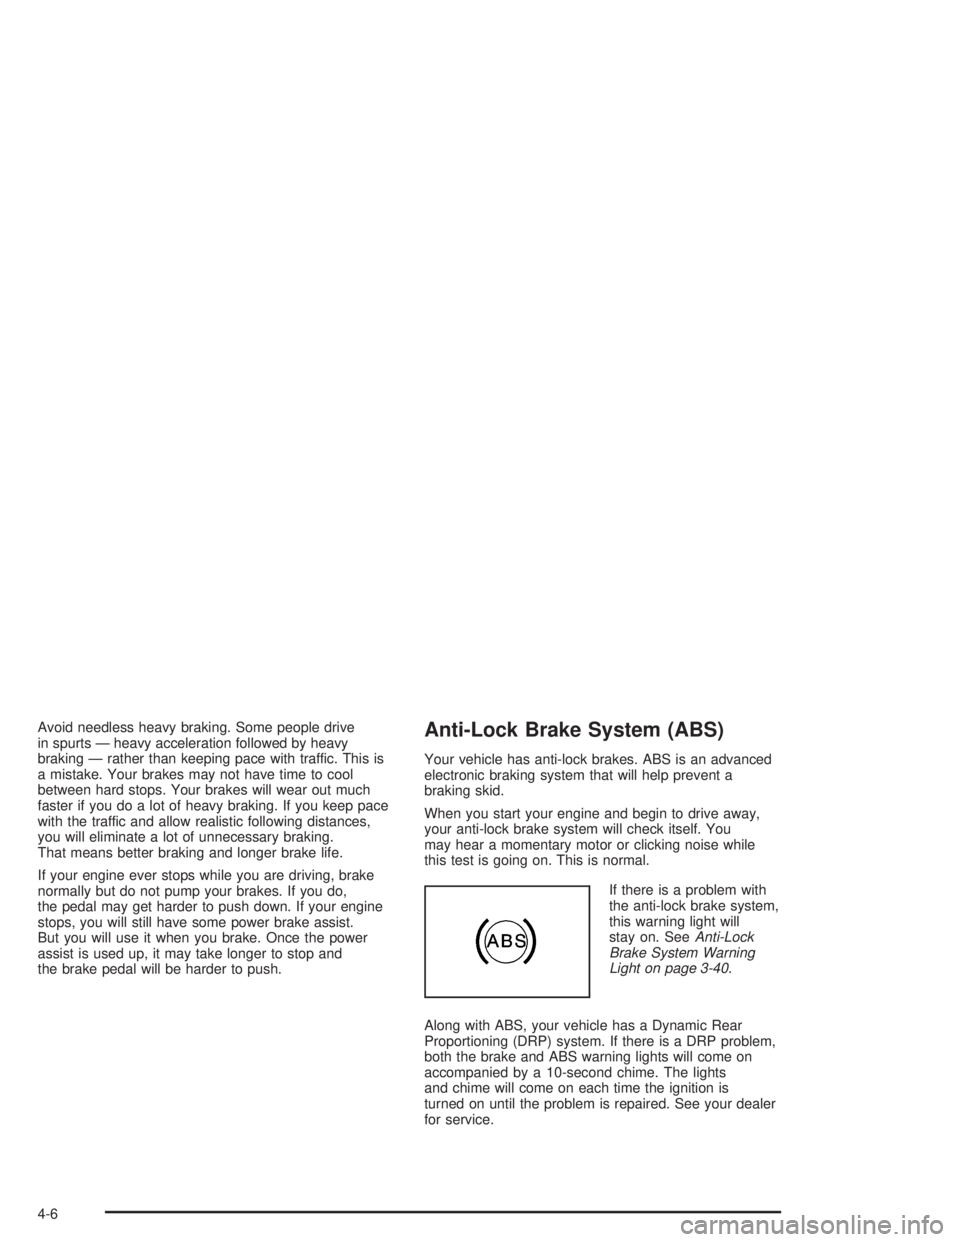
the brake pedal will be harder to push.Anti-Lock Brake System (ABS)
Your vehicle has anti-lock brakes. ABS is an advanced
electronic braking system that will help prevent a
braking skid.
When you start your engine and begin to drive away,
your anti-lock brake system will check itself. You
may hear a momentary motor or clicking noise while
this test is going on. This is normal.
If there is a problem with
the anti-lock brake system,
this warning light will
stay on. SeeAnti-Lock
Brake System Warning
Light on page 3-40.
Along with ABS, your vehicle has a Dynamic Rear
Proportioning (DRP) system. If there is a DRP problem,
both the brake and ABS warning lights will come on
accompanied by a 10-second chime. The lights
and chime will come on each time the ignition is
turned on until the problem is repaired. See your dealer
for service.
4-6