5-3 GMC ENVOY XUV 2004 User Guide
[x] Cancel search | Manufacturer: GMC, Model Year: 2004, Model line: ENVOY XUV, Model: GMC ENVOY XUV 2004Pages: 460, PDF Size: 2.99 MB
Page 345 of 460

3. Fill the radiator with the proper DEX-COOLž
coolant mixture, up to the base of the ®ller
neck. SeeEngine Coolant on page 5-23for more
information about the proper coolant mixture.4. Then ®ll the coolant recovery tank to the FULL
COLD mark.
5. Put the cap back on the coolant recovery tank, but
leave the radiator pressure cap off.
5-33
Page 346 of 460
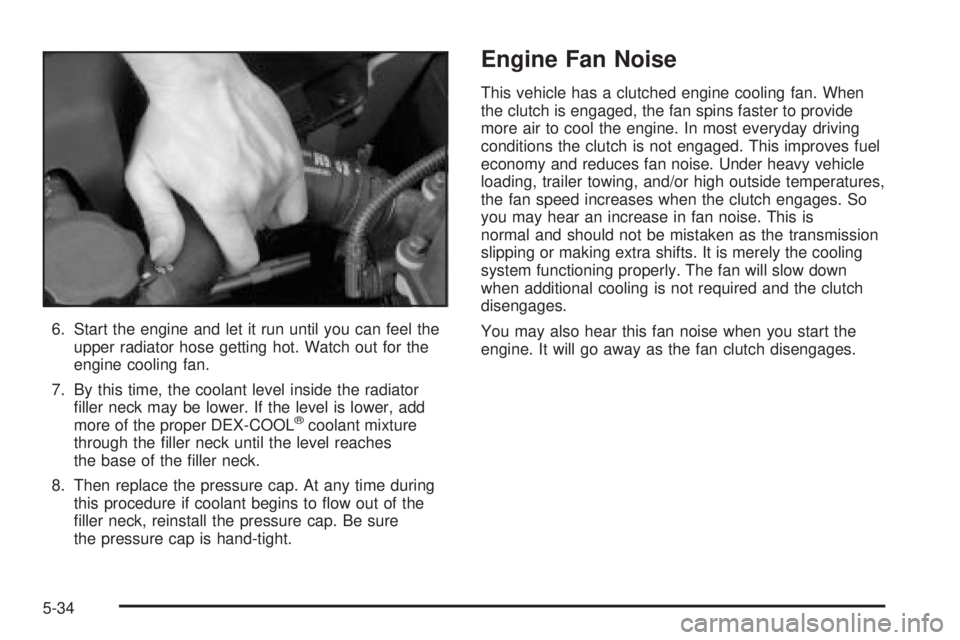
6. Start the engine and let it run until you can feel the
upper radiator hose getting hot. Watch out for the
engine cooling fan.
7. By this time, the coolant level inside the radiator
®ller neck may be lower. If the level is lower, add
more of the proper DEX-COOL
žcoolant mixture
through the ®ller neck until the level reaches
the base of the ®ller neck.
8. Then replace the pressure cap. At any time during
this procedure if coolant begins to ¯ow out of the
®ller neck, reinstall the pressure cap. Be sure
the pressure cap is hand-tight.
Engine Fan Noise
This vehicle has a clutched engine cooling fan. When
the clutch is engaged, the fan spins faster to provide
more air to cool the engine. In most everyday driving
conditions the clutch is not engaged. This improves fuel
economy and reduces fan noise. Under heavy vehicle
loading, trailer towing, and/or high outside temperatures,
the fan speed increases when the clutch engages. So
you may hear an increase in fan noise. This is
normal and should not be mistaken as the transmission
slipping or making extra shifts. It is merely the cooling
system functioning properly. The fan will slow down
when additional cooling is not required and the clutch
disengages.
You may also hear this fan noise when you start the
engine. It will go away as the fan clutch disengages.
5-34
Page 347 of 460
Power Steering Fluid
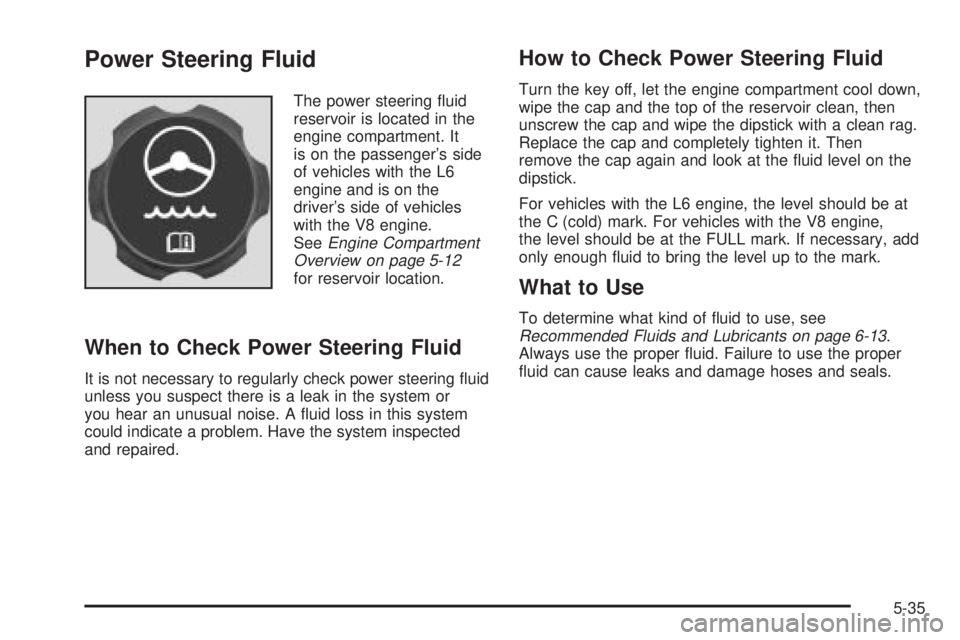
The power steering ¯uid
reservoir is located in the
engine compartment. It
is on the passenger's side
of vehicles with the L6
engine and is on the
driver's side of vehicles
with the V8 engine.
See
Engine Compartment
Overview on page 5-12
for reservoir location.
When to Check Power Steering Fluid
It is not necessary to regularly check power steering ¯uid
unless you suspect there is a leak in the system or
you hear an unusual noise. A ¯uid loss in this system
could indicate a problem. Have the system inspected
and repaired.
How to Check Power Steering Fluid
Turn the key off, let the engine compartment cool down,
wipe the cap and the top of the reservoir clean, then
unscrew the cap and wipe the dipstick with a clean rag.
Replace the cap and completely tighten it. Then
remove the cap again and look at the ¯uid level on the
dipstick.
For vehicles with the L6 engine, the level should be at
the C (cold) mark. For vehicles with the V8 engine,
the level should be at the FULL mark. If necessary, add
only enough ¯uid to bring the level up to the mark.
What to Use
To determine what kind of ¯uid to use, seeRecommended Fluids and Lubricants on page 6-13.
Always use the proper ¯uid. Failure to use the proper
¯uid can cause leaks and damage hoses and seals.
5-35
Page 348 of 460
Windshield Washer Fluid
What to Use
When you need windshield washer ¯uid, be sure to read
the manufacturer's instructions before use. If you will
be operating your vehicle in an area where the
temperature may fall below freezing, use a ¯uid that has
sufficient protection against freezing.
Adding Washer Fluid
Open the cap with the
washer symbol on it. Add
washer ¯uid until the
tank is full. See
Engine
Compartment Overview on
page 5-12
for reservoir
location.
Notice:
·When using concentrated washer ¯uid,
follow the manufacturer's instructions for
adding water.
·Do not mix water with ready-to-use washer ¯uid.
Water can cause the solution to freeze and
damage your washer ¯uid tank and other parts
of the washer system. Also, water does not
clean as well as washer ¯uid.
·Fill your washer ¯uid tank only three-quarters
full when it is very cold. This allows for
expansion if freezing occurs, which could
damage the tank if it is completely full.
·Do not use engine coolant (antifreeze) in your
windshield washer. It can damage your washer
system and paint.
5-36
Page 349 of 460
Brakes
Brake Fluid
Your brake master cylinder reservoir is ®lled with DOT-3
brake ¯uid. SeeEngine Compartment Overview on
page 5-12for the location of the reservoir.
There are only two reasons why the brake ¯uid level in
the reservoir might go down. The ®rst is that the
brake ¯uid goes down to an acceptable level during
normal brake lining wear. When new linings are put in,
the ¯uid level goes back up. The other reason isthat ¯uid is leaking out of the brake system. If it is, you
should have your brake system ®xed, since a leak
means that sooner or later your brakes will not work
well, or will not work at all.
So, it is not a good idea to ªtop offº your brake ¯uid.
Adding brake ¯uid will not correct a leak. If you add ¯uid
when your linings are worn, then you will have too
much ¯uid when you get new brake linings. You should
add (or remove) brake ¯uid, as necessary, only when
work is done on the brake hydraulic system.
{CAUTION:
If you have too much brake ¯uid, it can spill on
the engine. The ¯uid will burn if the engine is
hot enough. You or others could be burned,
and your vehicle could be damaged. Add brake
¯uid only when work is done on the brake
hydraulic system. See ªChecking Brake Fluidº
in this section.
Refer to the Maintenance Schedule to determine when
to check your brake ¯uid. See
Scheduled Maintenance
on page 6-4.
5-37
Page 350 of 460

Checking Brake Fluid
You can check the brake ¯uid without taking off the cap.
Just look at the brake ¯uid
reservoir. The ¯uid level
should be above MIN. If it
is not, have your brake
system checked to
see if there is a leak.
After work is done on the brake hydraulic system,
make sure the level is above the MIN but not over the
MAX mark.
What to Add
When you do need brake ¯uid, use only DOT-3 brake
¯uid. Use new brake ¯uid from a sealed container
only. See
Recommended Fluids and Lubricants on
page 6-13.Always clean the brake ¯uid reservoir cap and the area
around the cap before removing it. This will help
keep dirt from entering the reservoir.
{CAUTION:
With the wrong kind of ¯uid in your brake
system, your brakes may not work well, or
they may not even work at all. This could
cause a crash. Always use the proper
brake ¯uid.
Notice:
·Using the wrong ¯uid can badly damage brake
system parts. For example, just a few drops of
mineral-based oil, such as engine oil, in your
brake system can damage brake system
parts so badly that they will have to be replaced.
Do not let someone put in the wrong kind
of ¯uid.
·If you spill brake ¯uid on your vehicle's painted
surfaces, the paint ®nish can be damaged. Be
careful not to spill brake ¯uid on your vehicle. If
you do, wash it off immediately. See
Appearance
Care on page 5-83.
5-38
Page 351 of 460
Brake Wear
Your vehicle has four-wheel disc brakes.
Disc brake pads have built-in wear indicators that make
a high-pitched warning sound when the brake pads
are worn and new pads are needed. The sound
may come and go or be heard all the time your vehicle
is moving (except when you are pushing on the
brake pedal ®rmly).
{CAUTION:
The brake wear warning sound means that
soon your brakes will not work well. That
could lead to an accident. When you hear the
brake wear warning sound, have your vehicle
serviced.
Notice:Continuing to drive with worn-out brake
pads could result in costly brake repair.Some driving conditions or climates may cause a brake
squeal when the brakes are ®rst applied or lightly
applied. This does not mean something is wrong with
your brakes.
Properly torqued wheel nuts are necessary to help
prevent brake pulsation. When tires are rotated, inspect
brake pads for wear and evenly tighten wheel nuts in
the proper sequence to GM torque speci®cations.
Brake linings should always be replaced as complete
axle sets.
Brake Pedal Travel
See your dealer if the brake pedal does not return to
normal height, or if there is a rapid increase in
pedal travel. This could be a sign of brake trouble.
Brake Adjustment
Every time you make a brake stop, your disc brakes
adjust for wear.
5-39
Page 445 of 460
A
Accessory In¯ator...........................................5-68
Accessory Power Outlets.................................3-19
Adding a Snow Plow or Similar Equipment.........4-56
Adding Washer Fluid.......................................5-36
Additional Program Information........................... 7-9
Additives, Fuel................................................. 5-6
Add-On Electrical Equipment............................5-92
Adjustable Throttle and Brake Pedal..................2-27
Adjusting the Speakers
(Balance/Fade)............................3-65, 3-77, 3-92
After Off-Road Driving.....................................4-28
Air Bag
Readiness Light..........................................3-34
Air Bag Systems.............................................1-50
How Does an Air Bag Restrain?....................1-56
Servicing Your Air Bag-Equipped Vehicle.........1-59
What Makes an Air Bag In¯ate?....................1-56
What Will You See After an Air Bag In¯ates?......1-57
When Should an Air Bag In¯ate?...................1-55
Where Are the Air Bags?..............................1-53
Air Cleaner/Filter, Engine.................................5-20
Airbag Sensing and Diagnostic Module (SDM)...... 7-9
All Overseas Locations...................................... 7-4
AM .............................................................3-119
Antenna, Fixed Mast......................................3-121
Antenna, XMŸ Satellite Radio Antenna System . . . 3-121
Anti-lock Brake System..................................... 4-6Anti-Lock Brake, System Warning Light..............3-37
Appearance Care............................................5-83
Care of Safety Belts....................................5-87
Chemical Paint Spotting...............................5-90
Cleaning the Inside of Your Vehicle................5-84
Cleaning the Outside of Your Vehicle..............5-87
Finish Damage............................................5-89
Sheet Metal Damage...................................5-89
Underbody Maintenance...............................5-90
Vehicle Care/Appearance Materials................5-90
Weatherstrips..............................................5-87
Approaching a Hill..........................................4-20
Ashtrays........................................................3-19
Audio Output................................................3-113
Audio System(s).............................................3-61
Audio Steering Wheel Controls....................3-118
Care of Your Cassette Tape Player...............3-119
Care of Your CD and DVD Player................3-121
Care of Your CDs and DVDs.......................3-120
Chime Level Adjustment.............................3-121
Fixed Mast Antenna...................................3-121
Navigation/Radio System.............................3-104
Radio Personalization.................................3-117
Radio with Cassette and CD.........................3-74
Radio with CD............................................3-62
Radio with Six-Disc CD................................3-89
Rear Seat Audio (RSA)...............................3-116
Setting the Time..........................................3-61
Theft-Deterrent Feature...............................3-117
1
Page 446 of 460
Audio System(s) (cont.)
Understanding Radio Reception...................3-119
XMŸ Satellite Radio Antenna System...........3-121
Automatic Headlamp System............................3-14
Automatic Transfer Case..................................2-32
Automatic Transmission
Fluid..........................................................5-21
Operation...................................................2-29
B
Backglass Wiper Blade Replacement.................5-52
Backing Up....................................................4-63
Battery..........................................................5-40
BATTERY NOT CHARGING.............................3-56
Battery Replacement......................................... 2-6
Battery Run-Down Protection............................3-18
Before Leaving on a Long Trip.........................4-35
Before You Drive...........................................3-104
Before You Go Off-Roading..............................4-15
Brake
Parking......................................................2-35
System Warning Light..................................3-36
Brake Adjustment............................................5-39
Brake Fluid....................................................5-37
Brake Pedal, Throttle.......................................2-27
Brake Pedal Travel.........................................5-39
Brake Wear...................................................5-39
Brakes..........................................................5-37Braking........................................................... 4-5
Braking in Emergencies..................................... 4-8
Break-In, New Vehicle.....................................2-24
Bulb Replacement...........................................5-48
Headlamps.................................................5-48
Replacement Bulbs......................................5-50
Taillamps and Turn Signal Lamps..................5-49
Buying New Tires...........................................5-64
C
California Fuel.................................................. 5-5
Canada........................................................... 7-4
Canadian Owners................................................ ii
Canadian Roadside Assistance........................... 7-7
Capacities and Speci®cations..........................5-101
Carbon Monoxide...........4-39, 4-56, 2-12, 2-13, 2-39
Care of
Safety Belts................................................5-87
Your Cassette Tape Player..........................3-119
Your CD and DVD Player...........................3-121
Your CDs and DVDs..................................3-120
Cargo Area, All-Weather..................................2-52
Cargo Area Floor Drains..................................2-52
Cargo Tie Downs............................................2-53
Cassette Tape Messages.................................3-85
CD Adapter Kits.............................................3-85
CD Messages...............................3-73, 3-88, 3-103
Chains, Tires..................................................5-68
2
Page 447 of 460
Charging System Light....................................3-35
Check
Engine Light...............................................3-38
Gages Warning Light...................................3-44
CHECK WASHER FLUID.................................3-57
Checking Brake Fluid......................................5-38
Checking Coolant............................................5-25
Checking Engine Oil........................................5-15
Checking Things Under the Hood......................5-10
Checking Your Restraint Systems......................1-60
Chemical Paint Spotting...................................5-90
Child Restraints
Child Restraint Systems...............................1-35
Infants and Young Children...........................1-31
Lower Anchorages and Top Tethers for
Children (LATCH System)..........................1-40
Older Children.............................................1-29
Securing a Child Restraint Designed for the
LATCH System........................................1-43
Securing a Child Restraint in a Rear Outside
Seat Position...........................................1-44
Securing a Child Restraint in the Center
Seat Position...........................................1-46
Securing a Child Restraint in the Right
Front Seat Position...................................1-47
Top Strap...................................................1-38
Top Strap Anchor Location............................1-40
Where to Put the Restraint...........................1-38Chime Level Adjustment.................................3-121
Cigarette Lighter.............................................3-19
Cleaning
Inside of Your Vehicle..................................5-84
Outside of Your Vehicle................................5-87
Underbody Maintenance...............................5-90
Video Screen............................................3-121
Weatherstrips..............................................5-87
Cleaning Aluminum Wheels..............................5-89
Cleaning Exterior Lamps/Lenses.......................5-88
Cleaning Fabric/Carpet....................................5-84
Cleaning Glass Surfaces..................................5-86
Cleaning Interior Plastic Components.................5-86
Cleaning Leather............................................5-86
Cleaning the Top of the Instrument Panel...........5-86
Cleaning the Windshield, Backglass and Wiper
Blades.......................................................5-88
Cleaning Tires................................................5-89
Cleaning Vinyl................................................5-85
CLEAR ROOF OBSTRUCTION.........................3-59
Climate Control System
Climate Controls Personalization....................3-29
Dual..........................................................3-20
Dual Automatic............................................3-23
Rear..........................................................3-28
CLOSE OR OPEN THE ROOF.........................3-59
CLOSE THE ROOF........................................3-59
CLOSE THE TAILGATE...................................3-60
3