stop start GMC ENVOY XUV 2004 Owner's Guide
[x] Cancel search | Manufacturer: GMC, Model Year: 2004, Model line: ENVOY XUV, Model: GMC ENVOY XUV 2004Pages: 460, PDF Size: 2.99 MB
Page 270 of 460
Q:Am I likely to stall when going downhill?
A:It is much more likely to happen going uphill. But if
it happens going downhill, here is what to do.
·Stop your vehicle by applying the regular brakes.
Apply the parking brake.
·Shift to PARK (P) and, while still braking, restart the
engine.
·Shift back to a low gear, release the parking brake,
and drive straight down.
·If the engine will not start, get out and get help.
Driving Across an Incline
Sooner or later, an off-road trail will probably go across
the incline of a hill. If this happens, you have to
decide whether to try to drive across the incline. Here
are some things to consider:
·A hill that can be driven straight up or down may be
too steep to drive across. When you go straight up
or down a hill, the length of the wheel base (the
distance from the front wheels to the rear wheels)reduces the likelihood the vehicle will tumble end
over end. But when you drive across an incline, the
much more narrow track width (the distance
between the left and right wheels) may not prevent
the vehicle from tilting and rolling over. Also,
driving across an incline puts more weight on the
downhill wheels. This could cause a downhill
slide or a rollover.
·Surface conditions can be a problem when you
drive across a hill. Loose gravel, muddy spots,
or even wet grass can cause your tires to slip
sideways, downhill. If the vehicle slips sideways,
it can hit something that will trip it (a rock, a rut, etc.)
and roll over.
·Hidden obstacles can make the steepness of the
incline even worse. If you drive across a rock
with the uphill wheels, or if the downhill wheels drop
into a rut or depression, your vehicle can tilt
even more.
For reasons like these, you need to decide carefully
whether to try to drive across an incline. Just because
the trail goes across the incline does not mean you have
to drive it. The last vehicle to try it might have
rolled over.
4-24
Page 272 of 460
Stalling on an Incline
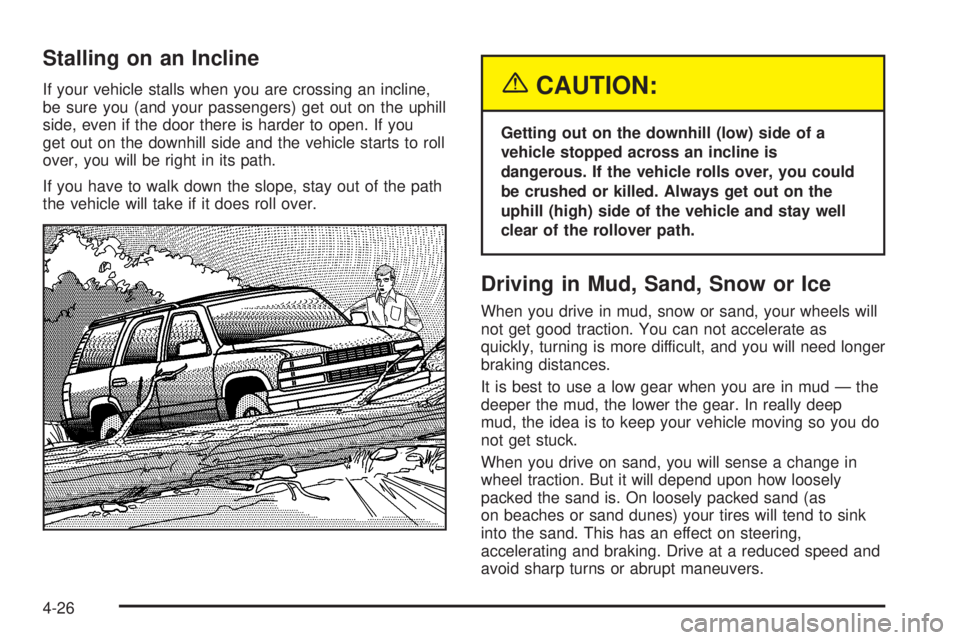
If your vehicle stalls when you are crossing an incline,
be sure you (and your passengers) get out on the uphill
side, even if the door there is harder to open. If you
get out on the downhill side and the vehicle starts to roll
over, you will be right in its path.
If you have to walk down the slope, stay out of the path
the vehicle will take if it does roll over.{CAUTION:
Getting out on the downhill (low) side of a
vehicle stopped across an incline is
dangerous. If the vehicle rolls over, you could
be crushed or killed. Always get out on the
uphill (high) side of the vehicle and stay well
clear of the rollover path.
Driving in Mud, Sand, Snow or Ice
When you drive in mud, snow or sand, your wheels will
not get good traction. You can not accelerate as
quickly, turning is more difficult, and you will need longer
braking distances.
It is best to use a low gear when you are in mud Ð the
deeper the mud, the lower the gear. In really deep
mud, the idea is to keep your vehicle moving so you do
not get stuck.
When you drive on sand, you will sense a change in
wheel traction. But it will depend upon how loosely
packed the sand is. On loosely packed sand (as
on beaches or sand dunes) your tires will tend to sink
into the sand. This has an effect on steering,
accelerating and braking. Drive at a reduced speed and
avoid sharp turns or abrupt maneuvers.
4-26
Page 273 of 460
Hard packed snow and ice offer the worst tire traction.
On these surfaces, it is very easy to lose control.
On wet ice, for example, the traction is so poor that you
will have difficulty accelerating. And if you do get
moving, poor steering and difficult braking can cause
you to slide out of control.
{CAUTION:
Driving on frozen lakes, ponds or rivers can be
dangerous. Underwater springs, currents
under the ice, or sudden thaws can weaken the
ice. Your vehicle could fall through the ice and
you and your passengers could drown. Drive
your vehicle on safe surfaces only.
Driving in Water
Heavy rain can mean ¯ash ¯ooding, and ¯ood waters
demand extreme caution.
Find out how deep the water is before you drive through
it. If it is deep enough to cover your wheel hubs,
axles or exhaust pipe, do not try it Ð you probably will
not get through. Also, water that deep can damage
your axle and other vehicle parts.If the water is not too deep, drive slowly through it.
At faster speeds, water splashes on your ignition system
and your vehicle can stall. Stalling can also occur if
you get your tailpipe under water. And, as long as your
tailpipe is under water, you will never be able to
start your engine. When you go through water,
remember that when your brakes get wet, it may take
you longer to stop.
{CAUTION:
Driving through rushing water can be
dangerous. Deep water can sweep your vehicle
downstream and you and your passengers
could drown. If it is only shallow water, it can
still wash away the ground from under your
tires, and you could lose traction and roll the
vehicle over. Do not drive through rushing
water.
See
Driving in Rain and on Wet Roads on page 4-30for
more information on driving through water.
4-27
Page 276 of 460

Driving in Rain and on Wet Roads
Rain and wet roads can mean driving trouble. On a wet
road, you can not stop, accelerate or turn as well
because your tire-to-road traction is not as good as on
dry roads. And, if your tires do not have much tread
left, you will get even less traction. It is always wise to
go slower and be cautious if rain starts to fall while
you are driving. The surface may get wet suddenly when
your re¯exes are tuned for driving on dry pavement.The heavier the rain, the harder it is to see. Even if your
windshield wiper blades are in good shape, a heavy
rain can make it harder to see road signs and
traffic signals, pavement markings, the edge of the road
and even people walking.
It is wise to keep your wiping equipment in good shape
and keep your windshield washer tank ®lled with
washer ¯uid. Replace your windshield wiper inserts
when they show signs of streaking or missing areas on
the windshield, or when strips of rubber start to
separate from the inserts.
4-30
Page 281 of 460
Once you are moving on the freeway, make certain you
allow a reasonable following distance. Expect to
move slightly slower at night.
When you want to leave the freeway, move to the
proper lane well in advance. If you miss your exit, do
not, under any circumstances, stop and back up. Drive
on to the next exit.
The exit ramp can be curved, sometimes quite sharply.
The exit speed is usually posted.
Reduce your speed according to your speedometer, not
to your sense of motion. After driving for any distance
at higher speeds, you may tend to think you are
going slower than you actually are.
Before Leaving on a Long Trip
Make sure you are ready. Try to be well rested. If you
must start when you are not fresh Ð such as after
a day's work Ð do not plan to make too many miles that
®rst part of the journey. Wear comfortable clothing
and shoes you can easily drive in.Is your vehicle ready for a long trip? If you keep it
serviced and maintained, it is ready to go. If it needs
service, have it done before starting out. Of course, you
will ®nd experienced and able service experts in GM
dealerships all across North America. They will be ready
and willing to help if you need it.
Here are some things you can check before a trip:
·Windshield Washer Fluid:Is the reservoir full? Are
all windows clean inside and outside?
·Wiper Blades:Are they in good shape?
·Fuel, Engine Oil, Other Fluids:Have you checked
all levels?
·Lamps:Are they all working? Are the lenses clean?
·Tires:They are vitally important to a safe,
trouble-free trip. Is the tread good enough for
long-distance driving? Are the tires all in¯ated to the
recommended pressure?
·Weather Forecasts:What is the weather outlook
along your route? Should you delay your trip a
short time to avoid a major storm system?
·Maps:Do you have up-to-date maps?
4-35
Page 301 of 460

Electronically Controlled Air
Suspension System
Your vehicle may be equipped with an electronically
controlled air suspension system that automatically
keeps your vehicle level as you load and unload. The
system includes a compressor, two height sensors
and two air springs supporting the rear axle.
The system also has an internal clock to prevent
overheating. If the system overheats, all leveling function
stops until the system cools down. During this time,
the indicator light on the air in¯ator system will be
¯ashing.
The ignition has to be on for the system to in¯ate, in
order to raise the vehicle to the standard ride height after
loading. The system can lower the vehicle to the
standard ride height after unloading with the ignition on
and also for up to 30 minutes after the ignition has
been turned off.
You may hear the compressor operating when you load
your vehicle, and periodically as the system adjusts
the vehicle to the standard ride height.Load leveling will not function normally with the in¯ator
hose attached to the in¯ator outlet. Remove the
in¯ator hose from the outlet during loading and
unloading.
If the vehicle is parked for an extended period of time,
some bleed down of the suspension is normal. Upon
starting the vehicle, proper height will be achieved.
Overload Protection
The air suspension system is equipped with overload
protection. Overload protection is designed to protect the
air suspension system, and it is an indicator to the
driver that the vehicle is overloaded. When the overload
protection mode is on, it will not allow damage to the
air compressor. However, do not overload the vehicle.
See
Loading Your Vehicle on page 4-49.
If the suspension remains at a low height, the rear axle
load has exceeded GAWR (Gross Axle Weight
Rating). When the overload protection mode is activated,
the compressor operates for about 30 seconds to one
minute without raising the vehicle depending on the
amount of overload. This will continue each time
the ignition is turned on until the rear axle load is
reduced below GAWR.
4-55
Page 311 of 460
{CAUTION:
It can be dangerous to get out of your vehicle
if the shift lever is not fully in PARK (P) with
the parking brake ®rmly set. Your vehicle
can roll.
If you have left the engine running, the vehicle
can move suddenly. You or others could be
injured. To be sure your vehicle won't move,
even when you're on fairly level ground, use
the steps that follow.
Always put the shift lever fully in PARK (P)
with the parking brake ®rmly set.
If the transfer case on four-wheel drive
vehicles is in NEUTRAL, your vehicle will be
free to roll, even if your shift lever is in
PARK (P). So, be sure the transfer case is in a
drive gear Ð not in NEUTRAL.
See ªFour-Wheel Drive (Automatic Transfer
Case)º in the Index.
When You Are Ready to Leave After
Parking on a Hill
1. Apply your regular brakes and hold the pedal down
while you:
·start your engine,
·shift into a gear, and
·release the parking brake.
2. Let up on the brake pedal.
3. Drive slowly until the trailer is clear of the chocks.
4. Stop and have someone pick up and store the
chocks.
Maintenance When Trailer Towing
Your vehicle will need service more often when you're
pulling a trailer. See the Maintenance Schedule for more
on this. Things that are especially important in trailer
operation are automatic transmission ¯uid (don't over®ll),
engine oil, axle lubricant, belt(s), cooling system and
brake system. Each of these is covered in this manual,
and the Index will help you ®nd them quickly. If
you're trailering, it's a good idea to review these sections
before you start your trip.
Check periodically to see that all hitch nuts and bolts
are tight.
4-65
Page 321 of 460

{CAUTION:
If you spill fuel and then something ignites it,
you could be badly burned. Fuel can spray out
on you if you open the fuel cap too quickly.
This spray can happen if your tank is nearly
full, and is more likely in hot weather. Open
the fuel cap slowly and wait for any ªhissº
noise to stop. Then unscrew the cap all
the way.
Be careful not to spill fuel. Don't top off or over®ll your
tank, and wait a few seconds after you've ®nished
pumping before you remove the nozzle. Clean fuel from
painted surfaces as soon as possible. See
Cleaning
the Outside of Your Vehicle on page 5-87.
When you put the fuel cap back on, turn it to the right
(clockwise) until you hear a clicking sound. Make
sure you fully install the cap. The diagnostic system can
determine if the fuel cap has been left off or improperly
installed. This would allow fuel to evaporate into the
atmosphere. See
Malfunction Indicator Lamp on
page 3-38.
{CAUTION:
If a ®re starts while you are refueling, do not
remove the nozzle. Shut off the ¯ow of fuel by
shutting off the pump or by notifying the
station attendant. Leave the area immediately.
Notice:If you need a new fuel cap, be sure to get
the right type. Your dealer can get one for you.
If you get the wrong type, it may not ®t properly.
This may cause your malfunction indicator lamp to
light and may damage your fuel tank and emissions
system. See
Malfunction Indicator Lamp on
page 3-38.
5-9
Page 330 of 460
Notice:Use only engine oil identi®ed as meeting
GM Standard GM6094M and showing the American
Petroleum Institute Certi®ed For Gasoline Engines
starburst symbol. Failure to use the recommended
oil can result in engine damage not covered by
your warranty.
GM Goodwrench
žoil meets all the requirements for
your vehicle.
If you are in an area of extreme cold, where the
temperature falls below-20ÉF (-29ÉC), it is
recommended that you use either an SAE 5W-30
synthetic oil or an SAE 0W-30 oil. Both will provide
easier cold starting and better protection for your engine
at extremely low temperatures.
Engine Oil Additives
Do not add anything to your oil. The recommended oils
with the starburst symbol that meet GM Standard
GM6094M are all you will need for good performance
and engine protection.
When to Change Engine Oil (GM Oil
Life System)
Your vehicle has a computer system that lets you know
when to change the engine oil and ®lter. This is
based on engine revolutions and engine temperature,
and not on mileage. Based on driving conditions,
the mileage at which an oil change will be indicated can
vary considerably. For the oil life system to work
properly, you must reset the system every time the oil is
changed.
When the system has calculated that oil life has been
diminished, it will indicate that an oil change is
necessary. A CHANGE ENGINE OIL light will come on.
Change your oil as soon as possible within the next
two times you stop for fuel. It is possible that, if you are
driving under the best conditions, the oil life system
may not indicate that an oil change is necessary for over
a year. However, your engine oil and ®lter must be
changed at least once a year and at this time the system
must be reset. Your dealer has GM-trained people
who will perform this work using genuine GM parts and
reset the system. It is also important to check your
oil regularly and keep it at the proper level.
If the system is ever reset accidentally, you must
change your oil at 3,000 miles (5 000 km) since your
last oil change. Remember to reset the oil life system
whenever the oil is changed.
5-18
Page 381 of 460

To use the air in¯ator, attach the appropriate nozzle
adapter to the end of the hose if required. Then attach
that end of the hose to the object you wish to in¯ate.
Attach the other end of the hose to the outlet.
Press and release the switch to turn the air in¯ator on.
The indicator light will remain on when the in¯ator is
running.
The system has an internal clock to prevent overheating.
The system will allow about ®ve minutes of running
time, then the compressor will stop. The indicator light
will then begin to ¯ash. When the indicator is off,
the in¯ator can be started again by pressing the switch.
If the compressor is still hot, it may only run for a
short time before shutting off again.
Press and release the switch to turn the in¯ator off.
Place the in¯ator kit tools in the pouch and store
it properly. Remove the in¯ator hose from the outlet
during loading and unloading. Load leveling will
not function with the in¯ator hose attached to the
in¯ator outlet.To reinstall the cover, line up the tabs at the back of the
cover, put it in place and latch the tabs.
A continuous ¯ashing indicator light may also indicate a
malfunction in the air suspension system.
{CAUTION:
In¯ating something too much can make it
explode, and you or others could be injured.
Be sure to read the in¯ator instructions, and
in¯ate any object only to its recommended
pressure.
5-69