high beam GMC ENVOY XUV 2004 Owner's Manual
[x] Cancel search | Manufacturer: GMC, Model Year: 2004, Model line: ENVOY XUV, Model: GMC ENVOY XUV 2004Pages: 460, PDF Size: 2.99 MB
Page 130 of 460
Tilt Wheel
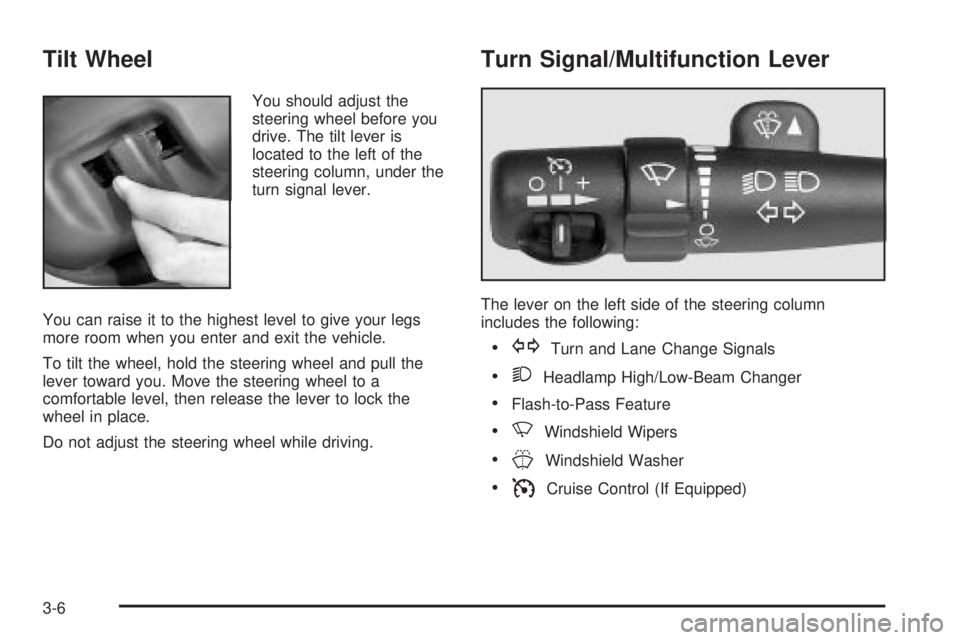
You should adjust the
steering wheel before you
drive. The tilt lever is
located to the left of the
steering column, under the
turn signal lever.
You can raise it to the highest level to give your legs
more room when you enter and exit the vehicle.
To tilt the wheel, hold the steering wheel and pull the
lever toward you. Move the steering wheel to a
comfortable level, then release the lever to lock the
wheel in place.
Do not adjust the steering wheel while driving.
Turn Signal/Multifunction Lever
The lever on the left side of the steering column
includes the following:
·GTurn and Lane Change Signals
·2Headlamp High/Low-Beam Changer
·Flash-to-Pass Feature
·NWindshield Wipers
·JWindshield Washer
·ICruise Control (If Equipped)
3-6
Page 132 of 460
Headlamp High/Low-Beam Changer
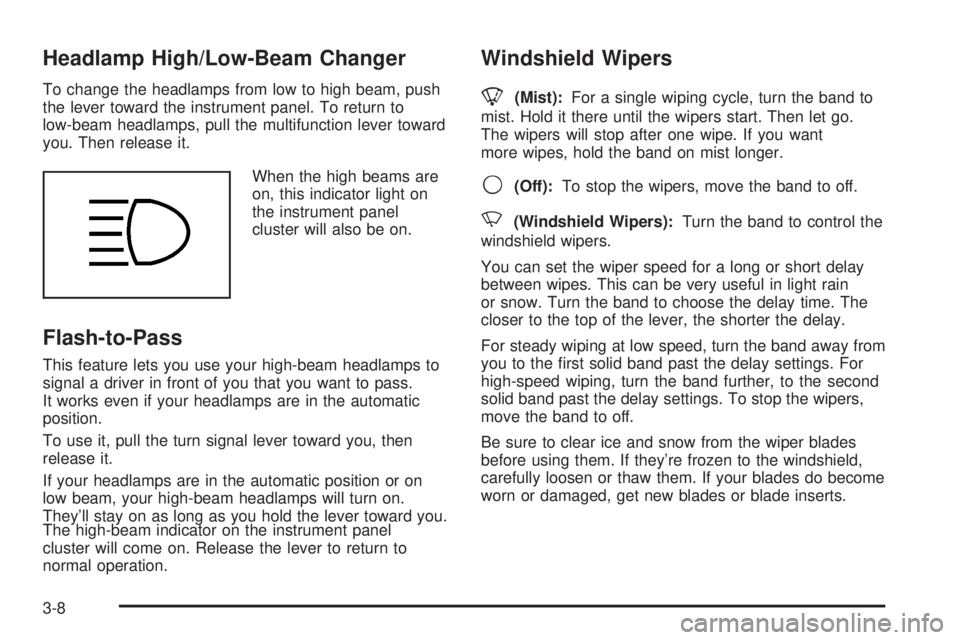
To change the headlamps from low to high beam, push
the lever toward the instrument panel. To return to
low-beam headlamps, pull the multifunction lever toward
you. Then release it.
When the high beams are
on, this indicator light on
the instrument panel
cluster will also be on.
Flash-to-Pass
This feature lets you use your high-beam headlamps to
signal a driver in front of you that you want to pass.
It works even if your headlamps are in the automatic
position.
To use it, pull the turn signal lever toward you, then
release it.
If your headlamps are in the automatic position or on
low beam, your high-beam headlamps will turn on.
They'll stay on as long as you hold the lever toward you.
The high-beam indicator on the instrument panel
cluster will come on. Release the lever to return to
normal operation.
Windshield Wipers
8
(Mist):For a single wiping cycle, turn the band to
mist. Hold it there until the wipers start. Then let go.
The wipers will stop after one wipe. If you want
more wipes, hold the band on mist longer.
9(Off):To stop the wipers, move the band to off.
N(Windshield Wipers):Turn the band to control the
windshield wipers.
You can set the wiper speed for a long or short delay
between wipes. This can be very useful in light rain
or snow. Turn the band to choose the delay time. The
closer to the top of the lever, the shorter the delay.
For steady wiping at low speed, turn the band away from
you to the ®rst solid band past the delay settings. For
high-speed wiping, turn the band further, to the second
solid band past the delay settings. To stop the wipers,
move the band to off.
Be sure to clear ice and snow from the wiper blades
before using them. If they're frozen to the windshield,
carefully loosen or thaw them. If your blades do become
worn or damaged, get new blades or blade inserts.
3-8
Page 140 of 460
Fog Lamps
Your vehicle may have this feature. Use your fog lamps
for better vision in foggy or misty conditions. Your
ignition must be in RUN for your fog lamps to work.
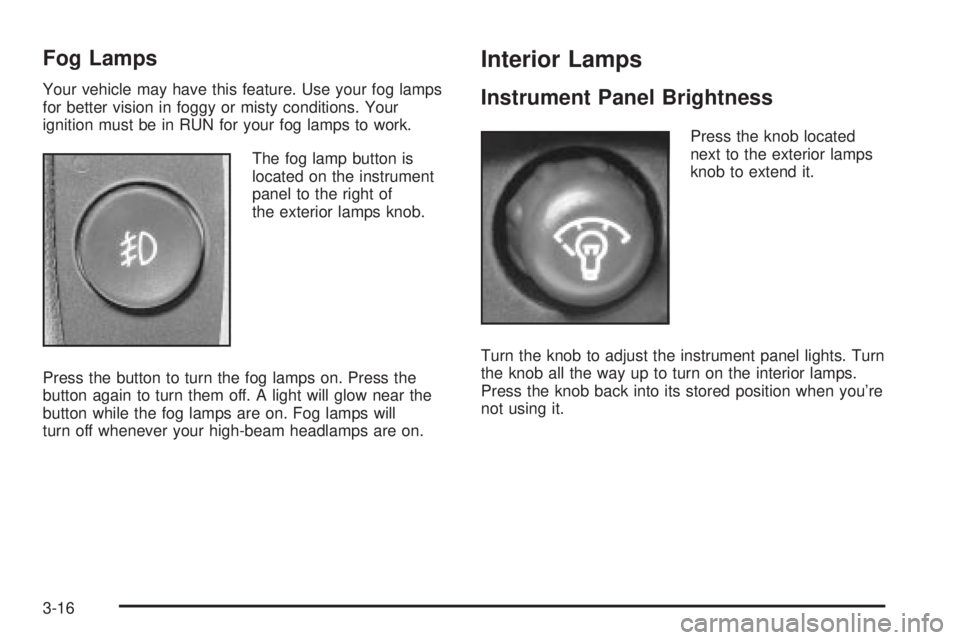
The fog lamp button is
located on the instrument
panel to the right of
the exterior lamps knob.
Press the button to turn the fog lamps on. Press the
button again to turn them off. A light will glow near the
button while the fog lamps are on. Fog lamps will
turn off whenever your high-beam headlamps are on.
Interior Lamps
Instrument Panel Brightness
Press the knob located
next to the exterior lamps
knob to extend it.
Turn the knob to adjust the instrument panel lights. Turn
the knob all the way up to turn on the interior lamps.
Press the knob back into its stored position when you're
not using it.
3-16
Page 275 of 460

·Since you can not see as well, you may need to
slow down and keep more space between you
and other vehicles.
·Slow down, especially on higher speed roads. Your
headlamps can light up only so much road ahead.
·In remote areas, watch for animals.
·If you are tired, pull off the road in a safe place
and rest.
No one can see as well at night as in the daytime.
But as we get older these differences increase.
A 50-year-old driver may require at least twice as much
light to see the same thing at night as a 20-year-old.
What you do in the daytime can also affect your
night vision. For example, if you spend the day in bright
sunshine you are wise to wear sunglasses. Your
eyes will have less trouble adjusting to night. But if you
are driving, do not wear sunglasses at night. They
may cut down on glare from headlamps, but they also
make a lot of things invisible.You can be temporarily blinded by approaching
headlamps. It can take a second or two, or even several
seconds, for your eyes to readjust to the dark. When
you are faced with severe glare (as from a driver
who does not lower the high beams, or a vehicle with
misaimed headlamps), slow down a little. Avoid
staring directly into the approaching headlamps.
Keep your windshield and all the glass on your vehicle
clean Ð inside and out. Glare at night is made much
worse by dirt on the glass. Even the inside of the glass
can build up a ®lm caused by dust. Dirty glass makes
lights dazzle and ¯ash more than clean glass would,
making the pupils of your eyes contract repeatedly.
Remember that your headlamps light up far less of a
roadway when you are in a turn or curve. Keep
your eyes moving; that way, it is easier to pick out dimly
lighted objects. Just as your headlamps should be
checked regularly for proper aim, so should your eyes
be examined regularly. Some drivers suffer from
night blindness Ð the inability to see in dim light Ð and
are not even aware of it.
4-29
Page 362 of 460
Replacement Bulbs
Exterior Lamp Bulb Number
Halogen Headlamps
Low Beam 9006 HB4
High Beam 9005 HB3
Front Sidemarker Lamps 194
Front Turn Signal Lamps 3457
Tail and Stoplamps 3057
Rear Turn Signal Lamps 3057
Back Up Lamps 3157
For any bulb not listed here, contact your dealer.
Windshield Wiper Blade
Replacement
Windshield wiper blades should be inspected at least
twice a year for wear or cracking.
Notice:Allowing the wiper blade arm to touch the
windshield when no wiper blade is installed
could damage the windshield. Any damage that
occurs would not be covered by your warranty. Do
not allow the wiper blade arm to touch the
windshield.
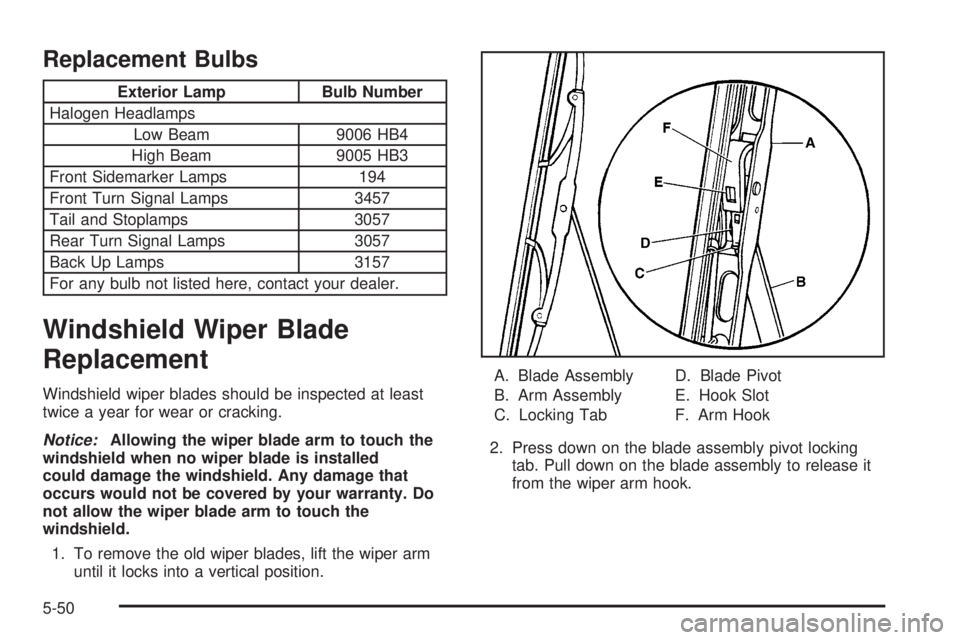
1. To remove the old wiper blades, lift the wiper arm
until it locks into a vertical position.A. Blade Assembly
B. Arm Assembly
C. Locking TabD. Blade Pivot
E. Hook Slot
F. Arm Hook
2. Press down on the blade assembly pivot locking
tab. Pull down on the blade assembly to release it
from the wiper arm hook.
5-50
Page 406 of 460

Fuses Usage
1 Electrically-Controlled Air Suspension
2Passenger's Side High-Beam
Headlamp
3Passenger's Side Low-Beam
HeadlampFuses Usage
4 Back-Up-Trailer Lamps
5 Driver's Side High-Beam Headlamp
6 Driver's Side Low-Beam Headlamp
7 Wash L6 Engine
5-94
Page 407 of 460

Fuses Usage
8 Automatic Transfer Case
9 Windshield Wipers
10 Powertrain Control Module B
11 Fog Lamps
12 Stop Lamp
13 Cigarette Lighter
14 Ignition Coils
15 Blank
16 TBD-Ignition 1
17 Crank
18 Air Bag
19 Electric Brake
20 Cooling Fan
21 Horn
22 Ignition E
23 Electronic Throttle Control
24Instrument Panel Cluster, Driver
Information Center
25 Automatic Shift Lock Control System
26 Engine 1
27 Back-Up
28 Powertrain Control Module 1
29 Oxygen Sensor
30 Air Conditioning
31 Truck Body Controller
32 Trailer
33 Anti-Lock Brakes (ABS)Fuses Usage
34 Ignition A
35 Blower Motor
36 Ignition B
50 Passenger's Side Trailer Turn
51 Driver's Side Trailer Turn
52 Hazard Flashers
53 Electric Adjustable Pedal
54 A.I.R. Solenoid
56 A.I.R. Pump
Relays Usage
37 Blank
38 Rear Window Washer
39 Fog Lamps
40 Horn
41 Fuel Pump
42 Windshield Wipers/Washer
43 High-Beam Headlamp
44 Air Conditioning
45 Cooling Fan
46 Headlamp Driver Module
47 Starter
49 Electric Adjustable Pedal
55 A.I.R. Solenoid
Miscellaneous Usage
48 Instrument Panel Battery
49 Blank
5-95
Page 409 of 460

Fuses Usage
1Electrically-Controlled Air
Suspension
2Passenger's Side High-Beam
Headlamp
3Passenger's Side Low-Beam
Headlamp
4 Back-Up-Trailer Lamps
5Driver's Side High-Beam
Headlamp
6Driver's Side Low-Beam
Headlamp
7 Wash
8 Automatic Transfer Case
9 Windshield Wipers
10 Powertrain Control Module B
11 Fog Lamps
12 Stop Lamp
13 Cigarette Lighter
14 Ignition Coils
15 Canister Vent
16 TBD-Ignition 1
17 Crank
18 Air Bag
19 Electric Brake
20 Cooling FanFuses Usage
21 Horn
22 Ignition E
23 Electronic Throttle Control
24Instrument Panel Cluster, Driver
Information Center
25Automatic Shift Lock Control
System
26 Engine 1
27 Back-Up
28 Powertrain Control Module 1
30 Air Conditioning
31 Truck Body Controller
32 Trailer
33 Anti-Lock Brakes (ABS)
34 Ignition A
35 Blower Motor
36 Ignition B
50 Passenger's Side Trailer Turn
51 Driver's Side Trailer Turn
52 Hazard Flashers
53 Oxygen Sensor Bank A
54 Oxygen Sensor Bank B
55 Injector Bank A
56 Injector Bank B
5-97
Page 410 of 460

Fuses Usage
57 Electric Adjustable Pedal
Relays Usage
37 Headlamp Washer
38 Rear Window Washer
39 Fog Lamps
40 Horn
41 Fuel Pump
42 Windshield Wipers/Washer
43 High-Beam Headlamp
44 Air Conditioning
45 Cooling Fan
46 Headlamp Driver Module
47 Starter
49 Electric Adjustable Pedal
58 Ignition 1
Miscellaneous Usage
48 Instrument Panel BatteryRear Underseat Fuse Block
5-98
Page 451 of 460
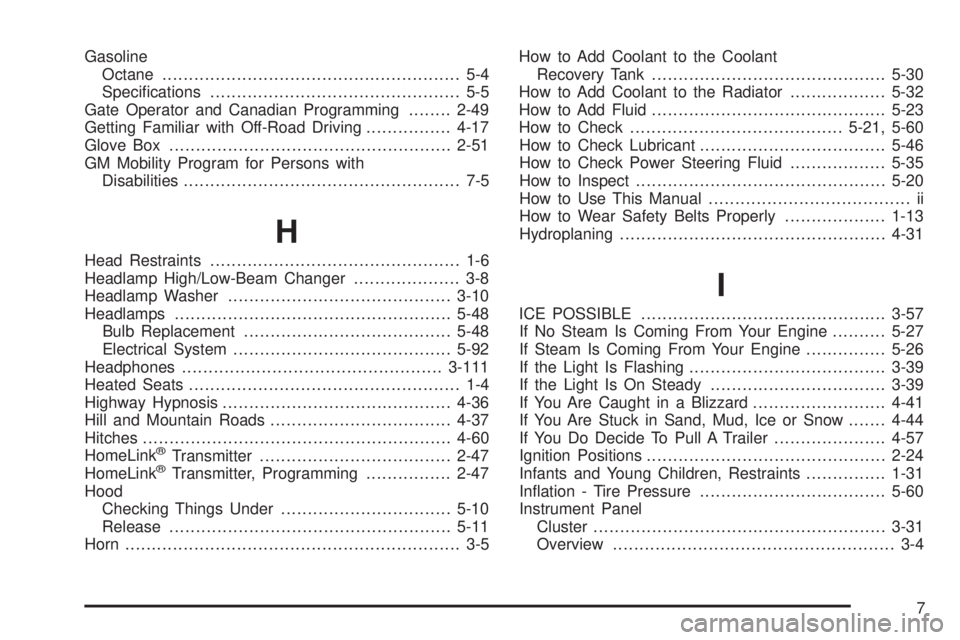
Gasoline
Octane........................................................ 5-4
Speci®cations............................................... 5-5
Gate Operator and Canadian Programming........2-49
Getting Familiar with Off-Road Driving................4-17
Glove Box.....................................................2-51
GM Mobility Program for Persons with
Disabilities.................................................... 7-5
H
Head Restraints............................................... 1-6
Headlamp High/Low-Beam Changer.................... 3-8
Headlamp Washer..........................................3-10
Headlamps....................................................5-48
Bulb Replacement.......................................5-48
Electrical System.........................................5-92
Headphones.................................................3-111
Heated Seats................................................... 1-4
Highway Hypnosis...........................................4-36
Hill and Mountain Roads..................................4-37
Hitches..........................................................4-60
HomeLink
žTransmitter....................................2-47
HomeLinkžTransmitter, Programming................2-47
Hood
Checking Things Under................................5-10
Release.....................................................5-11
Horn............................................................... 3-5How to Add Coolant to the Coolant
Recovery Tank............................................5-30
How to Add Coolant to the Radiator..................5-32
How to Add Fluid............................................5-23
How to Check........................................5-21, 5-60
How to Check Lubricant...................................5-46
How to Check Power Steering Fluid..................5-35
How to Inspect...............................................5-20
How to Use This Manual...................................... ii
How to Wear Safety Belts Properly...................1-13
Hydroplaning..................................................4-31
I
ICE POSSIBLE..............................................3-57
If No Steam Is Coming From Your Engine..........5-27
If Steam Is Coming From Your Engine...............5-26
If the Light Is Flashing.....................................3-39
If the Light Is On Steady.................................3-39
If You Are Caught in a Blizzard.........................4-41
If You Are Stuck in Sand, Mud, Ice or Snow.......4-44
If You Do Decide To Pull A Trailer.....................4-57
Ignition Positions.............................................2-24
Infants and Young Children, Restraints...............1-31
In¯ation - Tire Pressure...................................5-60
Instrument Panel
Cluster.......................................................3-31
Overview..................................................... 3-4
7