service indicator GMC JIMMY 1997 Owner's Manual
[x] Cancel search | Manufacturer: GMC, Model Year: 1997, Model line: JIMMY, Model: GMC JIMMY 1997Pages: 410, PDF Size: 20.03 MB
Page 88 of 410
4LO: This setting also engages your front axle to give
you extra traction. You may never need 4LO. It sends
the maximum power to all
four wheels. You might
choose 4LO
if you were driving off-road in sand, mud
or deep snow and climbing or descending steep hills.
Indicator lights
in the switches show you which setting
you are
in. The indicator lights will come on briefly when
you turn on
the ignition and one will stay on. If the lights
do not come
on, you should take your vehicle in for
service.
An indicator light will flash while shifting. It will
remain illuminated when the shift is completed.
Shifting from 2HI to 4HI
Press and release the 4HI switch. This can be done at
any speed. and the front axle will lock automatically.
Shifting from 4HI to 2HI
Press and release the 2HI switch. This can be done at
any speed. and the. front axle will unlock automatically.
Shifting from 2HI or 4HI to 4LO
To
shift from 2HI or .CHI to 4LO. the vehicle must be
stopped or moving less than
3 rnph (4.8 k~nh) with the
transmission
in NEUTRAL (N) in vehicles equipped with an
automatic transmission or the clutch pedal engaged
in
vehicles equipped with a manual transmission. The
preferred method for shifting into 4LO is to have your
vehicle moving
1 to 2 mph (I .6 to 3.2 kmh). Press
and release
the 4LO switch. You must wait for the
4LO indicator light to stop flashing and remain
illuminated before shifting your transmission into
gear or releasing
the clutch pedal.
If the 4L0 switch is pressed when your vehicle is
in
gear and/or moving, the 4LO indicator light will flash
for
30 seconds and not complete the shift unless your
vehicle is moving slower than
3 tnph (4.8 km/h) and
the transmission
is in NEUTRAL (N) or the clutch
pedal engaged.
On automatic transmission equipped vehicles,
if your
transfer case does
not shift into 4LO. your transmission
indicator switch may reyuire adjustment. With
your
transmission in NEUTRAL (N)! press and release the
4L0 switch. While the 4LO indicator light is flashing.
shift yo~lr transmission into PARK (P). Wait unlil the
4L0 indicator light remains illuminated before shifting
your trrmstnission
into gear. This will get you into 4LO.
but you should take
your vehicle in for service to restore
normal operation.
Page 89 of 410
Shifting from 4LO to 4HI or 2HI
To shift from 4LO to 4HI or 2H1, your vehicle must be
stopped or moving
less than 3 mph (4.8 kndh) with the
transnJission
in NEUTRAL (N) or the clutch pedal
engaged. The preferred method for shifting out of
4LO is to have your vehicle moving
1 to 2 mph (1.6 to
3.2 kdh). Press and release the 4HI switch. You must
wait for the
4HI indicator light to stop flashing and
remain illuminated before shifting your transmission
into gear
or releasing the clutch pedal.
If the 4Hi switch is pressed when your vehicle is in gear
and/or moving. the 4HI indicator light
will flash for
30 seconds but not complete the shift unless the
vehicle is moving slower than
3 nlph (4.8 km/h) and
the transmission is in NEUTRAL (N) or the clutch
pedal engaged.
On automatic transmission equipped vehicles. if your
transfer case does not
shift into 4H1, your transmission
indicator switch
may require adjustment. With your
transmission
in NEUTRAL (N), press and release the
4HI switch. While the 4HI indicator light is flashing,
shift your transmission into PARK
(P). Wait until the
4HI indicator light remains illuminated before shifting
your transmission into gear. This
will get you into 4H1,
but you should take your vehicle in for service to restore
norrnal operation.
2-2s
Page 134 of 410

Air Bag Readiness Light
There is an air bag readiness light 011 the instrument
panel, which shows
AIR RAG. The system checks the
air bag's electrical system for ~~~alfunctions. The light
tells you if there is an electrical problem. The syslem
check includes the air bag sensors. the air
bag module,
the wiring and the diagnostic module. For n~ore
information
on the air bag system. sec .'Air Rag" in
the Index.
AIR
BAG
This light will ~0111e on
when you start your engine,
and it will flash for a few
seconds. Then thc light
should go out. This means
the system
is ready.
If the air bag readiness light stays 011 after you start the
engine or comes on when you are driving, your ail- bag
system
may not work properly. Have your vehicle
serviced right
away.
The air bag readiness light should flash for a few
seconds when you turn the ignition key to
RUN. If the
light doesn't
co111e on then. have it fixed so it will be
re.ady
to warn you if there is a problem.
_. -
lrging System Indicator Light
II
The charging system light
will come on brietly when
you turn on the ignition,
but the engine is not
running, as
a check to
show you it is working.
It should go out once the engine is running. If it stays
on. or comes on while you are driving. you may have
a problem with the. charging system. It could indicate
that
you have problem with a generator drive belt. or
another electrical problem. Have it checked right away.
Driving while this light
is on could drain your battery.
If you must drive a short distance with the light 011, be
certain to turn off
all your accessories. such as the radio
and air conditioner.
2-73
Page 138 of 410

Malfunction Indicator Lamp
(Service Engine Soon Light)
SERVICE
ENGINE
SOON
NOTICE:
If you keep driving your vehicle with this light
on, after
a while, your emission controls may not
work as well, your fuel econonly may not be as
good and your engine may not run
as smoothly.
This could lead to costly repairs that
may not be
covered
by your warranty.
This light should
come on. as ;I check to show you it is
working, tvhen the ignition is on and the engine is not
running. It' the light doesn't conw on, have it repaired.
This light will also come on during a malfunction in one
of two t1;ays:
2-77
Page 263 of 410
Some gasolines that are not reformulated for low
emissions contain an octane-enhancing additive called
methylcyclopentadienyl manganese tricarbonyl
(MMT):
ask your service station operator whether or not his fuel
contains MMT. General Motors does not recommend the
use
of such gasolines. If fuels containing MMT are used,
spark plug life may be reduced and your emission
control system performance
may be affected. The
malfunction indicator lamp on your instrument panel
may turn on.
If this occurs, return to your authorized
GM dealer for service.
To provide cleaner ail-, all gasolines in the United States
are now required
to contain additives that will help
prevent deposits from forming
in your engine and fuel
system, allowing; your emission control system to
function properly. Therefore, you should not have
to add
anything
to the fuel. In addition, gasolines containing
oxygenates, such as ethers and ethanol, and
reformulated gasolines may be available
in your area to
help clean the air. General Motors recommends that you
use these gasolines if they comply with the
specifications described earlier.
I NOTICE:
Your vehicle was not designed for fuel that
contains methanol. Don’t use it. It can corrode
metal parts in your fuel system and also damage
plastic and rubber parts. That damage wouldn’t
be covered under your warranty.
Fuels in Foreign Countries
If you plan on driving in another country outside the United
States or Canada, the proper fuel may be hard to find. Never
use leaded gnsooline or any other fuel not recommended
in the
previous text on fuel. Costly repairs caused by use of
improper fuel wouldn’t be covered by your warranty.
To check on ~w1 availability, ask an auto club, or
contact a nlajor oil company that does business in the
country where you’ll be driving.
You can also write us at the following address for
advice. Just tell us where you-re going and give your
Vehicle Identil’ication Number
(VIN).
General Motors International Product Center
1908 Colonel Sam Drive
Osha~/a. Ontario
L 1 H 8P7
6-4
Page 290 of 410
Brake Wear
Your vehicle has front disc brakes and rear drum brakes.
If you have the all-wheel drive option, your vehicle has
four-wheel disc brakes.
Disc brake pads have built-in wear indicators that make
a
high-pitched warning sound when the brake pads are worn
and new pads are needed.
The sound may come and go or
be heard all the time your vehicle is moving (except when
you are pushing on the brake pedal firmly).
I A CAUTION: I
The brake wear warning sound means that soon
your brakes won't
work well. That could lead to
an accident. When you hear the brake wear
warning
sound, have your vehicle serviced.
NOTICE:
Continuing to drive with worn-out brake pads
could result in costly brake repair.
Some driving conditions or climates may cause a brake
squeal when the brakes are first applied or lightly
applied. This does not mean something is wrong
with
your brakes.
Properly torqued wheel nuts are necessary to help
prevent brake pulsation. When tires are rotated, inspect
brake
pads for wear and evenly torque wheel nuts in the
proper sequence to
GM specifications.
Your rear
drum brakes don't have wear indicators,
but
if you ever hear a rear brake rubbing noise: have
the rear brake linings inspected. Also, the rear brake
drums should be removed and inspected each time the
tires are removed
for rotation or changing. When you
have the front brake pads replaced. have the rear brakes
inspected, too.
Brake linings should always be replaced as complete
axle sets.
See
"Brake System Inspection" in Section 7 of this manual
under
Part C "Periodic Maintenance Inspections."
6-31
Page 303 of 410

When It's Time for New Tires
One way to tell when it's
time for new tires is to
check the treadwear
indicators, which will
appear
when YOLII- tires have
only 1/16 inch ( I .6 mm) or
less
of tread remaining.
You need a new tire if any of the following statements
are true:
0 You can see the indicators at three or more places
around the tire.
You can see cord or hbric showing through the
tire's rubber.
The tread or sidewall is cracked. cut or snagged deep
enough
to show cord or fabric.
The tire has a bump. bulge or split.
The tire has a puncture, cut or other damage that
can't be repaired well because of the size or location
of the darnage.
Buying New Tires
To find out what kind ;m.l size of tires you need, look at
the CertificatiodTire label.
The tires installed on your vehicle when
it was new had
a Tire Performance Criteria Specification (TPC Spec)
number
on each tire's sidewall. When you get new tires,
your vehicle
will continue to have tires that are designed
to give proper endurance, handling, speed rating,
traction. ride and other things during normal service
on
your vehicle. If your tires have an all-season tread
design, the
TPC number will be followed by an "MS"
(for mud and snow).
If you ever replace your tires with those not hktving a
TPC Spec number. make sure [hey are the same size.
load range, speed rating and construction type (bias,
bias-belted or radial) as your original tires.
c get ones with that same TPC Spec number. That way
6-44
Page 396 of 410
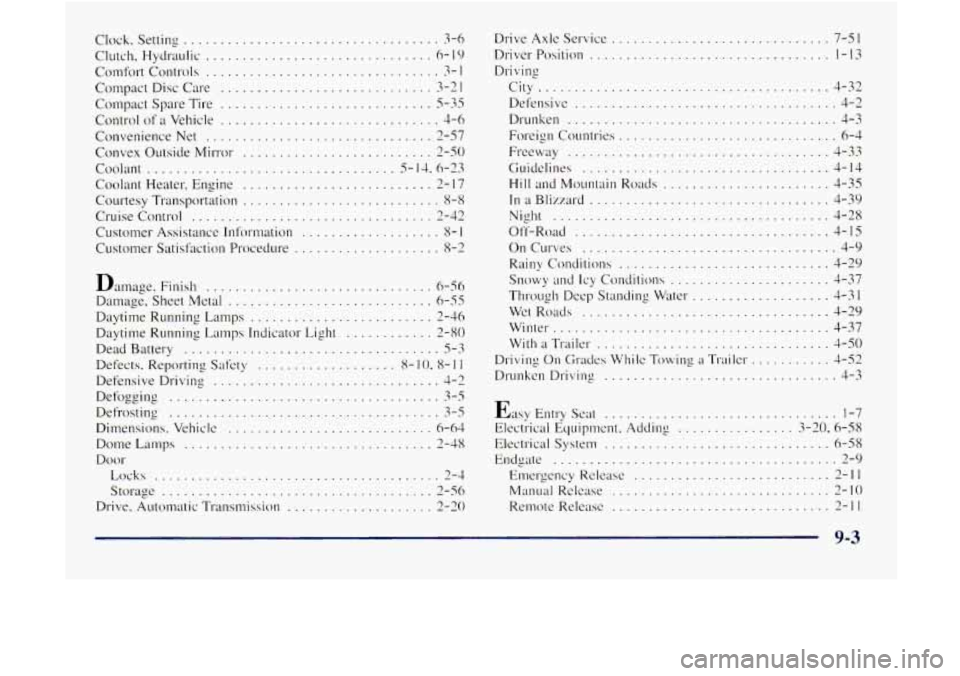
Clock . Setting ................................... 3-6
Clutch. Hydraulic
............................... 6- 19
Comfort Controls ................................ 3- I
Compact Disc Care ............................. 3-2 I
Compact Spare Tire 3-33
Control of a Vehicle .............................. 4-6
Convenience Net
............................... 2-57
Convex Outside Mirror
.......................... 2-50
Coolant ................................... 5- 14.6-23
Coolant Heater. Engine
.......................... 2- I7
Cruise Control ................................. 2-42
Customer Assistance Information
................... 8- I
Customer Satisfaction Procecture .................... 8-2
.. .............................
Courtesy Transportation ........................... 8-8
Damage
. Finish ............................... 6-56
Damage. Sheet Metal
............................ 6-55
Daytime Running Lamps Indicator Light ............ 2-80
Dead Battery
................................... 5-3
Defects. Reporting Safety ................... X- IO. 8- 1 1
Defensive Driving ............................... 3-2
Defogging ..................................... 3-5
Defrosting ..................................... 3-5
Dimensions . Vehicle ............................ 6-64
Dome Latmps
.................................. - 3-48
Door
Locks
....................................... 2-3
Storage ..................................... 2-56
Drive. Automatic Transmission
.................... 2-20
Daytime Running Lamps ......................... 2-36 Drive
Axlc Service ... ........................ 7-51
Driver Position
.................................
City ........................................ 4-32
Defensive
.................................... 4-2
Drunken
..................................... 4-3
Foreign Countries
.............................. 6-4
Guidelines
.................................. 4-14
Hill and Mountain Roads
....................... 4-35
In a Blizzard ................................. 4-39
Night
...................................... 4-28
Ofl-Road ................................... 4-15
On Curves ................................... 4-9
Rainy Conditions
............................. 3-29
Snowy and Icy Conditions ...................... 3-37
Through Deep Standing Water
................... 4-31
Wintet-
...................................... 4-37
With
a Trailer ................................ 4-50
Driving On Grades Whilc Towing :I Trailer ........... 3-52
Drunken Driving ................................ 3-3
F~KWLI~ .................................... 4-33
Wet Roads .................................. 1-29
Easy Entry scat ................................ 1-7
Electrical Equipmcnt
. Addin2 ................ 3-20, 6-58
Electrical System
............................... 6-58
Elnergency Releasc
........................... 2-11
EIldgate ....................................... 2-9
M;tIlLlal Rclc~~e
.............................. 2- IO
Re111ote Release .............................. 2-11
9-3
Page 399 of 410

Labels Certificatioflire
............................. 4-42
Fuse
....................................... 6-60
Safety Belt
.................................. 1-48
Service Parts Identification
..................... 6-58
Vehicle Identification Number
................... 6-58
Lamps
........................................ 2-45
Dome
...................................... 2-48
FrontMap
................................... 2-48
Front Reading
........................... 2-47, 2-51
Latches, Seatback
................................ 1-6
Leaving Your Vehicle
............................. 2-5
Leaving Your Vehicle with the Engine Running
....... 2-32
Air Bag Readiness
....................... 1-21, 2-73
Anti-Lock Brake System Warning
............ 2-76, 4-7
Brake System Warning
......................... 2-75
Charging System
............................. 2-73
Daytime Running Lamps Indicator
............... 2-80
Gate Ajar
................................... 2-81
Safety Belt Reminder
...................... 1-9, 2-72
Service Engine Soon
.......................... 2-77
Shift
.................................. 2-22, 2-80
Loading Your Vehicle
........................... 4-42
Locking Rear Axle
.............................. 2-23
LockoutSwitch
................................ 2-37
Interior
..................................... 2-47
OnReminder
................................ 2-4 6
Lighter
....................................... 2-61
Lights
CheckGages
................................ 2-80 Locks
......................................... 2-4
Door ........................................ 2-4
Key Lock Cylinder
Service ..................... 7-47
PowerDoor
.................................. 2-5
Rear Door Security
............................. 2-5
Steering Column Park Lock Check
............... 7-49
Loss of Control
................................ 4-13
Lubricants and Fluids
....................... 6-64, 7-52
Lubrication Service, Body
........................ 7-47
Luggagecarrier
................................ 2-59
Lumbar Controls
............................ 1-3, 1-4
Maintenance Record
........................... 7-55
Maintenance Schedule
............................ 7-1
Long Tripmighway
....................... 7-6, 7-30
Owner Checks and Services
..................... 7-46
Periodic Maintenance Inspections
................ 7-50
Recommended Fluids and Lubricants
............. 7-52
Scheduled Maintenance Services
.................. 7-4
Short TripKity
............................ 7-5, 7-7
Maintenance, Underbody
......................... 6-56
Maintenance When Trailer Towing
................. 4-54
Malfunction Indicator Lamp
...................... 2-77
Manual Front Seat
............................... 1-2
Manual Lumbar Support
.......................... 1-3
Manual Transmission Check
...................................... 7-47
Fluid
....................................... 6-18
Shifting
..................................... 2-21
Starting Your Engine
.......................... 2-16
9-6