tow GMC JIMMY 2005 Owner's Guide
[x] Cancel search | Manufacturer: GMC, Model Year: 2005, Model line: JIMMY, Model: GMC JIMMY 2005Pages: 432, PDF Size: 2.65 MB
Page 106 of 432

{CAUTION:
If you have four-wheel drive, your vehicle will
be free to roll — even if your shift lever is in
PARK (P) — if your transfer case is in
NEUTRAL. So be sure the transfer case is in a
drive gear — not in NEUTRAL. SeeFour-Wheel
Drive on page 2-30.
Follow the proper steps to be sure your vehicle will not
move. SeeShifting Into Park (P) (Automatic
Transmission) on page 2-37.
If you are pulling a trailer, seeTowing a Trailer on
page 4-57.
Mirrors
Manual Rearview Mirror
Pull the tab under the mirror toward you to reduce the
glare from headlamps behind you after dark. Push
the tab away from you for normal daytime operation.
Automatic Dimming Rearview Mirror
If your vehicle has this feature, the mirror automatically
changes to reduce glare from headlamps behind
you. A photocell on the back of the mirror senses when
it is becoming dark outside. Another photocell built
into the mirror surface senses when headlamps
are behind you.
At night, when the glare is too high, the mirror will
gradually darken to reduce glare. This change may take
a few seconds. The mirror will return to its clear
daytime state when the vehicle is put into REVERSE (R)
or when the glare is reduced.
AUTO (Automatic Dimming):This button is located at
the base of the mirror. Use it to turn on the automatic
feature. The button has an indicator light to show it is on.
OFF:Press this button to turn the automatic feature off.
Time Delay
The automatic mirror has a time delay feature which
prevents unnecessary switching from the night back to
the day position. This delay prevents rapid changing
of the mirror as you drive under lights and through traffic.
2-42
Page 107 of 432

Cleaning the Photocells
Use a cotton swab and glass cleaner to clean the
photocells and mirror face when necessary.
Cleaning the Mirror
When cleaning the mirror, use a paper towel or similar
material dampened with glass cleaner. Do not spray
glass cleaner directly on the mirror as that may cause
the liquid cleaner to enter the mirror housing.
Outside Manual Mirror
Adjust your outside mirrors so you can see a little of the
side of your vehicle and the area beside and behind
your vehicle from a comfortable driving position.
You can also fold the mirrors in before entering a car
wash. Pull the mirrors in toward the vehicle. Push
the mirrors back out when �nished.
Outside Power Mirrors
If your vehicle has this
feature, the controls are
located on the driver’s door
armrest.
Move the selector switch to the left or right to choose
the driver’s or passenger’s mirror, then use the
arrows located on the four-way control pad to move the
mirror in the direction you want the mirror to go.
Put the selector switch back in the center position when
�nished adjusting the mirror so that you don’t
accidentally bump into the control pad and get the
mirror out of adjustment.
2-43
Page 120 of 432

A. Collapsible Dividers
B. Anchor
Bracket/Cargo
Tie-Down Plugs
C. PartitionsD. Soda Pop/Gallon
Jug Holder
E. Partition Storage
F. Cargo Tie-Down
CutoutsTo increase the space in the convenience system, do
the following:
1. Pull up on the individual partitions (C) to remove
them. Storage for the partitions is located in
area (E).
2. Fold the collapsible dividers (A) by pulling upward
and folding the dividers toward each other.
To reinstall or rearrange the partitions, push down
gently on the partitions making sure both sides �t into
the appropriate slots of the collapsible dividers (A).
Located on the top of each collapsible divider (A) are
T-pins designed to hold grocery bags, etc., in an upright
position.
The anchor bracket/cargo tie down plugs (B), located in
the center and on each side of the convenience
system nearest the passenger compartment, are used
to help seal the convenience system. However, the
plugs also cover the anchor bracket/cargo tie-downs. To
remove the plugs, grasp the edges of the plugs and
pull straight out. SeeChild Restraint Systems on
page 1-35andTop Strap on page 1-39for more
information on using anchor brackets.
There are two cutouts (F) for the rear cargo tie-downs
located near the tailgate. In order to access the rear
cargo tie-downs, the cutouts must be removed.
2-56
Page 125 of 432
Instrument Panel Overview...............................3-4
Hazard Warning Flashers................................3-6
Other Warning Devices...................................3-6
Horn.............................................................3-6
Tilt Wheel.....................................................3-6
Turn Signal/Multifunction Lever.........................3-7
Turn and Lane-Change Signals........................3-8
Headlamp High/Low-Beam Changer..................3-9
Flash-to-Pass.................................................3-9
Windshield Wipers..........................................3-9
Cruise Control..............................................3-11
Exterior Lamps.............................................3-14
Headlamps on Reminder................................3-15
Daytime Running Lamps (DRL).......................3-15
Automatic Headlamp System..........................3-16
Fog Lamps..................................................3-17
Instrument Panel Brightness...........................3-18
Dome Lamps...............................................3-18
Entry Lighting...............................................3-18
Exit Lighting.................................................3-18
Front Reading Lamps....................................3-19
Map Lamps.................................................3-19
Battery Run-Down Protection..........................3-19
Ashtrays and Cigarette Lighter........................3-19Climate Controls............................................3-20
Climate Control System.................................3-20
Outlet Adjustment.........................................3-22
Warning Lights, Gages, and Indicators............3-23
Instrument Panel Cluster................................3-24
Speedometer and Odometer...........................3-26
Trip Odometer..............................................3-26
Tachometer.................................................3-26
Safety Belt Reminder Light.............................3-26
Airbag Readiness Light..................................3-27
Charging System Light..................................3-28
Voltmeter Gage............................................3-28
Up-Shift Light...............................................3-29
Brake System Warning Light..........................3-29
Anti-Lock Brake System Warning Light.............3-30
Engine Coolant Temperature Gage..................3-31
Malfunction Indicator Lamp.............................3-31
Oil Pressure Gage........................................3-34
Security Light...............................................3-35
Highbeam On Light.......................................3-35
Service Four-Wheel Drive Warning Light..........3-36
Tow/Haul Mode Light....................................3-36
Check Gages Warning Light...........................3-37
Gate Ajar Light.............................................3-37
Fuel Gage...................................................3-38
Low Fuel Warning Light.................................3-38
Section 3 Instrument Panel
3-1
Page 130 of 432

Hazard Warning Flashers
Your hazard warning �ashers let you warn others. They
also let police know you have a problem. Your front
and rear turn signal lamps will �ash on and off.
The hazard warning �asher
button is located on top of
the steering column.
Your hazard warning �ashers work no matter what
position your key is in, and even if the key is not in the
ignition.
Press the button to make the front and rear turn signal
lamps �ash on and off. Press the button again to
turn the �ashers off.
When the hazard warning �ashers are on, your turn
signals will not work.
Other Warning Devices
If you carry re�ective triangles, you can set them up at
the side of the road about 300 feet (100 m) behind
your vehicle.
Horn
To sound the horn, press the horn symbol on the
steering wheel pad.
Tilt Wheel
A tilt wheel allows you to adjust the steering wheel before
you drive. You can raise it to the highest level to allow
more room for the driver to enter and exit the vehicle.
The tilt lever is located on
the driver’s side of the
steering column, under the
turn signal lever.
To tilt, hold the steering wheel and pull the tilt lever
toward you. Move the wheel to a comfortable level, then
release the tilt lever to lock the wheel in place.
3-6
Page 132 of 432
Turn and Lane-Change Signals
The turn signal has two upward (for right) and
two downward (for left) positions. These positions
allow you to signal a turn or a lane change.
To signal a turn, move the lever all the way up or down.
When the turn is �nished, the lever will return
automatically.
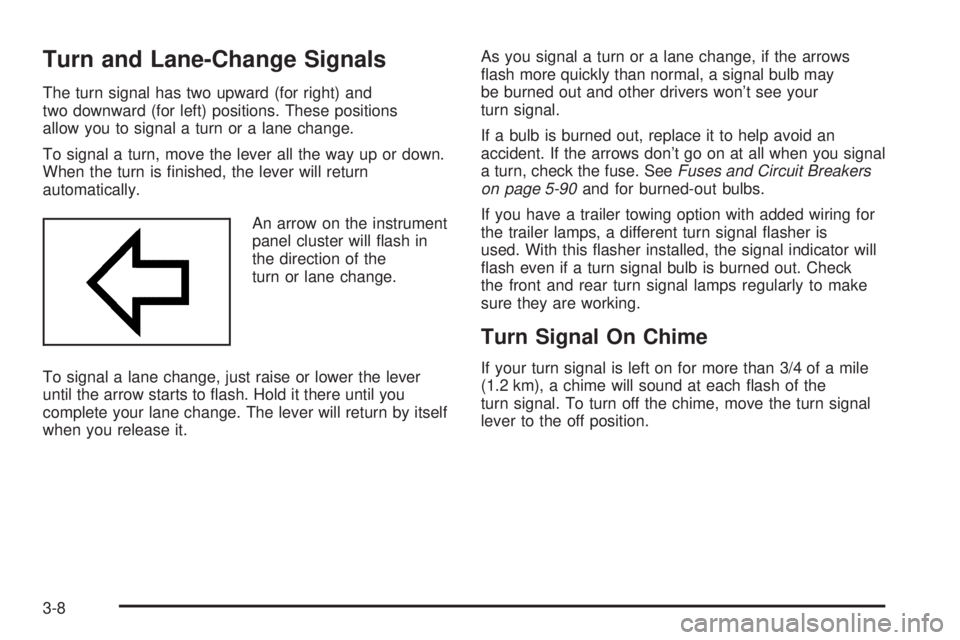
An arrow on the instrument
panel cluster will �ash in
the direction of the
turn or lane change.
To signal a lane change, just raise or lower the lever
until the arrow starts to �ash. Hold it there until you
complete your lane change. The lever will return by itself
when you release it.As you signal a turn or a lane change, if the arrows
�ash more quickly than normal, a signal bulb may
be burned out and other drivers won’t see your
turn signal.
If a bulb is burned out, replace it to help avoid an
accident. If the arrows don’t go on at all when you signal
a turn, check the fuse. SeeFuses and Circuit Breakers
on page 5-90and for burned-out bulbs.
If you have a trailer towing option with added wiring for
the trailer lamps, a different turn signal �asher is
used. With this �asher installed, the signal indicator will
�ash even if a turn signal bulb is burned out. Check
the front and rear turn signal lamps regularly to make
sure they are working.
Turn Signal On Chime
If your turn signal is left on for more than 3/4 of a mile
(1.2 km), a chime will sound at each �ash of the
turn signal. To turn off the chime, move the turn signal
lever to the off position.
3-8
Page 133 of 432
Headlamp High/Low-Beam Changer
To change the headlamps from low beam to high or
high to low, pull the multifunction lever all the way
toward you. Then release it.
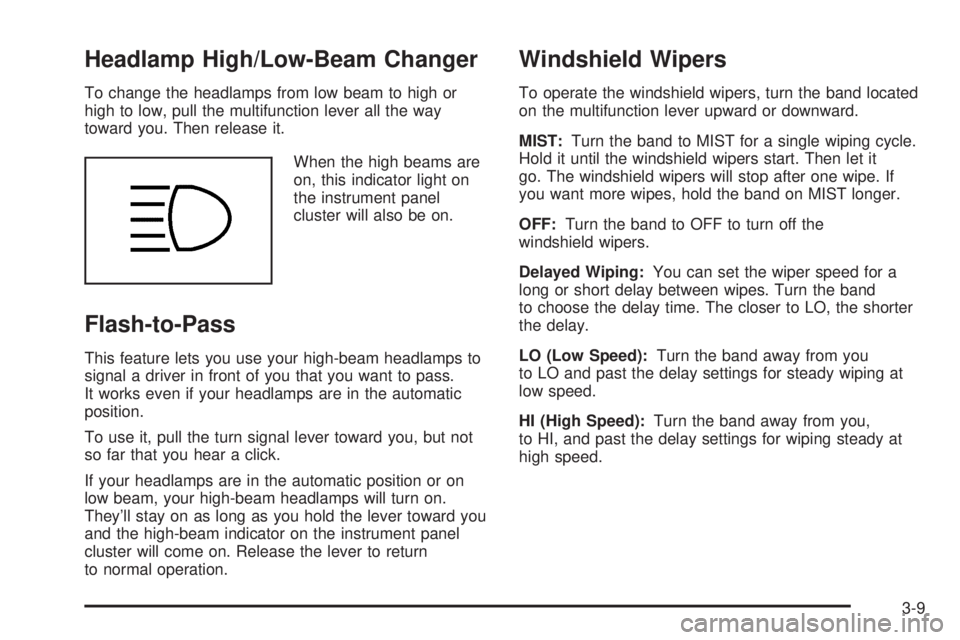
When the high beams are
on, this indicator light on
the instrument panel
cluster will also be on.
Flash-to-Pass
This feature lets you use your high-beam headlamps to
signal a driver in front of you that you want to pass.
It works even if your headlamps are in the automatic
position.
To use it, pull the turn signal lever toward you, but not
so far that you hear a click.
If your headlamps are in the automatic position or on
low beam, your high-beam headlamps will turn on.
They’ll stay on as long as you hold the lever toward you
and the high-beam indicator on the instrument panel
cluster will come on. Release the lever to return
to normal operation.
Windshield Wipers
To operate the windshield wipers, turn the band located
on the multifunction lever upward or downward.
MIST:Turn the band to MIST for a single wiping cycle.
Hold it until the windshield wipers start. Then let it
go. The windshield wipers will stop after one wipe. If
you want more wipes, hold the band on MIST longer.
OFF:Turn the band to OFF to turn off the
windshield wipers.
Delayed Wiping:You can set the wiper speed for a
long or short delay between wipes. Turn the band
to choose the delay time. The closer to LO, the shorter
the delay.
LO (Low Speed):Turn the band away from you
to LO and past the delay settings for steady wiping at
low speed.
HI (High Speed):Turn the band away from you,
to HI, and past the delay settings for wiping steady at
high speed.
3-9
Page 144 of 432
Certain electrical accessories may not be compatible
with the cigarette lighter power outlet and could result in
blown vehicle or adapter fuses.
Notice:Adding any electrical equipment to your
vehicle may damage it or keep other components
from working as they should. The repairs would not
be covered by your warranty. Check with your
dealer before adding electrical equipment.
When adding electrical equipment, be sure to follow the
installation instructions included with the equipment.
Notice:Improper use of the cigarette lighter power
outlet can cause damage not covered by your
warranty. Do not hang any type of accessory or
accessory bracket from the plug. The cigarette
lighter power outlet is designed for accessory or as
a cigarette lighter only.Climate Controls
Climate Control System
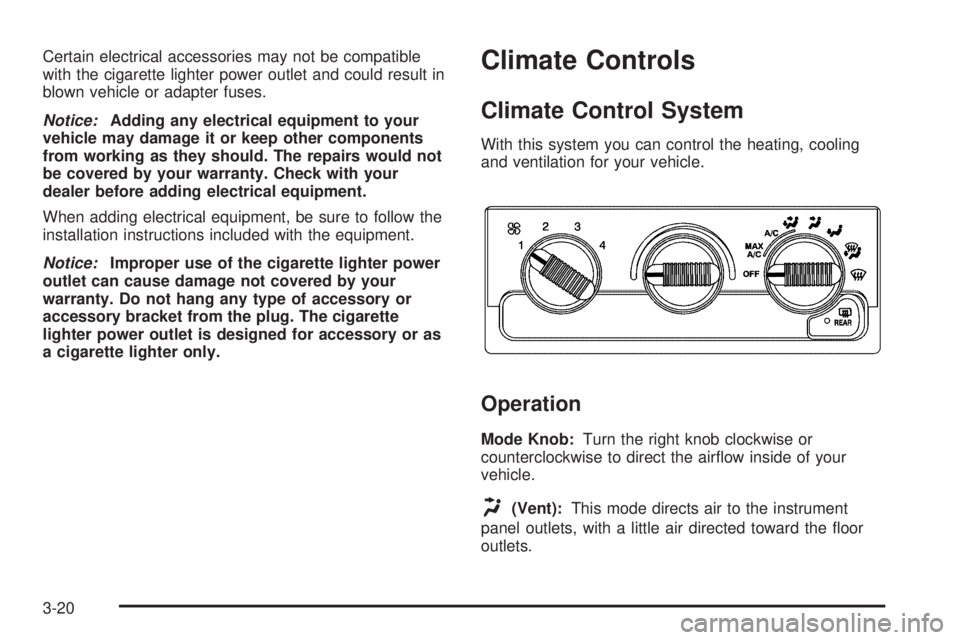
With this system you can control the heating, cooling
and ventilation for your vehicle.
Operation
Mode Knob:Turn the right knob clockwise or
counterclockwise to direct the air�ow inside of your
vehicle.
H(Vent):This mode directs air to the instrument
panel outlets, with a little air directed toward the �oor
outlets.
3-20
Page 145 of 432
)(Bi-Level):This mode directs half of the air to the
instrument panel outlets, then directs most of the
remaining air to the �oor outlets. A little air is also
directed toward the windshield and the side window
outlets. Cooler air is directed to the upper outlets and
warmer air to the �oor outlets.
6(Floor):This mode directs most of the air to the
�oor outlets with a little air directed to the windshield and
the side window outlets.
9(Fan):Turn the left knob clockwise or
counterclockwise to increase or decrease the fan speed.
Turn the mode knob to OFF to turn off the fan.
The mode knob can also be used to select defog or
defrost mode. For more information, see “Defogging and
Defrosting” later in this section.
On hot days, open the windows to let hot inside air
escape; then close them. This helps to reduce the time
it takes for your vehicle to cool down. It also helps
the system to operate more efficiently.
A/C (Air Conditioning):Turn the knob to the A/C
position to turn the air-conditioning system on or
off. When the system is on, this setting cools and
dehumidi�es the air entering your vehicle and directs it
through the �oor outlets as well as the instrument
panel outlets.MAX A/C (Maximum Air Conditioning):This mode
recirculates much of the air inside your vehicle so
it cools quickly. It directs most of the air through the
instrument panel vents and a small amount through the
�oor vents.
You may notice a slight change in engine performance
when the air-conditioning compressor shuts off and
turns on again. This is normal. The system is designed
to make adjustments to help with fuel economy while
still maintaining the selected temperature.
The air-conditioning system removes moisture from the
air, so you may sometimes notice a small amount of
water dripping underneath your vehicle while idling
or after turning off the engine. This is normal.
Defogging and Defrosting
Fog on the inside of windows is a result of high humidity
(moisture) condensing on the cool window glass. This
can be minimized if the climate control system is
used properly. There are two modes to clear fog or frost
from your windshield and side windows. Use the
defog mode to clear the windows of fog or moisture and
warm the passengers. use the defrost mode to
remove fog or frost from the windshield more quickly.
For best results, clear all snow and ice from the
windshield before defrosting.
3-21
Page 154 of 432

If the light comes on while you are driving, pull off the
road and stop carefully. You may notice that the pedal is
harder to push. Or, the pedal may go closer to the
�oor. It may take longer to stop. If the light is still on,
have the vehicle towed for service. SeeTowing
Your Vehicle on page 4-49.
{CAUTION:
Your brake system may not be working
properly if the brake system warning light is
on. Driving with the brake system warning light
on can lead to an accident. If the light is still
on after you have pulled off the road and
stopped carefully, have the vehicle towed for
service.
Anti-Lock Brake System
Warning Light
With the anti-lock brake
system, this light will
come on when you start
your engine and may
stay on for several
seconds. That’s normal.
If the light stays on, or comes on when you’re driving,
your vehicle needs service. If the regular brake
system warning light isn’t on, you still have brakes, but
you don’t have anti-lock brakes. If the regular brake
system warning light is also on, you don’t have anti-lock
brakes and there’s a problem with your regular
brakes. SeeBrake System Warning Light on page 3-29.
The anti-lock brake system warning light should come
on brie�y when you turn the ignition key to RUN. If
the light doesn’t come on then, have it �xed so it will be
ready to warn you if there is a problem.
3-30