fuse GMC JIMMY 2005 Owner's Manual
[x] Cancel search | Manufacturer: GMC, Model Year: 2005, Model line: JIMMY, Model: GMC JIMMY 2005Pages: 432, PDF Size: 2.65 MB
Page 8 of 432
Front Seats
Manual Seats
{CAUTION:
You can lose control of the vehicle if you try to
adjust a manual driver’s seat while the vehicle
is moving. The sudden movement could startle
and confuse you, or make you push a pedal
when you do not want to. Adjust the driver’s
seat only when the vehicle is not moving.
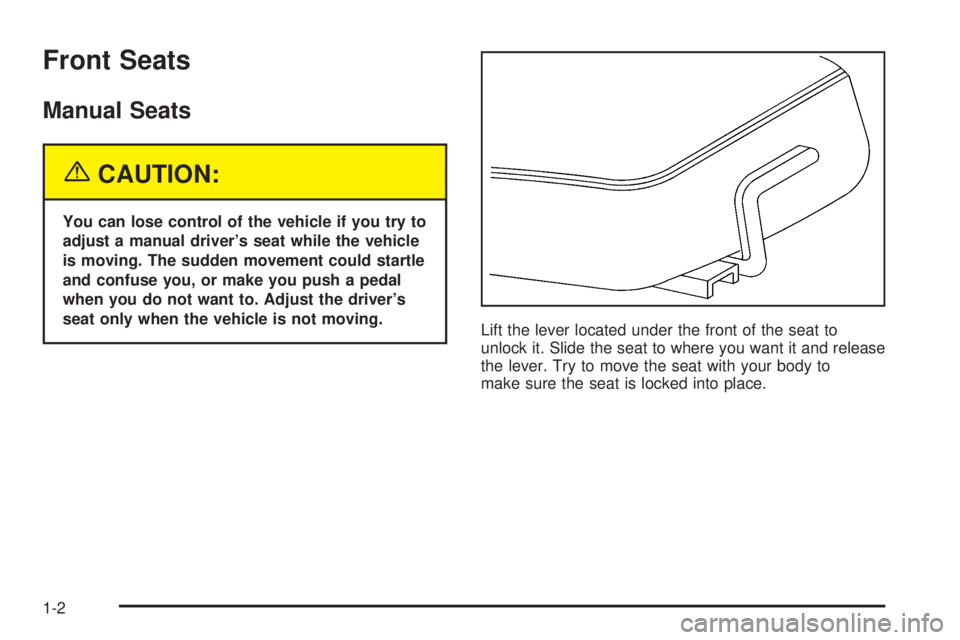
Lift the lever located under the front of the seat to
unlock it. Slide the seat to where you want it and release
the lever. Try to move the seat with your body to
make sure the seat is locked into place.
1-2
Page 83 of 432
3. Close all doors. The SECURITY light should go off
after approximately 30 seconds. The alarm is not
armed until the SECURITY light goes off.
If a door is opened without the key or the remote keyless
entry transmitter, the alarm will go off. Your vehicle’s
headlamps will �ash and the horn will sound for
110 seconds, then will turn off to save the battery power.
Remember, the theft-deterrent system won’t activate if
you lock the doors with a key or use the manual
door lock. It activates only if you use a power door lock
switch with the door open, or with the remote keyless
entry transmitter. You should also remember that
you can start your vehicle with the correct ignition key if
the alarm has been set off.
Here’s how to avoid setting off the alarm by accident:
If you don’t want to activate the theft-deterrent
system, the vehicle should be locked with the door
keyafterthe doors are closed.
Always unlock a door with a key, or use the remote
keyless entry transmitter. Unlocking a door any
other way will set off the alarm.
If you set off the alarm by accident, unlock any door
with the key. You can also turn off the alarm by pressing
UNLOCK on the remote keyless entry transmitter.
The alarm won’t stop if you try to unlock a door any
other way.
Testing the Alarm
The alarm can be tested by following these steps:
1. From inside the vehicle, lower the driver’s window
and open the driver’s door.
2. Activate the system by locking the doors with the
power door lock switch while the door is open, or
with the remote keyless entry transmitter.
3. Get out of the vehicle, close the door and wait for
the SECURITY light to go out.
4. Then reach in through the window, unlock the door
with the manual door lock and open the door. This
should set off the alarm.
If the alarm does not sound when it should but the
vehicle’s headlamps �ash, check to see if the horn
works. The horn fuse may be blown. To replace
the fuse, seeFuses and Circuit Breakers on page 5-90.
If the alarm does not sound or the vehicle’s headlamps
do not �ash, the vehicle should be serviced by an
authorized service center.
2-19
Page 84 of 432
Passlock®
Your vehicle is equipped with the
Passlock®theft-deterrent system.
Passlock
®is a passive theft-deterrent system.
Passlock®enables fuel if the ignition lock cylinder is
turned with a valid key. If a correct key is not used or the
ignition lock cylinder is tampered with, fuel is disabled.
During normal operation, the SECURITY light will go off
approximately �ve seconds after the key is turned
to RUN.
If the engine stalls and the SECURITY light �ashes,
wait about 10 minutes until the light stops �ashing before
trying to restart the engine. Remember to release the
key from START as soon as the engine starts.
If the engine does not start after three tries, the vehicle
needs service.
If the engine is running and the SECURITY message
comes on, you will be able to restart the engine if
you turn the engine off. However, your
Passlock
®system is not working properly and must be
serviced by your dealer. Your vehicle is not protected
by Passlock
®at this time. You may also want to check
the fuse. SeeFuses and Circuit Breakers on page 5-90.
See your dealer for service.
In an emergency, call the GM Roadside Assistance
Center. SeeRoadside Assistance Program on page 7-5.
Starting and Operating Your
Vehicle
New Vehicle Break-In
Notice:Your vehicle does not need an elaborate
break-in. But it will perform better in the long run if
you follow these guidelines:
Keep your speed at 55 mph (88 km/h) or less for
the �rst 500 miles (805 km).
Do not drive at any one speed — fast or
slow — for the �rst 500 miles (805 km). Do not
make full-throttle starts.
Avoid making hard stops for the �rst 200 miles
(322 km) or so. During this time your new brake
linings are not yet broken in. Hard stops with new
linings can mean premature wear and earlier
replacement. Follow this breaking-in guideline
every time you get new brake linings.
Do not tow a trailer during break-in. SeeTowing a
Trailer on page 4-57for more information.
2-20
Page 88 of 432

When starting your engine in very cold weather
(below 0°F or (–18°C), do this:
1. With your foot off the accelerator pedal, turn the
ignition key to START and hold it there up to
15 seconds. When the engine starts, let go of
the key.
2. If your engine still will not start, or starts but then
stops, it could be �ooded with too much gasoline.
Try pushing your accelerator pedal all the way to the
�oor and holding it there as you hold the key in
START for about three seconds. When the engine
starts, let go of the key and accelerator. If the
vehicle starts brie�y but then stops again, do the
same thing, but this time keep the pedal down
for �ve or six seconds. This clears the extra
gasoline from the engine.
Notice:Your engine is designed to work with the
electronics in your vehicle. If you add electrical
parts or accessories, you could change the way the
engine operates. Before adding electrical equipment,
check with your dealer. If you do not, your engine
might not perform properly.
Engine Speed Control
Your vehicle has an engine overspeed control that
shuts the fuel off if the engine reaches 5,600 rpm.
Engine Coolant Heater
Your vehicle may be equipped with this feature.
In very cold weather, 0°F (–18°C) or colder, the engine
coolant heater can help. You will get easier starting
and better fuel economy during engine warm-up.
Usually, the coolant heater should be plugged in a
minimum of four hours prior to starting your vehicle. At
temperatures above 32°F (0°C), use of the coolant
heater is not required. Your vehicle may also have an
internal thermostat in the plug end of the cord. This will
prevent operation of the engine coolant heater when
the temperature is at or above 0°F (−18°) as noted on
the cord.
To Use the Engine Coolant Heater
1. Turn off the engine.
2. Open the hood and unwrap the electrical cord. The
cord is located in the engine compartment behind
the underhood fuse block on the driver’s side of the
vehicle.
3. Plug it into a normal, grounded 110-volt AC outlet.
2-24
Page 132 of 432
Turn and Lane-Change Signals
The turn signal has two upward (for right) and
two downward (for left) positions. These positions
allow you to signal a turn or a lane change.
To signal a turn, move the lever all the way up or down.
When the turn is �nished, the lever will return
automatically.
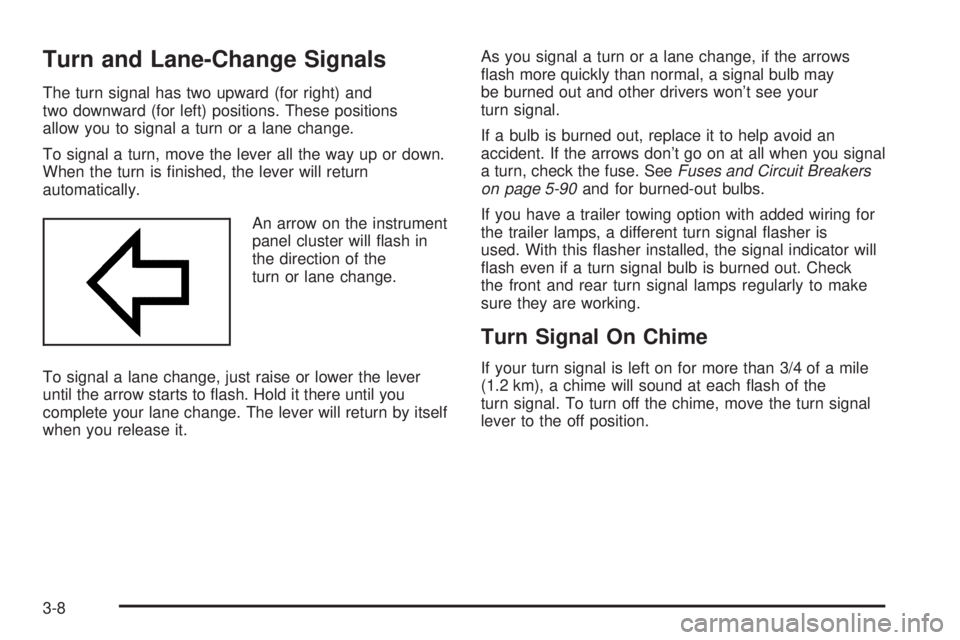
An arrow on the instrument
panel cluster will �ash in
the direction of the
turn or lane change.
To signal a lane change, just raise or lower the lever
until the arrow starts to �ash. Hold it there until you
complete your lane change. The lever will return by itself
when you release it.As you signal a turn or a lane change, if the arrows
�ash more quickly than normal, a signal bulb may
be burned out and other drivers won’t see your
turn signal.
If a bulb is burned out, replace it to help avoid an
accident. If the arrows don’t go on at all when you signal
a turn, check the fuse. SeeFuses and Circuit Breakers
on page 5-90and for burned-out bulbs.
If you have a trailer towing option with added wiring for
the trailer lamps, a different turn signal �asher is
used. With this �asher installed, the signal indicator will
�ash even if a turn signal bulb is burned out. Check
the front and rear turn signal lamps regularly to make
sure they are working.
Turn Signal On Chime
If your turn signal is left on for more than 3/4 of a mile
(1.2 km), a chime will sound at each �ash of the
turn signal. To turn off the chime, move the turn signal
lever to the off position.
3-8
Page 144 of 432
Certain electrical accessories may not be compatible
with the cigarette lighter power outlet and could result in
blown vehicle or adapter fuses.
Notice:Adding any electrical equipment to your
vehicle may damage it or keep other components
from working as they should. The repairs would not
be covered by your warranty. Check with your
dealer before adding electrical equipment.
When adding electrical equipment, be sure to follow the
installation instructions included with the equipment.
Notice:Improper use of the cigarette lighter power
outlet can cause damage not covered by your
warranty. Do not hang any type of accessory or
accessory bracket from the plug. The cigarette
lighter power outlet is designed for accessory or as
a cigarette lighter only.Climate Controls
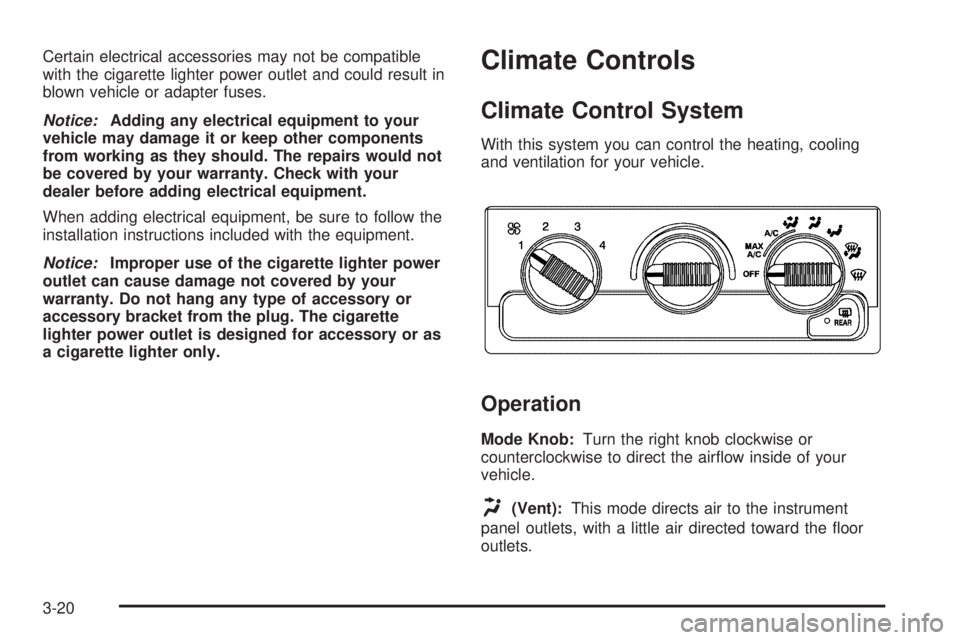
Climate Control System
With this system you can control the heating, cooling
and ventilation for your vehicle.
Operation
Mode Knob:Turn the right knob clockwise or
counterclockwise to direct the air�ow inside of your
vehicle.
H(Vent):This mode directs air to the instrument
panel outlets, with a little air directed toward the �oor
outlets.
3-20
Page 220 of 432

Environmental Concerns
Off-road driving can provide wholesome and satisfying
recreation. However, it also raises environmental
concerns. We recognize these concerns and urge every
off-roader to follow these basic rules for protecting
the environment:
Always use established trails, roads and areas that
have been specially set aside for public off-road
recreational driving; obey all posted regulations.
Avoid any driving practice that could damage the
environment — shrubs, �owers, trees, grasses — or
disturb wildlife (this includes wheel-spinning,
breaking down trees or unnecessary driving through
streams or over soft ground).
Always carry a litter bag — make sure all refuse is
removed from any campsite before leaving.
Take extreme care with open �res, where permitted,
camp stoves and lanterns.
Never park your vehicle over dry grass or other
combustible materials that could catch �re from the
heat of the vehicle’s exhaust system.
Traveling to Remote Areas
It makes sense to plan your trip, especially when going
to a remote area. Know the terrain and plan your
route. You are much less likely to get bad surprises.
Get accurate maps of trails and terrain. Try to learn of
any blocked or closed roads.
It is also a good idea to travel with at least one other
vehicle. If something happens to one of them, the other
can help quickly.
Does your vehicle have a winch? If so, be sure to read
the winch instructions. In a remote area, a winch
can be handy if you get stuck. But you will want to know
how to use it properly.
Getting Familiar with Off-Road Driving
It is a good idea to practice in an area that is safe
and close to home before you go into the wilderness.
Off-road driving does require some new and different
skills. Here is what we mean.
Tune your senses to different kinds of signals. Your
eyes, for example, need to constantly sweep the terrain
for unexpected obstacles. Your ears need to listen
for unusual tire or engine sounds. With your arms,
hands, feet and body, you will need to respond to
vibrations and vehicle bounce.
4-16
Page 255 of 432

{CAUTION:
Shifting a four-wheel-drive vehicle’s transfer
case into NEUTRAL can cause your vehicle to
roll even if the transmission is in Park (P) for
an automatic transmission, or if your vehicle is
in gear, for a manual transmission. You or
others could be injured. Make sure the parking
brake is �rmly set before you shift the transfer
case to NEUTRAL.
4. With the engine running, shift the transfer case to
NEUTRAL (N). See “Automatic Transfer Case”
underFour-Wheel Drive on page 5-44for more
information on how to shift the transfer case
to NEUTRAL.5. Release the parking brake only after the vehicle
being towed is �rmly attached to the towing
vehicle.
Notice:If you exceed 55 mph (90 km/h) while
towing your vehicle, it could be damaged. Never
exceed 55 mph (90 km/h) while towing your vehicle.
Notice:Do not exceed the posted speed limit
when towing your vehicle. If you do, your vehicle
could be badly damaged.
6. Turn the ignition to OFF. To prevent your battery
from draining while towing, remove the RDO BATT
and CLSTR fuses from the instrument panel
fuse block. Be sure to replace the fuse when you
reach your destination. SeeInstrument Panel
Fuse Block on page 5-91.
4-51
Page 257 of 432

Dolly Towing
(Vehicles with Automatic Transfer Case)
If your vehicle has an automatic transfer case, your
vehicle can be dolly towed.
1. Follow the dolly manufacturer’s instructions to attach
and secure the vehicle being towed to the dolly and
then the loaded dolly to the tow vehicle.
2. Firmly set the parking brake.
3. Put an automatic or a manual transmission in
NEUTRAL (N).
{CAUTION:
Shifting a four-wheel-drive vehicle’s transfer
case into NEUTRAL can cause your vehicle to
roll even if the transmission is in Park (P) for an
automatic transmission, or if your vehicle is in
gear, for a manual transmission. You or others
could be injured. Make sure the parking brake is
�rmly set before you shift the transfer case
to NEUTRAL.4. Shift the transfer case to 2HI. SeeFour-Wheel
Drive on page 2-30for how to shift the
transfer case.
5. Release the parking brake only after the vehicle
being towed is �rmly attached to the towing vehicle.
Notice:Do not exceed the posted speed limit when
towing your vehicle. If you do, your vehicle could
be badly damaged.
Notice:If you tow your vehicle from the front for
more than 50 miles (80 km) on a dolly, you could
damage it. Never dolly tow your vehicle from
the front more than 50 miles (80 km).
6. Turn the ignition to OFF. To prevent your battery
from draining while towing, remove the RDO BATT
and CLSTR fuses from the instrument panel fuse
block. Be sure to replace the fuse when you reach
your destination SeeInstrument Panel Fuse Block on
page 5-91.
4-53
Page 258 of 432

Rear Towing (Rear Wheels off the Ground)
If your vehicle has an electronic transfer case, you can
dolly tow your vehicle from the rear only if the rear wheels
are on the dolly. Use the following steps to dolly tow
your vehicle:
1. Follow the dolly manufacturer’s instructions to attach
and secure the vehicle being towed to the dolly and
then the loaded dolly to the tow vehicle.
2. Firmly set the parking brake.
3. Put the automatic or manual transmission in
NEUTRAL (N).
4. Release the parking brake only after the vehicle
being towed is �rmly attached to the towing vehicle.{CAUTION:
Shifting a four-wheel-drive vehicle’s transfer
case into NEUTRAL can cause your vehicle to
roll even if the transmission is in Park (P) for
an automatic transmission, or if your vehicle is
in gear, for a manual transmission. You or
others could be injured. Make sure the parking
brake is �rmly set before you shift the transfer
case to NEUTRAL.
Notice:Do not exceed the posted speed limit when
towing your vehicle. If you do, your vehicle could
be badly damaged.
5. Turn the ignition to OFF. To prevent your battery
from draining while towing, remove the RDO BATT
and CLSTR fuses from the instrument panel
fuse block. Be sure to replace the fuse when you
reach your destination. SeeInstrument Panel
Fuse Block on page 5-91.
4-54