high beam GMC SAVANA 2006 Owner's Manual
[x] Cancel search | Manufacturer: GMC, Model Year: 2006, Model line: SAVANA, Model: GMC SAVANA 2006Pages: 394, PDF Size: 2.56 MB
Page 119 of 394
Instrument Panel Overview...............................3-4
Hazard Warning Flashers................................3-5
Other Warning Devices...................................3-6
Horn.............................................................3-6
Tilt Wheel.....................................................3-6
Turn Signal/Multifunction Lever.........................3-7
Turn and Lane-Change Signals........................3-7
Headlamp High/Low-Beam Changer..................3-8
Flash-to-Pass.................................................3-8
Windshield Wipers..........................................3-9
Windshield Washer.........................................3-9
Cruise Control..............................................3-10
Exterior Lamps.............................................3-13
Headlamps on Reminder................................3-14
Daytime Running Lamps (DRL).......................3-14
Instrument Panel Brightness...........................3-14
Dome Lamps...............................................3-15
Dome Lamp Override....................................3-15
Entry Lighting...............................................3-15
Exit Lighting.................................................3-15
Reading Lamps............................................3-15
Battery Run-Down Protection..........................3-16
Accessory Power Outlet(s).............................3-16
Ashtray(s) and Cigarette Lighter......................3-17Climate Controls............................................3-17
Climate Control System.................................3-17
Outlet Adjustment.........................................3-20
Rear Heating System....................................3-21
Rear Air Conditioning and Heating System.......3-21
Warning Lights, Gages, and Indicators............3-23
Instrument Panel Cluster................................3-24
Speedometer and Odometer...........................3-25
Trip Odometer..............................................3-25
Engine Speed Limiter....................................3-25
Safety Belt Reminder Light.............................3-26
Passenger Safety Belt Reminder Light.............3-26
Airbag Readiness Light..................................3-27
Airbag Off Light............................................3-28
Passenger Airbag Status Indicator...................3-29
Charging System Light..................................3-32
Voltmeter Gage............................................3-32
Brake System Warning Light..........................3-33
Anti-Lock Brake System Warning Light.............3-34
StabiliTrak
®Not Ready Light..........................3-34
StabiliTrak®Indicator Light..............................3-35
Engine Coolant Temperature Gage..................3-35
Malfunction Indicator Lamp.............................3-36
Oil Pressure Gage........................................3-38
Section 3 Instrument Panel
3-1
Page 120 of 394
Change Engine Oil Light................................3-39
Security Light...............................................3-40
Cruise Control Light......................................3-40
Reduced Engine Power Light.........................3-41
Highbeam On Light.......................................3-41
Daytime Running Lamps (DRL) Indicator Light.....3-41
Tow/Haul Mode Light....................................3-42
Check Gages Warning Light...........................3-42
Fuel Gage...................................................3-42
Audio System(s).............................................3-43
Setting the Time for Radios without Radio
Data Systems (RDS)..................................3-44
Setting the Time for Radios with Radio
Data Systems (RDS)..................................3-44AM-FM Radio...............................................3-45
Radio with CD..............................................3-47
Radio with Cassette and CD..........................3-52
Radio with Six-Disc CD.................................3-63
Theft-Deterrent Feature (Non-RDS Radios).......3-74
Theft-Deterrent Feature (RDS Radios).............3-74
Radio Reception...........................................3-75
Care of the Cassette Tape Player...................3-75
Care of Your CDs.........................................3-76
Care of the CD Player...................................3-77
Fixed Mast Antenna......................................3-77
Chime Level Adjustment................................3-77
Section 3 Instrument Panel
3-2
Page 125 of 394
Turn Signal/Multifunction Lever
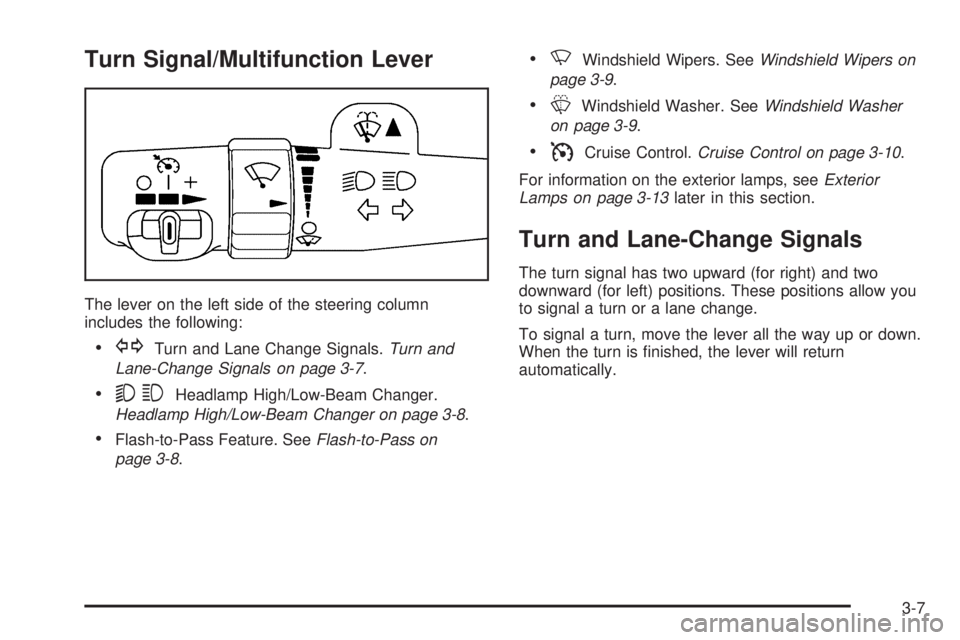
The lever on the left side of the steering column
includes the following:
•GTurn and Lane Change Signals.Turn and
Lane-Change Signals on page 3-7.
•53Headlamp High/Low-Beam Changer.
Headlamp High/Low-Beam Changer on page 3-8.
•Flash-to-Pass Feature. SeeFlash-to-Pass on
page 3-8.
•NWindshield Wipers. SeeWindshield Wipers on
page 3-9.
•LWindshield Washer. SeeWindshield Washer
on page 3-9.
•ICruise Control.Cruise Control on page 3-10.
For information on the exterior lamps, seeExterior
Lamps on page 3-13later in this section.
Turn and Lane-Change Signals
The turn signal has two upward (for right) and two
downward (for left) positions. These positions allow you
to signal a turn or a lane change.
To signal a turn, move the lever all the way up or down.
When the turn is finished, the lever will return
automatically.
3-7
Page 126 of 394
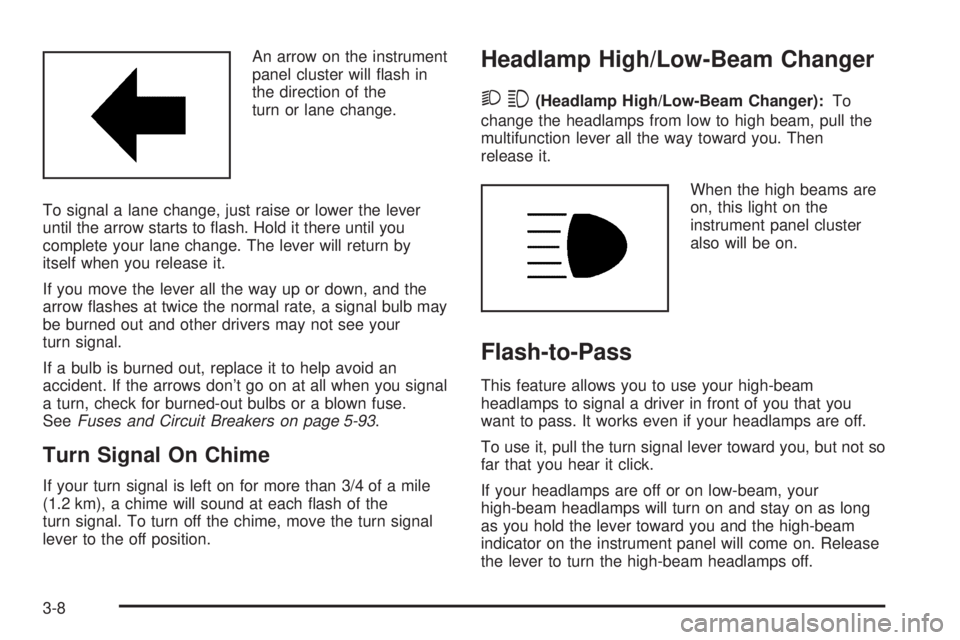
An arrow on the instrument
panel cluster will flash in
the direction of the
turn or lane change.
To signal a lane change, just raise or lower the lever
until the arrow starts to flash. Hold it there until you
complete your lane change. The lever will return by
itself when you release it.
If you move the lever all the way up or down, and the
arrow flashes at twice the normal rate, a signal bulb may
be burned out and other drivers may not see your
turn signal.
If a bulb is burned out, replace it to help avoid an
accident. If the arrows don’t go on at all when you signal
a turn, check for burned-out bulbs or a blown fuse.
SeeFuses and Circuit Breakers on page 5-93.
Turn Signal On Chime
If your turn signal is left on for more than 3/4 of a mile
(1.2 km), a chime will sound at each flash of the
turn signal. To turn off the chime, move the turn signal
lever to the off position.
Headlamp High/Low-Beam Changer
23(Headlamp High/Low-Beam Changer):To
change the headlamps from low to high beam, pull the
multifunction lever all the way toward you. Then
release it.
When the high beams are
on, this light on the
instrument panel cluster
also will be on.
Flash-to-Pass
This feature allows you to use your high-beam
headlamps to signal a driver in front of you that you
want to pass. It works even if your headlamps are off.
To use it, pull the turn signal lever toward you, but not so
far that you hear it click.
If your headlamps are off or on low-beam, your
high-beam headlamps will turn on and stay on as long
as you hold the lever toward you and the high-beam
indicator on the instrument panel will come on. Release
the lever to turn the high-beam headlamps off.
3-8
Page 131 of 394
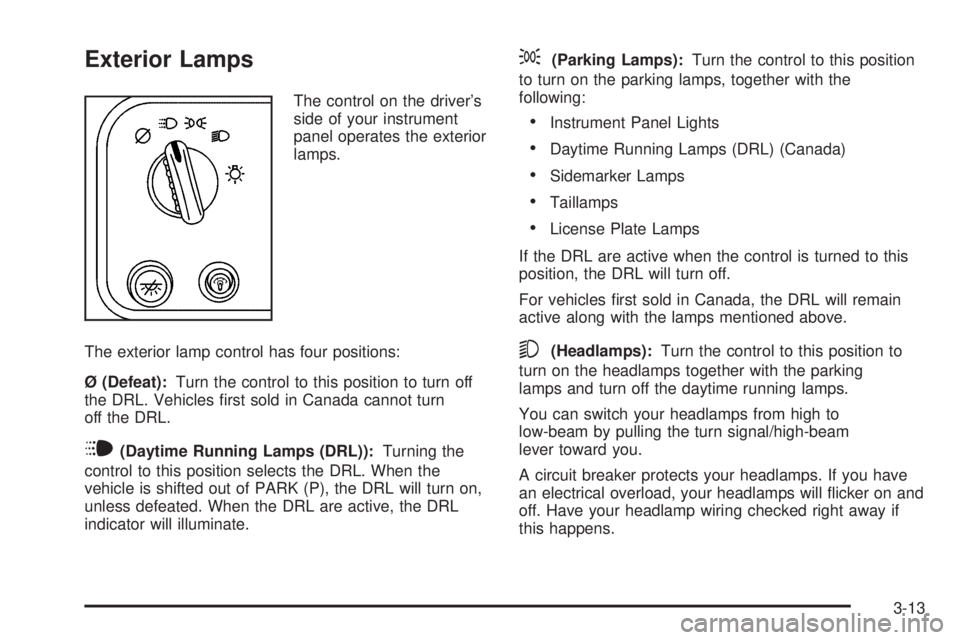
Exterior Lamps
The control on the driver’s
side of your instrument
panel operates the exterior
lamps.
The exterior lamp control has four positions:
Ø (Defeat):Turn the control to this position to turn off
the DRL. Vehicles first sold in Canada cannot turn
off the DRL.
i(Daytime Running Lamps (DRL)):Turning the
control to this position selects the DRL. When the
vehicle is shifted out of PARK (P), the DRL will turn on,
unless defeated. When the DRL are active, the DRL
indicator will illuminate.
;(Parking Lamps):Turn the control to this position
to turn on the parking lamps, together with the
following:
•Instrument Panel Lights
•Daytime Running Lamps (DRL) (Canada)
•Sidemarker Lamps
•Taillamps
•License Plate Lamps
If the DRL are active when the control is turned to this
position, the DRL will turn off.
For vehicles first sold in Canada, the DRL will remain
active along with the lamps mentioned above.
5(Headlamps):Turn the control to this position to
turn on the headlamps together with the parking
lamps and turn off the daytime running lamps.
You can switch your headlamps from high to
low-beam by pulling the turn signal/high-beam
lever toward you.
A circuit breaker protects your headlamps. If you have
an electrical overload, your headlamps will flicker on and
off. Have your headlamp wiring checked right away if
this happens.
3-13
Page 159 of 394
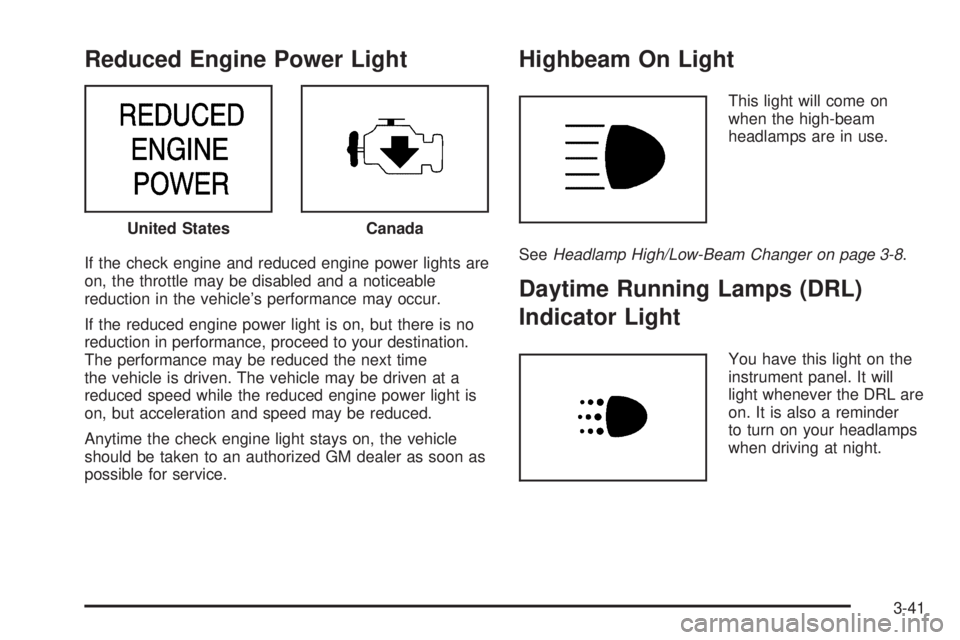
Reduced Engine Power Light
If the check engine and reduced engine power lights are
on, the throttle may be disabled and a noticeable
reduction in the vehicle’s performance may occur.
If the reduced engine power light is on, but there is no
reduction in performance, proceed to your destination.
The performance may be reduced the next time
the vehicle is driven. The vehicle may be driven at a
reduced speed while the reduced engine power light is
on, but acceleration and speed may be reduced.
Anytime the check engine light stays on, the vehicle
should be taken to an authorized GM dealer as soon as
possible for service.
Highbeam On Light
This light will come on
when the high-beam
headlamps are in use.
SeeHeadlamp High/Low-Beam Changer on page 3-8.
Daytime Running Lamps (DRL)
Indicator Light
You have this light on the
instrument panel. It will
light whenever the DRL are
on. It is also a reminder
to turn on your headlamps
when driving at night. United States
Canada
3-41
Page 213 of 394
Driving at Night
Night driving is more dangerous than day driving.
One reason is that some drivers are likely to be
impaired — by alcohol or drugs, with night vision
problems, or by fatigue.
Here are some tips on night driving.
•Drive defensively.
•Do not drink and drive.
•Adjust the inside rearview mirror to reduce the glare
from headlamps behind you.
•Since you cannot see as well, you may need to
slow down and keep more space between you
and other vehicles.
•Slow down, especially on higher speed roads.
Your vehicle’s headlamps can light up only so
much road ahead.
•In remote areas, watch for animals.
•If you are tired, pull off the road in a safe place
and rest.
No one can see as well at night as in the daytime. But
as we get older these differences increase. A
50-year-old driver may require at least twice as much
light to see the same thing at night as a 20-year-old.What you do in the daytime can also affect your night
vision. For example, if you spend the day in bright
sunshine you are wise to wear sunglasses. Your eyes
will have less trouble adjusting to night. But if you
are driving, do not wear sunglasses at night. They may
cut down on glare from headlamps, but they also
make a lot of things invisible.
You can be temporarily blinded by approaching
headlamps. It can take a second or two, or even several
seconds, for your eyes to re-adjust to the dark. When
you are faced with severe glare, as from a driver
who does not lower the high beams, or a vehicle with
misaimed headlamps, slow down a little. Avoid
staring directly into the approaching headlamps.
Keep the windshield and all the glass on your vehicle
clean — inside and out. Glare at night is made
much worse by dirt on the glass. Even the inside of the
glass can build up a film caused by dust. Dirty glass
makes lights dazzle and flash more than clean
glass would, making the pupils of your eyes contract
repeatedly.
Remember that the headlamps light up far less of a
roadway when you are in a turn or curve. Keep
your eyes moving; that way, it is easier to pick out dimly
lighted objects. Just as the headlamps should be
checked regularly for proper aim, so should your eyes
be examined regularly. Some drivers suffer from
night blindness — the inability to see in dim light — and
are not even aware of it.
4-17
Page 298 of 394
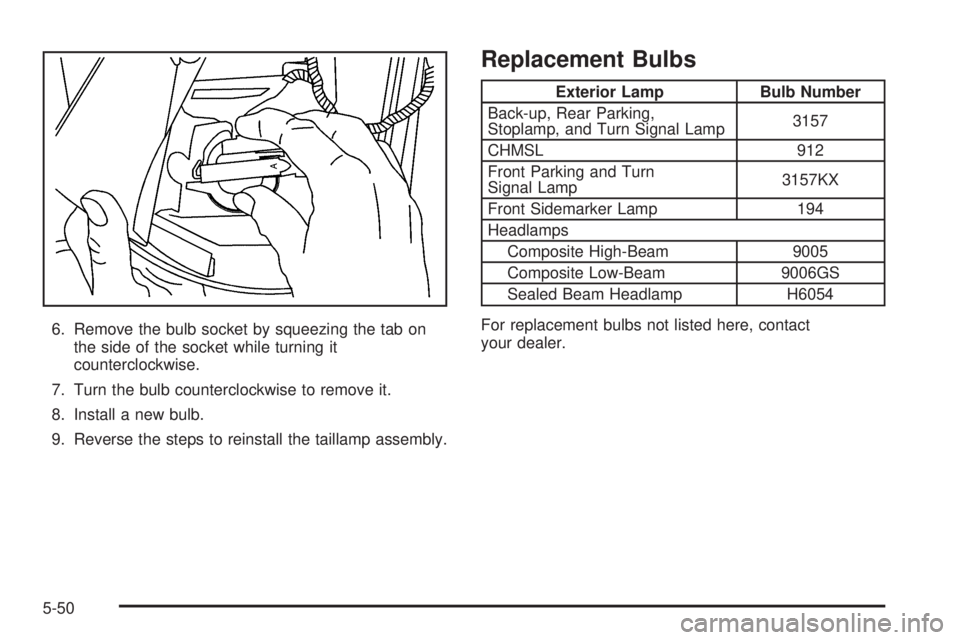
6. Remove the bulb socket by squeezing the tab on
the side of the socket while turning it
counterclockwise.
7. Turn the bulb counterclockwise to remove it.
8. Install a new bulb.
9. Reverse the steps to reinstall the taillamp assembly.
Replacement Bulbs
Exterior Lamp Bulb Number
Back-up, Rear Parking,
Stoplamp, and Turn Signal Lamp3157
CHMSL 912
Front Parking and Turn
Signal Lamp3157KX
Front Sidemarker Lamp 194
Headlamps
Composite High-Beam 9005
Composite Low-Beam 9006GS
Sealed Beam Headlamp H6054
For replacement bulbs not listed here, contact
your dealer.
5-50
Page 345 of 394
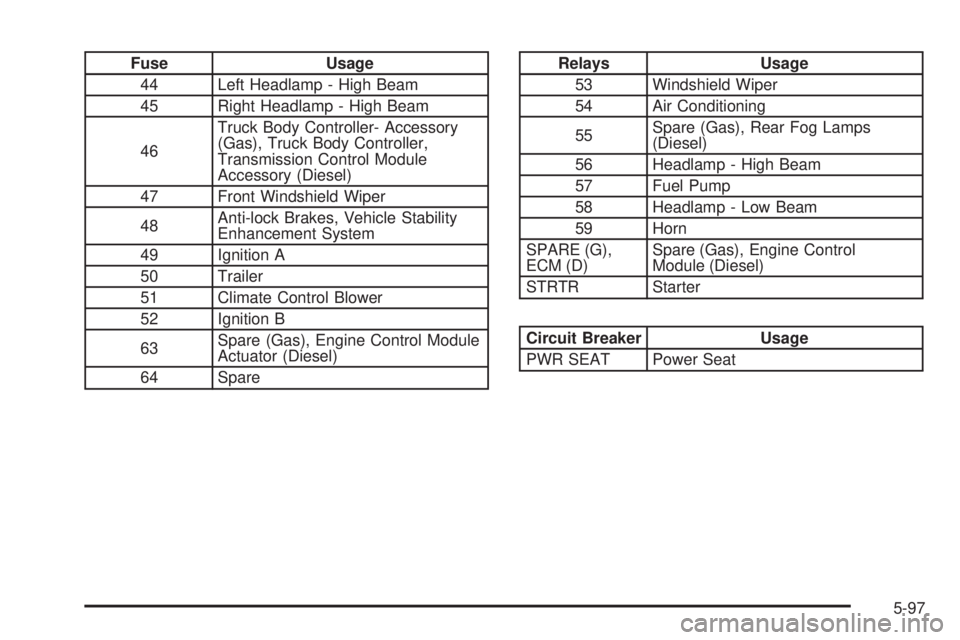
Fuse Usage
44 Left Headlamp - High Beam
45 Right Headlamp - High Beam
46Truck Body Controller- Accessory
(Gas), Truck Body Controller,
Transmission Control Module
Accessory (Diesel)
47 Front Windshield Wiper
48Anti-lock Brakes, Vehicle Stability
Enhancement System
49 Ignition A
50 Trailer
51 Climate Control Blower
52 Ignition B
63Spare (Gas), Engine Control Module
Actuator (Diesel)
64 SpareRelays Usage
53 Windshield Wiper
54 Air Conditioning
55Spare (Gas), Rear Fog Lamps
(Diesel)
56 Headlamp - High Beam
57 Fuel Pump
58 Headlamp - Low Beam
59 Horn
SPARE (G),
ECM (D)Spare (Gas), Engine Control
Module (Diesel)
STRTR Starter
Circuit Breaker Usage
PWR SEAT Power Seat
5-97
Page 388 of 394
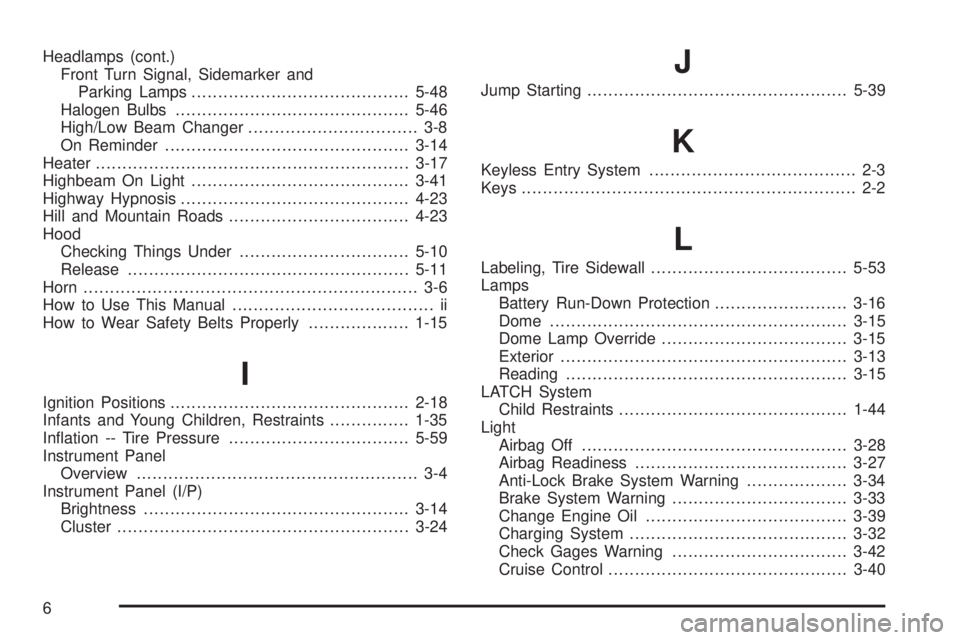
Headlamps (cont.)
Front Turn Signal, Sidemarker and
Parking Lamps.........................................5-48
Halogen Bulbs............................................5-46
High/Low Beam Changer................................ 3-8
On Reminder..............................................3-14
Heater...........................................................3-17
Highbeam On Light.........................................3-41
Highway Hypnosis...........................................4-23
Hill and Mountain Roads..................................4-23
Hood
Checking Things Under................................5-10
Release.....................................................5-11
Horn............................................................... 3-6
How to Use This Manual...................................... ii
How to Wear Safety Belts Properly...................1-15
I
Ignition Positions.............................................2-18
Infants and Young Children, Restraints...............1-35
Inflation -- Tire Pressure..................................5-59
Instrument Panel
Overview..................................................... 3-4
Instrument Panel (I/P)
Brightness..................................................3-14
Cluster.......................................................3-24
J
Jump Starting.................................................5-39
K
Keyless Entry System....................................... 2-3
Keys............................................................... 2-2
L
Labeling, Tire Sidewall.....................................5-53
Lamps
Battery Run-Down Protection.........................3-16
Dome........................................................3-15
Dome Lamp Override...................................3-15
Exterior......................................................3-13
Reading.....................................................3-15
LATCH System
Child Restraints...........................................1-44
Light
Airbag Off..................................................3-28
Airbag Readiness........................................3-27
Anti-Lock Brake System Warning...................3-34
Brake System Warning.................................3-33
Change Engine Oil......................................3-39
Charging System.........................................3-32
Check Gages Warning.................................3-42
Cruise Control.............................................3-40
6