oil level GMC SAVANA 2006 Owner's Manual
[x] Cancel search | Manufacturer: GMC, Model Year: 2006, Model line: SAVANA, Model: GMC SAVANA 2006Pages: 394, PDF Size: 2.56 MB
Page 120 of 394
Change Engine Oil Light................................3-39
Security Light...............................................3-40
Cruise Control Light......................................3-40
Reduced Engine Power Light.........................3-41
Highbeam On Light.......................................3-41
Daytime Running Lamps (DRL) Indicator Light.....3-41
Tow/Haul Mode Light....................................3-42
Check Gages Warning Light...........................3-42
Fuel Gage...................................................3-42
Audio System(s).............................................3-43
Setting the Time for Radios without Radio
Data Systems (RDS)..................................3-44
Setting the Time for Radios with Radio
Data Systems (RDS)..................................3-44AM-FM Radio...............................................3-45
Radio with CD..............................................3-47
Radio with Cassette and CD..........................3-52
Radio with Six-Disc CD.................................3-63
Theft-Deterrent Feature (Non-RDS Radios).......3-74
Theft-Deterrent Feature (RDS Radios).............3-74
Radio Reception...........................................3-75
Care of the Cassette Tape Player...................3-75
Care of Your CDs.........................................3-76
Care of the CD Player...................................3-77
Fixed Mast Antenna......................................3-77
Chime Level Adjustment................................3-77
Section 3 Instrument Panel
3-2
Page 157 of 394
A reading in the low pressure zone may be caused by a
dangerously low oil level or other problem causing
low oil pressure. Check your oil as soon as possible.
{CAUTION:
Do not keep driving if the oil pressure is low. If
you do, your engine can become so hot that it
catches �re. You or others could be burned.
Check your oil as soon as possible and have
your vehicle serviced.
Notice:Lack of proper engine oil maintenance may
damage the engine. The repairs would not be
covered by your warranty. Always follow the
maintenance schedule in this manual for changing
engine oil.
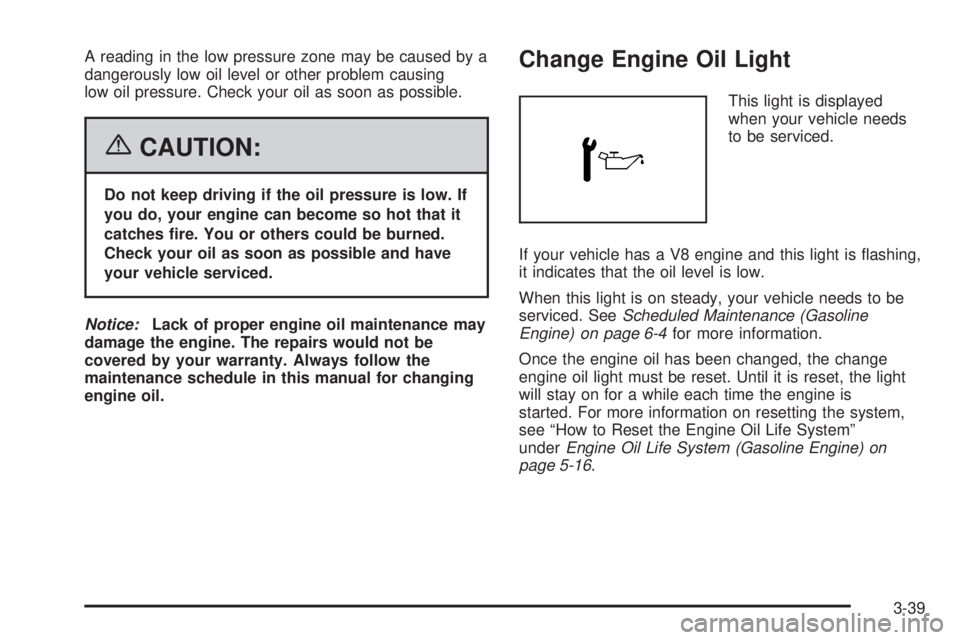
Change Engine Oil Light
This light is displayed
when your vehicle needs
to be serviced.
If your vehicle has a V8 engine and this light is flashing,
it indicates that the oil level is low.
When this light is on steady, your vehicle needs to be
serviced. SeeScheduled Maintenance (Gasoline
Engine) on page 6-4for more information.
Once the engine oil has been changed, the change
engine oil light must be reset. Until it is reset, the light
will stay on for a while each time the engine is
started. For more information on resetting the system,
see “How to Reset the Engine Oil Life System”
underEngine Oil Life System (Gasoline Engine) on
page 5-16.
3-39
Page 218 of 394
When you want to leave the freeway, move to the
proper lane well in advance. If you miss your exit, do
not, under any circumstances, stop and back up. Drive
on to the next exit.
The exit ramp can be curved, sometimes quite sharply.
The exit speed is usually posted.
Reduce your speed according to your speedometer, not
to your sense of motion. After driving for any distance
at higher speeds, you may tend to think you are
going slower than you actually are.
Before Leaving on a Long Trip
Make sure you are ready. Try to be well rested. If you
must start when you are not fresh — such as after
a day’s work — do not plan to make too many miles that
first part of the journey. Wear comfortable clothing
and shoes you can easily drive in.
Is your vehicle ready for a long trip? If you keep it
serviced and maintained, it is ready to go. If it needs
service, have it done before starting out. Of course, you
will find experienced and able service experts in GM
dealerships all across North America. They will be ready
and willing to help if you need it.Here are some things you can check before a trip:
•Windshield Washer Fluid:Is the reservoir full? Are
all windows clean inside and outside?
•Wiper Blades:Are they in good shape?
•Fuel, Engine Oil, Other Fluids:Have you checked
all levels?
•Lamps:Are they all working? Are the lenses clean?
•Tires:They are vitally important to a safe,
trouble-free trip. Is the tread good enough for
long-distance driving? Are the tires all inflated to the
recommended pressure?
•Weather Forecasts:What is the weather outlook
along your route? Should you delay your trip a
short time to avoid a major storm system?
•Maps:Do you have up-to-date maps?
4-22
Page 246 of 394
When towing at high altitude on steep uphill grades,
consider the following: Engine coolant will boil at a lower
temperature than at normal altitudes. If you turn your
engine off immediately after towing at high altitude
on steep uphill grades, your vehicle may show signs
similar to engine overheating. To avoid this, let the
engine run while parked (preferably on level ground)
with the automatic transmission in PARK (P) for a
few minutes before turning the engine off. If you do get
the overheat warning, seeEngine Overheating on
page 5-24.
Parking on Hills
{CAUTION:
You really should not park your vehicle, with a
trailer attached, on a hill. If something goes
wrong, your rig could start to move. People
can be injured, and both your vehicle and the
trailer can be damaged.
But if you ever have to park your rig on a hill, here’s
how to do it:
1. Apply your regular brakes, but don’t shift into
PARK (P) yet. Then turn your wheels into the curb if
facing downhill or into traffic if facing uphill.2. Have someone place chocks under the
trailer wheels.
3. When the wheel chocks are in place, release the
regular brakes until the chocks absorb the load.
4. Reapply the regular brakes. Then apply your
parking brake and then shift to PARK (P).
5. Release the regular brakes.
When You Are Ready to Leave After
Parking on a Hill
1. Apply your regular brakes and hold the pedal down
while you:
•start your engine,
•shift into a gear, and
•release the parking brake.
2. Let up on the brake pedal.
3. Drive slowly until the trailer is clear of the chocks.
4. Stop and have someone pick up and store
the chocks.
4-50
Page 261 of 394
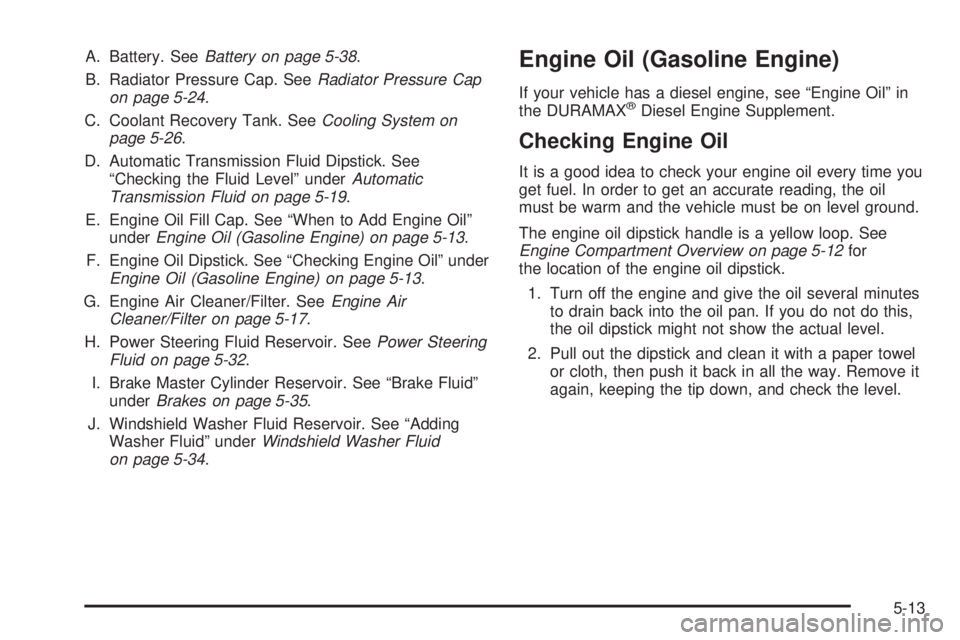
A. Battery. SeeBattery on page 5-38.
B. Radiator Pressure Cap. SeeRadiator Pressure Cap
on page 5-24.
C. Coolant Recovery Tank. SeeCooling System on
page 5-26.
D. Automatic Transmission Fluid Dipstick. See
“Checking the Fluid Level” underAutomatic
Transmission Fluid on page 5-19.
E. Engine Oil Fill Cap. See “When to Add Engine Oil”
underEngine Oil (Gasoline Engine) on page 5-13.
F. Engine Oil Dipstick. See “Checking Engine Oil” under
Engine Oil (Gasoline Engine) on page 5-13.
G. Engine Air Cleaner/Filter. SeeEngine Air
Cleaner/Filter on page 5-17.
H. Power Steering Fluid Reservoir. SeePower Steering
Fluid on page 5-32.
I. Brake Master Cylinder Reservoir. See “Brake Fluid”
underBrakes on page 5-35.
J. Windshield Washer Fluid Reservoir. See “Adding
Washer Fluid” underWindshield Washer Fluid
on page 5-34.Engine Oil (Gasoline Engine)
If your vehicle has a diesel engine, see “Engine Oil” in
the DURAMAX®Diesel Engine Supplement.
Checking Engine Oil
It is a good idea to check your engine oil every time you
get fuel. In order to get an accurate reading, the oil
must be warm and the vehicle must be on level ground.
The engine oil dipstick handle is a yellow loop. See
Engine Compartment Overview on page 5-12for
the location of the engine oil dipstick.
1. Turn off the engine and give the oil several minutes
to drain back into the oil pan. If you do not do this,
the oil dipstick might not show the actual level.
2. Pull out the dipstick and clean it with a paper towel
or cloth, then push it back in all the way. Remove it
again, keeping the tip down, and check the level.
5-13
Page 262 of 394
When to Add Engine Oil
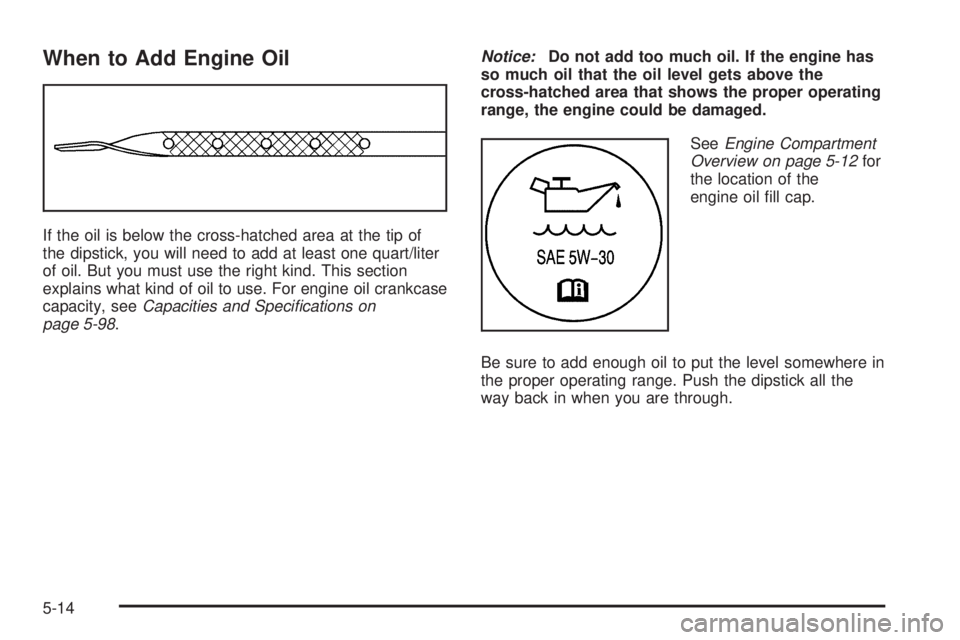
If the oil is below the cross-hatched area at the tip of
the dipstick, you will need to add at least one quart/liter
of oil. But you must use the right kind. This section
explains what kind of oil to use. For engine oil crankcase
capacity, seeCapacities and Speci�cations on
page 5-98.Notice:Do not add too much oil. If the engine has
so much oil that the oil level gets above the
cross-hatched area that shows the proper operating
range, the engine could be damaged.
SeeEngine Compartment
Overview on page 5-12for
the location of the
engine oil fill cap.
Be sure to add enough oil to put the level somewhere in
the proper operating range. Push the dipstick all the
way back in when you are through.
5-14
Page 264 of 394
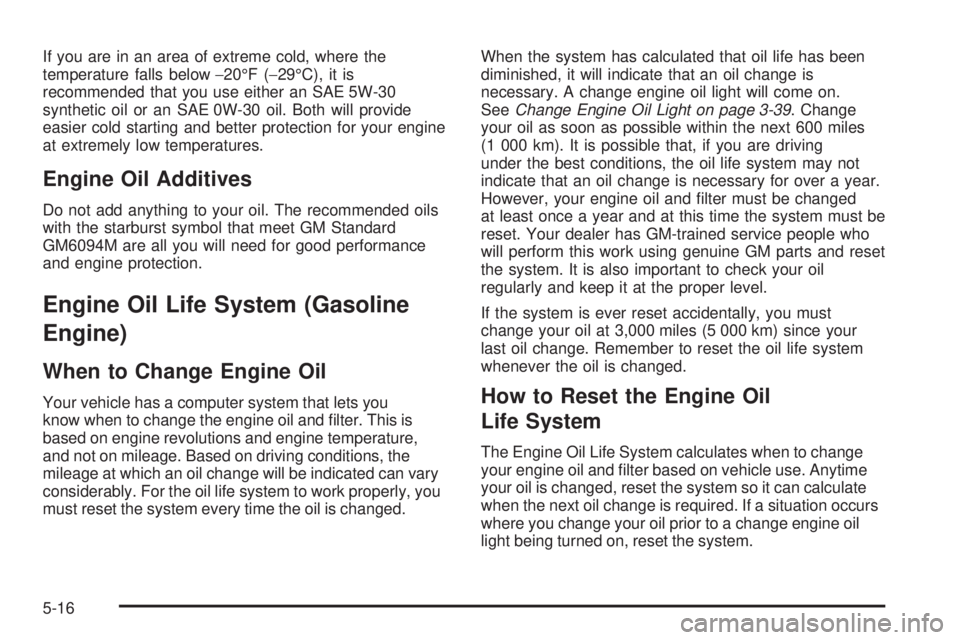
If you are in an area of extreme cold, where the
temperature falls below−20°F (−29°C), it is
recommended that you use either an SAE 5W-30
synthetic oil or an SAE 0W-30 oil. Both will provide
easier cold starting and better protection for your engine
at extremely low temperatures.
Engine Oil Additives
Do not add anything to your oil. The recommended oils
with the starburst symbol that meet GM Standard
GM6094M are all you will need for good performance
and engine protection.
Engine Oil Life System (Gasoline
Engine)
When to Change Engine Oil
Your vehicle has a computer system that lets you
know when to change the engine oil and filter. This is
based on engine revolutions and engine temperature,
and not on mileage. Based on driving conditions, the
mileage at which an oil change will be indicated can vary
considerably. For the oil life system to work properly, you
must reset the system every time the oil is changed.When the system has calculated that oil life has been
diminished, it will indicate that an oil change is
necessary. A change engine oil light will come on.
SeeChange Engine Oil Light on page 3-39. Change
your oil as soon as possible within the next 600 miles
(1 000 km). It is possible that, if you are driving
under the best conditions, the oil life system may not
indicate that an oil change is necessary for over a year.
However, your engine oil and filter must be changed
at least once a year and at this time the system must be
reset. Your dealer has GM-trained service people who
will perform this work using genuine GM parts and reset
the system. It is also important to check your oil
regularly and keep it at the proper level.
If the system is ever reset accidentally, you must
change your oil at 3,000 miles (5 000 km) since your
last oil change. Remember to reset the oil life system
whenever the oil is changed.How to Reset the Engine Oil
Life System
The Engine Oil Life System calculates when to change
your engine oil and filter based on vehicle use. Anytime
your oil is changed, reset the system so it can calculate
when the next oil change is required. If a situation occurs
where you change your oil prior to a change engine oil
light being turned on, reset the system.
5-16
Page 267 of 394
Automatic Transmission Fluid
When to Check and Change Automatic
Transmission Fluid
A good time to check your automatic transmission fluid
level is when the engine oil is changed.
Change the fluid and filter at the intervals listed in
Additional Required Services (Gasoline Engine) on
page 6-6, and be sure to use the transmission fluid listed
inRecommended Fluids and Lubricants (Gasoline
Engine) on page 6-13.
How to Check Automatic Transmission
Fluid
Because this operation can be a little difficult, you may
choose to have this done at the dealership service
department.
If you do it yourself, be sure to follow all the instructions
here, or you could get a false reading on the dipstick.
Notice:Too much or too little �uid can damage
your transmission. Too much can mean that some
of the �uid could come out and fall on hot engine
part or exhaust system parts, starting a �re.
Too little �uid could cause the transmission to
overheat. Be sure to get an accurate reading if you
check your transmission �uid.Wait at least 30 minutes before checking the
transmission fluid level if you have been driving:
•When outside temperatures are above 90°F (32°C).
•At high speed for quite a while.
•In heavy traffic — especially in hot weather.
•While pulling a trailer.
To get the right reading, the fluid should be at normal
operating temperature, which is 180°F to 200°F
(82°C to 93°C).
Get the vehicle warmed up by driving about 15 miles
(24 km) when outside temperatures are above 50°F
(10°C). If it is colder than 50°F (10°C), drive the vehicle
in DRIVE (D) until the engine temperature gage
moves and then remains steady for 10 minutes.
A cold fluid check can be made after the vehicle has
been sitting for eight hours or more with the engine off,
but this is used only as a reference. Let the engine
run at idle for five minutes if outside temperatures are
50°F (10°C) or more. If it is colder than 50°F (10°C), you
may have to idle the engine longer. Should the fluid
level be low during this cold check, you must check the
fluid hot before adding fluid. Checking the fluid hot
will give you a more accurate reading of the fluid level.
5-19
Page 269 of 394
How to Add Automatic Transmission
Fluid
Refer to the Maintenance Schedule to determine what
kind of transmission fluid to use. SeeRecommended
Fluids and Lubricants (Gasoline Engine) on page 6-13.
Using a funnel, add fluid down the transmission
dipstick tube only after checking the transmission fluid
while it is hot. A cold check is used only as a reference.
If the fluid level is low, add only enough of the proper
fluid to bring the level up to the HOT area for a hot
check. It does not take much fluid, generally less than
one pint (0.5 L). Do not overfill.
Notice:Use of the incorrect automatic transmission
�uid may damage your vehicle, and the damages
may not be covered by your warranty. Always
use the automatic transmission �uid listed in
Recommended Fluids and Lubricants (Gasoline
Engine) on page 6-13.
•After adding fluid, recheck the fluid level as
described under “How to Check Automatic
Transmission Fluid,” earlier in this section.
•When the correct fluid level is obtained, push the
dipstick back in all the way; then flip the handle
down to lock the dipstick in place.
Engine Coolant
The cooling system in your vehicle is filled with
DEX-COOL®engine coolant. This coolant is designed
to remain in your vehicle for five years or 150,000 miles
(240 000 km), whichever occurs first, if you add only
DEX-COOL
®extended life coolant.
The following explains your cooling system and how to
add coolant when it is low. If you have a problem
with engine overheating, seeEngine Overheating on
page 5-24.
A 50/50 mixture of clean, drinkable water and
DEX-COOL
®coolant will:
•Give freezing protection down to−34°F (−37°C).
•Give boiling protection up to 265°F (129°C).
•Protect against rust and corrosion.
•Help keep the proper engine temperature.
•Let the warning lights and gages work as
they should.
Notice:Using coolant other than DEX-COOL
®may
cause premature engine, heater core, radiator
and fuel operated heater (FOH) corrosion. In
addition, the engine coolant may require changing
sooner, at 30,000 miles (50 000 km) or 24 months,
whichever occurs �rst. Any repairs would not
be covered by your warranty. Always use
DEX-COOL
®(silicate-free) coolant in your vehicle.
5-21
Page 274 of 394
Cooling System
If your vehicle has a diesel engine, see “Van Models”
under “Cooling System” in the DURAMAX®Diesel
Supplement.
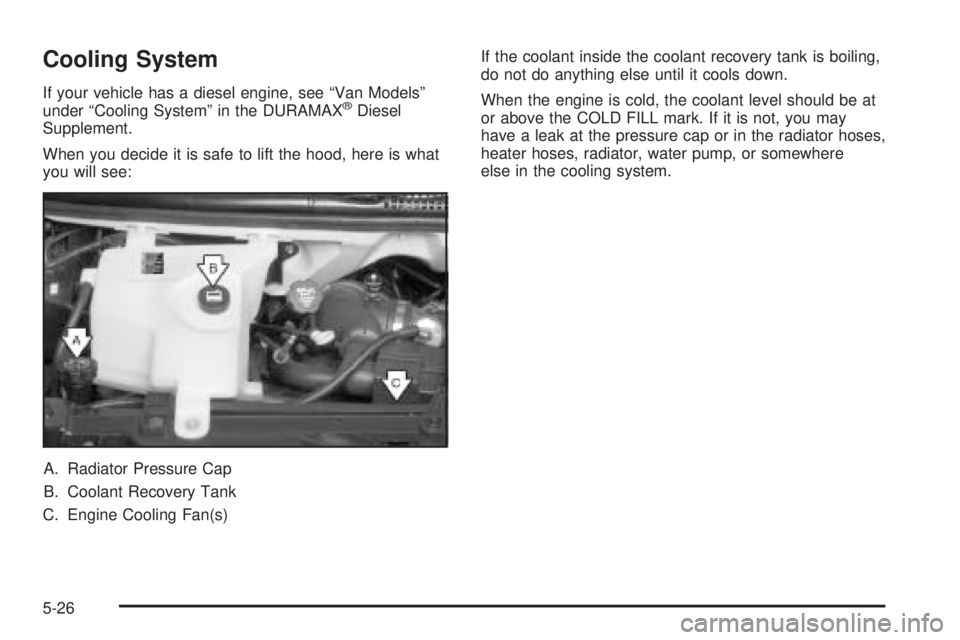
When you decide it is safe to lift the hood, here is what
you will see:
A. Radiator Pressure Cap
B. Coolant Recovery Tank
C. Engine Cooling Fan(s)If the coolant inside the coolant recovery tank is boiling,
do not do anything else until it cools down.
When the engine is cold, the coolant level should be at
or above the COLD FILL mark. If it is not, you may
have a leak at the pressure cap or in the radiator hoses,
heater hoses, radiator, water pump, or somewhere
else in the cooling system.
5-26