display GMC SAVANA 2010 Workshop Manual
[x] Cancel search | Manufacturer: GMC, Model Year: 2010, Model line: SAVANA, Model: GMC SAVANA 2010Pages: 424, PDF Size: 2.4 MB
Page 221 of 424
For the Six-Disc CD player, press and hold this button for
two seconds to eject all discs.
f(Tune):Turn this knob to select MP3 files on the
CD-R or CD-RW currently playing.
©SEEK¨:Press the left SEEK arrow to go to the
start of the current MP3 file, if more than 10 seconds
have played. Press the right arrow to go to the next MP3
file. If either SEEK arrow is held or pressed multiple
times, the player continues moving backward or forward
through MP3 files on the CD.
Sc(Previous Folder):Press the pushbutton
positioned under the Folder label to go to the first track in
the previous folder.
cT(Next Folder):Press the pushbutton positioned
under the Folder label to go to the first track in the next
folder.
sREV (Reverse):Press and hold this button to
reverse playback quickly within an MP3 file. Sound is
heard at a reduced volume. Release this button to
resume playing the file. The elapsed time of the file
displays.
\FWD (Fast Forward):Press and hold this button to
advance playback quickly within an MP3 file. Sound is
heard at a reduced volume. Release this button to
resume playing the file. The elapsed time of the file
displays.RDM (Random):With the random setting, MP3 files on
the CD-R or CD-RW can be listened to in random,
rather than sequential order, on one CD-R/CD-RW or all
discs in a six-disc CD player. To use random, do one
of the following:
1. To play MP3 files from the CD-R or CD-RW you
are listening to in random order, press the
pushbutton positioned under the RDM label until
Random Current Disc displays. Press the same
pushbutton again to turn off random play.
2. To play songs from all CDs loaded in a six-disc CD
player in random order, press the pushbutton
positioned under the RDM label until Randomize All
Discs displays. Press the same pushbutton again
to turn off random play.
h(Music Navigator):Use the music navigator
feature to play MP3 files on the CD-R or CD-RW in order
by artist or album. Press the pushbutton located below
the music navigator label. The player scans the disc to
sort the files by artist and album ID3 tag information. It
could take several minutes to scan the disc depending on
the number of MP3 files recorded to the CD-R or CD-RW.
The radio can begin playing while it is scanning the disc
in the background. When the scan is finished, the CD-R
or CD-RW begins playing again.
4-75
Page 222 of 424
Once the disc has scanned, the player defaults to playing
MP3 files in order by artist. The current artist playing is
shown on the second line of the display between the
arrows. Once all songs by that artist are played, the
player moves to the next artist in alphabetical order on
the CD-R/CD-RW and begins playing MP3 files by that
artist. If you want to listen to MP3 files by another artist,
press the pushbutton located below either arrow button.
You will go to the next or previous artist in alphabetical
order. Continue pressing either button until the desired
artist is displayed.
To change from playback by artist to playback by album,
press the pushbutton located below the Sort By label.
From the sort screen, push one of the buttons below the
album button. Press the pushbutton below the back label
to return to the main music navigator screen. Now the
album name is displayed on the second line between the
arrows and songs from the current album begins to play.
Once all songs from that album are played, the player
moves to the next album in alphabetical order on the
CD-R/CD-RW and begins playing MP3 files from that
album.
To exit music navigator mode, press the pushbutton
below the Back label to return to normal MP3 playback.
BAND:Press this button to listen to the radio when a
CD is playing. The inactive CD remains inside the radio
for future listening.CD/AUX (CD/Auxiliary):Press this button to play a CD
when listening to the radio. The CD icon and a
message showing disc and/or track number displays
when a CD is in the player. Press this button again and
the system automatically searches for an auxiliary
input device such as a portable audio player. If a
portable audio player is not connected, “No Input Device
Found” displays.
Theft-Deterrent Feature
Non-RDS Radios
THEFTLOCK®is designed to discourage theft of your
vehicle’s radio. The feature works automatically by
learning a portion of the Vehicle Identification Number
(VIN). If the radio is moved to a different vehicle, it does
not operate and LOC displays.
With THEFTLOCK
®activated, the radio does not
operate if stolen.
RDS Radios
THEFTLOCK®is designed to discourage theft of your
vehicle’s radio. The feature works automatically by
learning a portion of the Vehicle Identification Number
(VIN). If the radio is moved to a different vehicle, it does
not operate and LOCKED displays.
4-76
Page 223 of 424
When the radio and vehicle are turned off, the blinking
red light indicates that THEFTLOCK®is armed.
With THEFTLOCK
®activated, the radio does not
operate if stolen.
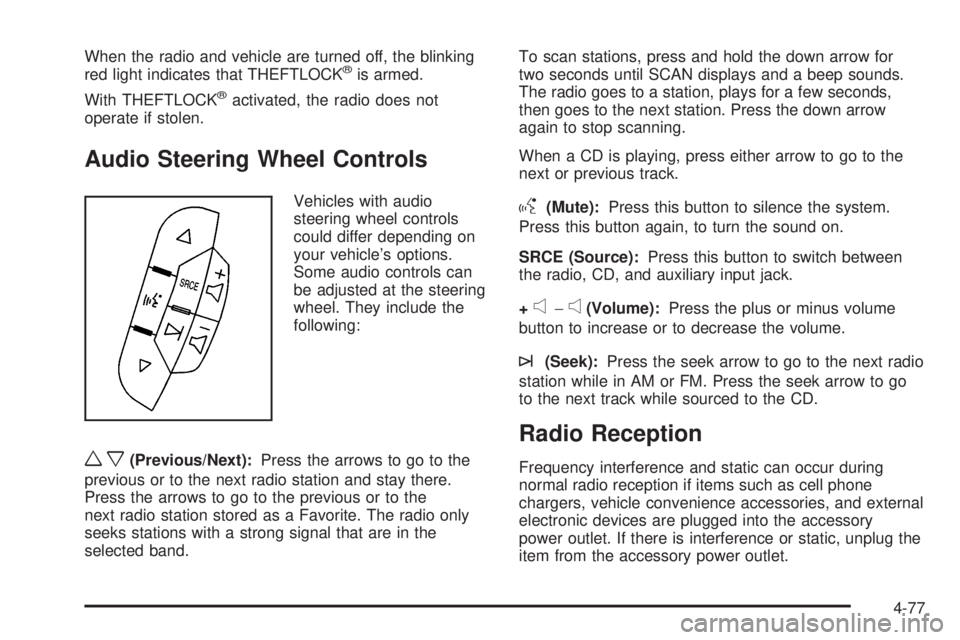
Audio Steering Wheel Controls
Vehicles with audio
steering wheel controls
could differ depending on
your vehicle’s options.
Some audio controls can
be adjusted at the steering
wheel. They include the
following:
wx(Previous/Next):Press the arrows to go to the
previous or to the next radio station and stay there.
Press the arrows to go to the previous or to the
next radio station stored as a Favorite. The radio only
seeks stations with a strong signal that are in the
selected band.To scan stations, press and hold the down arrow for
two seconds until SCAN displays and a beep sounds.
The radio goes to a station, plays for a few seconds,
then goes to the next station. Press the down arrow
again to stop scanning.
When a CD is playing, press either arrow to go to the
next or previous track.
g(Mute):Press this button to silence the system.
Press this button again, to turn the sound on.
SRCE (Source):Press this button to switch between
the radio, CD, and auxiliary input jack.
+
e−e(Volume):Press the plus or minus volume
button to increase or to decrease the volume.
¨(Seek):Press the seek arrow to go to the next radio
station while in AM or FM. Press the seek arrow to go
to the next track while sourced to the CD.
Radio Reception
Frequency interference and static can occur during
normal radio reception if items such as cell phone
chargers, vehicle convenience accessories, and external
electronic devices are plugged into the accessory
power outlet. If there is interference or static, unplug the
item from the accessory power outlet.
4-77
Page 296 of 424
If No Steam Is Coming From The
Engine Compartment
If an engine overheat warning is displayed but no steam
can be seen or heard, the problem may not be too
serious. Sometimes the engine can get a little too hot
when the vehicle:
•Climbs a long hill on a hot day.
•Stops after high-speed driving.
•Idles for long periods in traffic.
•Tows a trailer. See “Driving on Grades” under
Towing a Trailer on page 5-26.
If the overheat warning is displayed with no sign of
steam:
1. Turn the air off.
2. Turn the heater on to the highest temperature and
to the highest fan speed. Open the windows as
necessary.
3. In heavy traffic, let the engine idle in N (Neutral)
while stopped. If it is safe to do so, pull off the
road, shift to P (Park) or N (Neutral) and let
the engine idle.
If the temperature overheat gage is no longer in the
overheat zone or an overheat warning no longer
displays, the vehicle can be driven. Continue to drive
the vehicle slow for about 10 minutes. Keep a safevehicle distance from the car in front of you. If the
warning does not come back on, continue to drive
normally.
If the warning continues, pull over, stop, and park the
vehicle right away.
If there is still no sign of steam, push down the
accelerator until the engine speed is about twice as fast
as normal idle speed for at least three minutes while
you are parked. If you still have the warning, turn off the
engine until it cools down.
You may decide not to lift the hood but to get service
help right away.
Engine Fan Noise
Your vehicle has a clutched engine cooling fan. When
the clutch is engaged, the fan spins faster to provide
more air to cool the engine. In most everyday driving
conditions, the fan is spinning slower and the clutch is
not fully engaged. This improves fuel economy and
reduces fan noise. Under heavy vehicle loading, trailer
towing, and/or high outside temperatures, the fan
speed increases as the clutch more fully engages, so
you may hear an increase in fan noise. This is
normal and should not be mistaken as the transmission
slipping or making extra shifts. It is merely the cooling
system functioning properly. The fan will slow down
when additional cooling is not required and the clutch
partially disengages.
6-34
Page 328 of 424
Federal Communications Commission
(FCC) and Industry and Science
Canada
SeeRadio Frequency Statement on page 8-18for
information regarding Part 15 of the Federal
Communications Commission (FCC) Rules and
RSS-210/211 of Industry and Science Canada.
Tire Pressure Monitor Operation
This vehicle may have a Tire Pressure Monitor System
(TPMS). The TPMS is designed to warn the driver
when a low tire pressure condition exists. TPMS sensors
are mounted onto each tire and wheel assembly,
excluding the spare tire and wheel assembly. The TPMS
sensors monitor the air pressure in the vehicle’s tires
and transmits the tire pressure readings to a receiver
located in the vehicle.
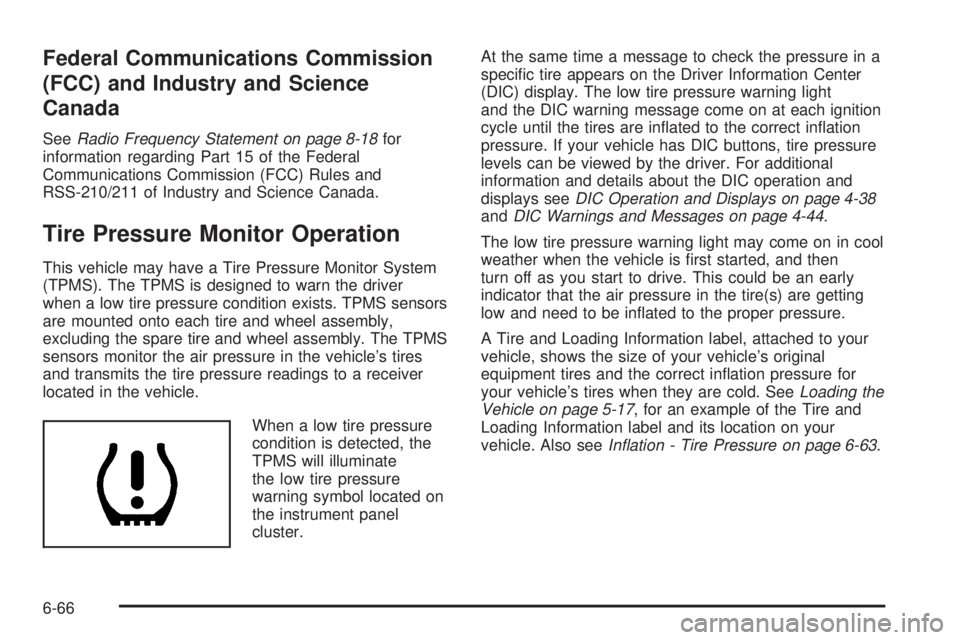
When a low tire pressure
condition is detected, the
TPMS will illuminate
the low tire pressure
warning symbol located on
the instrument panel
cluster.At the same time a message to check the pressure in a
specific tire appears on the Driver Information Center
(DIC) display. The low tire pressure warning light
and the DIC warning message come on at each ignition
cycle until the tires are inflated to the correct inflation
pressure. If your vehicle has DIC buttons, tire pressure
levels can be viewed by the driver. For additional
information and details about the DIC operation and
displays seeDIC Operation and Displays on page 4-38
andDIC Warnings and Messages on page 4-44.
The low tire pressure warning light may come on in cool
weather when the vehicle is first started, and then
turn off as you start to drive. This could be an early
indicator that the air pressure in the tire(s) are getting
low and need to be inflated to the proper pressure.
A Tire and Loading Information label, attached to your
vehicle, shows the size of your vehicle’s original
equipment tires and the correct inflation pressure for
your vehicle’s tires when they are cold. SeeLoading the
Vehicle on page 5-17, for an example of the Tire and
Loading Information label and its location on your
vehicle. Also seeIn�ation - Tire Pressure on page 6-63.
6-66
Page 329 of 424
Your vehicle’s TPMS can warn you about a low tire
pressure condition but it does not replace normal
tire maintenance. SeeTire Inspection and Rotation on
page 6-69andTires on page 6-55.
Notice:Liquid tire sealants could damage the Tire
Pressure Monitor System (TPMS) sensors. Sensor
damage caused by using a tire sealant is not
covered by your warranty. Do not use liquid tire
sealants.
TPMS Malfunction Light and Message
The TPMS will not function properly if one or more of the
TPMS sensors are missing or inoperable. When the
system detects a malfunction, the low tire warning light
flashes for about one minute and then stays on for
the remainder of the ignition cycle. A DIC warning
message is also displayed. The low tire warning light
and DIC warning message come on at each ignition
cycle until the problem is corrected. Some of the
conditions that can cause the malfunction light and DIC
message to come on are:
•One of the road tires has been replaced with the
spare tire. The spare tire does not have a TPMS
sensor. The TPMS malfunction light and DIC
message should go off once you re-install the road
tire containing the TPMS sensor.
•The TPMS sensor matching process was started
but not completed or not completed successfully
after rotating the vehicle’s tires. The DIC message
and TPMS malfunction light should go off once
the TPMS sensor matching process is performed
successfully. See “TPMS Sensor Matching Process”
later in this section.
•One or more TPMS sensors are missing or
damaged. The DIC message and the TPMS
malfunction light should go off when the TPMS
sensors are installed and the sensor matching
process is performed successfully. See your
dealer/retailer for service.
•Replacement tires or wheels do not match your
vehicle’s original equipment tires or wheels.
Tires and wheels other than those recommended
for your vehicle could prevent the TPMS from
functioning properly. SeeBuying New Tires on
page 6-73.
•Operating electronic devices or being near facilities
using radio wave frequencies similar to the TPMS
could cause the TPMS sensors to malfunction.
If the TPMS is not functioning it cannot detect or signal
a low tire condition. See your dealer/retailer for
service if the TPMS malfunction light and DIC message
comes on and stays on.
6-67
Page 330 of 424
TPMS Sensor Matching Process
Each TPMS sensor has a unique identification code.
Any time you rotate your vehicle’s tires or replace one or
more of the TPMS sensors, the identification codes
will need to be matched to the new tire/wheel position.
The sensors are matched to the tire/wheel positions
in the following order: driver side front tire, passenger
side front tire, passenger side rear tire, and driver
side rear tire using a TPMS diagnostic tool. See your
dealer/retailer for service.
The TPMS sensors can also be matched to each
tire/wheel position by increasing or decreasing the tire’s
air pressure. If increasing the tire’s air pressure, do
not exceed the maximum inflation pressure indicated on
the tire’s sidewall.
To decrease air-pressure out of a tire you can use the
pointed end of the valve cap, a pencil-style air pressure
gage, or a key.
You have two minutes to match the first tire/wheel
position, and five minutes overall to match all four tire/
wheel positions. If it takes longer than two minutes,
to match the first tire and wheel, or more than
five minutes to match all four tire and wheel positions
the matching process stops and you need to start over.The TPMS sensor matching process is outlined below:
1. Set the parking brake.
2. Turn the ignition switch to ON/RUN with the
engine off.
3. Press the Remote Keyless Entry (RKE) transmitter’s
LOCK and UNLOCK buttons at the same time for
approximately five seconds. The horn sounds twice
to signal the receiver is in relearn mode and
TIRE LEARNING ACTIVE message displays on the
DIC screen.
If your vehicle does not have RKE, press the Driver
Information Center (DIC) vehicle information
button until the PRESS
VTO RELEARN TIRE
POSITIONS message displays. The horn sounds
twice to signal the receiver is in relearn mode
and TIRE LEARNING ACTIVE message displays on
the DIC screen.
If your vehicle does not have RKE or DIC buttons,
press the trip odometer reset stem located on
the instrument panel cluster until the PRESS
VTO
RELEARN TIRE POSITIONS message displays.
The horn sounds twice to signal the receiver
is in relearn mode and TIRE LEARNING ACTIVE
message displays on the DIC screen.
4. Start with the driver side front tire.
6-68
Page 331 of 424
5. Remove the valve cap from the valve cap stem.
Activate the TPMS sensor by increasing or
decreasing the tire’s air pressure for five seconds,
or until a horn chirp sounds. The horn chirp,
which may take up to 30 seconds to sound,
confirms that the sensor identification code has
been matched to this tire and wheel position.
6. Proceed to the passenger side front tire, and repeat
the procedure in Step 5.
7. Proceed to the passenger side rear tire, and repeat
the procedure in Step 5.
8. Proceed to the driver side rear tire, and repeat the
procedure in Step 5. The horn sounds two times to
indicate the sensor identification code has been
matched to the driver side rear tire, and that
the TPMS sensor matching process is no longer
active. The TIRE LEARNING ACTIVE message on
the DIC display screen goes off.
9. Turn the ignition switch to LOCK/OFF.
10. Set all four tires to the recommended air pressure
level as indicated on the Tire and Loading
Information label.
11. Put the valve caps back on the valve stems.Tire Inspection and Rotation
Inspect tires regularly for signs of wear or damage.
Also inspect the spare tire. For more information
on tire inspection, seeWhen It Is Time for
New Tires on page 6-72.
Tires should be rotated every 5,000 to 8,000 miles
(8 000 to 13 000 km). SeeScheduled Maintenance
on page 7-3.
The purpose of a regular tire rotation is to achieve
a uniform wear for all tires on the vehicle. This
will ensure that the vehicle continues to perform
most like it did when the tires were new. The
first rotation is the most important. SeeScheduled
Maintenance on page 7-3.
Any time you notice unusual wear, rotate the tires
as soon as possible and check wheel alignment.
Also check for damaged tires or wheels. See
When It Is Time for New Tires on page 6-72and
Wheel Replacement on page 6-76.
6-69
Page 377 of 424
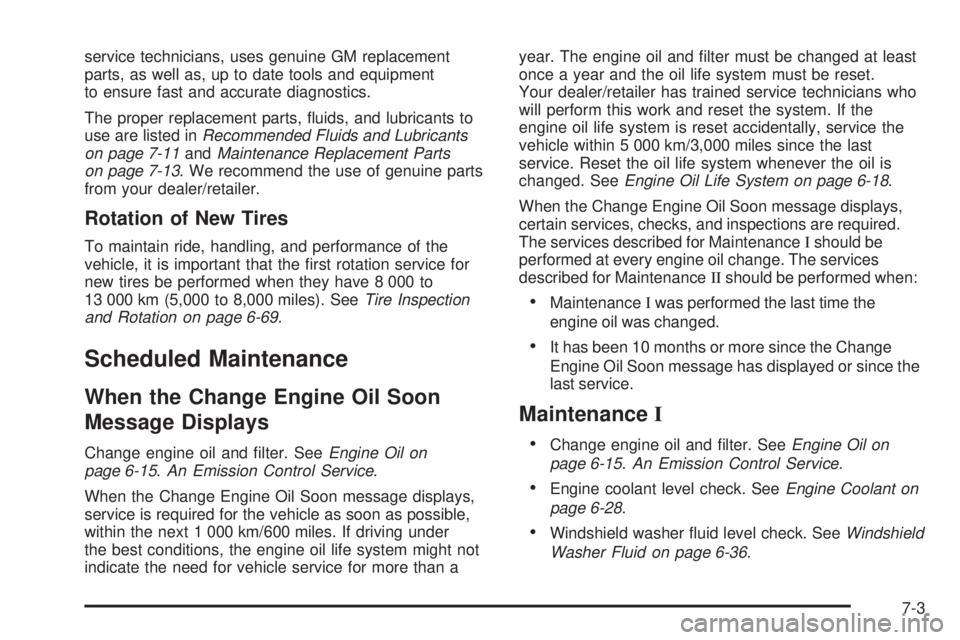
service technicians, uses genuine GM replacement
parts, as well as, up to date tools and equipment
to ensure fast and accurate diagnostics.
The proper replacement parts, fluids, and lubricants to
use are listed inRecommended Fluids and Lubricants
on page 7-11andMaintenance Replacement Parts
on page 7-13. We recommend the use of genuine parts
from your dealer/retailer.
Rotation of New Tires
To maintain ride, handling, and performance of the
vehicle, it is important that the first rotation service for
new tires be performed when they have 8 000 to
13 000 km (5,000 to 8,000 miles). SeeTire Inspection
and Rotation on page 6-69.
Scheduled Maintenance
When the Change Engine Oil Soon
Message Displays
Change engine oil and filter. SeeEngine Oil on
page 6-15.An Emission Control Service.
When the Change Engine Oil Soon message displays,
service is required for the vehicle as soon as possible,
within the next 1 000 km/600 miles. If driving under
the best conditions, the engine oil life system might not
indicate the need for vehicle service for more than ayear. The engine oil and filter must be changed at least
once a year and the oil life system must be reset.
Your dealer/retailer has trained service technicians who
will perform this work and reset the system. If the
engine oil life system is reset accidentally, service the
vehicle within 5 000 km/3,000 miles since the last
service. Reset the oil life system whenever the oil is
changed. SeeEngine Oil Life System on page 6-18.
When the Change Engine Oil Soon message displays,
certain services, checks, and inspections are required.
The services described for MaintenanceIshould be
performed at every engine oil change. The services
described for MaintenanceIIshould be performed when:
•MaintenanceIwas performed the last time the
engine oil was changed.
•It has been 10 months or more since the Change
Engine Oil Soon message has displayed or since the
last service.
MaintenanceI
•Change engine oil and filter. SeeEngine Oil on
page 6-15.An Emission Control Service.
•Engine coolant level check. SeeEngine Coolant on
page 6-28.
•Windshield washer fluid level check. SeeWindshield
Washer Fluid on page 6-36.
7-3
Page 385 of 424
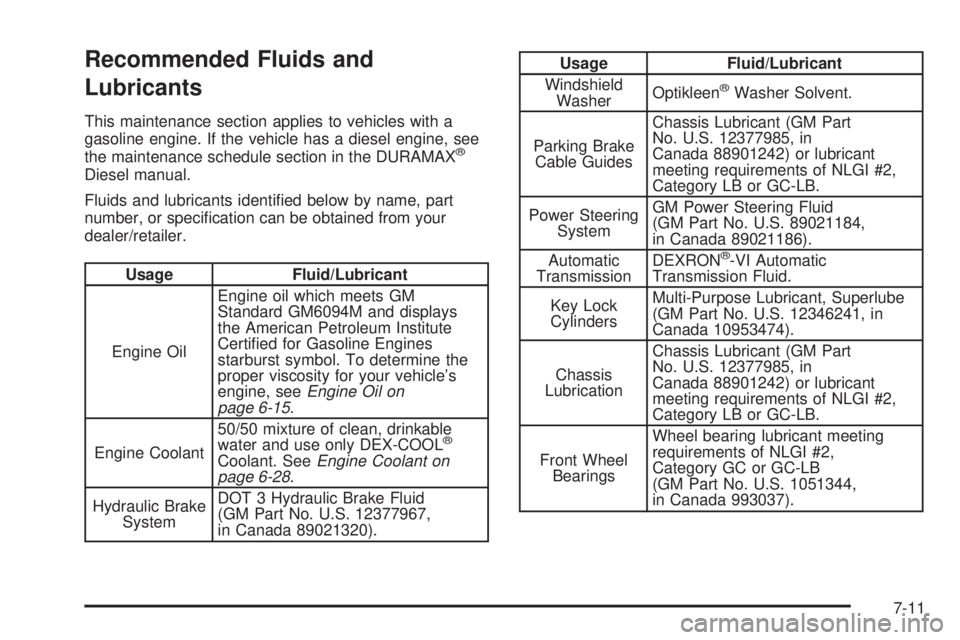
Recommended Fluids and
Lubricants
This maintenance section applies to vehicles with a
gasoline engine. If the vehicle has a diesel engine, see
the maintenance schedule section in the DURAMAX
®
Diesel manual.
Fluids and lubricants identified below by name, part
number, or specification can be obtained from your
dealer/retailer.
Usage Fluid/Lubricant
Engine OilEngine oil which meets GM
Standard GM6094M and displays
the American Petroleum Institute
Certified for Gasoline Engines
starburst symbol. To determine the
proper viscosity for your vehicle’s
engine, seeEngine Oil on
page 6-15.
Engine Coolant50/50 mixture of clean, drinkable
water and use only DEX-COOL
®
Coolant. SeeEngine Coolant on
page 6-28.
Hydraulic Brake
SystemDOT 3 Hydraulic Brake Fluid
(GM Part No. U.S. 12377967,
in Canada 89021320).
Usage Fluid/Lubricant
Windshield
WasherOptikleen
®Washer Solvent.
Parking Brake
Cable GuidesChassis Lubricant (GM Part
No. U.S. 12377985, in
Canada 88901242) or lubricant
meeting requirements of NLGI #2,
Category LB or GC-LB.
Power Steering
SystemGM Power Steering Fluid
(GM Part No. U.S. 89021184,
in Canada 89021186).
Automatic
TransmissionDEXRON
®-VI Automatic
Transmission Fluid.
Key Lock
CylindersMulti-Purpose Lubricant, Superlube
(GM Part No. U.S. 12346241, in
Canada 10953474).
Chassis
LubricationChassis Lubricant (GM Part
No. U.S. 12377985, in
Canada 88901242) or lubricant
meeting requirements of NLGI #2,
Category LB or GC-LB.
Front Wheel
BearingsWheel bearing lubricant meeting
requirements of NLGI #2,
Category GC or GC-LB
(GM Part No. U.S. 1051344,
in Canada 993037).
7-11