tires GMC SAVANA 2010 Owner's Manual
[x] Cancel search | Manufacturer: GMC, Model Year: 2010, Model line: SAVANA, Model: GMC SAVANA 2010Pages: 424, PDF Size: 2.4 MB
Page 1 of 424
In Brief........................................................... 1-1
Instrument Panel
........................................ 1-2
Initial Drive Information
............................... 1-4
Vehicle Features
......................................1-13
Performance and Maintenance
...................1-16
Seats and Restraint System............................. 2-1
Head Restraints
......................................... 2-2
Front Seats
............................................... 2-2
Rear Seats
............................................... 2-6
Safety Belts
.............................................2-10
Child Restraints
.......................................2-30
Airbag System
.........................................2-60
Restraint System Check
............................2-79
Features and Controls..................................... 3-1
Keys
........................................................ 3-3
Doors and Locks
....................................... 3-8
Windows
.................................................3-16
Theft-Deterrent Systems
............................3-20
Starting and Operating Your Vehicle
...........3-22
Mirrors
....................................................3-40
Storage Areas
.........................................3-42Instrument Panel............................................. 4-1
Instrument Panel Overview
.......................... 4-3
Climate Controls
......................................4-15
Warning Lights, Gages, and Indicators
........4-20
Driver Information Center (DIC)
..................4-37
Audio System(s)
.......................................4-59
Driving Your Vehicle....................................... 5-1
Your Driving, the Road, and the Vehicle
....... 5-2
Towing
...................................................5-22
Service and Appearance Care.......................... 6-1
Service
..................................................... 6-3
Fuel
......................................................... 6-5
Checking Things Under the Hood
...............6-12
All-Wheel Drive
........................................6-45
Rear Axle
...............................................6-46
Front Axle
...............................................6-46
Noise Control System
...............................6-47
Bulb Replacement
....................................6-48
Windshield Wiper Blade Replacement
.........6-54
Tires
......................................................6-55
Appearance Care
.....................................6-96
2010 GMC Savana Owner ManualM
Page 23 of 424
Tire Pressure Monitor
This vehicle may have a Tire Pressure Monitor
System (TPMS).
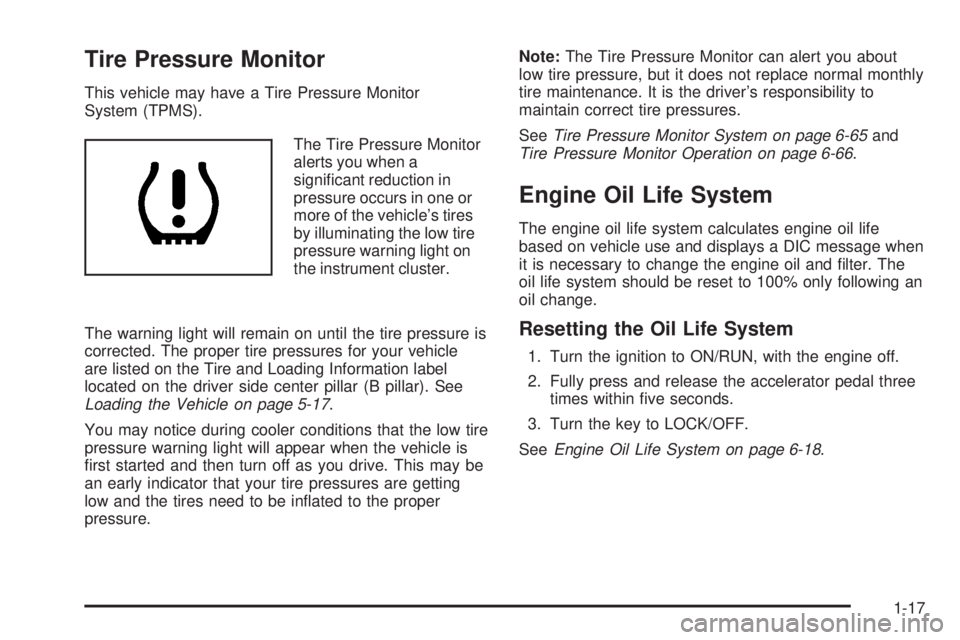
The Tire Pressure Monitor
alerts you when a
signiï¬cant reduction in
pressure occurs in one or
more of the vehicleâs tires
by illuminating the low tire
pressure warning light on
the instrument cluster.
The warning light will remain on until the tire pressure is
corrected. The proper tire pressures for your vehicle
are listed on the Tire and Loading Information label
located on the driver side center pillar (B pillar). See
Loading the Vehicle on page 5-17.
You may notice during cooler conditions that the low tire
pressure warning light will appear when the vehicle is
ï¬rst started and then turn off as you drive. This may be
an early indicator that your tire pressures are getting
low and the tires need to be inï¬ated to the proper
pressure.Note:The Tire Pressure Monitor can alert you about
low tire pressure, but it does not replace normal monthly
tire maintenance. It is the driverâs responsibility to
maintain correct tire pressures.
SeeTire Pressure Monitor System on page 6-65and
Tire Pressure Monitor Operation on page 6-66.
Engine Oil Life System
The engine oil life system calculates engine oil life
based on vehicle use and displays a DIC message when
it is necessary to change the engine oil and ï¬lter. The
oil life system should be reset to 100% only following an
oil change.
Resetting the Oil Life System
1. Turn the ignition to ON/RUN, with the engine off.
2. Fully press and release the accelerator pedal three
times within ï¬ve seconds.
3. Turn the key to LOCK/OFF.
SeeEngine Oil Life System on page 6-18.
1-17
Page 24 of 424
Fuel E85 (85% Ethanol)
If the vehicle has the 4.8L V8 engine (VIN Code A), the
5.3L V8 engine (VIN Code 4), or the 6.0L V8 engine
(VIN Code G) and the N15 ï¬exible fuel option, you can
use either unleaded gasoline or ethanol fuel containing
up to 85% ethanol (E85). SeeFuel on page 6-5.In
all other engines, use only the unleaded gasoline
described underGasoline Octane on page 6-6.
Vehicles that have the 4.8L V8 engine (VIN Code A),
the 5.3L V8 engine (VIN Code 4), or the 6.0L V8 engine
(VIN Code G) and the N15 ï¬exible fuel option have a
yellow fuel cap and can use 85% ethanol fuel (E85). See
Fuel E85 (85% Ethanol) on page 6-8.
Driving for Better Fuel Economy
Driving habits can affect fuel mileage. Here are some
driving tips to get the best fuel economy possible.
â¢Avoid fast starts and accelerate smoothly.
â¢Brake gradually and avoid abrupt stops.
â¢Avoid idling the engine for long periods of time.
â¢When road and weather conditions are appropriate,
use cruise control, if equipped.
â¢Always follow posted speed limits or drive more
slowly when conditions require.
â¢Keep vehicle tires properly inï¬ated.
â¢Combine several trips into a single trip.
â¢Replace the vehicleâs tires with the same TPC Spec
number molded into the tireâs sidewall near the size.
â¢Follow recommended scheduled maintenance.
Roadside Assistance Program
U.S.:1-800-GMC-8782 (462-8782)
TTY Users:1-888-889-2438
Canada:1-800-268-6800
As the owner of a new GMC, you are automatically
enrolled in the Roadside Assistance program. This
program provides technically trained advisors who are
available 24 hours a day, 365 days a year, minor repair
information or towing arrangements.
Online Owner Center
The Online Owner Center is a complimentary service
that includes online service reminders, vehicle
maintenance tips, online owner manual, special
privileges and more.
Sign up today at:www.gmownercenter.com/gmc
(U.S.) orwww.gm.ca(Canada).
1-18
Page 102 of 424
Adding Equipment to Your
Airbag-Equipped Vehicle
Q:Is there anything I might add to or change
about the vehicle that could keep the airbags
from working properly?
A:Yes. If you add things that change the vehicleâs
frame, bumper system, height, front end or side
sheet metal, they may keep the airbag system from
working properly. Changing or moving any parts
of the front seats, safety belts, the airbag sensing
and diagnostic module, steering wheel, instrument
panel, roof-rail airbag modules, ceiling headliner
or pillar garnish trim, front sensors, or airbag wiring
can affect the operation of the airbag system.
In addition, the vehicle may have a passenger
sensing system for the right front passenger
position, which includes sensors that are part of the
passenger seat. The passenger sensing system
may not operate properly if the original seat trim is
replaced with non-GM covers, upholstery or
trim, or with GM covers, upholstery or trim designed
for a different vehicle. Any object, such as an
aftermarket seat heater or a comfort enhancing pad
or device, installed under or on top of the seat
fabric, could also interfere with the operation of thepassenger sensing system. This could either
prevent proper deployment of the passenger
airbag(s) or prevent the passenger sensing system
from properly turning off the passenger airbag(s).
SeePassenger Sensing System on page 2-72.
If you have any questions about this, you should
contact Customer Assistance before you modify the
vehicle. The phone numbers and addresses for
Customer Assistance are in Step Two of the
Customer Satisfaction Procedure in this manual.
SeeCustomer Satisfaction Procedure on page 8-2.
If the vehicle has rollover roof-rail airbags, see
Different Size Tires and Wheels on page 6-74for
additional important information.
Q:Because I have a disability, I have to get my
vehicle modi�ed. How can I �nd out whether
this will affect my airbag system?
A:If you have questions, call Customer Assistance.
The phone numbers and addresses for Customer
Assistance are in Step Two of the Customer
Satisfaction Procedure in this manual. See
Customer Satisfaction Procedure on page 8-2.
In addition, your dealer/retailer and the service manual
have information about the location of the airbag sensors,
sensing and diagnostic module and airbag wiring.
2-78
Page 133 of 424
3 (Third):This position is also used for normal driving.
It reduces vehicle speed more than D (Drive) without
using the brakes. You might choose 3 (Third) instead of
D (Drive) when driving on hilly, winding roads, when
towing a trailer, so there is less shifting between gears
and when going down a steep hill. See Range Select
Mode later in this section.
2 (Second):This position reduces vehicle speed even
more than 3 (Third) without using the brakes. You can
use 2 (Second) on hills. It can help control vehicle speed
as you go down steep mountain roads, but then you
would also want to use the brakes off and on. See Range
Select Mode later in this section.
If you manually select 2 (Second) in an automatic
transmission, the transmission will start in second gear.
You can use this feature for reducing the speed of the
rear wheels when you are trying to start the vehicle from
a stop on slippery road surfaces.
1 (First):This position reduces vehicle speed without
using the brakes. You can use it for major/severe
downgrades where the vehicle would otherwise
accelerate due to steepness of grade. When you shift
to 1 (First) it provides the lowest gear appropriate to
current road speed and continues to downshift as the
vehicle slows, eventually downshifting to 1 (First) gear.
The transmission can be held in 1 (First) gear using
Range Select Mode or the shift lever. See Range Select
Mode later in this section.Notice:Spinning the tires or holding the vehicle
in one place on a hill using only the accelerator
pedal may damage the transmission. The repair
will not be covered by the vehicle warranty. If you
are stuck, do not spin the tires. When stopping on
a hill, use the brakes to hold the vehicle in place.
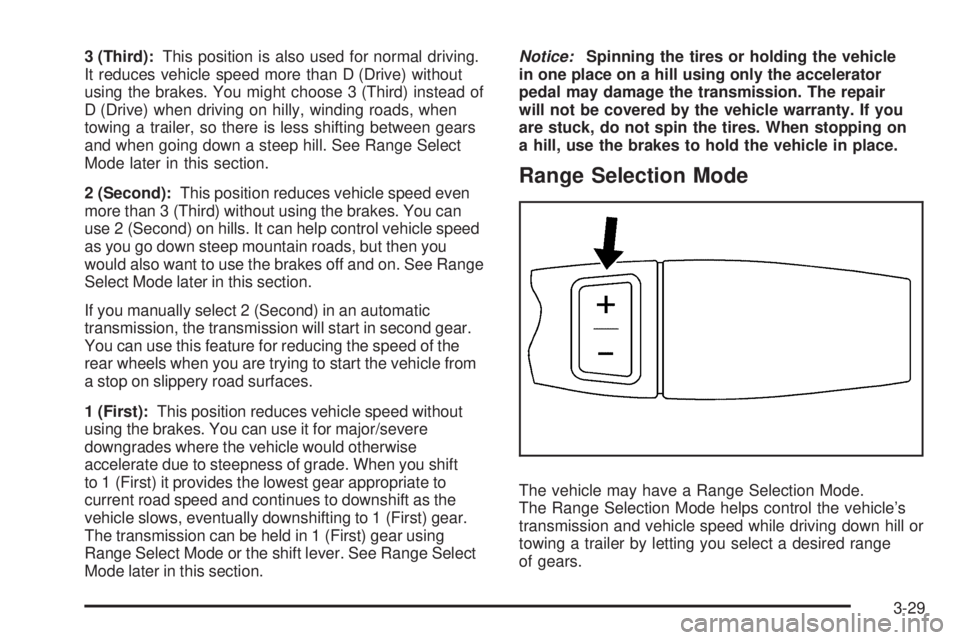
Range Selection Mode
The vehicle may have a Range Selection Mode.
The Range Selection Mode helps control the vehicleâs
transmission and vehicle speed while driving down hill or
towing a trailer by letting you select a desired range
of gears.
3-29
Page 134 of 424
To use this feature, do the following:
1. Move the shift lever to M (Manual Mode).
2. Press the plus/minus buttons, located on the
steering column shift lever, to select the desired
range of gears for current driving conditions.
When M (Manual Mode) is selected a number displays
in the DIC next to the M indicating the current gear.
This number is the highest gear that can be used.
However, the vehicle can automatically shift to lower
gears as it adjusts to driving conditions. This means
that all gears below that number are available. When
5 (Fifth) is selected, 1 (First) through 5 (Fifth) gears
are automatically shifted by the vehicle, but 6 (Sixth)
cannot be used until the plus/minus button located
on the steering column lever is used to change to
the gear.Grade Braking is not available when Range Selection
Mode is active. SeeTow/Haul Mode on page 3-33.
While using Range Selection Mode, cruise control and
the Tow/Haul mode can be used.
Notice:Spinning the tires or holding the vehicle
in one place on a hill using only the accelerator
pedal may damage the transmission. The repair
will not be covered by the vehicle warranty. If you
are stuck, do not spin the tires. When stopping on a
hill, use the brakes to hold the vehicle in place.
Low Traction Mode
Low Traction Mode can assist in vehicle acceleration
when road conditions are slippery. While the vehicle is
at a stop, select the second gear range using Range
Selection Mode. This will limit torque to the wheels after
it detects wheel slip, preventing the tires from spinning.
3-30
Page 137 of 424
2 (Second):This position reduces vehicle speed even
more than 3 (Third) without using the brakes. You can
use 2 (Second) on hills. It can help control vehicle speed
as you go down steep mountain roads, but then you
would also want to use the brakes off and on.
You may use this feature for reducing torque to the rear
wheels when you are trying to start the vehicle from a
stop on slippery road surfaces.
1 (First):This position reduces vehicle speed even
more than 2 (Second) without using the brakes. You
can use it on very steep hills, or in deep snow or mud.
If the shift lever is put in 1 (First) while the vehicle is
moving forward, the transmission will not shift into ï¬rst
gear until the vehicle is going slowly enough.
Notice:Spinning the tires or holding the vehicle
in one place on a hill using only the accelerator
pedal may damage the transmission. The repair
will not be covered by the vehicle warranty. If you
are stuck, do not spin the tires. When stopping on a
hill, use the brakes to hold the vehicle in place.Tow/Haul Mode
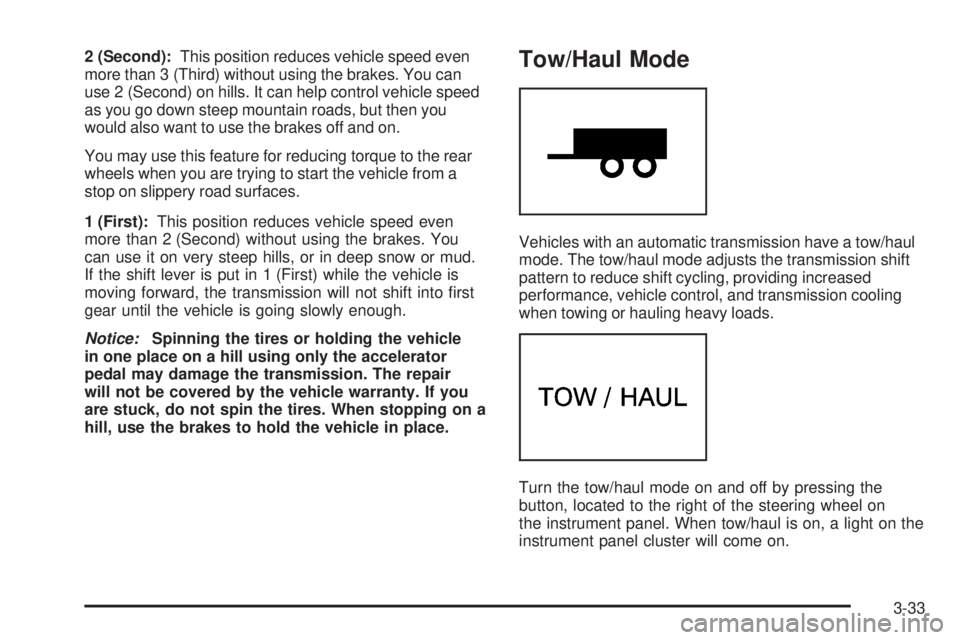
Vehicles with an automatic transmission have a tow/haul
mode. The tow/haul mode adjusts the transmission shift
pattern to reduce shift cycling, providing increased
performance, vehicle control, and transmission cooling
when towing or hauling heavy loads.
Turn the tow/haul mode on and off by pressing the
button, located to the right of the steering wheel on
the instrument panel. When tow/haul is on, a light on the
instrument panel cluster will come on.
3-33
Page 177 of 424
When the Light is On Steady
This indicates that one or more of the tires are
signiï¬cantly underinï¬ated.
A tire pressure message in the Driver Information
Center (DIC), can accompany the light. SeeDriver
Information Center (DIC) on page 4-37for more
information. Stop and check the tires as soon as it is
safe to do so. If underinï¬ated, inï¬ate to the proper
pressure. SeeIn�ation - Tire Pressure on page 6-63for
more information.
When the Light Flashes First and Then is
On Steady
This indicates that there may be a problem with the Tire
Pressure Monitor System. The light ï¬ashes for about
a minute and stays on steady for the remainder of
the ignition cycle. This sequence repeats with every
ignition cycle. SeeTire Pressure Monitor Operation on
page 6-66for more information.
Malfunction Indicator Lamp
Check Engine Light
A computer system called OBD II (On-Board
Diagnostics-Second Generation) monitors operation of
the fuel, ignition, and emission control systems. It
ensures that emissions are at acceptable levels for the
life of the vehicle, helping to produce a cleaner
environment.
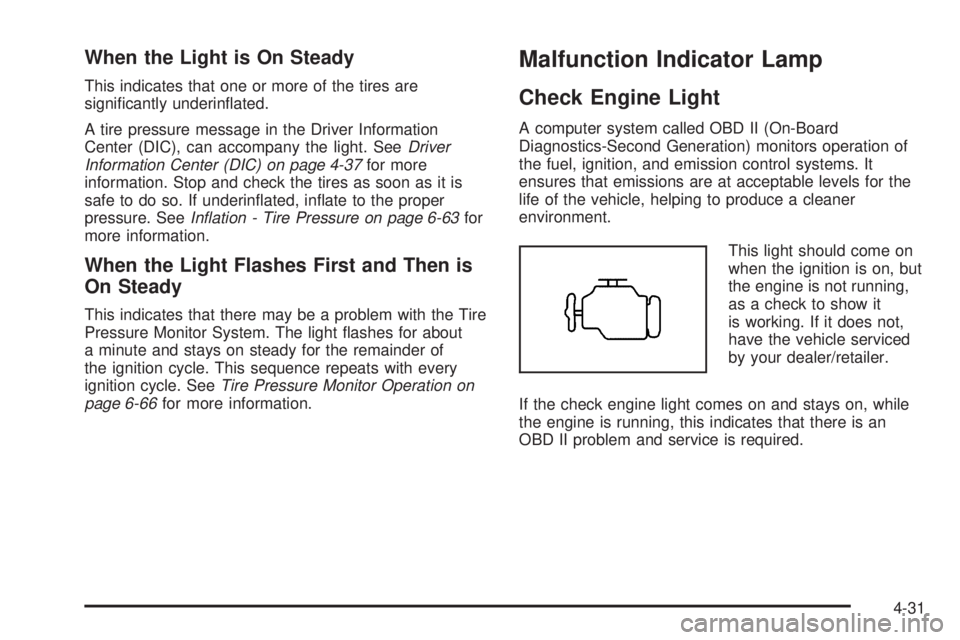
This light should come on
when the ignition is on, but
the engine is not running,
as a check to show it
is working. If it does not,
have the vehicle serviced
by your dealer/retailer.
If the check engine light comes on and stays on, while
the engine is running, this indicates that there is an
OBD II problem and service is required.
4-31
Page 178 of 424
Malfunctions often are indicated by the system before
any problem is apparent. Being aware of the light
can prevent more serious damage to the vehicle. This
system assists the service technician in correctly
diagnosing any malfunction.
Notice:If the vehicle is continually driven with this
light on, after a while, the emission controls
might not work as well, the vehicleâs fuel economy
might not be as good, and the engine might not
run as smoothly. This could lead to costly repairs
that might not be covered by the vehicle warranty.
Notice:Modi�cations made to the engine,
transmission, exhaust, intake, or fuel system of the
vehicle or the replacement of the original tires
with other than those of the same Tire Performance
Criteria (TPC) can affect the vehicleâs emission
controls and can cause this light to come on.
Modi�cations to these systems could lead to costly
repairs not covered by the vehicle warranty. This
could also result in a failure to pass a required
Emission Inspection/Maintenance test. See
Accessories and Modiï¬cations on page 6-3.This light comes on during a malfunction in one of
two ways:
Light Flashing:A misï¬re condition has been detected.
A misï¬re increases vehicle emissions and could
damage the emission control system on the vehicle.
Diagnosis and service might be required.
To prevent more serious damage to the vehicle:
â¢Reduce vehicle speed.
â¢Avoid hard accelerations.
â¢Avoid steep uphill grades.
â¢If towing a trailer, reduce the amount of cargo being
hauled as soon as it is possible.
If the light continues to ï¬ash, when it is safe to do so,
stop the vehicle. Find a safe place to park the vehicle.
Turn the key off, wait at least 10 seconds, and restart
the engine. If the light is still ï¬ashing, follow the previous
steps and see your dealer/retailer for service as soon
as possible.
Light On Steady:An emission control system
malfunction has been detected on the vehicle.
Diagnosis and service might be required.
4-32
Page 187 of 424
Vehicle Information Menu Items
T
(Vehicle Information):Press this button to scroll
through the following menu items:
Oil Life
Press the vehicle information button until OIL LIFE
REMAINING displays. This display shows an estimate
of the oilâs remaining useful life. If you see 99% OIL LIFE
REMAINING on the display, that means 99% of the
current oil life remains. The engine oil life system
will alert you to change the oil on a schedule consistent
with your driving conditions.
When the remaining oil life is low, the CHANGE
ENGINE OIL SOON message will appear on the display.
See âCHANGE ENGINE OIL SOONâ underDIC
Warnings and Messages on page 4-44. You should
change the oil as soon as possible. SeeEngine Oil on
page 6-15. In addition to the engine oil life system
monitoring the oil life, additional maintenance is
recommended in the Maintenance Schedule in this
manual. SeeScheduled Maintenance on page 7-3for
more information.
Remember, you must reset the OIL LIFE yourself after
each oil change. It will not reset itself. Also, be
careful not to reset the OIL LIFE accidentally at any
time other than when the oil has just been changed.It cannot be reset accurately until the next oil change.
To reset the engine oil life system, seeEngine Oil
Life System on page 6-18.
Units
Press the vehicle information button until UNITS
displays. This display allows you to select between
English or Metric units of measurement. Once in this
display, press the set/reset button to select between
ENGLISH or METRIC units.
Tire Pressure
If your vehicle has the Tire Pressure Monitor System
(TPMS), the pressure for each tire can be viewed in
the DIC. The tire pressure will be shown in either
kilopascals (kPa) or pounds per square inch (psi). Press
the vehicle information button until the DIC displays
FRONT TIRES PSI (kPa) LEFT ## RIGHT ##. Press the
vehicle information button again until the DIC displays
REAR TIRES PSI (kPa) LEFT ## RIGHT ##.
If a low tire pressure condition is detected by the system
while driving, a message advising you to check the
pressure in a speciï¬c tire will appear in the display. See
In�ation - Tire Pressure on page 6-63andDIC Warnings
and Messages on page 4-44for more information.
If the tire pressure display shows dashes instead of a
value, there may be a problem with your vehicle. If this
consistently occurs, see your dealer/retailer for service.
4-41