bulb GMC SAVANA 2014 Owner's Manual
[x] Cancel search | Manufacturer: GMC, Model Year: 2014, Model line: SAVANA, Model: GMC SAVANA 2014Pages: 408, PDF Size: 4.19 MB
Page 1 of 408
Black plate (1,1)GMC Savana Owner Manual (GMNA-Localizing-U.S./Canada-6014682) -
2014 - CRC 2nd Edition - 8/26/13
2014 GMC Savana Owner ManualM
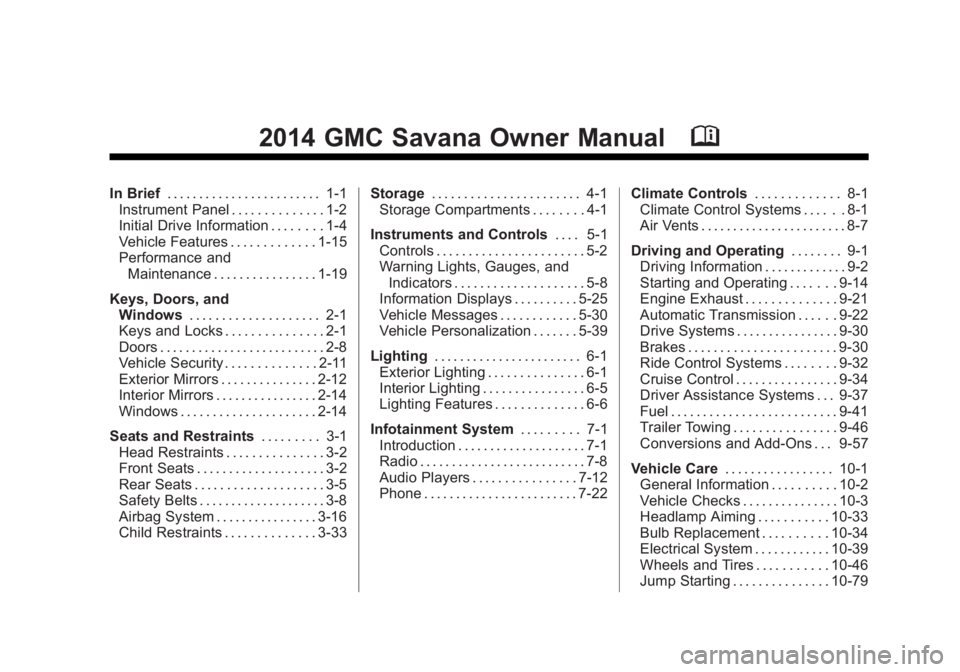
In Brief. . . . . . . . . . . . . . . . . . . . . . . . 1-1
Instrument Panel . . . . . . . . . . . . . . 1-2
Initial Drive Information . . . . . . . . 1-4
Vehicle Features . . . . . . . . . . . . . 1-15
Performance and Maintenance . . . . . . . . . . . . . . . . 1-19
Keys, Doors, and Windows . . . . . . . . . . . . . . . . . . . . 2-1
Keys and Locks . . . . . . . . . . . . . . . 2-1
Doors . . . . . . . . . . . . . . . . . . . . . . . . . . 2-8
Vehicle Security . . . . . . . . . . . . . . 2-11
Exterior Mirrors . . . . . . . . . . . . . . . 2-12
Interior Mirrors . . . . . . . . . . . . . . . . 2-14
Windows . . . . . . . . . . . . . . . . . . . . . 2-14
Seats and Restraints . . . . . . . . . 3-1
Head Restraints . . . . . . . . . . . . . . . 3-2
Front Seats . . . . . . . . . . . . . . . . . . . . 3-2
Rear Seats . . . . . . . . . . . . . . . . . . . . 3-5
Safety Belts . . . . . . . . . . . . . . . . . . . . 3-8
Airbag System . . . . . . . . . . . . . . . . 3-16
Child Restraints . . . . . . . . . . . . . . 3-33 Storage
. . . . . . . . . . . . . . . . . . . . . . . 4-1
Storage Compartments . . . . . . . . 4-1
Instruments and Controls . . . . 5-1
Controls . . . . . . . . . . . . . . . . . . . . . . . 5-2
Warning Lights, Gauges, and Indicators . . . . . . . . . . . . . . . . . . . . 5-8
Information Displays . . . . . . . . . . 5-25
Vehicle Messages . . . . . . . . . . . . 5-30
Vehicle Personalization . . . . . . . 5-39
Lighting . . . . . . . . . . . . . . . . . . . . . . . 6-1
Exterior Lighting . . . . . . . . . . . . . . . 6-1
Interior Lighting . . . . . . . . . . . . . . . . 6-5
Lighting Features . . . . . . . . . . . . . . 6-6
Infotainment System . . . . . . . . . 7-1
Introduction . . . . . . . . . . . . . . . . . . . . 7-1
Radio . . . . . . . . . . . . . . . . . . . . . . . . . . 7-8
Audio Players . . . . . . . . . . . . . . . . 7-12
Phone . . . . . . . . . . . . . . . . . . . . . . . . 7-22 Climate Controls
. . . . . . . . . . . . . 8-1
Climate Control Systems . . . . . . 8-1
Air Vents . . . . . . . . . . . . . . . . . . . . . . . 8-7
Driving and Operating . . . . . . . . 9-1
Driving Information . . . . . . . . . . . . . 9-2
Starting and Operating . . . . . . . 9-14
Engine Exhaust . . . . . . . . . . . . . . 9-21
Automatic Transmission . . . . . . 9-22
Drive Systems . . . . . . . . . . . . . . . . 9-30
Brakes . . . . . . . . . . . . . . . . . . . . . . . 9-30
Ride Control Systems . . . . . . . . 9-32
Cruise Control . . . . . . . . . . . . . . . . 9-34
Driver Assistance Systems . . . 9-37
Fuel . . . . . . . . . . . . . . . . . . . . . . . . . . 9-41
Trailer Towing . . . . . . . . . . . . . . . . 9-46
Conversions and Add-Ons . . . 9-57
Vehicle Care . . . . . . . . . . . . . . . . . 10-1
General Information . . . . . . . . . . 10-2
Vehicle Checks . . . . . . . . . . . . . . . 10-3
Headlamp Aiming . . . . . . . . . . . 10-33
Bulb Replacement . . . . . . . . . . 10-34
Electrical System . . . . . . . . . . . . 10-39
Wheels and Tires . . . . . . . . . . . 10-46
Jump Starting . . . . . . . . . . . . . . . 10-79
Page 152 of 408
Black plate (4,1)GMC Savana Owner Manual (GMNA-Localizing-U.S./Canada-6014682) -
2014 - CRC 2nd Edition - 8/26/13
6-4 Lighting
wiper speed. When the wipers are
not operating, these lamps turn off.
Move the exterior lamp control to
P
or;to disable this feature.
Hazard Warning Flashers
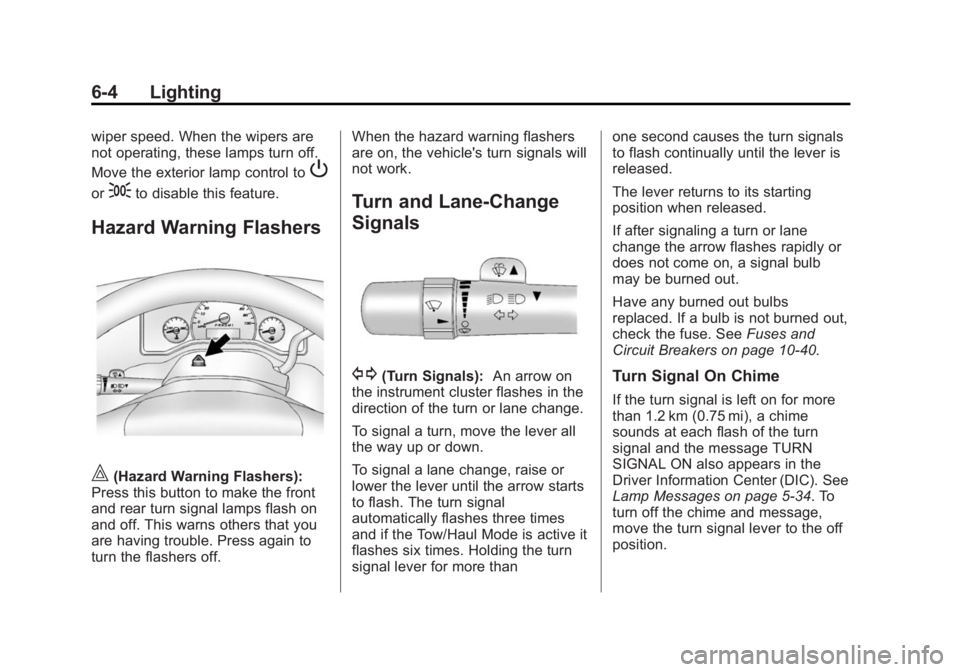
|(Hazard Warning Flashers):
Press this button to make the front
and rear turn signal lamps flash on
and off. This warns others that you
are having trouble. Press again to
turn the flashers off. When the hazard warning flashers
are on, the vehicle's turn signals will
not work.
Turn and Lane-Change
Signals
G(Turn Signals):
An arrow on
the instrument cluster flashes in the
direction of the turn or lane change.
To signal a turn, move the lever all
the way up or down.
To signal a lane change, raise or
lower the lever until the arrow starts
to flash. The turn signal
automatically flashes three times
and if the Tow/Haul Mode is active it
flashes six times. Holding the turn
signal lever for more than one second causes the turn signals
to flash continually until the lever is
released.
The lever returns to its starting
position when released.
If after signaling a turn or lane
change the arrow flashes rapidly or
does not come on, a signal bulb
may be burned out.
Have any burned out bulbs
replaced. If a bulb is not burned out,
check the fuse. See
Fuses and
Circuit Breakers on page 10-40.Turn Signal On Chime
If the turn signal is left on for more
than 1.2 km (0.75 mi), a chime
sounds at each flash of the turn
signal and the message TURN
SIGNAL ON also appears in the
Driver Information Center (DIC). See
Lamp Messages on page 5-34. To
turn off the chime and message,
move the turn signal lever to the off
position.
Page 242 of 408
Black plate (48,1)GMC Savana Owner Manual (GMNA-Localizing-U.S./Canada-6014682) -
2014 - CRC 2nd Edition - 8/26/13
9-48 Driving and Operating
Backing Up
Hold the bottom of the steering
wheel with one hand. To move the
trailer to the left, move that hand to
the left. To move the trailer to the
right, move your hand to the right.
Always back up slowly and,
if possible, have someone
guide you.
Making Turns
{Caution
Making very sharp turns while
trailering could cause the trailer to
come in contact with the vehicle.
The vehicle could be damaged.
Avoid making very sharp turns
while trailering.
When turning with a trailer, make
wider turns than normal. Do this so
the trailer will not strike soft
shoulders, curbs, road signs, trees,
or other objects. Avoid jerky or
sudden maneuvers. Signal well in
advance. If the trailer turn signal bulbs burn
out, the arrows on the instrument
cluster will still flash for turns. It is
important to check occasionally to
be sure the trailer bulbs are still
working.
Driving on Grades
Reduce speed and shift to a lower
gear
before starting down a long or
steep downgrade. If the
transmission is not shifted down, the
brakes might get hot and no longer
work well.
Vehicles can tow in D (Drive). Shift
the transmission to a lower gear if
the transmission shifts too often
under heavy loads and/or hilly
conditions.
The Tow/Haul Mode may be used if
the transmission shifts too often.
See Tow/Haul Mode on page 9-29.
When towing at high altitude on
steep uphill grades, consider the
following: Engine coolant will boil at
a lower temperature than at normal
altitudes. If the engine is turned off immediately after towing at high
altitude on steep uphill grades, the
vehicle may show signs similar to
engine overheating. To avoid this,
let the engine run while parked,
preferably on level ground, with the
transmission in P (Park) for a few
minutes before turning the engine
off. If the overheat warning comes
on, see
Engine Overheating on
page 10-22.
Parking on Hills
{Warning
Parking the vehicle on a hill with
the trailer attached can be
dangerous. If something goes
wrong, the rig could start to move.
People can be injured, and both
the vehicle and the trailer can be
damaged. When possible, always
park the rig on a flat surface.
Page 253 of 408
Black plate (1,1)GMC Savana Owner Manual (GMNA-Localizing-U.S./Canada-6014682) -
2014 - CRC 2nd Edition - 8/26/13
Vehicle Care 10-1
Vehicle Care
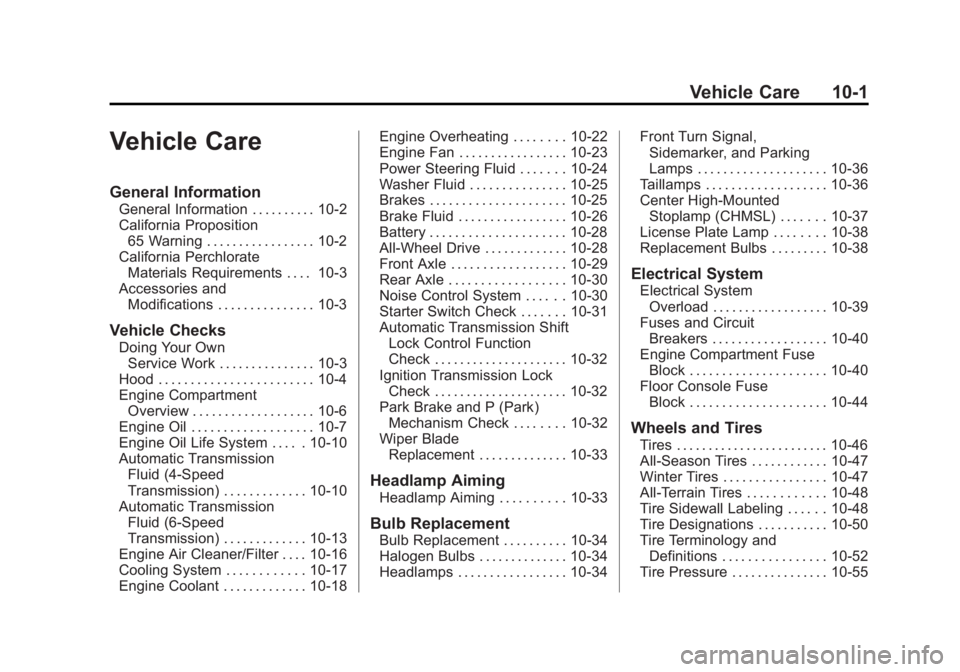
General Information
General Information . . . . . . . . . . 10-2
California Proposition65 Warning . . . . . . . . . . . . . . . . . 10-2
California Perchlorate Materials Requirements . . . . 10-3
Accessories and Modifications . . . . . . . . . . . . . . . 10-3
Vehicle Checks
Doing Your OwnService Work . . . . . . . . . . . . . . . 10-3
Hood . . . . . . . . . . . . . . . . . . . . . . . . 10-4
Engine Compartment Overview . . . . . . . . . . . . . . . . . . . 10-6
Engine Oil . . . . . . . . . . . . . . . . . . . 10-7
Engine Oil Life System . . . . . 10-10
Automatic Transmission Fluid (4-Speed
Transmission) . . . . . . . . . . . . . 10-10
Automatic Transmission Fluid (6-Speed
Transmission) . . . . . . . . . . . . . 10-13
Engine Air Cleaner/Filter . . . . 10-16
Cooling System . . . . . . . . . . . . 10-17
Engine Coolant . . . . . . . . . . . . . 10-18 Engine Overheating . . . . . . . . 10-22
Engine Fan . . . . . . . . . . . . . . . . . 10-23
Power Steering Fluid . . . . . . . 10-24
Washer Fluid . . . . . . . . . . . . . . . 10-25
Brakes . . . . . . . . . . . . . . . . . . . . . 10-25
Brake Fluid . . . . . . . . . . . . . . . . . 10-26
Battery . . . . . . . . . . . . . . . . . . . . . 10-28
All-Wheel Drive . . . . . . . . . . . . . 10-28
Front Axle . . . . . . . . . . . . . . . . . . 10-29
Rear Axle . . . . . . . . . . . . . . . . . . 10-30
Noise Control System . . . . . . 10-30
Starter Switch Check . . . . . . . 10-31
Automatic Transmission Shift
Lock Control Function
Check . . . . . . . . . . . . . . . . . . . . . 10-32
Ignition Transmission Lock Check . . . . . . . . . . . . . . . . . . . . . 10-32
Park Brake and P (Park) Mechanism Check . . . . . . . . 10-32
Wiper Blade Replacement . . . . . . . . . . . . . . 10-33
Headlamp Aiming
Headlamp Aiming . . . . . . . . . . 10-33
Bulb Replacement
Bulb Replacement . . . . . . . . . . 10-34
Halogen Bulbs . . . . . . . . . . . . . . 10-34
Headlamps . . . . . . . . . . . . . . . . . 10-34 Front Turn Signal,
Sidemarker, and Parking
Lamps . . . . . . . . . . . . . . . . . . . . 10-36
Taillamps . . . . . . . . . . . . . . . . . . . 10-36
Center High-Mounted Stoplamp (CHMSL) . . . . . . . 10-37
License Plate Lamp . . . . . . . . 10-38
Replacement Bulbs . . . . . . . . . 10-38
Electrical System
Electrical System Overload . . . . . . . . . . . . . . . . . . 10-39
Fuses and Circuit Breakers . . . . . . . . . . . . . . . . . . 10-40
Engine Compartment Fuse Block . . . . . . . . . . . . . . . . . . . . . 10-40
Floor Console Fuse
Block . . . . . . . . . . . . . . . . . . . . . 10-44
Wheels and Tires
Tires . . . . . . . . . . . . . . . . . . . . . . . . 10-46
All-Season Tires . . . . . . . . . . . . 10-47
Winter Tires . . . . . . . . . . . . . . . . 10-47
All-Terrain Tires . . . . . . . . . . . . 10-48
Tire Sidewall Labeling . . . . . . 10-48
Tire Designations . . . . . . . . . . . 10-50
Tire Terminology andDefinitions . . . . . . . . . . . . . . . . 10-52
Tire Pressure . . . . . . . . . . . . . . . 10-55
Page 286 of 408
Black plate (34,1)GMC Savana Owner Manual (GMNA-Localizing-U.S./Canada-6014682) -
2014 - CRC 2nd Edition - 8/26/13
10-34 Vehicle Care
Bulb Replacement
For the proper type of replacement
bulbs, seeReplacement Bulbs on
page 10-38.
For any bulb‐changing procedure
not listed in this section, contact
your dealer.
Halogen Bulbs
{Warning
Halogen bulbs have pressurized
gas inside and can burst if you
drop or scratch the bulb. You or
others could be injured. Be sure
to read and follow the instructions
on the bulb package.
Headlamps
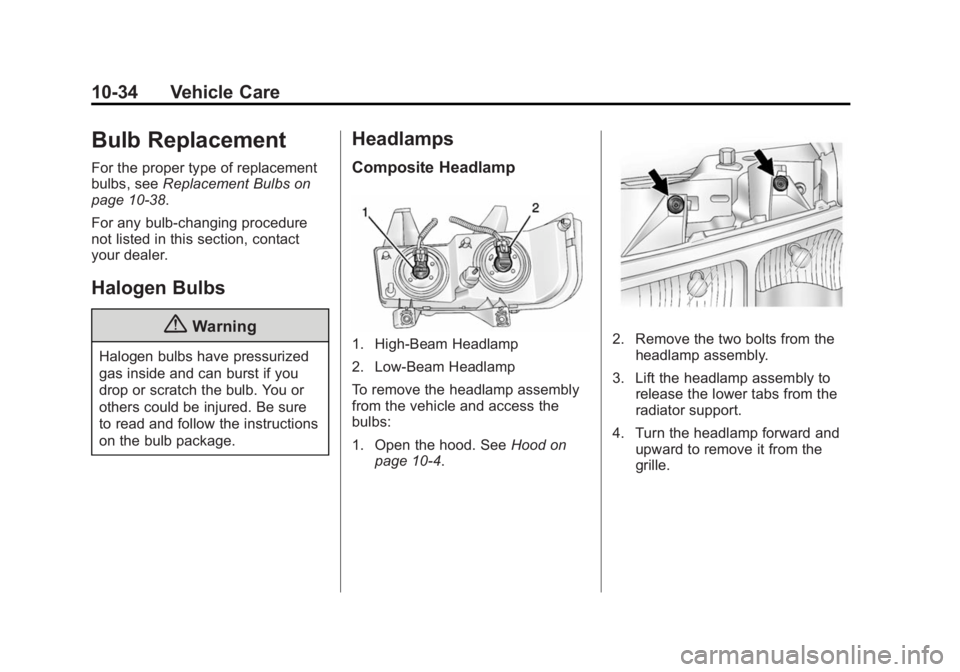
Composite Headlamp
1. High-Beam Headlamp
2. Low-Beam Headlamp
To remove the headlamp assembly
from the vehicle and access the
bulbs:
1. Open the hood. See Hood on
page 10-4.2. Remove the two bolts from the
headlamp assembly.
3. Lift the headlamp assembly to release the lower tabs from the
radiator support.
4. Turn the headlamp forward and upward to remove it from the
grille.
Page 287 of 408
Black plate (35,1)GMC Savana Owner Manual (GMNA-Localizing-U.S./Canada-6014682) -
2014 - CRC 2nd Edition - 8/26/13
Vehicle Care 10-35
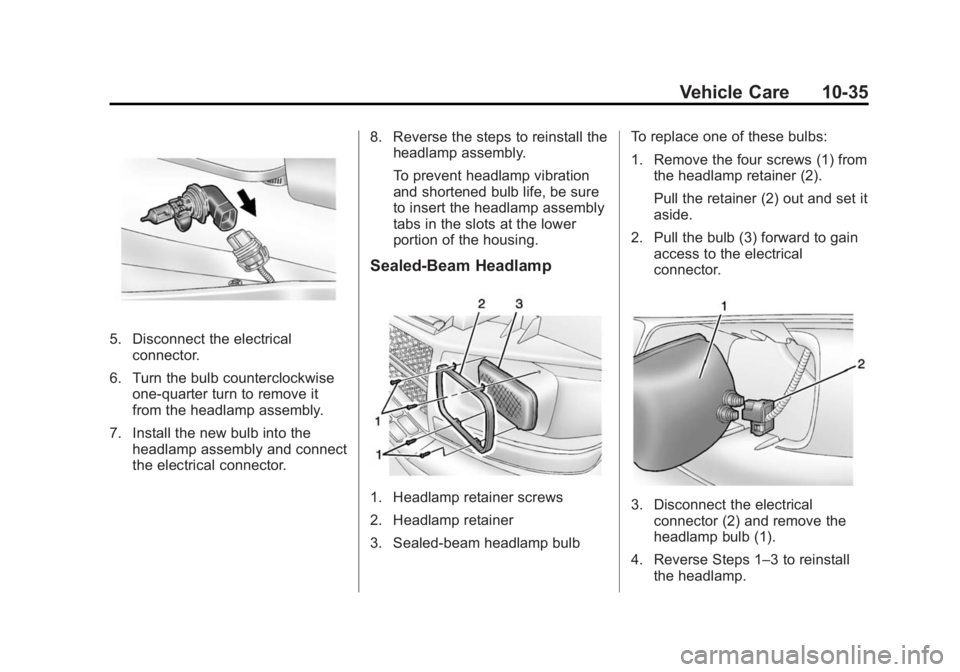
5. Disconnect the electricalconnector.
6. Turn the bulb counterclockwise one-quarter turn to remove it
from the headlamp assembly.
7. Install the new bulb into the headlamp assembly and connect
the electrical connector. 8. Reverse the steps to reinstall the
headlamp assembly.
To prevent headlamp vibration
and shortened bulb life, be sure
to insert the headlamp assembly
tabs in the slots at the lower
portion of the housing.
Sealed-Beam Headlamp
1. Headlamp retainer screws
2. Headlamp retainer
3. Sealed-beam headlamp bulb To replace one of these bulbs:
1. Remove the four screws (1) from
the headlamp retainer (2).
Pull the retainer (2) out and set it
aside.
2. Pull the bulb (3) forward to gain access to the electrical
connector.3. Disconnect the electricalconnector (2) and remove the
headlamp bulb (1).
4. Reverse Steps 1–3 to reinstall the headlamp.
Page 288 of 408
Black plate (36,1)GMC Savana Owner Manual (GMNA-Localizing-U.S./Canada-6014682) -
2014 - CRC 2nd Edition - 8/26/13
10-36 Vehicle Care
Front Turn Signal,
Sidemarker, and Parking
Lamps
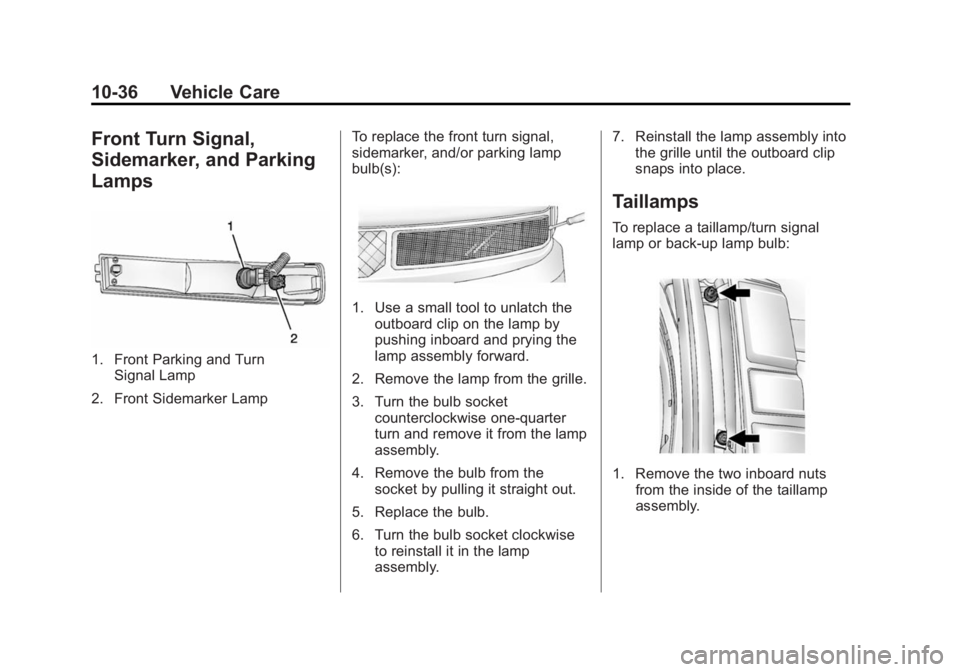
1. Front Parking and TurnSignal Lamp
2. Front Sidemarker Lamp To replace the front turn signal,
sidemarker, and/or parking lamp
bulb(s):
1. Use a small tool to unlatch the
outboard clip on the lamp by
pushing inboard and prying the
lamp assembly forward.
2. Remove the lamp from the grille.
3. Turn the bulb socket counterclockwise one-quarter
turn and remove it from the lamp
assembly.
4. Remove the bulb from the socket by pulling it straight out.
5. Replace the bulb.
6. Turn the bulb socket clockwise to reinstall it in the lamp
assembly. 7. Reinstall the lamp assembly into
the grille until the outboard clip
snaps into place.
Taillamps
To replace a taillamp/turn signal
lamp or back-up lamp bulb:
1. Remove the two inboard nuts
from the inside of the taillamp
assembly.
Page 289 of 408
Black plate (37,1)GMC Savana Owner Manual (GMNA-Localizing-U.S./Canada-6014682) -
2014 - CRC 2nd Edition - 8/26/13
Vehicle Care 10-37
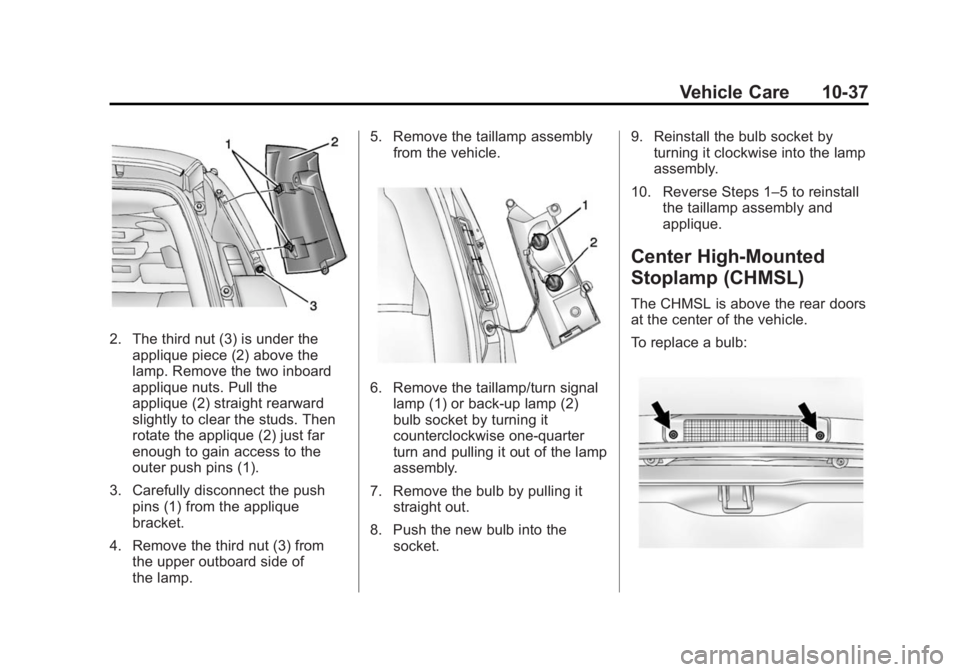
2. The third nut (3) is under theapplique piece (2) above the
lamp. Remove the two inboard
applique nuts. Pull the
applique (2) straight rearward
slightly to clear the studs. Then
rotate the applique (2) just far
enough to gain access to the
outer push pins (1).
3. Carefully disconnect the push pins (1) from the applique
bracket.
4. Remove the third nut (3) from the upper outboard side of
the lamp. 5. Remove the taillamp assembly
from the vehicle.
6. Remove the taillamp/turn signallamp (1) or back-up lamp (2)
bulb socket by turning it
counterclockwise one-quarter
turn and pulling it out of the lamp
assembly.
7. Remove the bulb by pulling it straight out.
8. Push the new bulb into the socket. 9. Reinstall the bulb socket by
turning it clockwise into the lamp
assembly.
10. Reverse Steps 1–5 to reinstall the taillamp assembly and
applique.
Center High-Mounted
Stoplamp (CHMSL)
The CHMSL is above the rear doors
at the center of the vehicle.
To replace a bulb:
Page 290 of 408
Black plate (38,1)GMC Savana Owner Manual (GMNA-Localizing-U.S./Canada-6014682) -
2014 - CRC 2nd Edition - 8/26/13
10-38 Vehicle Care
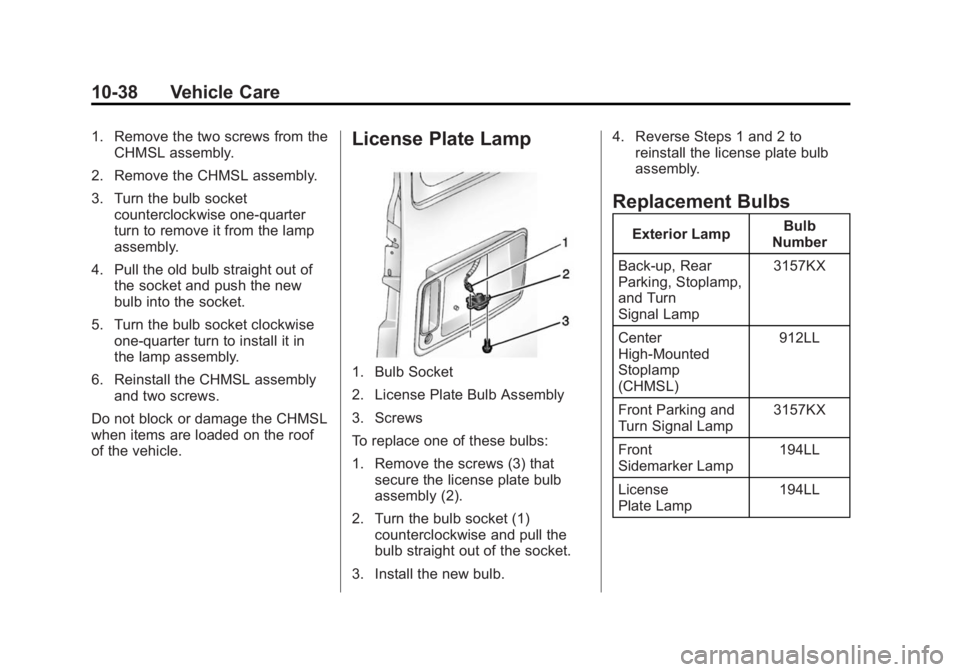
1. Remove the two screws from theCHMSL assembly.
2. Remove the CHMSL assembly.
3. Turn the bulb socket counterclockwise one-quarter
turn to remove it from the lamp
assembly.
4. Pull the old bulb straight out of the socket and push the new
bulb into the socket.
5. Turn the bulb socket clockwise one-quarter turn to install it in
the lamp assembly.
6. Reinstall the CHMSL assembly and two screws.
Do not block or damage the CHMSL
when items are loaded on the roof
of the vehicle.License Plate Lamp
1. Bulb Socket
2. License Plate Bulb Assembly
3. Screws
To replace one of these bulbs:
1. Remove the screws (3) that secure the license plate bulb
assembly (2).
2. Turn the bulb socket (1) counterclockwise and pull the
bulb straight out of the socket.
3. Install the new bulb. 4. Reverse Steps 1 and 2 to
reinstall the license plate bulb
assembly.
Replacement Bulbs
Exterior Lamp Bulb
Number
Back-up, Rear
Parking, Stoplamp,
and Turn
Signal Lamp 3157KX
Center
High-Mounted
Stoplamp
(CHMSL) 912LL
Front Parking and
Turn Signal Lamp 3157KX
Front
Sidemarker Lamp 194LL
License
Plate Lamp 194LL
Page 291 of 408
Black plate (39,1)GMC Savana Owner Manual (GMNA-Localizing-U.S./Canada-6014682) -
2014 - CRC 2nd Edition - 8/26/13
Vehicle Care 10-39
Exterior LampBulb
Number
Headlamps
Composite
High-Beam
Headlamp 9005LL
Composite
Low-Beam
Headlamp 9006LL
Sealed Beam
Headlamp H6054
For replacement bulbs not listed
here, contact your dealer.Electrical System
Electrical System
Overload
The vehicle has fuses and circuit
breakers to protect against an
electrical system overload.
When the current electrical load is
too heavy, the circuit breaker opens
and closes, protecting the circuit
until the current load returns to
normal or the problem is fixed. This
greatly reduces the chance of circuit
overload and fire caused by
electrical problems.
Fuses and circuit breakers protect
power devices in the vehicle.
Replace a bad fuse with a new one
of the identical size and rating.
If there is a problem on the road and
a fuse needs to be replaced, the
same amperage fuse can be
borrowed. Choose some feature of
the vehicle that is not needed to use
and replace it as soon as possible.
Headlamp Wiring
An electrical overload may cause
the lamps to go on and off, or in
some cases to remain off. Have the
headlamp wiring checked right away
if the lamps go on and off or
remain off.
Windshield Wipers
If the wiper motor overheats due to
heavy snow or ice, the windshield
wipers will stop until the motor cools
and will then restart.
Although the circuit is protected
from electrical overload, overload
due to heavy snow or ice may
cause wiper linkage damage.
Always clear ice and heavy snow
from the windshield before using the
windshield wipers.
If the overload is caused by an
electrical problem and not snow or
ice, be sure to get it fixed.