fuel pressure GMC SAVANA 2018 Owner's Manual
[x] Cancel search | Manufacturer: GMC, Model Year: 2018, Model line: SAVANA, Model: GMC SAVANA 2018Pages: 354, PDF Size: 5.09 MB
Page 6 of 354
GMC Savana Owner Manual (GMNA-Localizing-U.S./Canada-11374214) -
2018 - CRC - 2/2/18
In Brief 5
In Brief
Instrument Panel
Instrument Panel . . . . . . . . . . . . . . . . 6
Initial Drive Information
Initial Drive Information . . . . . . . . . . 8
Remote Keyless Entry (RKE)System . . . . . . . . . . . . . . . . . . . . . . . . 8
Remote Vehicle Start . . . . . . . . . . . 8
Door Locks . . . . . . . . . . . . . . . . . . . . . 9
Windows . . . . . . . . . . . . . . . . . . . . . . . . 9
Seat Adjustment . . . . . . . . . . . . . . . 10
Seat Belts . . . . . . . . . . . . . . . . . . . . . . 11
Airbag On-Off Switch . . . . . . . . . . 11
Mirror Adjustment . . . . . . . . . . . . . . 12
Steering Wheel Adjustment . . . . 12
Interior Lighting . . . . . . . . . . . . . . . . 13
Exterior Lighting . . . . . . . . . . . . . . . 13
Windshield Wiper/Washer . . . . . . 14
Climate Controls . . . . . . . . . . . . . . . 15
Transmission . . . . . . . . . . . . . . . . . . 16
Vehicle Features
Infotainment System . . . . . . . . . . . 17
Radio(s) . . . . . . . . . . . . . . . . . . . . . . . 17
Satellite Radio . . . . . . . . . . . . . . . . . 18
Portable Audio Devices . . . . . . . . 18
Bluetooth . . . . . . . . . . . . . . . . . . . . . . 19 Steering Wheel Controls . . . . . . . 19
Cruise Control . . . . . . . . . . . . . . . . . 20
Side Blind Zone
Alert (SBZA) . . . . . . . . . . . . . . . . . . 20
Rear Vision Camera (RVC) . . . . 20
Parking Assist . . . . . . . . . . . . . . . . . 20
Power Outlets . . . . . . . . . . . . . . . . . 21
Performance and Maintenance
Traction Control/Electronic
Stability Control . . . . . . . . . . . . . . 21
Tire Pressure Monitor . . . . . . . . . . 22
Fuel (Gasoline) . . . . . . . . . . . . . . . . 22
Fuel (Diesel) . . . . . . . . . . . . . . . . . . . 22
E85 or FlexFuel . . . . . . . . . . . . . . . . 22
Engine Oil Life System . . . . . . . . 22
Driving for Better Fuel Economy . . . . . . . . . . . . . . . . . . . . . 23
Roadside Assistance Program . . . . . . . . . . . . . . . . . . . . . . 23
Page 23 of 354
GMC Savana Owner Manual (GMNA-Localizing-U.S./Canada-11374214) -
2018 - CRC - 2/2/18
22 In Brief
Tire Pressure Monitor
This vehicle may have a Tire
Pressure Monitor System (TPMS).
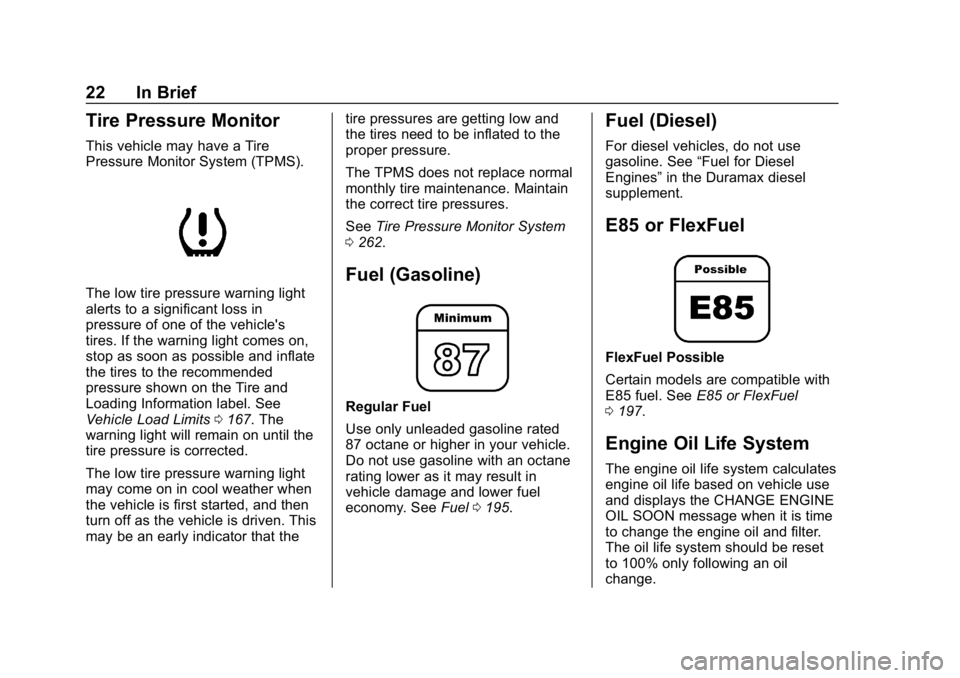
The low tire pressure warning light
alerts to a significant loss in
pressure of one of the vehicle's
tires. If the warning light comes on,
stop as soon as possible and inflate
the tires to the recommended
pressure shown on the Tire and
Loading Information label. See
Vehicle Load Limits0167. The
warning light will remain on until the
tire pressure is corrected.
The low tire pressure warning light
may come on in cool weather when
the vehicle is first started, and then
turn off as the vehicle is driven. This
may be an early indicator that the tire pressures are getting low and
the tires need to be inflated to the
proper pressure.
The TPMS does not replace normal
monthly tire maintenance. Maintain
the correct tire pressures.
See
Tire Pressure Monitor System
0 262.
Fuel (Gasoline)
Regular Fuel
Use only unleaded gasoline rated
87 octane or higher in your vehicle.
Do not use gasoline with an octane
rating lower as it may result in
vehicle damage and lower fuel
economy. See Fuel0195.
Fuel (Diesel)
For diesel vehicles, do not use
gasoline. See “Fuel for Diesel
Engines” in the Duramax diesel
supplement.
E85 or FlexFuel
FlexFuel Possible
Certain models are compatible with
E85 fuel. See E85 or FlexFuel
0 197.
Engine Oil Life System
The engine oil life system calculates
engine oil life based on vehicle use
and displays the CHANGE ENGINE
OIL SOON message when it is time
to change the engine oil and filter.
The oil life system should be reset
to 100% only following an oil
change.
Page 90 of 354
GMC Savana Owner Manual (GMNA-Localizing-U.S./Canada-11374214) -
2018 - CRC - 2/2/18
Instruments and Controls 89
Instruments and
Controls
Controls
Steering Wheel Adjustment . . . . 89
Steering Wheel Controls . . . . . . . 90
Horn . . . . . . . . . . . . . . . . . . . . . . . . . . . 91
Windshield Wiper/Washer . . . . . . 91
Compass . . . . . . . . . . . . . . . . . . . . . . 92
Clock . . . . . . . . . . . . . . . . . . . . . . . . . . 93
Power Outlets . . . . . . . . . . . . . . . . . 94
Cigarette Lighter . . . . . . . . . . . . . . . 95
Ashtrays . . . . . . . . . . . . . . . . . . . . . . . 96
Warning Lights, Gauges, and
Indicators
Warning Lights, Gauges, andIndicators . . . . . . . . . . . . . . . . . . . . 96
Instrument Cluster . . . . . . . . . . . . . 97
Speedometer . . . . . . . . . . . . . . . . . . 98
Odometer . . . . . . . . . . . . . . . . . . . . . . 98
Trip Odometer . . . . . . . . . . . . . . . . . 98
Fuel Gauge . . . . . . . . . . . . . . . . . . . . 98
Engine Oil Pressure Gauge . . . . 99
Engine Coolant Temperature Gauge . . . . . . . . . . . . . . . . . . . . . . 100
Voltmeter Gauge . . . . . . . . . . . . . 100
Seat Belt Reminders . . . . . . . . . 101 Airbag Readiness Light . . . . . . . 101
Airbag On-Off Light . . . . . . . . . . . 102
Charging System Light . . . . . . . 103
Malfunction Indicator Lamp
(Check Engine Light) . . . . . . . . 103
Brake System Warning Light . . . . . . . . . . . . . . . . . . . . . . . . 105
Antilock Brake System (ABS) Warning Light . . . . . . . . . . . . . . . 106
Tow/Haul Mode Light . . . . . . . . . 106
StabiliTrak OFF Light . . . . . . . . . 106
Traction Control System (TCS)/ StabiliTrak Light . . . . . . . . . . . . . 107
Tire Pressure Light . . . . . . . . . . . 107
Engine Oil Pressure Light . . . . 108
Low Fuel Warning Light . . . . . . 108
Security Light . . . . . . . . . . . . . . . . . 108
High-Beam On Light . . . . . . . . . . 109
Cruise Control Light . . . . . . . . . . 109
Information Displays
Driver Information Center (DIC) . . . . . . . . . . . . . . . . 109
Vehicle Messages
Vehicle Messages . . . . . . . . . . . . 114
Engine Power Messages . . . . . 114
Vehicle Speed Messages . . . . . 114
Vehicle Personalization
Vehicle Personalization . . . . . . . 115
Controls
Steering Wheel
Adjustment
For vehicles with a tilt steering
wheel, the lever is located on the
left side of the steering column.
To adjust the steering wheel:
1. Pull the lever to move the steering wheel up or down into
a comfortable position.
2. Release the lever to lock the steering wheel in place.
Page 109 of 354
GMC Savana Owner Manual (GMNA-Localizing-U.S./Canada-11374214) -
2018 - CRC - 2/2/18
108 Instruments and Controls
Engine Oil Pressure Light
Caution
Lack of proper engine oil
maintenance can damage the
engine. Driving with the engine oil
low can also damage the engine.
The repairs would not be covered
by the vehicle warranty. Check
the oil level as soon as possible.
Add oil if required, but if the oil
level is within the operating range
and the oil pressure is still low,
have the vehicle serviced. Always
follow the maintenance schedule
for changing engine oil.
This light should come on briefly as
the engine is started. If it does not
come on, have the vehicle serviced
by your dealer.If the light comes on and stays on, it
means that oil is not flowing through
the engine properly. The vehicle
could be low on oil and might have
some other system problem. See
your dealer.
Low Fuel Warning Light
English Shown, Metric Similar
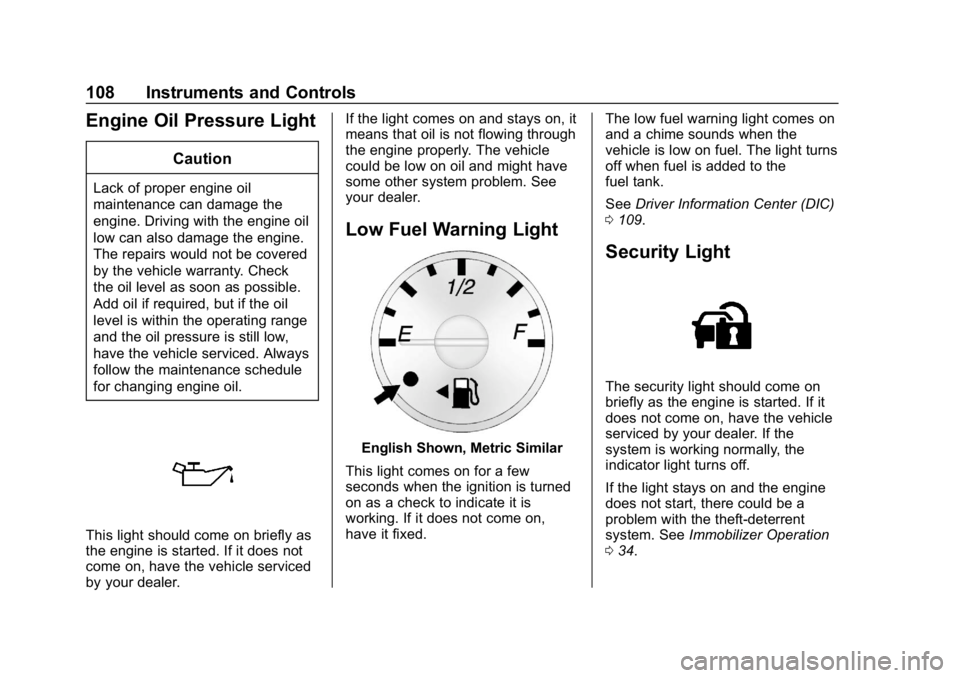
This light comes on for a few
seconds when the ignition is turned
on as a check to indicate it is
working. If it does not come on,
have it fixed. The low fuel warning light comes on
and a chime sounds when the
vehicle is low on fuel. The light turns
off when fuel is added to the
fuel tank.
See
Driver Information Center (DIC)
0 109.
Security Light
The security light should come on
briefly as the engine is started. If it
does not come on, have the vehicle
serviced by your dealer. If the
system is working normally, the
indicator light turns off.
If the light stays on and the engine
does not start, there could be a
problem with the theft-deterrent
system. See Immobilizer Operation
0 34.
Page 111 of 354
GMC Savana Owner Manual (GMNA-Localizing-U.S./Canada-11374214) -
2018 - CRC - 2/2/18
110 Instruments and Controls
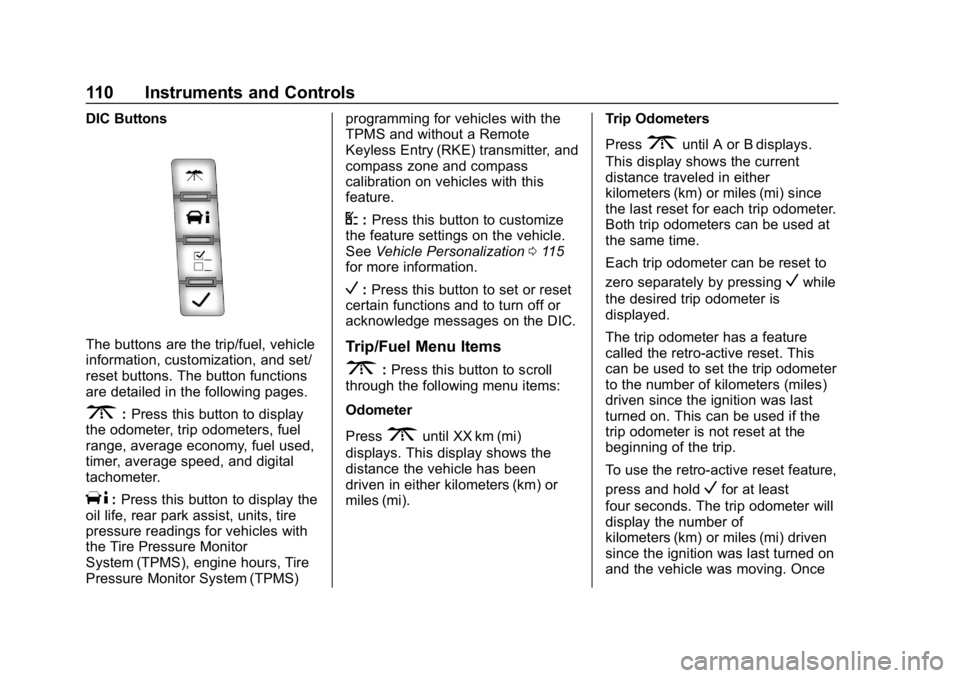
DIC Buttons
The buttons are the trip/fuel, vehicle
information, customization, and set/
reset buttons. The button functions
are detailed in the following pages.
3:Press this button to display
the odometer, trip odometers, fuel
range, average economy, fuel used,
timer, average speed, and digital
tachometer.
T: Press this button to display the
oil life, rear park assist, units, tire
pressure readings for vehicles with
the Tire Pressure Monitor
System (TPMS), engine hours, Tire
Pressure Monitor System (TPMS) programming for vehicles with the
TPMS and without a Remote
Keyless Entry (RKE) transmitter, and
compass zone and compass
calibration on vehicles with this
feature.
U:
Press this button to customize
the feature settings on the vehicle.
See Vehicle Personalization 0115
for more information.
V: Press this button to set or reset
certain functions and to turn off or
acknowledge messages on the DIC.
Trip/Fuel Menu Items
3: Press this button to scroll
through the following menu items:
Odometer
Press
3until XX km (mi)
displays. This display shows the
distance the vehicle has been
driven in either kilometers (km) or
miles (mi). Trip Odometers
Press
3until A or B displays.
This display shows the current
distance traveled in either
kilometers (km) or miles (mi) since
the last reset for each trip odometer.
Both trip odometers can be used at
the same time.
Each trip odometer can be reset to
zero separately by pressing
Vwhile
the desired trip odometer is
displayed.
The trip odometer has a feature
called the retro-active reset. This
can be used to set the trip odometer
to the number of kilometers (miles)
driven since the ignition was last
turned on. This can be used if the
trip odometer is not reset at the
beginning of the trip.
To use the retro-active reset feature,
press and hold
Vfor at least
four seconds. The trip odometer will
display the number of
kilometers (km) or miles (mi) driven
since the ignition was last turned on
and the vehicle was moving. Once
Page 171 of 354
GMC Savana Owner Manual (GMNA-Localizing-U.S./Canada-11374214) -
2018 - CRC - 2/2/18
170 Driving and Operating
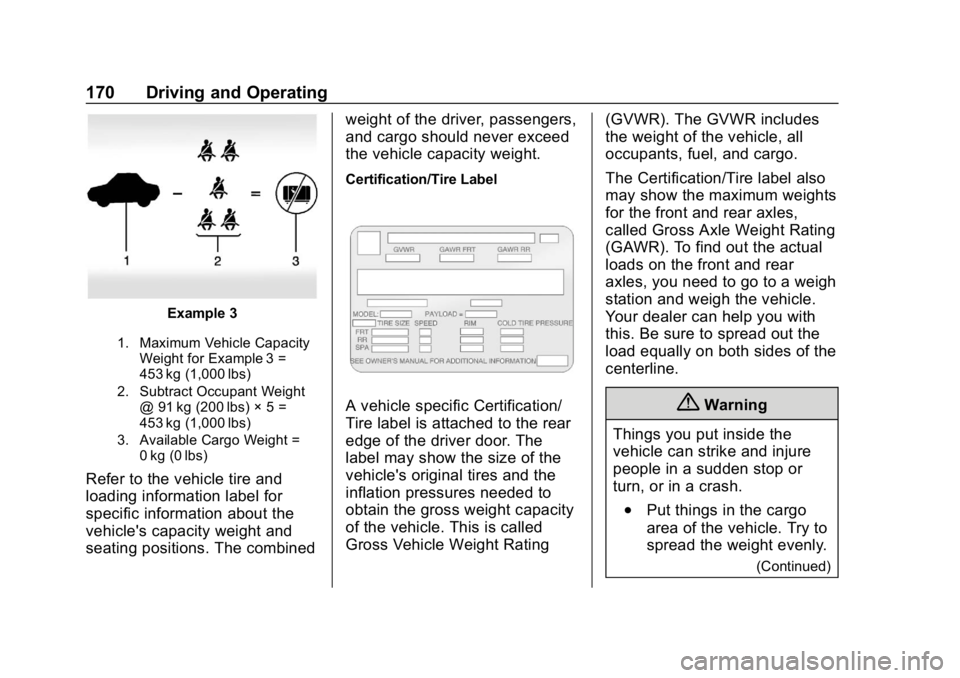
Example 3
1. Maximum Vehicle CapacityWeight for Example 3 =
453 kg (1,000 lbs)
2. Subtract Occupant Weight @ 91 kg (200 lbs) × 5 =
453 kg (1,000 lbs)
3. Available Cargo Weight = 0 kg (0 lbs)
Refer to the vehicle tire and
loading information label for
specific information about the
vehicle's capacity weight and
seating positions. The combined weight of the driver, passengers,
and cargo should never exceed
the vehicle capacity weight.
Certification/Tire Label
A vehicle specific Certification/
Tire label is attached to the rear
edge of the driver door. The
label may show the size of the
vehicle's original tires and the
inflation pressures needed to
obtain the gross weight capacity
of the vehicle. This is called
Gross Vehicle Weight Rating
(GVWR). The GVWR includes
the weight of the vehicle, all
occupants, fuel, and cargo.
The Certification/Tire label also
may show the maximum weights
for the front and rear axles,
called Gross Axle Weight Rating
(GAWR). To find out the actual
loads on the front and rear
axles, you need to go to a weigh
station and weigh the vehicle.
Your dealer can help you with
this. Be sure to spread out the
load equally on both sides of the
centerline.{Warning
Things you put inside the
vehicle can strike and injure
people in a sudden stop or
turn, or in a crash.
.Put things in the cargo
area of the vehicle. Try to
spread the weight evenly.
(Continued)
Page 260 of 354
GMC Savana Owner Manual (GMNA-Localizing-U.S./Canada-11374214) -
2018 - CRC - 2/2/18
Vehicle Care 259
Belt:A rubber coated layer of
cords between the plies and the
tread. Cords may be made from
steel or other reinforcing
materials.
Bead
:The tire bead contains
steel wires wrapped by steel
cords that hold the tire onto
the rim.
Bias Ply Tire
:A pneumatic tire
in which the plies are laid at
alternate angles less than
90 degrees to the centerline of
the tread.
Cold Tire Pressure
:The
amount of air pressure in a tire,
measured in kPa (kilopascal)
or psi (pounds per square inch)
before a tire has built up heat
from driving. See Tire Pressure
0 261.
Curb Weight
:The weight of a
motor vehicle with standard and
optional equipment including the maximum capacity of fuel, oil,
and coolant, but without
passengers and cargo.
DOT Markings
:A code molded
into the sidewall of a tire
signifying that the tire is in
compliance with the U.S.
Department of Transportation
(DOT) Motor Vehicle Safety
Standards. The DOT code
includes the Tire Identification
Number (TIN), an alphanumeric
designator which can also
identify the tire manufacturer,
production plant, brand, and
date of production.
GVWR
:Gross Vehicle Weight
Rating. See Vehicle Load Limits
0 167.
GAWR FRT
:Gross Axle Weight
Rating for the front axle. See
Vehicle Load Limits 0167.
GAWR RR
:Gross Axle Weight
Rating for the rear axle. See
Vehicle Load Limits 0167. Intended Outboard Sidewall
:
The side of an asymmetrical tire
that must always face outward
when mounted on a vehicle.
Kilopascal (kPa)
:The metric
unit for air pressure.
Light Truck (LT-Metric) Tire
:A
tire used on light duty trucks and
some multipurpose passenger
vehicles.
Load Index
:An assigned
number ranging from 1 to 279
that corresponds to the load
carrying capacity of a tire.
Maximum Inflation Pressure
:
The maximum air pressure to
which a cold tire can be inflated.
The maximum air pressure is
molded onto the sidewall.
Maximum Load Rating
:The
load rating for a tire at the
maximum permissible inflation
pressure for that tire.
Page 262 of 354
GMC Savana Owner Manual (GMNA-Localizing-U.S./Canada-11374214) -
2018 - CRC - 2/2/18
Vehicle Care 261
government testing procedures.
The ratings are molded into the
sidewall of the tire. SeeUniform
Tire Quality Grading 0271.
Vehicle Capacity Weight
:The
number of designated seating
positions multiplied by
68 kg (150 lb) plus the rated
cargo load. See Vehicle Load
Limits 0167.
Vehicle Maximum Load on the
Tire
:Load on an individual tire
due to curb weight, accessory
weight, occupant weight, and
cargo weight.
Vehicle Placard
:A label
permanently attached to a
vehicle showing the vehicle
capacity weight and the original
equipment tire size and
recommended inflation pressure.
See “Tire and Loading
Information Label” underVehicle
Load Limits 0167.
Tire Pressure
Tires need the correct amount of
air pressure to operate
effectively.
Caution
Neither tire underinflation nor
overinflation is good.
Underinflated tires, or tires
that do not have enough air,
can result in:
.Tire overloading and
overheating which could
lead to a blowout.
.Premature or
irregular wear.
.Poor handling.
.Reduced fuel economy.
Overinflated tires, or tires that
have too much air, can
result in:
.Unusual wear.
(Continued)
Caution (Continued)
.Poor handling.
.Rough ride.
.Needless damage from
road hazards.
The Tire and Loading
Information label on the vehicle
indicates the original equipment
tires and the correct cold tire
inflation pressures. The
recommended pressure is the
minimum air pressure needed to
support the vehicle's maximum
load carrying capacity.
For additional information
regarding how much weight the
vehicle can carry, and an
example of the Tire and Loading
Information label, see Vehicle
Load Limits 0167. How the
vehicle is loaded affects vehicle
handling and ride comfort. Never
Page 264 of 354
GMC Savana Owner Manual (GMNA-Localizing-U.S./Canada-11374214) -
2018 - CRC - 2/2/18
Vehicle Care 263
causes the tire to overheat and can
lead to tire failure. Under-inflation
also reduces fuel efficiency and tire
tread life, and may affect the
vehicle's handling and stopping
ability.
Please note that the TPMS is not a
substitute for proper tire
maintenance, and it is the driver's
responsibility to maintain correct tire
pressure, even if under-inflation has
not reached the level to trigger
illumination of the TPMS low tire
pressure telltale.
Your vehicle has also been
equipped with a TPMS malfunction
indicator to indicate when the
system is not operating properly.
The TPMS malfunction indicator is
combined with the low tire pressure
telltale. When the system detects a
malfunction, the telltale will flash for
approximately one minute and then
remain continuously illuminated.
This sequence will continue upon
subsequent vehicle start-ups as
long as the malfunction exists.When the malfunction indicator is
illuminated, the system may not be
able to detect or signal low tire
pressure as intended. TPMS
malfunctions may occur for a variety
of reasons, including the installation
of replacement or alternate tires or
wheels on the vehicle that prevent
the TPMS from functioning properly.
Always check the TPMS malfunction
telltale after replacing one or more
tires or wheels on your vehicle to
ensure that the replacement or
alternate tires and wheels allow the
TPMS to continue to function
properly.
See
Tire Pressure Monitor
Operation 0263.
See Radio Frequency Statement
0 326.
Tire Pressure Monitor
Operation
This vehicle may have a Tire
Pressure Monitor System (TPMS).
The TPMS is designed to warn the
driver when a low tire pressure
condition exists. TPMS sensors are mounted onto each tire and wheel
assembly, excluding the spare tire
and wheel assembly. The TPMS
sensors monitor the air pressure in
the tires and transmit the tire
pressure readings to a receiver
located in the vehicle.
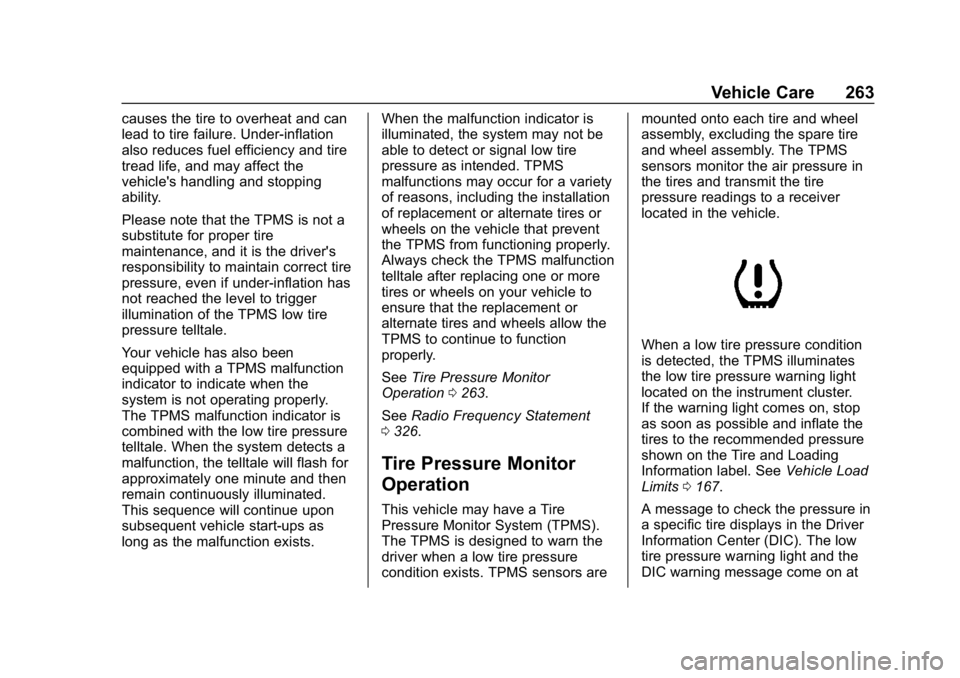
When a low tire pressure condition
is detected, the TPMS illuminates
the low tire pressure warning light
located on the instrument cluster.
If the warning light comes on, stop
as soon as possible and inflate the
tires to the recommended pressure
shown on the Tire and Loading
Information label. See
Vehicle Load
Limits 0167.
A message to check the pressure in
a specific tire displays in the Driver
Information Center (DIC). The low
tire pressure warning light and the
DIC warning message come on at
Page 295 of 354
GMC Savana Owner Manual (GMNA-Localizing-U.S./Canada-11374214) -
2018 - CRC - 2/2/18
294 Vehicle Care
Visually check constant velocity joint
boots and axle seals for leaks.
Lubricate the upper and lower
control arm ball joints, at least every
other engine oil change.
Lubricate the tie rod ball joints, idler
arm pivot shaft bearings, idler arm
socket, and pitman arm socket, at
least every other engine oil change.
Caution
Lubrication of applicable steering/
suspension points should not be
done unless the temperature is
−12 °C (10 °F) or higher,
or damage could result.
Body Component Lubrication
Lubricate all key lock cylinders,
hood hinges, liftgate hinges, and the
fuel door hinge unless the
components are plastic. Applying
silicone grease on weatherstrips
with a clean cloth will make them
last longer, seal better, and not stick
or squeak.
Underbody Maintenance
At least twice a year, spring and fall,
use plain water to flush dirt and
debris from the vehicle's underbody.
Your dealer or an underbody car
washing system can do this. If not
removed, rust and corrosion can
develop.
Do not directly power wash the
transfer case and/or front/rear axle
output seals. High pressure water
can overcome the seals and
contaminate the fluid. Contaminated
fluid will decrease the life of the
transfer case and/or axles and
should be replaced.
Sheet Metal Damage
If the vehicle is damaged and
requires sheet metal repair or
replacement, make sure the body
repair shop applies anti-corrosion
material to parts repaired or
replaced to restore corrosion
protection.
Original manufacturer replacement
parts will provide the corrosion
protection while maintaining the
vehicle warranty.
Finish Damage
Quickly repair minor chips and
scratches with touch-up materials
available from your dealer to avoid
corrosion. Larger areas of finish
damage can be corrected in your
dealer's body and paint shop.
Chemical Paint Spotting
Airborne pollutants can fall upon
and attack painted vehicle surfaces
causing blotchy, ring-shaped
discolorations, and small, irregular
dark spots etched into the paint
surface. See“Finish Care”
previously in this section.
Interior Care
To prevent dirt particle abrasions,
regularly clean the vehicle's interior.
Immediately remove any soils.
Newspapers or dark garments can
transfer color to the vehicle’s
interior.
Use a soft bristle brush to remove
dust from knobs and crevices on the
instrument cluster. Using a mild
soap solution, immediately remove