GMC SAVANA 2019 Service Manual
Manufacturer: GMC, Model Year: 2019, Model line: SAVANA, Model: GMC SAVANA 2019Pages: 373, PDF Size: 5.58 MB
Page 41 of 373
GMC Savana Owner Manual (GMNA-Localizing-U.S./Canada-12146167) -
2019 - CRC - 11/26/18
40 Keys, Doors, and Windows
Troubleshooting
If the vehicle is in R (Reverse) and
a blue screen is displayed in the
mirror and then the display shuts
off, see your dealer for service.
SeeRear Vision Camera (RVC)
0 198.Windows
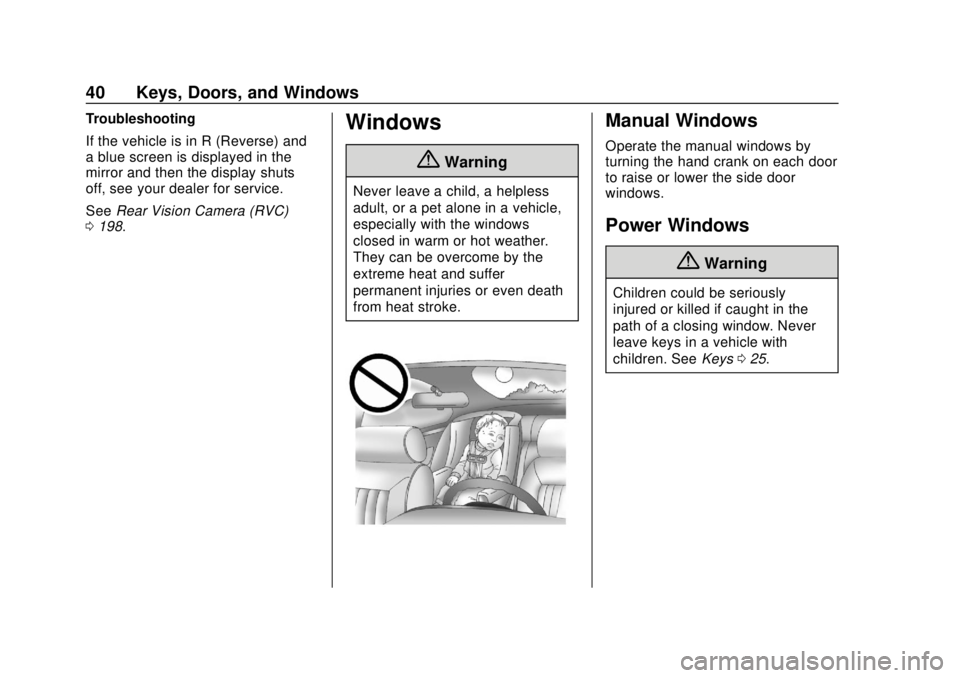
{Warning
Never leave a child, a helpless
adult, or a pet alone in a vehicle,
especially with the windows
closed in warm or hot weather.
They can be overcome by the
extreme heat and suffer
permanent injuries or even death
from heat stroke.
Manual Windows
Operate the manual windows by
turning the hand crank on each door
to raise or lower the side door
windows.
Power Windows
{Warning
Children could be seriously
injured or killed if caught in the
path of a closing window. Never
leave keys in a vehicle with
children. See Keys025.
Page 42 of 373
GMC Savana Owner Manual (GMNA-Localizing-U.S./Canada-12146167) -
2019 - CRC - 11/26/18
Keys, Doors, and Windows 41
If equipped, power windows work
when the ignition is on, in ACC/
ACCESSORY, or when Retained
Accessory Power (RAP) is active.
SeeRetained Accessory Power
(RAP) 0181.
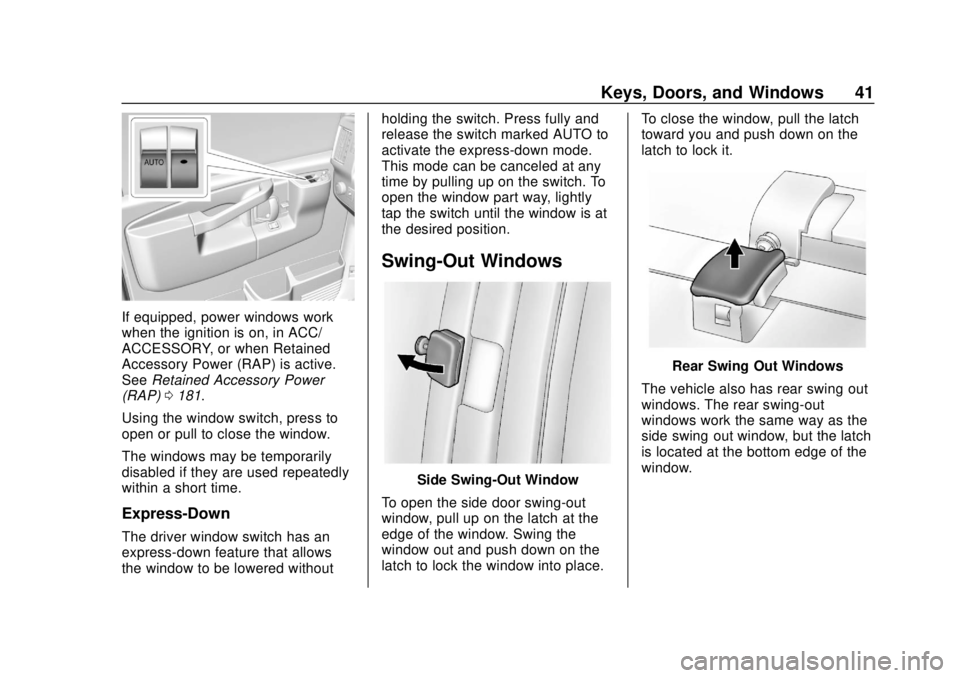
Using the window switch, press to
open or pull to close the window.
The windows may be temporarily
disabled if they are used repeatedly
within a short time.
Express-Down
The driver window switch has an
express-down feature that allows
the window to be lowered without holding the switch. Press fully and
release the switch marked AUTO to
activate the express-down mode.
This mode can be canceled at any
time by pulling up on the switch. To
open the window part way, lightly
tap the switch until the window is at
the desired position.
Swing-Out Windows
Side Swing-Out Window
To open the side door swing-out
window, pull up on the latch at the
edge of the window. Swing the
window out and push down on the
latch to lock the window into place. To close the window, pull the latch
toward you and push down on the
latch to lock it.
Rear Swing‐Out Windows
The vehicle also has rear swing‐out
windows. The rear swing-out
windows work the same way as the
side swing‐out window, but the latch
is located at the bottom edge of the
window.
Page 43 of 373
GMC Savana Owner Manual (GMNA-Localizing-U.S./Canada-12146167) -
2019 - CRC - 11/26/18
42 Keys, Doors, and Windows
Enhanced Technology
Glass
The vehicle may be equipped with
Enhanced Technology Glass (ETG).
ETG is part of the overall occupant
protection system on passenger and
crew vans. ETG may help keep
passengers sitting next to these
fixed windows from being ejected
through the glass in some, but not
all crashes. Even with this glass,
seat belts must still be worn at all
times. For passenger and crew
vans, use only ETG glass approved
for the vehicle for replacement when
damaged.The following table shows laminated glass location, based on vehicle model
and options.
Vehicle Configuration ETG Locations
Passenger Vans with five or more
seating positions Sliding door forward window (if
equipped) and rear-most side
windows
Long Wheelbase Cargo Vans Rear-most side windows
Crew Vans Sliding door forward window (if
equipped) and rear-most side
windows.
Rear Windows
Rear Side Door Windows
(Cargo Van Only)
{Warning
The vehicle may have a partition
behind the front seats or vertical
metal panels on the inside of the
rear side door windows. These
are part of the occupant
protection system. Do not
remove them.
Sun Visors
To block out glare, swing down the
sun visors. You can also swing them
to the side.
Visor Vanity Mirror
The vehicle may have visor vanity
mirrors, with or without lamps. Lift
the mirror cover to turn the lamps
on, if equipped.
Page 44 of 373
GMC Savana Owner Manual (GMNA-Localizing-U.S./Canada-12146167) -
2019 - CRC - 11/26/18
Seats and Restraints 43
Seats and
Restraints
Head Restraints
Head Restraints . . . . . . . . . . . . . . . 44
Front Seats
Seat Adjustment . . . . . . . . . . . . . . . 44
Power Seat Adjustment . . . . . . . . 44
Reclining Seatbacks . . . . . . . . . . . 45
Rear Seats
Rear Seats . . . . . . . . . . . . . . . . . . . . 46
Seat Belts
Seat Belts . . . . . . . . . . . . . . . . . . . . . 50
How to Wear Seat BeltsProperly . . . . . . . . . . . . . . . . . . . . . . 51
Lap-Shoulder Belt . . . . . . . . . . . . . 53
Seat Belt Use During Pregnancy . . . . . . . . . . . . . . . . . . . . 57
Seat Belt Extender . . . . . . . . . . . . . 58
Safety System Check . . . . . . . . . . 58
Seat Belt Care . . . . . . . . . . . . . . . . . 58
Replacing Seat Belt System Parts after a Crash . . . . . . . . . . . 59
Airbag System
Airbag System . . . . . . . . . . . . . . . . . 60
Where Are the Airbags? . . . . . . . 62
When Should an AirbagInflate? . . . . . . . . . . . . . . . . . . . . . . . 64
What Makes an Airbag
Inflate? . . . . . . . . . . . . . . . . . . . . . . . 65
How Does an Airbag Restrain? . . . . . . . . . . . . . . . . . . . . . 65
What Will You See after an Airbag Inflates? . . . . . . . . . . . . . . 65
Airbag On-Off Switch . . . . . . . . . . 67
Servicing the Airbag-Equipped Vehicle . . . . . . . . . . . . . . . . . . . . . . . 69
Adding Equipment to the Airbag-Equipped Vehicle . . . . . 70
Airbag System Check . . . . . . . . . . 70
Replacing Airbag System Parts after a Crash . . . . . . . . . . . . . . . . . 71
Child Restraints
Older Children . . . . . . . . . . . . . . . . . 71
Infants and Young Children . . . . 73
Child Restraint Systems . . . . . . . 75
Where to Put the Restraint . . . . . 77
Lower Anchors and Tethers forChildren (LATCH System) . . . . 78
Replacing LATCH System Parts After a Crash . . . . . . . . . . . . . . . . . 84 Securing Child Restraints (With
the Seat Belt in the
Rear Seat) . . . . . . . . . . . . . . . . . . . 85
Securing Child Restraints (With the Seat Belt in the
Front Seat) . . . . . . . . . . . . . . . . . . . 87
Page 45 of 373
GMC Savana Owner Manual (GMNA-Localizing-U.S./Canada-12146167) -
2019 - CRC - 11/26/18
44 Seats and Restraints
Head Restraints
On vehicles with factory installed
seats, the front seats have built-in
head restraints that are not
adjustable in the outboard seating
positions.
Front Seats
Seat Adjustment
{Warning
You can lose control of the
vehicle if you try to adjust a driver
seat while the vehicle is moving.
Adjust the driver seat only when
the vehicle is not moving.
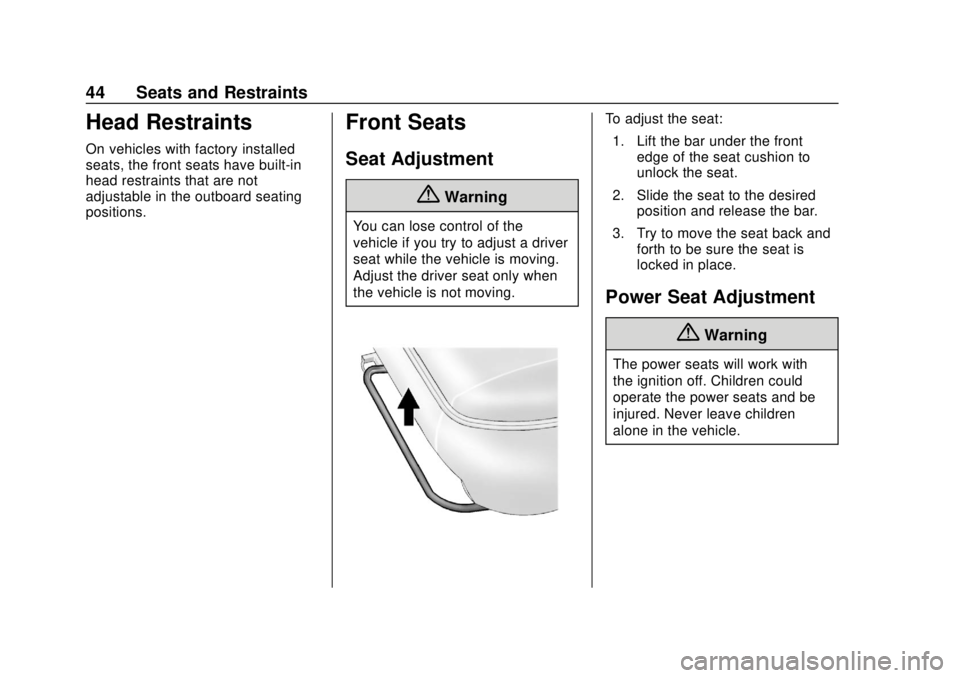
To adjust the seat:1. Lift the bar under the front edge of the seat cushion to
unlock the seat.
2. Slide the seat to the desired position and release the bar.
3. Try to move the seat back and forth to be sure the seat is
locked in place.
Power Seat Adjustment
{Warning
The power seats will work with
the ignition off. Children could
operate the power seats and be
injured. Never leave children
alone in the vehicle.
Page 46 of 373
GMC Savana Owner Manual (GMNA-Localizing-U.S./Canada-12146167) -
2019 - CRC - 11/26/18
Seats and Restraints 45
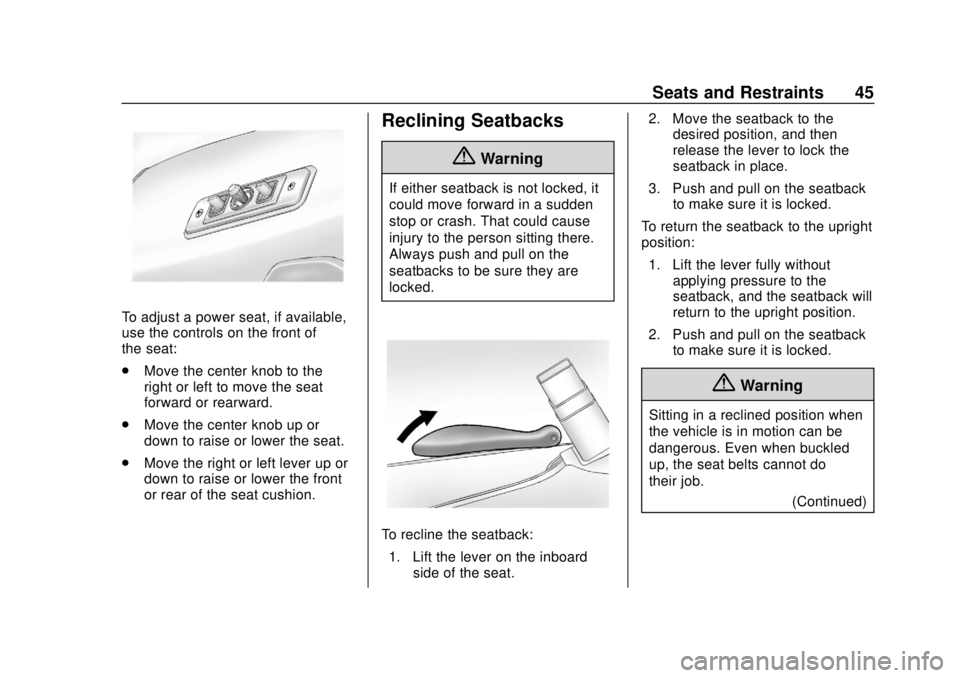
To adjust a power seat, if available,
use the controls on the front of
the seat:
.Move the center knob to the
right or left to move the seat
forward or rearward.
. Move the center knob up or
down to raise or lower the seat.
. Move the right or left lever up or
down to raise or lower the front
or rear of the seat cushion.
Reclining Seatbacks
{Warning
If either seatback is not locked, it
could move forward in a sudden
stop or crash. That could cause
injury to the person sitting there.
Always push and pull on the
seatbacks to be sure they are
locked.
To recline the seatback:
1. Lift the lever on the inboard side of the seat. 2. Move the seatback to the
desired position, and then
release the lever to lock the
seatback in place.
3. Push and pull on the seatback to make sure it is locked.
To return the seatback to the upright
position: 1. Lift the lever fully without applying pressure to the
seatback, and the seatback will
return to the upright position.
2. Push and pull on the seatback to make sure it is locked.
{Warning
Sitting in a reclined position when
the vehicle is in motion can be
dangerous. Even when buckled
up, the seat belts cannot do
their job.
(Continued)
Page 47 of 373
GMC Savana Owner Manual (GMNA-Localizing-U.S./Canada-12146167) -
2019 - CRC - 11/26/18
46 Seats and Restraints
Warning (Continued)
The shoulder belt will not be
against your body. Instead, it will
be in front of you. In a crash, you
could go into it, receiving neck or
other injuries.
The lap belt could go up over
your abdomen. The belt forces
would be there, not at your pelvic
bones. This could cause serious
internal injuries.
For proper protection when the
vehicle is in motion, have the
seatback upright. Then sit well
back in the seat and wear the
seat belt properly.
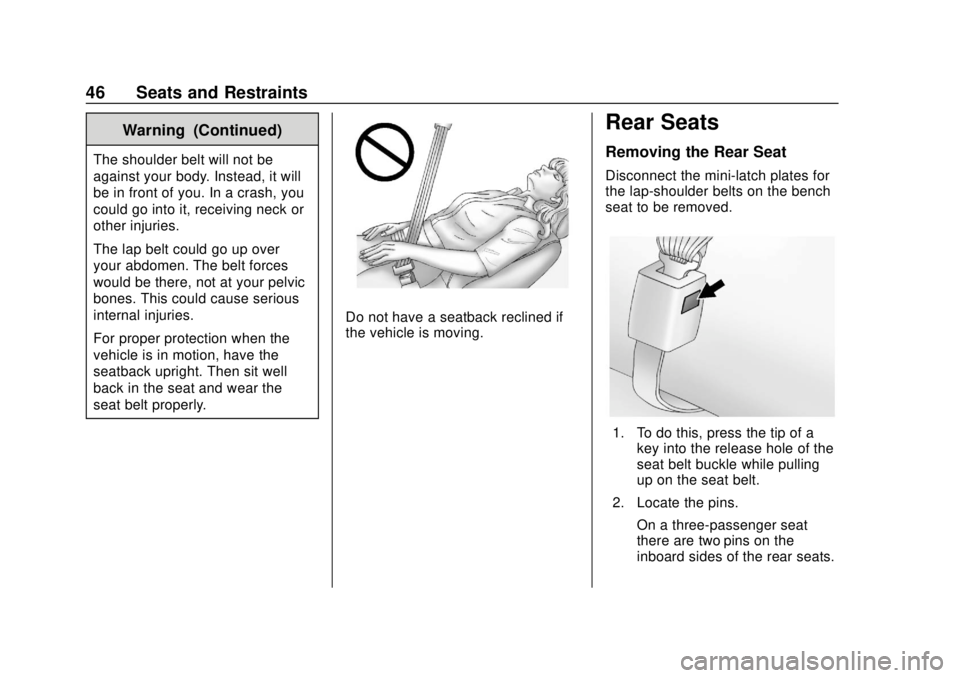
Do not have a seatback reclined if
the vehicle is moving.
Rear Seats
Removing the Rear Seat
Disconnect the mini-latch plates for
the lap-shoulder belts on the bench
seat to be removed.
1. To do this, press the tip of akey into the release hole of the
seat belt buckle while pulling
up on the seat belt.
2. Locate the pins. On a three-passenger seat
there are two pins on the
inboard sides of the rear seats.
Page 48 of 373
GMC Savana Owner Manual (GMNA-Localizing-U.S./Canada-12146167) -
2019 - CRC - 11/26/18
Seats and Restraints 47
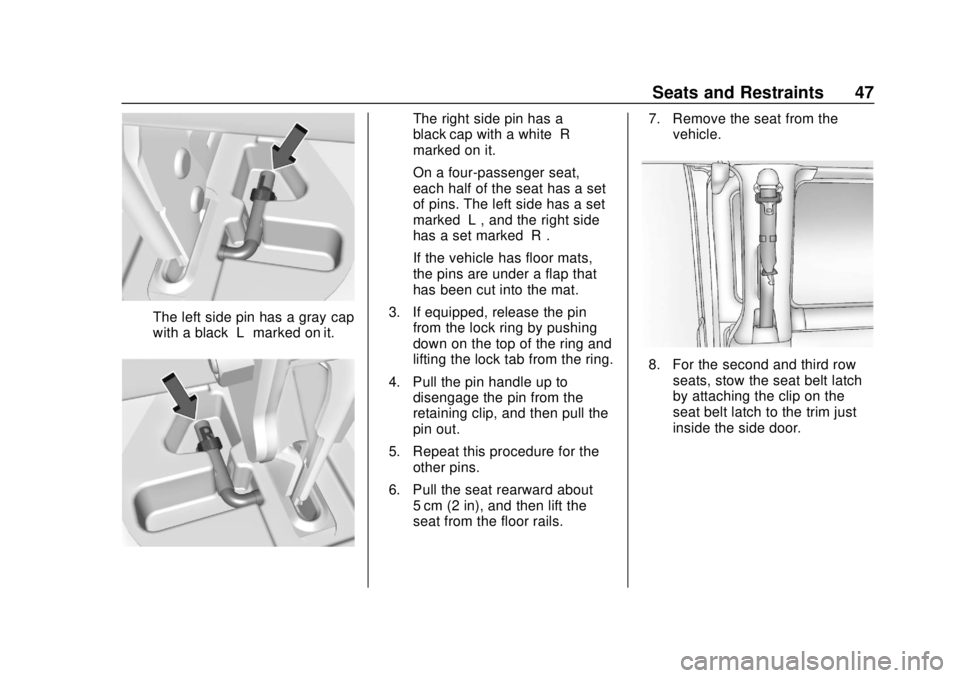
The left side pin has a gray cap
with a black“L”marked on it.
The right side pin has a
black cap with a white “R”
marked on it.
On a four-passenger seat,
each half of the seat has a set
of pins. The left side has a set
marked “L”, and the right side
has a set marked “R”.
If the vehicle has floor mats,
the pins are under a flap that
has been cut into the mat.
3. If equipped, release the pin from the lock ring by pushing
down on the top of the ring and
lifting the lock tab from the ring.
4. Pull the pin handle up to disengage the pin from the
retaining clip, and then pull the
pin out.
5. Repeat this procedure for the other pins.
6. Pull the seat rearward about 5 cm (2 in), and then lift the
seat from the floor rails. 7. Remove the seat from the
vehicle.
8. For the second and third rowseats, stow the seat belt latch
by attaching the clip on the
seat belt latch to the trim just
inside the side door.
Page 49 of 373
GMC Savana Owner Manual (GMNA-Localizing-U.S./Canada-12146167) -
2019 - CRC - 11/26/18
48 Seats and Restraints
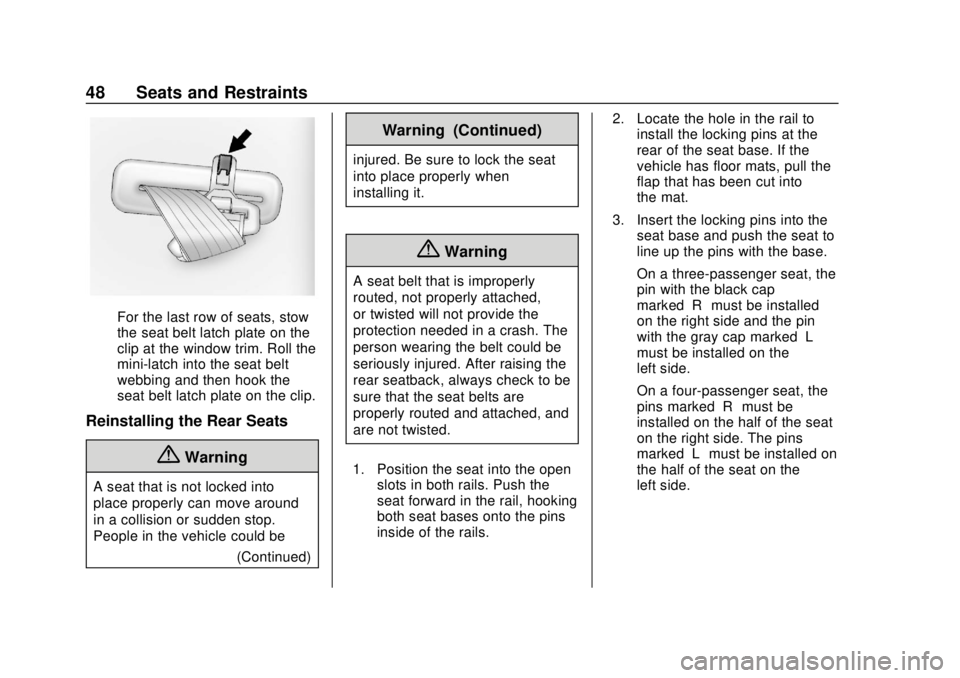
For the last row of seats, stow
the seat belt latch plate on the
clip at the window trim. Roll the
mini-latch into the seat belt
webbing and then hook the
seat belt latch plate on the clip.
Reinstalling the Rear Seats
{Warning
A seat that is not locked into
place properly can move around
in a collision or sudden stop.
People in the vehicle could be(Continued)
Warning (Continued)
injured. Be sure to lock the seat
into place properly when
installing it.
{Warning
A seat belt that is improperly
routed, not properly attached,
or twisted will not provide the
protection needed in a crash. The
person wearing the belt could be
seriously injured. After raising the
rear seatback, always check to be
sure that the seat belts are
properly routed and attached, and
are not twisted.
1. Position the seat into the open slots in both rails. Push the
seat forward in the rail, hooking
both seat bases onto the pins
inside of the rails. 2. Locate the hole in the rail to
install the locking pins at the
rear of the seat base. If the
vehicle has floor mats, pull the
flap that has been cut into
the mat.
3. Insert the locking pins into the seat base and push the seat to
line up the pins with the base.
On a three-passenger seat, the
pin with the black cap
marked “R”must be installed
on the right side and the pin
with the gray cap marked “L”
must be installed on the
left side.
On a four-passenger seat, the
pins marked “R”must be
installed on the half of the seat
on the right side. The pins
marked “L”must be installed on
the half of the seat on the
left side.
Page 50 of 373
GMC Savana Owner Manual (GMNA-Localizing-U.S./Canada-12146167) -
2019 - CRC - 11/26/18
Seats and Restraints 49
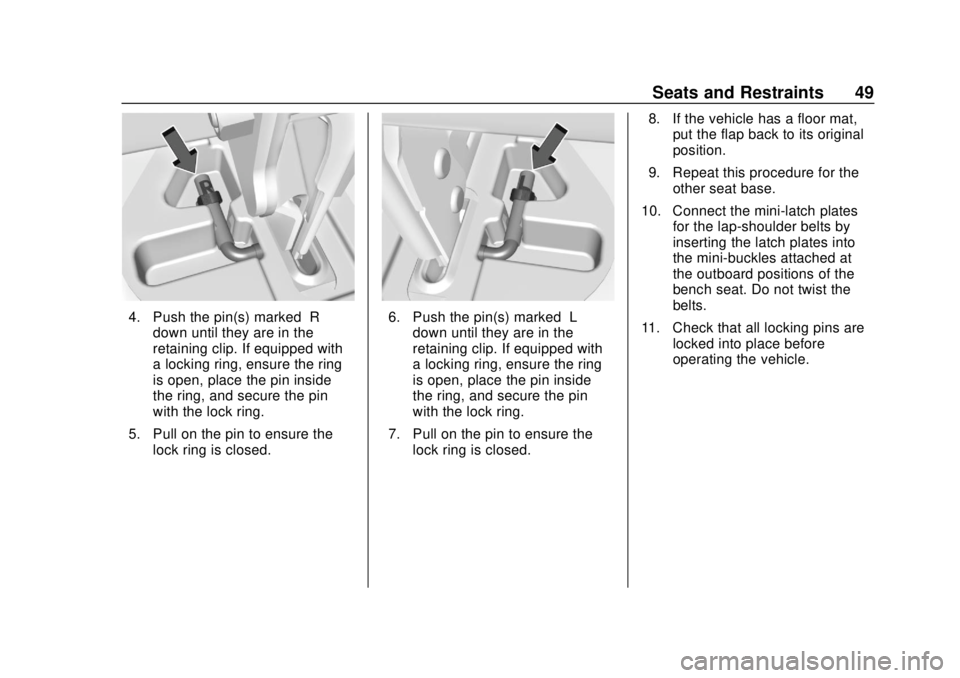
4. Push the pin(s) marked“R”
down until they are in the
retaining clip. If equipped with
a locking ring, ensure the ring
is open, place the pin inside
the ring, and secure the pin
with the lock ring.
5. Pull on the pin to ensure the lock ring is closed.6. Push the pin(s) marked “L”
down until they are in the
retaining clip. If equipped with
a locking ring, ensure the ring
is open, place the pin inside
the ring, and secure the pin
with the lock ring.
7. Pull on the pin to ensure the lock ring is closed. 8. If the vehicle has a floor mat,
put the flap back to its original
position.
9. Repeat this procedure for the other seat base.
10. Connect the mini-latch plates for the lap-shoulder belts by
inserting the latch plates into
the mini-buckles attached at
the outboard positions of the
bench seat. Do not twist the
belts.
11. Check that all locking pins are locked into place before
operating the vehicle.