change time GMC SAVANA PASSENGER 2010 Owners Manual
[x] Cancel search | Manufacturer: GMC, Model Year: 2010, Model line: SAVANA PASSENGER, Model: GMC SAVANA PASSENGER 2010Pages: 424, PDF Size: 2.38 MB
Page 20 of 424
©¨:Seek or scan stations.
4:Press to display additional text information related to
the current FM-RDS station or MP3 song. A choice of
additional information such as: Channel, Song, Artist, and
CAT (category) can display. Continue pressing to
highlight the desired label, or press the softkey located
under any one of the tabs and the information about that
tab displays.
For more information about these and other radio
features, seeAudio System(s) on page 4-59.
Storing a Favorite Station
Depending on which radio the vehicle has, radio
stations are stored as either favorites or presets.
For vehicles with a FAV button, a maximum of
36 stations can be stored as favorites using the
six softkeys located below the radio station frequency
tabs and by using the radio FAV button. Press FAV
to go through up to six pages of favorites, each having
six favorite stations available per page. Each page
of favorites can contain any combination of AM and FM
stations.
If the radio does not have a FAV button, up to
18 stations (six FM1, six FM2, and six AM), can be
programmed on the six numbered buttons.
SeeRadio(s) on page 4-62.
Setting the Clock
To set the time and date for the Radio with CD (MP3):
1. Press
Hand the HR, MIN, MM, DD, YYYY
(hour, minute, month, day, and year) displays.
2. Press the pushbutton located below any one of the
tabs that you want to change.
3. Increase or decrease the time or date, depending
on the radio, by pressing
©SEEK¨arrows,
s\REV/FWD buttons, or by turningf
clockwise or counterclockwise.
For detailed instructions on setting the clock for your
specific audio system, seeSetting the Clock on
page 4-60.
Portable Audio Devices
This vehicle may have an auxiliary input jack, located
on the audio faceplate. External devices such as iPod®,
MP3 players, etc. can be connected to the auxiliary
input jack using a 3.5 mm (1/8 in) input jack cable.
See “Using the Auxiliary Input Jack” underRadio(s) on
page 4-62.
1-14
Page 23 of 424
Tire Pressure Monitor
This vehicle may have a Tire Pressure Monitor
System (TPMS).
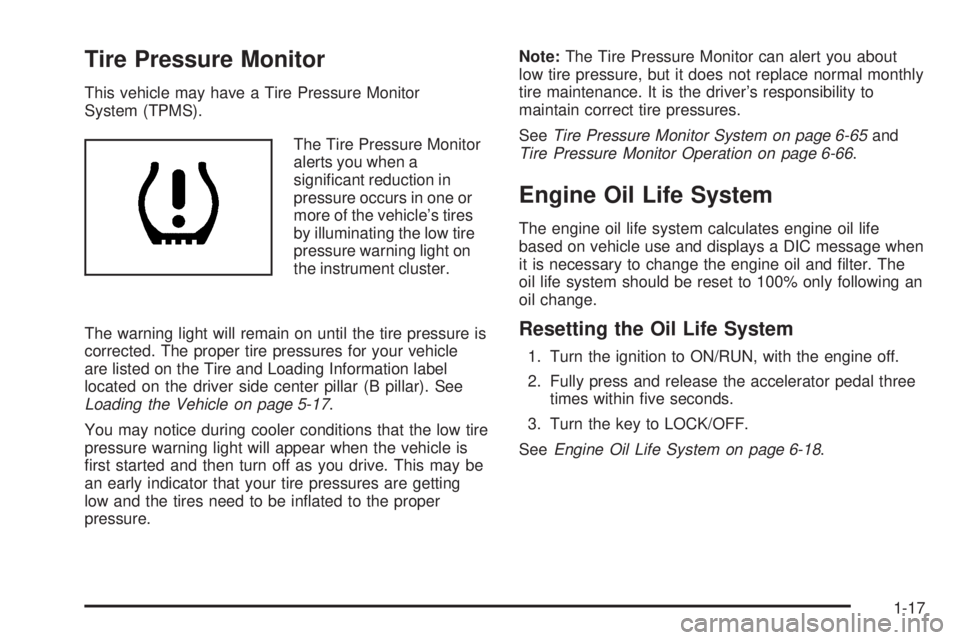
The Tire Pressure Monitor
alerts you when a
significant reduction in
pressure occurs in one or
more of the vehicle’s tires
by illuminating the low tire
pressure warning light on
the instrument cluster.
The warning light will remain on until the tire pressure is
corrected. The proper tire pressures for your vehicle
are listed on the Tire and Loading Information label
located on the driver side center pillar (B pillar). See
Loading the Vehicle on page 5-17.
You may notice during cooler conditions that the low tire
pressure warning light will appear when the vehicle is
first started and then turn off as you drive. This may be
an early indicator that your tire pressures are getting
low and the tires need to be inflated to the proper
pressure.Note:The Tire Pressure Monitor can alert you about
low tire pressure, but it does not replace normal monthly
tire maintenance. It is the driver’s responsibility to
maintain correct tire pressures.
SeeTire Pressure Monitor System on page 6-65and
Tire Pressure Monitor Operation on page 6-66.
Engine Oil Life System
The engine oil life system calculates engine oil life
based on vehicle use and displays a DIC message when
it is necessary to change the engine oil and filter. The
oil life system should be reset to 100% only following an
oil change.
Resetting the Oil Life System
1. Turn the ignition to ON/RUN, with the engine off.
2. Fully press and release the accelerator pedal three
times within five seconds.
3. Turn the key to LOCK/OFF.
SeeEngine Oil Life System on page 6-18.
1-17
Page 57 of 424
Infants and Young Children
Everyone in a vehicle needs protection! This includes
infants and all other children. Neither the distance
traveled nor the age and size of the traveler changes
the need, for everyone, to use safety restraints. In fact,
the law in every state in the United States and in
every Canadian province says children up to some age
must be restrained while in a vehicle.
{WARNING:
Children can be seriously injured or strangled if a
shoulder belt is wrapped around their neck and
the safety belt continues to tighten. Never leave
children unattended in a vehicle and never allow
children to play with the safety belts.Airbags plus lap-shoulder belts offer protection for
adults and older children, but not for young children and
infants. Neither the vehicle’s safety belt system nor
its airbag system is designed for them. Every time
infants and young children ride in vehicles, they should
have the protection provided by appropriate child
restraints.
Children who are not restrained properly can strike
other people, or can be thrown out of the vehicle.
2-33
Page 128 of 424
Starting Procedure
1. With your foot off the accelerator pedal, turn the
ignition key to START. When the engine starts,
let go of the key. The idle speed will go down as
your engine gets warm. Do not race the engine
immediately after starting it. Operate the engine and
transmission gently to allow the oil to warm up
and lubricate all moving parts.
The vehicle has a Computer-Controlled Cranking
System. This feature assists in starting the engine
and protects components. If the ignition key is turned
to the START position, and then released when the
engine begins cranking, the engine will continue
cranking for a few seconds or until the vehicle starts.
If the engine does not start and the key is held in
START for many seconds, cranking will be stopped
after 15 seconds to prevent cranking motor damage.
To prevent gear damage, this system also prevents
cranking if the engine is already running. Engine
cranking can be stopped by turning the ignition
switch to the ACC/ACCESSORY or LOCK/OFF
position.
Notice:Cranking the engine for long periods of
time, by returning the key to the START position
immediately after cranking has ended, can overheat
and damage the cranking motor, and drain the
battery. Wait at least 15 seconds between each try,
to let the cranking motor cool down.2. If the engine does not start after 5-10 seconds,
especially in very cold weather (below 0°F or−18°C),
it could be flooded with too much gasoline. Try
pushing the accelerator pedal all the way to the
floor and holding it there as you hold the key in
START for up to 15 seconds. Wait at least
15 seconds between each try, to allow the cranking
motor to cool down. When the engine starts, let go of
the key and accelerator. If the vehicle starts briefly
but then stops again, do the same thing. This clears
the extra gasoline from the engine. Do not race the
engine immediately after starting it. Operate the
engine and transmission gently until the oil warms
up and lubricates all moving parts.
Notice:The engine is designed to work with the
electronics in the vehicle. If you add electrical parts
or accessories, you could change the way the
engine operates. Before adding electrical equipment,
check with your dealer/retailer. If you do not, the
engine might not perform properly. Any resulting
damage would not be covered by the vehicle
warranty.
3-24
Page 147 of 424
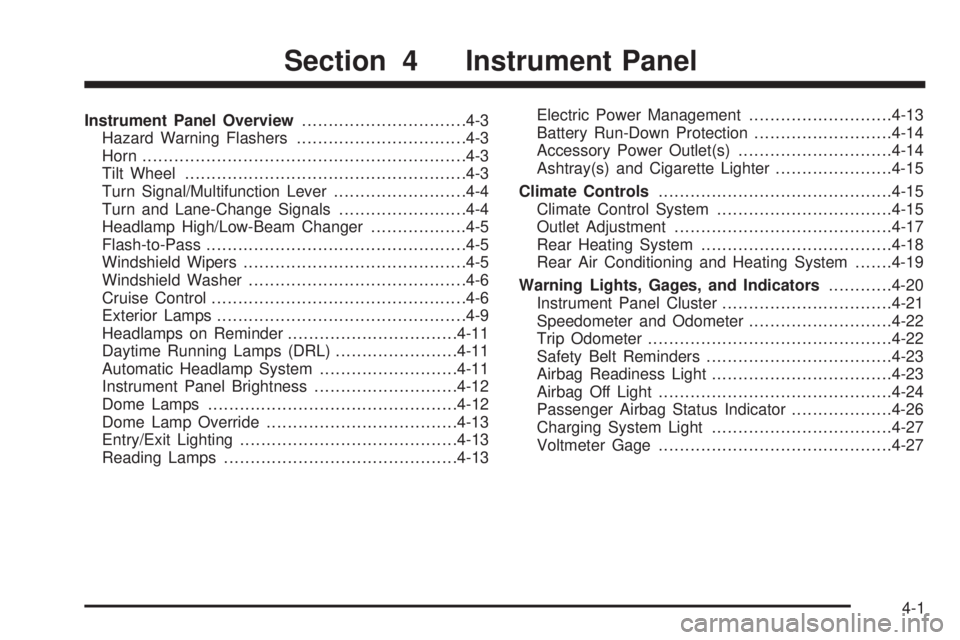
Instrument Panel Overview...............................4-3
Hazard Warning Flashers................................4-3
Horn .............................................................4-3
Tilt Wheel.....................................................4-3
Turn Signal/Multifunction Lever.........................4-4
Turn and Lane-Change Signals........................4-4
Headlamp High/Low-Beam Changer..................4-5
Flash-to-Pass.................................................4-5
Windshield Wipers..........................................4-5
Windshield Washer.........................................4-6
Cruise Control................................................4-6
Exterior Lamps...............................................4-9
Headlamps on Reminder................................4-11
Daytime Running Lamps (DRL).......................4-11
Automatic Headlamp System..........................4-11
Instrument Panel Brightness...........................4-12
Dome Lamps ...............................................4-12
Dome Lamp Override....................................4-13
Entry/Exit Lighting.........................................4-13
Reading Lamps............................................4-13Electric Power Management...........................4-13
Battery Run-Down Protection..........................4-14
Accessory Power Outlet(s).............................4-14
Ashtray(s) and Cigarette Lighter......................4-15
Climate Controls............................................4-15
Climate Control System.................................4-15
Outlet Adjustment.........................................4-17
Rear Heating System....................................4-18
Rear Air Conditioning and Heating System.......4-19
Warning Lights, Gages, and Indicators............4-20
Instrument Panel Cluster................................4-21
Speedometer and Odometer...........................4-22
Trip Odometer..............................................4-22
Safety Belt Reminders...................................4-23
Airbag Readiness Light
..................................4-23
Airbag Off Light............................................4-24
Passenger Airbag Status Indicator...................4-26
Charging System Light..................................4-27
Voltmeter Gage............................................4-27
Section 4 Instrument Panel
4-1
Page 150 of 424
Turn Signal/Multifunction Lever
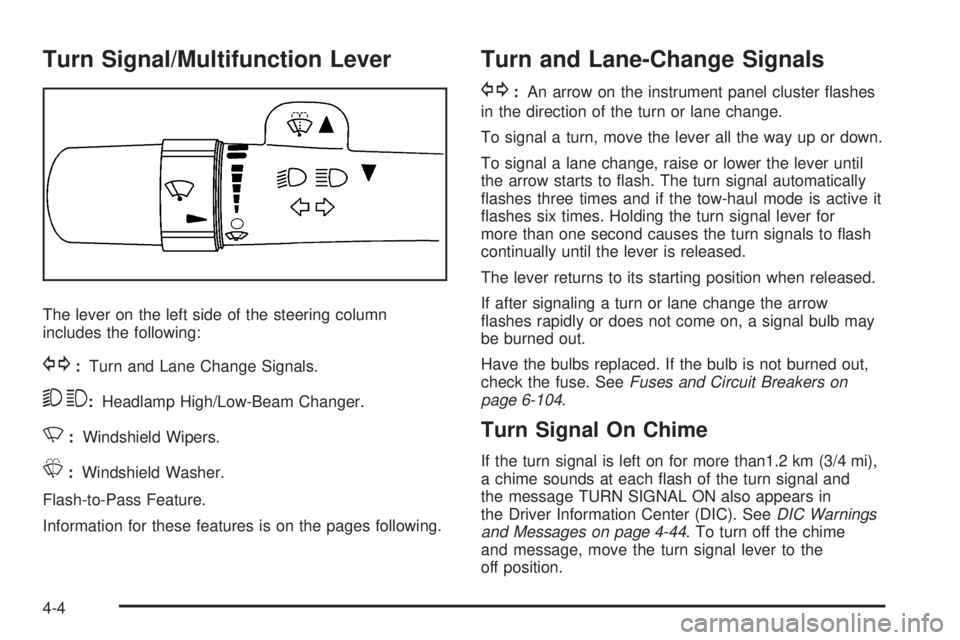
The lever on the left side of the steering column
includes the following:
G:Turn and Lane Change Signals.
53:Headlamp High/Low-Beam Changer.
N:Windshield Wipers.
L:Windshield Washer.
Flash-to-Pass Feature.
Information for these features is on the pages following.
Turn and Lane-Change Signals
G:An arrow on the instrument panel cluster flashes
in the direction of the turn or lane change.
To signal a turn, move the lever all the way up or down.
To signal a lane change, raise or lower the lever until
the arrow starts to flash. The turn signal automatically
flashes three times and if the tow-haul mode is active it
flashes six times. Holding the turn signal lever for
more than one second causes the turn signals to flash
continually until the lever is released.
The lever returns to its starting position when released.
If after signaling a turn or lane change the arrow
flashes rapidly or does not come on, a signal bulb may
be burned out.
Have the bulbs replaced. If the bulb is not burned out,
check the fuse. SeeFuses and Circuit Breakers on
page 6-104.
Turn Signal On Chime
If the turn signal is left on for more than1.2 km (3/4 mi),
a chime sounds at each flash of the turn signal and
the message TURN SIGNAL ON also appears in
the Driver Information Center (DIC). SeeDIC Warnings
and Messages on page 4-44. To turn off the chime
and message, move the turn signal lever to the
off position.
4-4
Page 151 of 424
Headlamp High/Low-Beam Changer
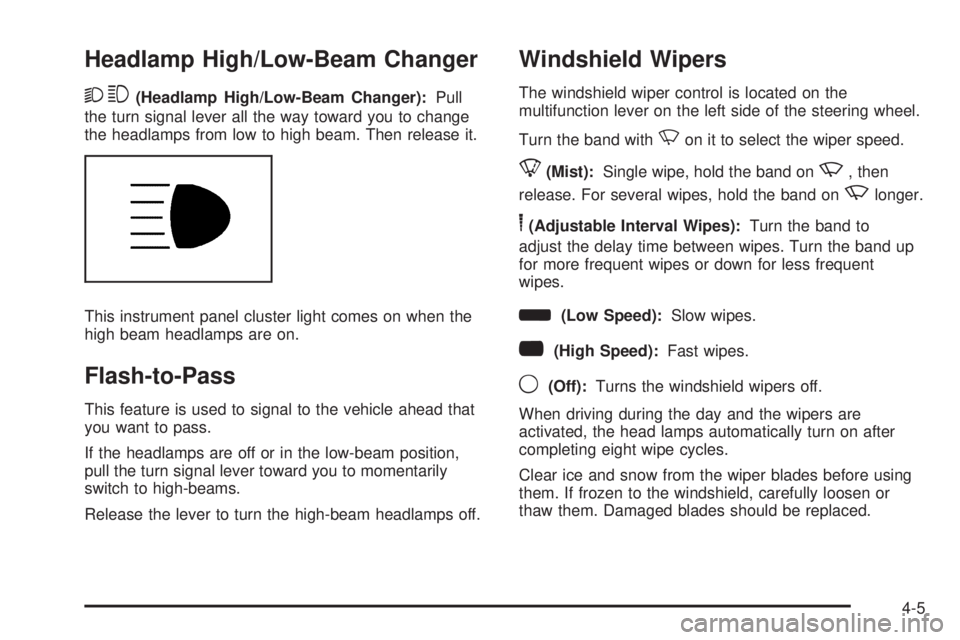
23(Headlamp High/Low-Beam Changer):Pull
the turn signal lever all the way toward you to change
the headlamps from low to high beam. Then release it.
This instrument panel cluster light comes on when the
high beam headlamps are on.
Flash-to-Pass
This feature is used to signal to the vehicle ahead that
you want to pass.
If the headlamps are off or in the low-beam position,
pull the turn signal lever toward you to momentarily
switch to high-beams.
Release the lever to turn the high-beam headlamps off.
Windshield Wipers
The windshield wiper control is located on the
multifunction lever on the left side of the steering wheel.
Turn the band with
Non it to select the wiper speed.
8(Mist):Single wipe, hold the band onz, then
release. For several wipes, hold the band on
zlonger.
6(Adjustable Interval Wipes):Turn the band to
adjust the delay time between wipes. Turn the band up
for more frequent wipes or down for less frequent
wipes.
d(Low Speed):Slow wipes.
a(High Speed):Fast wipes.
9(Off):Turns the windshield wipers off.
When driving during the day and the wipers are
activated, the head lamps automatically turn on after
completing eight wipe cycles.
Clear ice and snow from the wiper blades before using
them. If frozen to the windshield, carefully loosen or
thaw them. Damaged blades should be replaced.
4-5
Page 156 of 424
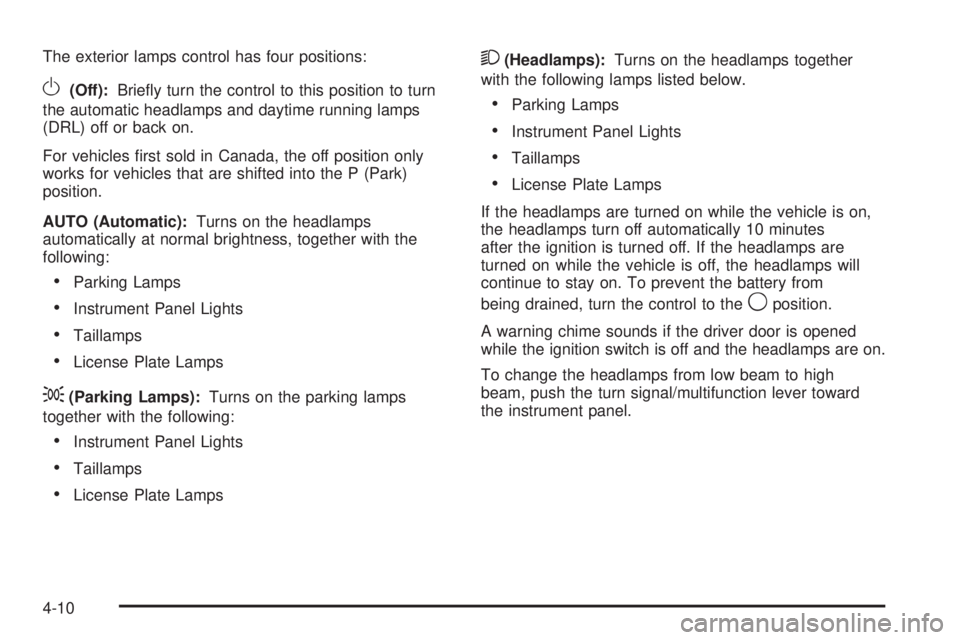
The exterior lamps control has four positions:
O(Off):Briefly turn the control to this position to turn
the automatic headlamps and daytime running lamps
(DRL) off or back on.
For vehicles first sold in Canada, the off position only
works for vehicles that are shifted into the P (Park)
position.
AUTO (Automatic):Turns on the headlamps
automatically at normal brightness, together with the
following:
•Parking Lamps
•Instrument Panel Lights
•Taillamps
•License Plate Lamps
;(Parking Lamps):Turns on the parking lamps
together with the following:
•Instrument Panel Lights
•Taillamps
•License Plate Lamps
2(Headlamps):Turns on the headlamps together
with the following lamps listed below.
•Parking Lamps
•Instrument Panel Lights
•Taillamps
•License Plate Lamps
If the headlamps are turned on while the vehicle is on,
the headlamps turn off automatically 10 minutes
after the ignition is turned off. If the headlamps are
turned on while the vehicle is off, the headlamps will
continue to stay on. To prevent the battery from
being drained, turn the control to the
9position.
A warning chime sounds if the driver door is opened
while the ignition switch is off and the headlamps are on.
To change the headlamps from low beam to high
beam, push the turn signal/multifunction lever toward
the instrument panel.
4-10
Page 158 of 424
There is a delay in the transition between the daytime
and nighttime operation of the Daytime Running Lamps
(DRL) and the automatic headlamp systems so that
driving under bridges or bright overhead street lights does
not affect the system. The DRL and automatic headlamp
system is only affected when the light sensor sees a
change in lighting lasting longer than the delay.
If the vehicle is started in a dark garage, the automatic
headlamp system comes on immediately. Once the
vehicle leaves the garage, it takes approximately
30 seconds for the automatic headlamp system to
change to DRL if it is light outside. During that delay,
the instrument panel cluster may not be as bright
as usual. Make sure the instrument panel brightness
control is in the full bright position. SeeInstrument Panel
Brightness on page 4-12.
Instrument Panel Brightness
The knob for this feature is located next to the exterior
lamps control.
D(Instrument Panel Lights):Push the knob to
extend and then turn clockwise or counterclockwise to
brighten or dim the instrument panel lights and the radio
display. This only works if the headlamps or parking
lamps are on.
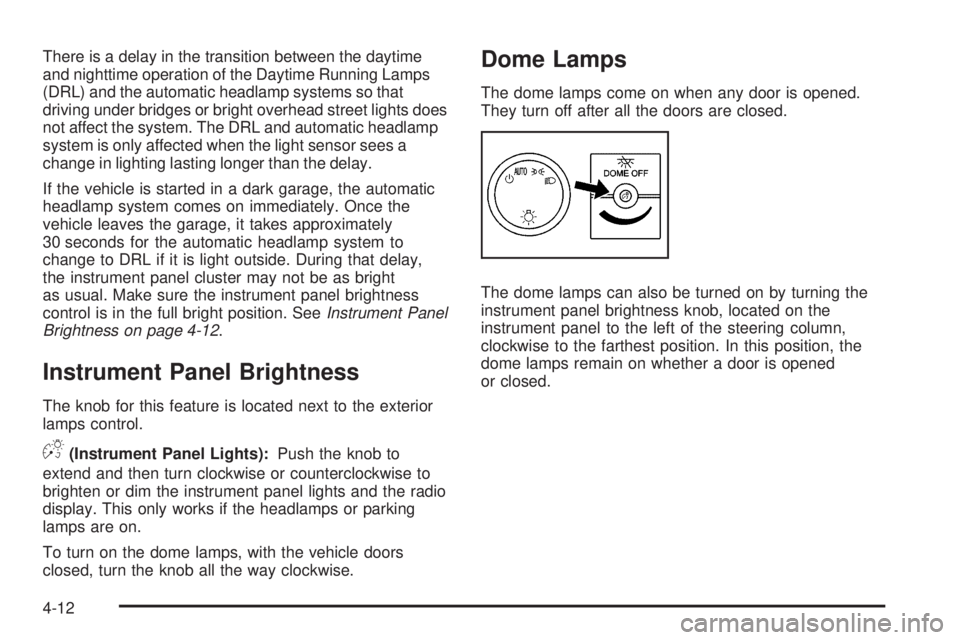
To turn on the dome lamps, with the vehicle doors
closed, turn the knob all the way clockwise.
Dome Lamps
The dome lamps come on when any door is opened.
They turn off after all the doors are closed.
The dome lamps can also be turned on by turning the
instrument panel brightness knob, located on the
instrument panel to the left of the steering column,
clockwise to the farthest position. In this position, the
dome lamps remain on whether a door is opened
or closed.
4-12
Page 162 of 424
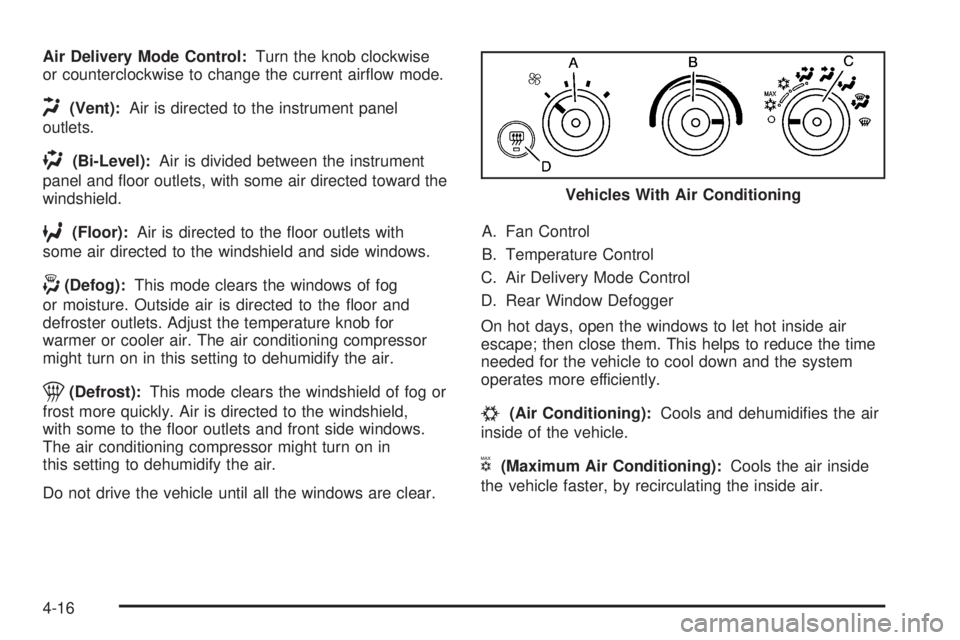
Air Delivery Mode Control:Turn the knob clockwise
or counterclockwise to change the current airflow mode.
H(Vent):Air is directed to the instrument panel
outlets.
)(Bi-Level):Air is divided between the instrument
panel and floor outlets, with some air directed toward the
windshield.
6(Floor):Air is directed to the floor outlets with
some air directed to the windshield and side windows.
-(Defog):This mode clears the windows of fog
or moisture. Outside air is directed to the floor and
defroster outlets. Adjust the temperature knob for
warmer or cooler air. The air conditioning compressor
might turn on in this setting to dehumidify the air.
1(Defrost):This mode clears the windshield of fog or
frost more quickly. Air is directed to the windshield,
with some to the floor outlets and front side windows.
The air conditioning compressor might turn on in
this setting to dehumidify the air.
Do not drive the vehicle until all the windows are clear.A. Fan Control
B. Temperature Control
C. Air Delivery Mode Control
D. Rear Window Defogger
On hot days, open the windows to let hot inside air
escape; then close them. This helps to reduce the time
needed for the vehicle to cool down and the system
operates more efficiently.
#(Air Conditioning):Cools and dehumidifies the air
inside of the vehicle.
V(Maximum Air Conditioning):Cools the air inside
the vehicle faster, by recirculating the inside air.Vehicles With Air Conditioning
4-16