steering wheel GMC SAVANA PASSENGER 2011 User Guide
[x] Cancel search | Manufacturer: GMC, Model Year: 2011, Model line: SAVANA PASSENGER, Model: GMC SAVANA PASSENGER 2011Pages: 414, PDF Size: 6.32 MB
Page 81 of 414
Black plate (31,1)GMC Savana Owner Manual - 2011
Seats and Restraints 3-31
What Makes an Airbag
Inflate?
In a deployment event, the sensing
system sends an electrical signal
triggering a release of gas from the
inflator. Gas from the inflator fills the
airbag causing the bag to break out
of the cover and deploy. The inflator,
the airbag, and related hardware are
all part of the airbag module.
Frontal airbag modules are located
inside the steering wheel and
instrument panel. For vehicles with
roof-rail airbags, there are airbag
modules in the ceiling of the vehicle,
near the side windows for the first,
second, and third rows (if equipped).
SeeWhere Are the Airbags? on
page 3‑27 for more information.
How Does an Airbag
Restrain?
In moderate to severe frontal or
near frontal collisions, even belted
occupants can contact the steering
wheel or the instrument panel. In
moderate to severe side collisions,
even belted occupants can contact
the inside of the vehicle.
Airbags supplement the protection
provided by safety belts. Frontal
airbags distribute the force of the
impact more evenly over the
occupant's upper body, stopping the
occupant more gradually. Roof-rail
airbags distribute the force of the
impact more evenly over the
occupant's upper body. Rollover capable roof-rail airbags
are designed to help contain the
head and chest of occupants in the
outboard seating positions in the
first, second, and third rows,
if equipped. The rollover capable
roof-rail airbags are designed to
help reduce the risk of full or partial
ejection in rollover events, although
no system can prevent all such
ejections.
But airbags would not help in many
types of collisions, primarily
because the occupant's motion is
not toward those airbags. See
When Should an Airbag Inflate? on
page 3‑29
for more information.
Airbags should never be regarded
as anything more than a supplement
to safety belts.
Page 92 of 414
Black plate (42,1)GMC Savana Owner Manual - 2011
3-42 Seats and Restraints
Adding Equipment to the
Airbag-Equipped Vehicle
Q: Is there anything I might addto or change about the vehicle
that could keep the airbags
from working properly?
A: Yes. If you add things that
change the vehicle's frame,
bumper system, height, front end
or side sheet metal, they may
keep the airbag system from
working properly. Changing or
moving any parts of the front
seats, safety belts, the airbag
sensing and diagnostic module,
steering wheel, instrument
panel, roof-rail airbag modules,
ceiling headliner or pillar garnish
trim, front sensors, rollover
sensor module, or airbag wiring
can affect the operation of the
airbag system. In addition, the vehicle may
have a passenger sensing
system for the right front
passenger position, which
includes sensors that are part of
the passenger seat. The
passenger sensing system may
not operate properly if the
original seat trim is replaced
with non-GM covers, upholstery
or trim, or with GM covers,
upholstery or trim designed for a
different vehicle. Any object,
such as an aftermarket seat
heater or a comfort enhancing
pad or device, installed under or
on top of the seat fabric, could
also interfere with the operation
of the passenger sensing
system. This could either
prevent proper deployment of
the passenger airbag(s) or
prevent the passenger sensing
system from properly turning off
the passenger airbag(s). See
Passenger Sensing System on
page 3‑37.If you have any questions
about this, you should contact
Customer Assistance before you
modify the vehicle. The phone
numbers and addresses for
Customer Assistance are in
Step Two of the Customer
Satisfaction Procedure in this
manual. See
Customer
Satisfaction Procedure on
page 13‑1.
If the vehicle has rollover
roof-rail airbags, see Different
Size Tires and Wheels on
page 10‑67 for additional
important information.
Page 123 of 414
Black plate (1,1)GMC Savana Owner Manual - 2011
Instruments and Controls 5-1
Instruments and
Controls
Controls
Steering Wheel Adjustment . . . 5-2
Steering Wheel Controls . . . . . . 5-2
Horn . . . . . . . . . . . . . . . . . . . . . . . . . . 5-4
Windshield Wiper/Washer . . . . . 5-4
Compass . . . . . . . . . . . . . . . . . . . . . 5-5
Clock . . . . . . . . . . . . . . . . . . . . . . . . . 5-7
Power Outlets . . . . . . . . . . . . . . . . . 5-9
Cigarette Lighter . . . . . . . . . . . . . . 5-9
Ashtrays . . . . . . . . . . . . . . . . . . . . . 5-10
Warning Lights, Gauges, and
Indicators
Warning Lights, Gauges, andIndicators . . . . . . . . . . . . . . . . . . 5-10
Instrument Cluster . . . . . . . . . . . 5-11
Speedometer . . . . . . . . . . . . . . . . 5-12
Odometer . . . . . . . . . . . . . . . . . . . . 5-12
Trip Odometer . . . . . . . . . . . . . . . 5-12
Fuel Gauge . . . . . . . . . . . . . . . . . . 5-12 Engine Oil Pressure
Gauge . . . . . . . . . . . . . . . . . . . . . . 5-13
Engine Coolant Temperature Gauge . . . . . . . . . . . . . . . . . . . . . . 5-14
Voltmeter Gauge . . . . . . . . . . . . . 5-15
Safety Belt Reminders . . . . . . . 5-16
Airbag Readiness Light . . . . . . 5-16
Airbag On-Off Light . . . . . . . . . . 5-17
Passenger Airbag Status
Indicator . . . . . . . . . . . . . . . . . . . . 5-19
Charging System Light . . . . . . 5-20
Malfunction Indicator Lamp . . . . . . . . . . . . . 5-20
Brake System Warning Light . . . . . . . . . . . . . . . . . . . . . . . 5-23
Antilock Brake System (ABS) Warning Light . . . . . . . . . . . . . . 5-24
Tow/Haul Mode Light . . . . . . . . 5-24
StabiliTrak®Indicator Light . . . 5-24
Tire Pressure Light . . . . . . . . . . 5-25
Engine Oil Pressure Light . . . . 5-25
Security Light . . . . . . . . . . . . . . . . 5-26
High-Beam On Light . . . . . . . . . 5-26
Cruise Control Light . . . . . . . . . 5-26
Information Displays
Driver Information Center (DIC) . . . . . . . . . . . . . . . 5-27
Vehicle Messages
Vehicle Messages . . . . . . . . . . . 5-32
Battery Voltage and ChargingMessages . . . . . . . . . . . . . . . . . . 5-32
Brake System Messages . . . . 5-32
Compass Messages . . . . . . . . . 5-32
Door Ajar Messages . . . . . . . . . 5-33
Engine Cooling System Messages . . . . . . . . . . . . . . . . . . 5-33
Engine Oil Messages . . . . . . . . 5-34
Engine Power Messages . . . . 5-35
Fuel System Messages . . . . . . 5-35
Key and Lock Messages . . . . . 5-36
Lamp Messages . . . . . . . . . . . . . 5-36
Ride Control System Messages . . . . . . . . . . . . . . . . . . 5-36
Airbag System Messages . . . . 5-37
Anti-theft Alarm System Messages . . . . . . . . . . . . . . . . . . 5-38
Service Vehicle Messages . . . 5-38
Tire Messages . . . . . . . . . . . . . . . 5-38
Transmission Messages . . . . . 5-39
Vehicle Reminder Messages . . . . . . . . . . . . . . . . . . 5-40
Vehicle Personalization
Vehicle Personalization . . . . . . 5-40
Page 124 of 414
Black plate (2,1)GMC Savana Owner Manual - 2011
5-2 Instruments and Controls
Controls
Steering Wheel
Adjustment
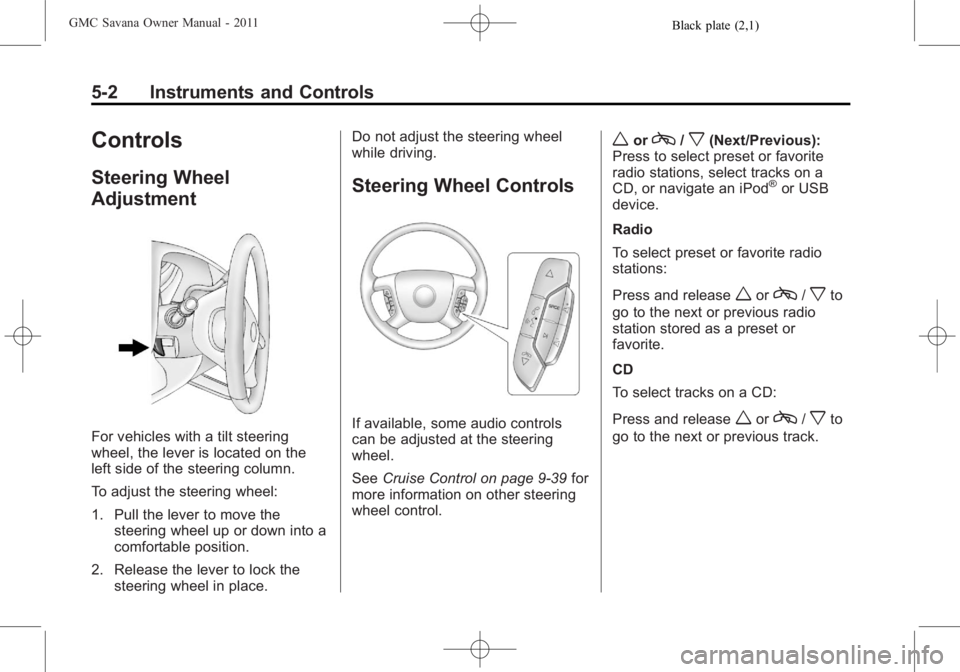
For vehicles with a tilt steering
wheel, the lever is located on the
left side of the steering column.
To adjust the steering wheel:
1. Pull the lever to move thesteering wheel up or down into a
comfortable position.
2. Release the lever to lock the steering wheel in place. Do not adjust the steering wheel
while driving.
Steering Wheel Controls
If available, some audio controls
can be adjusted at the steering
wheel.
See
Cruise Control on page 9‑39 for
more information on other steering
wheel control.
worc/x(Next/Previous):
Press to select preset or favorite
radio stations, select tracks on a
CD, or navigate an iPod
®or USB
device.
Radio
To select preset or favorite radio
stations:
Press and release
worc/xto
go to the next or previous radio
station stored as a preset or
favorite.
CD
To select tracks on a CD:
Press and release
worc/xto
go to the next or previous track.
Page 126 of 414
Black plate (4,1)GMC Savana Owner Manual - 2011
5-4 Instruments and Controls
Horn
Press the horn symbol in the middle
of the steering wheel to sound
the horn.
Windshield Wiper/Washer
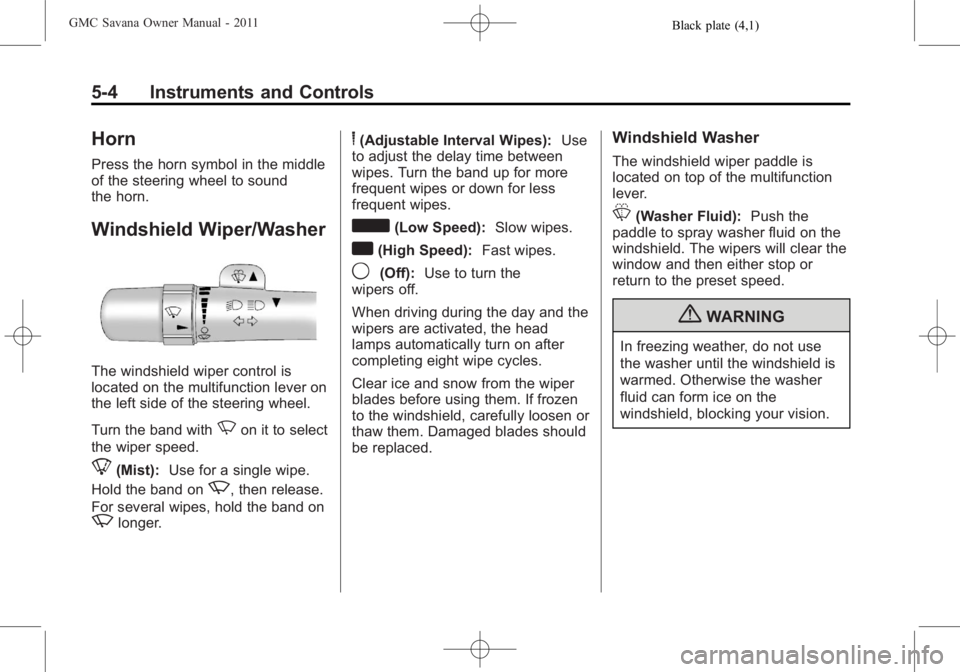
The windshield wiper control is
located on the multifunction lever on
the left side of the steering wheel.
Turn the band with
Non it to select
the wiper speed.
8(Mist): Use for a single wipe.
Hold the band on
z, then release.
For several wipes, hold the band on
zlonger.
6(Adjustable Interval Wipes): Use
to adjust the delay time between
wipes. Turn the band up for more
frequent wipes or down for less
frequent wipes.
d(Low Speed): Slow wipes.
a(High Speed): Fast wipes.
9(Off):Use to turn the
wipers off.
When driving during the day and the
wipers are activated, the head
lamps automatically turn on after
completing eight wipe cycles.
Clear ice and snow from the wiper
blades before using them. If frozen
to the windshield, carefully loosen or
thaw them. Damaged blades should
be replaced.
Windshield Washer
The windshield wiper paddle is
located on top of the multifunction
lever.
L(Washer Fluid): Push the
paddle to spray washer fluid on the
windshield. The wipers will clear the
window and then either stop or
return to the preset speed.
{WARNING
In freezing weather, do not use
the washer until the windshield is
warmed. Otherwise the washer
fluid can form ice on the
windshield, blocking your vision.
Page 144 of 414
Black plate (22,1)GMC Savana Owner Manual - 2011
5-22 Instruments and Controls
.Make sure to fuel the vehicle
with quality fuel. Poor fuel quality
causes the engine not to run as
efficiently as designed and can
cause: stalling after start-up,
stalling when the vehicle is
changed into gear, misfiring,
hesitation on acceleration,
or stumbling on acceleration.
These conditions might go away
once the engine is warmed up.
If one or more of these conditions
occurs, change the fuel brand used.
It will require at least one full tank of
the proper fuel to turn the light off.
See Recommended Fuel on
page 9‑42.
If none of the above have made the
light turn off, your dealer can check
the vehicle. The dealer has the
proper test equipment and
diagnostic tools to fix any
mechanical or electrical problems
that might have developed.Emissions Inspection and
Maintenance Programs
Some state/provincial and local
governments may have programs
to inspect the on-vehicle emission
control equipment. For the
inspection, the emission system
test equipment is connected to the
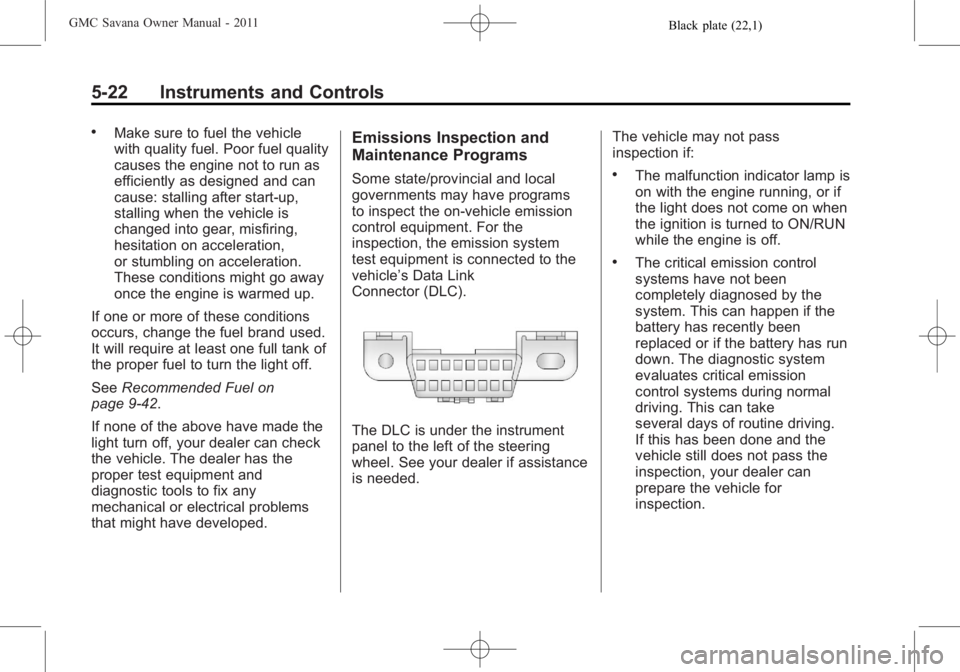
vehicle’s Data Link
Connector (DLC).
The DLC is under the instrument
panel to the left of the steering
wheel. See your dealer if assistance
is needed. The vehicle may not pass
inspection if:
.The malfunction indicator lamp is
on with the engine running, or if
the light does not come on when
the ignition is turned to ON/RUN
while the engine is off.
.The critical emission control
systems have not been
completely diagnosed by the
system. This can happen if the
battery has recently been
replaced or if the battery has run
down. The diagnostic system
evaluates critical emission
control systems during normal
driving. This can take
several days of routine driving.
If this has been done and the
vehicle still does not pass the
inspection, your dealer can
prepare the vehicle for
inspection.
Page 169 of 414
Black plate (1,1)GMC Savana Owner Manual - 2011
Lighting 6-1
Lighting
Exterior Lighting
Exterior Lamp Controls . . . . . . . . 6-1
Exterior Lamps OffReminder . . . . . . . . . . . . . . . . . . . . 6-2
Headlamp High/Low-Beam Changer . . . . . . . . . . . . . . . . . . . . . 6-2
Flash-to-Pass . . . . . . . . . . . . . . . . . 6-3
Daytime Running Lamps (DRL) . . . . . . . . . . . . . . . . 6-3
Automatic Headlamp System . . . . . . . . . . . . . . . . . . . . . . 6-3
Hazard Warning Flashers . . . . . 6-4
Turn and Lane-Change Signals . . . . . . . . . . . . . . . . . . . . . . 6-5
Interior Lighting
Instrument Panel IlluminationControl . . . . . . . . . . . . . . . . . . . . . . 6-5
Dome Lamps . . . . . . . . . . . . . . . . . 6-6
Reading Lamps . . . . . . . . . . . . . . . 6-6
Lighting Features
Entry/Exit Lighting . . . . . . . . . . . . . 6-7
Battery Load Management . . . . 6-7
Battery Power Protection . . . . . . 6-7
Exterior Lighting
Exterior Lamp Controls
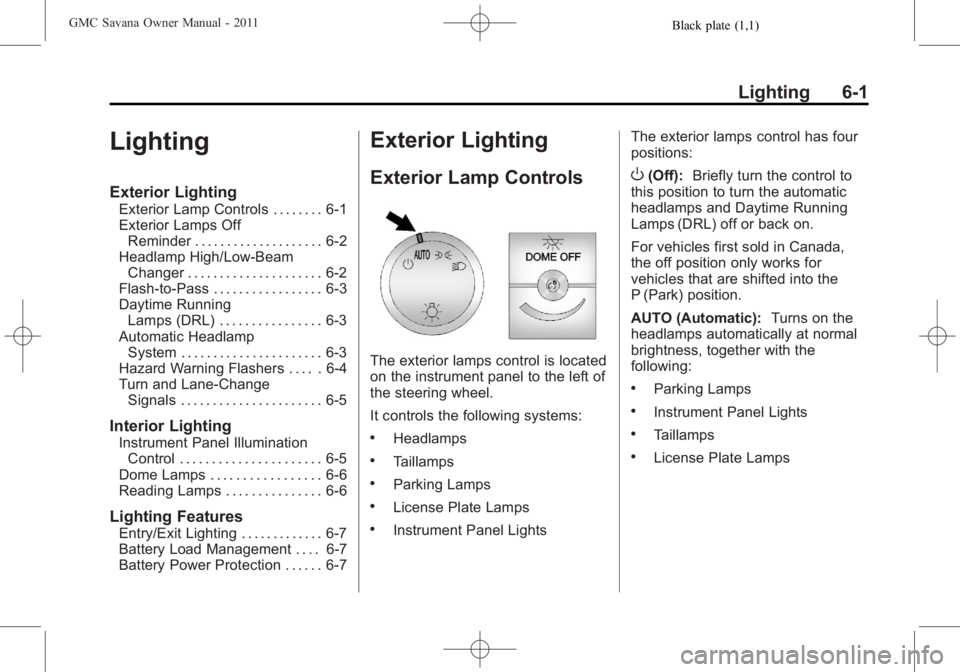
The exterior lamps control is located
on the instrument panel to the left of
the steering wheel.
It controls the following systems:
.Headlamps
.Taillamps
.Parking Lamps
.License Plate Lamps
.Instrument Panel Lights The exterior lamps control has four
positions:
O(Off):
Briefly turn the control to
this position to turn the automatic
headlamps and Daytime Running
Lamps (DRL) off or back on.
For vehicles first sold in Canada,
the off position only works for
vehicles that are shifted into the
P (Park) position.
AUTO (Automatic): Turns on the
headlamps automatically at normal
brightness, together with the
following:
.Parking Lamps
.Instrument Panel Lights
.Taillamps
.License Plate Lamps
Page 184 of 414
Black plate (8,1)GMC Savana Owner Manual - 2011
7-8 Infotainment System
Finding a Station
BAND:Press to switch between
FM1, FM2, AM and XM. The
selection displays.
f(Tune): Turn clockwise or
counterclockwise to increase or
decrease the station frequency.
©SEEK¨: Press the arrows to go
to the previous or to the next station
and stay there.
To scan stations, press and hold
either arrow for two seconds until a
beep sounds. The radio goes to a
station, plays for a few seconds,
then goes to the next station. For
AM-FM Radio and Radio with CD
(Base), the station frequency
flashes while the radio is in the scan
mode. Press either arrow again to
stop scanning. The radio seeks and scans stations
only with a strong signal that are in
the selected band.
For AM-FM Radio and Radio with
CD (Base), scan presets within the
current selected band by pressing
and holding either SEEK arrow for
four seconds until a double beep
sounds. The radio goes to a stored
preset, plays for a few seconds if a
strong signal is present, then goes
to the next stored preset. The
station frequency flashes while the
radio is in the scan mode.
Setting Preset Stations
If the radio does not have a FAV
button, up to 18 stations (six FM1,
six FM2, and six AM), can be
programmed on the six numbered
softkeys, by performing the following
steps:
1. Turn the radio on.
2. Press BAND to select FM1,
FM2, or AM. 3. Tune in the desired station.
4. Press and hold one of the six
numbered softkeys for
three seconds until a beep
sounds. When that softkey is
pressed and released, the
station that was set, returns.
5. Repeat the Steps 2 through 4 for each softkey.
Storing a Radio Station as a
Favorite
Drivers are encouraged to set up
their radio station favorites while the
vehicle is parked. Tune to favorite
stations using the presets, favorites
button, and steering wheel controls,
if the vehicle has this feature. See
Defensive Driving on page 9‑2.
Page 186 of 414
Black plate (10,1)GMC Savana Owner Manual - 2011
7-10 Infotainment System
©SEEK¨:Press the arrows to go
to the previous or to the next station
and stay there.
To scan stations, press and hold
either arrow for two seconds until a
beep sounds. The radio goes to a
station, plays for a few seconds,
then goes to the next station. For
AM-FM Radio and Radio with CD
(Base), the station frequency
flashes while the radio is in the scan
mode. Press either arrow again to
stop scanning.
The radio seeks and scans stations
only with a strong signal that are in
the selected band.
For AM-FM Radio and Radio with
CD (Base), scan presets within the
current selected band by pressing
and holding either SEEK arrow for
four seconds until a double beep
sounds. The radio goes to a stored
preset, plays for a few seconds if a
strong signal is present, then goes
to the next stored preset. The
station frequency flashes while the
radio is in the scan mode.Setting Preset Stations
If the radio does not have a FAV
button, up to 18 stations (six FM1,
six FM2, and six AM), can be
programmed on the six numbered
softkeys, by performing the following
steps:
1. Turn the radio on.
2. Press BAND to select FM1, FM2, or AM.
3. Tune in the desired station.
4. Press and hold one of the six numbered softkeys for
three seconds until a beep
sounds. When that softkey is
pressed and released, the
station that was set, returns.
5. Repeat the Steps 2 through 4 for each softkey.
Storing a Radio Station as a
Favorite
Drivers are encouraged to set up
their radio station favorites while the
vehicle is parked. Tune to favorite
stations using the presets, favorites
button, and steering wheel controls,
if the vehicle has this feature. See
Defensive Driving on page 9‑2.
FAV (Favorites): If the vehicle has
a FAV button, a maximum of
36 stations can be programmed as
favorites using the six softkeys
positioned below the radio station
frequency tabs and by using the
radio favorites page button (FAV
button). Press the FAV button to go
through up to six pages of favorites,
each having six favorite stations
available per page. Each page of
favorites can contain any
combination of AM and FM stations.
The balance/fade and tone settings
that were previously adjusted, are
stored with the favorite stations.
Page 200 of 414
Black plate (24,1)GMC Savana Owner Manual - 2011
7-24 Infotainment System
.See“Storing and Deleting Phone
Numbers” in this section for
more information.
{WARNING
When using a cell phone, it can
be distracting to look too long or
too often at the screen of the
phone or the infotainment
(navigation) system. Taking your
eyes off the road too long or too
often could cause a crash
resulting in injury or death. Focus
your attention on driving.
A Bluetooth system can use a
Bluetooth‐capable cell phone with a
Hands‐Free Profile to make and
receive phone calls. The system
can be used while the key is in the
ON/RUN or ACC/ACCESSORY
position. The range of the Bluetooth
system can be up to 9.1 m (30 ft).
Not all phones support all functions,
and not all phones are guaranteed
to work with the in-vehicle Bluetooth system. See www.gm.com/bluetooth
for more information on compatible
phones.
Voice Recognition
The Bluetooth system uses voice
recognition to interpret voice
commands to dial phone numbers
and name tags.
For additional information, say
“Help”
while you are in a voice
recognition menu.
Noise: Keep interior noise levels to
a minimum. The system may not
recognize voice commands if there
is too much background noise.
When to Speak: A short tone
sounds after the system responds
indicating when it is waiting for a
voice command. Wait until the tone
and then speak.
How to Speak: Speak clearly in a
calm and natural voice.
Audio System
When using the in‐vehicle Bluetooth
system, sound comes through the
vehicle's front audio system
speakers and overrides the audio
system. Use the audio system
volume knob, during a call, to
change the volume level. The
adjusted volume level remains in
memory for later calls. To prevent
missed calls, a minimum volume
level is used if the volume is turned
down too low.
Bluetooth Controls
Use the buttons located on the
steering wheel to operate the
in‐vehicle Bluetooth system. See
Steering Wheel Controls on
page 5‑2 for more information.
b/g(Push To Talk): Press to
answer incoming calls, confirm
system information, and start
speech recognition.
c/x(Phone On Hook): Press
to end a call, reject a call, or cancel
an operation.