mirror controls GMC SIERRA 1500 2009 Owners Manual
[x] Cancel search | Manufacturer: GMC, Model Year: 2009, Model line: SIERRA 1500, Model: GMC SIERRA 1500 2009Pages: 602, PDF Size: 3.22 MB
Page 1 of 602
Seats and Restraint System............................. 1-1
Head Restraints
......................................... 1-3
Front Seats
............................................... 1-4
Rear Seats
..............................................1-14
Safety Belts
.............................................1-16
Child Restraints
.......................................1-38
Airbag System
.........................................1-72
Restraint System Check
............................1-91
Features and Controls..................................... 2-1
Keys
........................................................ 2-3
Doors and Locks
......................................2-10
Windows
.................................................2-15
Theft-Deterrent Systems
............................2-18
Starting and Operating Your Vehicle
...........2-22
Mirrors
....................................................2-57
Object Detection Systems
..........................2-61
OnStar
®System
......................................2-70
Universal Home Remote System
................2-73
Storage Areas
.........................................2-80
Sunroof
..................................................2-84Instrument Panel............................................. 3-1
Instrument Panel Overview
.......................... 3-4
Climate Controls
......................................3-24
Warning Lights, Gages, and Indicators
........3-33
Driver Information Center (DIC)
..................3-53
Audio System(s)
.......................................3-84
Driving Your Vehicle....................................... 4-1
Your Driving, the Road, and the Vehicle
....... 4-2
Towing
...................................................4-47
Service and Appearance Care.......................... 5-1
Service
..................................................... 5-4
Fuel
......................................................... 5-6
Checking Things Under the Hood
...............5-14
Rear Axle
...............................................5-51
Four-Wheel Drive
.....................................5-53
Front Axle
...............................................5-56
Noise Control System
...............................5-57
Headlamp Aiming
.....................................5-58
Bulb Replacement
....................................5-61
Windshield Wiper Blade Replacement
.........5-66
2009 GMC Sierra Owner ManualM
Page 5 of 602
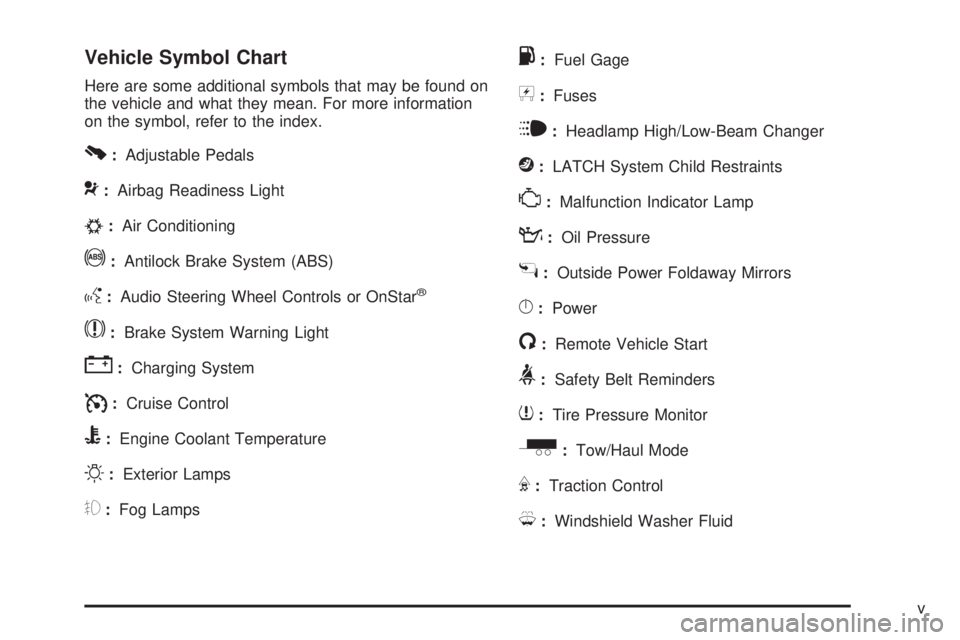
Vehicle Symbol Chart
Here are some additional symbols that may be found on
the vehicle and what they mean. For more information
on the symbol, refer to the index.
0:Adjustable Pedals
9:Airbag Readiness Light
#:Air Conditioning
!:Antilock Brake System (ABS)
g:Audio Steering Wheel Controls or OnStar®
$:Brake System Warning Light
":Charging System
I:Cruise Control
B:Engine Coolant Temperature
O:Exterior Lamps
#:Fog Lamps
.:Fuel Gage
+:Fuses
i:Headlamp High/Low-Beam Changer
j:LATCH System Child Restraints
*:Malfunction Indicator Lamp
::Oil Pressure
g:Outside Power Foldaway Mirrors
}:Power
/:Remote Vehicle Start
>:Safety Belt Reminders
7:Tire Pressure Monitor
_:Tow/Haul Mode
F:Traction Control
M:Windshield Washer Fluid
v
Page 13 of 602
Power Lumbar
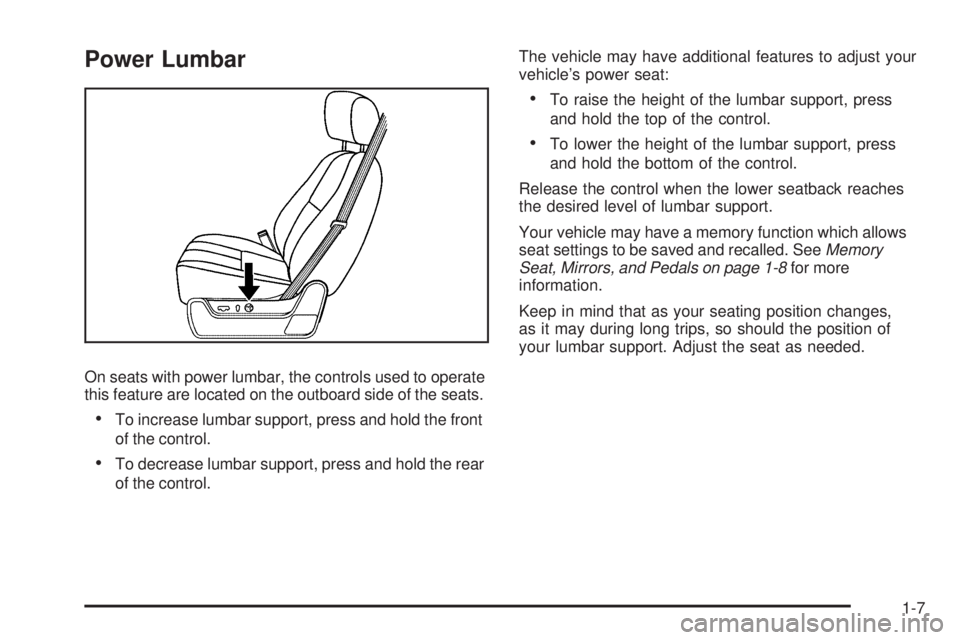
On seats with power lumbar, the controls used to operate
this feature are located on the outboard side of the seats.
To increase lumbar support, press and hold the front
of the control.
To decrease lumbar support, press and hold the rear
of the control.The vehicle may have additional features to adjust your
vehicle’s power seat:
To raise the height of the lumbar support, press
and hold the top of the control.
To lower the height of the lumbar support, press
and hold the bottom of the control.
Release the control when the lower seatback reaches
the desired level of lumbar support.
Your vehicle may have a memory function which allows
seat settings to be saved and recalled. SeeMemory
Seat, Mirrors, and Pedals on page 1-8for more
information.
Keep in mind that as your seating position changes,
as it may during long trips, so should the position of
your lumbar support. Adjust the seat as needed.
1-7
Page 14 of 602
Heated Seats
On vehicles with heated front seats, the controls are
located on the driver and passenger doors.
I(Heated Seatback):Press to turn on the heated
seatback.
J(Heated Seat and Seatback):Press to turn on the
heated seat and seatback.
The light on the button will come on to indicate that the
feature is working. Press the button to cycle through the
temperature settings of high, medium, and low and to turn
the heat to the seat off. Indicator lights will show the level
of heat selected: three for high, two for medium, and one
for low.
The heated seats will be canceled 10 seconds after the
ignition is turned off. To use the heated seat feature after
restarting the vehicle, press the heated seat or seatback
button again.
Memory Seat, Mirrors, and Pedals
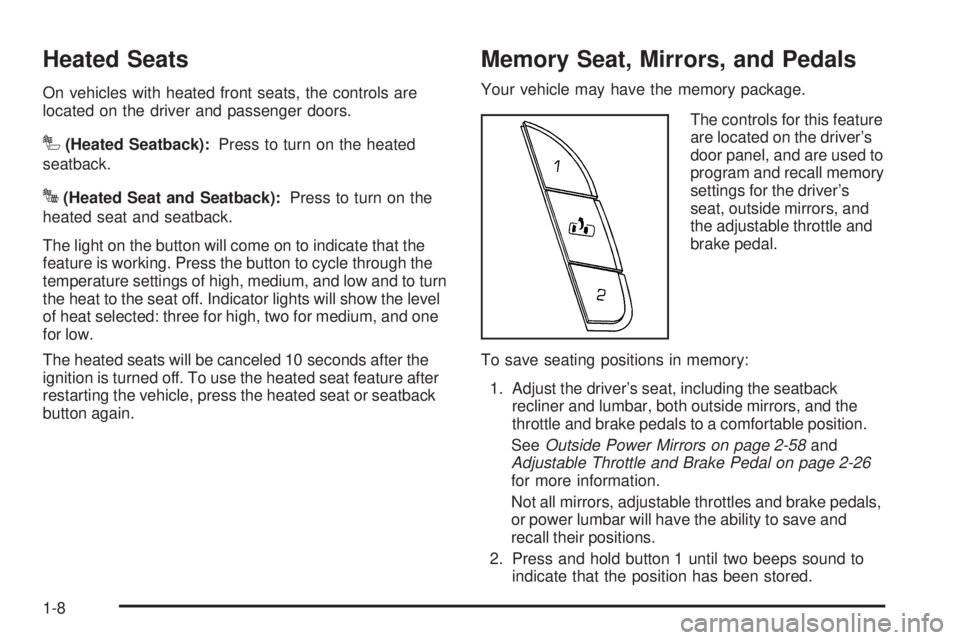
Your vehicle may have the memory package.
The controls for this feature
are located on the driver’s
door panel, and are used to
program and recall memory
settings for the driver’s
seat, outside mirrors, and
the adjustable throttle and
brake pedal.
To save seating positions in memory:
1. Adjust the driver’s seat, including the seatback
recliner and lumbar, both outside mirrors, and the
throttle and brake pedals to a comfortable position.
SeeOutside Power Mirrors on page 2-58and
Adjustable Throttle and Brake Pedal on page 2-26
for more information.
Not all mirrors, adjustable throttles and brake pedals,
or power lumbar will have the ability to save and
recall their positions.
2. Press and hold button 1 until two beeps sound to
indicate that the position has been stored.
1-8
Page 15 of 602
A second seating, lumbar, mirror, and throttle and brake
pedal position can be programmed by repeating the
above steps and pressing button 2.
To recall the memory positions, the vehicle must be in
PARK (P). Press and release either button 1 or button 2
corresponding to the desired driving position. The seat,
outside mirrors, and adjustable throttle and brake pedals
will move to the position previously stored. You will hear a
single beep.
If you use the remote keyless entry transmitter to enter
your vehicle and the remote recall memory feature is on,
automatic seat, adjustable mirror, and adjustable pedal
movements will occur. See “MEMORY SEAT RECALL”
underDIC Vehicle Customization (With DIC Buttons) on
page 3-75for more information.
To stop recall movement of the memory function at any
time, press one of the power seat controls, memory
buttons, power mirror buttons, or adjustable pedal switch.
If something has blocked the driver’s seat and/or the
adjustable pedals while recalling a memory position, the
driver’s seat and/or the adjustable pedals recall may stop
working. If this happens, remove the obstruction and
press the appropriate control for the area that is not
responding for two seconds. Try recalling the memory
position again by pressing the appropriate memory
button. If the memory position is still not recalling, see
your dealer for service.Easy Exit Seat
The control for this feature is located on the driver’s
door panel between buttons 1 and 2.
With the vehicle in PARK (P), the driver’s seat exit
position can be recalled by pressing the exit button.
You will hear a single beep, and the driver’s seat
will move back.
If the easy exit seat feature is programmed in the Driver
Information Center (DIC), automatic seat movement
will occur when the key is removed from the ignition.
See “EASY EXIT SEAT” underDIC Vehicle
Customization (With DIC Buttons) on page 3-75for
more information.
The memory seat and easy exit features can also be
programmed using the DIC.
For programming information, seeDIC Vehicle
Customization (With DIC Buttons) on page 3-75.
1-9
Page 99 of 602
Keys...............................................................2-3
Remote Keyless Entry (RKE) System................2-4
Remote Keyless Entry (RKE) System
Operation...................................................2-5
Remote Vehicle Start......................................2-7
Doors and Locks............................................2-10
Door Locks..................................................2-10
Power Door Locks........................................2-10
Delayed Locking...........................................2-11
Programmable Automatic Door Locks..............2-11
Rear Door Security Locks..............................2-11
Lockout Protection........................................2-12
Rear Doors..................................................2-12
Tailgate.......................................................2-13
Windows........................................................2-15
Manual Windows..........................................2-16
Power Windows............................................2-16
Power Sliding Rear Window...........................2-17
Sun Visors...................................................2-18
Theft-Deterrent Systems..................................2-18
Content Theft-Deterrent.................................2-18
PASS-Key
®III+ Electronic Immobilizer.............2-20
PASS-Key®III+ Electronic Immobilizer
Operation.................................................2-20Starting and Operating Your Vehicle................2-22
New Vehicle Break-In....................................2-22
Ignition Positions..........................................2-22
Retained Accessory Power (RAP)...................2-23
Starting the Engine.......................................2-24
Fast Idle System..........................................2-25
Adjustable Throttle and Brake Pedal................2-26
Engine Coolant Heater..................................2-27
Active Fuel Management™.............................2-28
Automatic Transmission Operation...................2-28
Tow/Haul Mode............................................2-34
Four-Wheel Drive..........................................2-37
Parking Brake..............................................2-50
Shifting Into Park..........................................2-52
Shifting Out of Park......................................2-54
Parking Over Things That Burn.......................2-54
Engine Exhaust............................................2-55
Running the Vehicle While Parked..................2-56
Mirrors...........................................................2-57
Manual Rearview Mirror.................................2-57
Automatic Dimming Rearview Mirror................2-57
Outside Manual Mirrors..................................2-57
Outside Towing Mirrors..................................2-58
Outside Power Mirrors...................................2-58
Outside Power Foldaway Mirrors.....................2-59
Section 2 Features and Controls
2-1
Page 100 of 602
Park Tilt Mirrors............................................2-60
Outside Convex Mirror...................................2-60
Outside Heated Mirrors..................................2-60
Object Detection Systems...............................2-61
Ultrasonic Rear Parking Assist (URPA)............2-61
Rear Vision Camera (RVC)............................2-64
OnStar
®System.............................................2-70
Universal Home Remote System......................2-73
Universal Home Remote System Operation
(With Three Round LED)............................2-74Storage Areas................................................2-80
Glove Box...................................................2-80
Cupholders..................................................2-80
Instrument Panel Storage...............................2-81
Center Console Storage.................................2-81
Luggage Carrier...........................................2-82
Rear Seat Armrest........................................2-82
Cargo Management System...........................2-83
Sunroof.........................................................2-84
Section 2 Features and Controls
2-2
Page 156 of 602
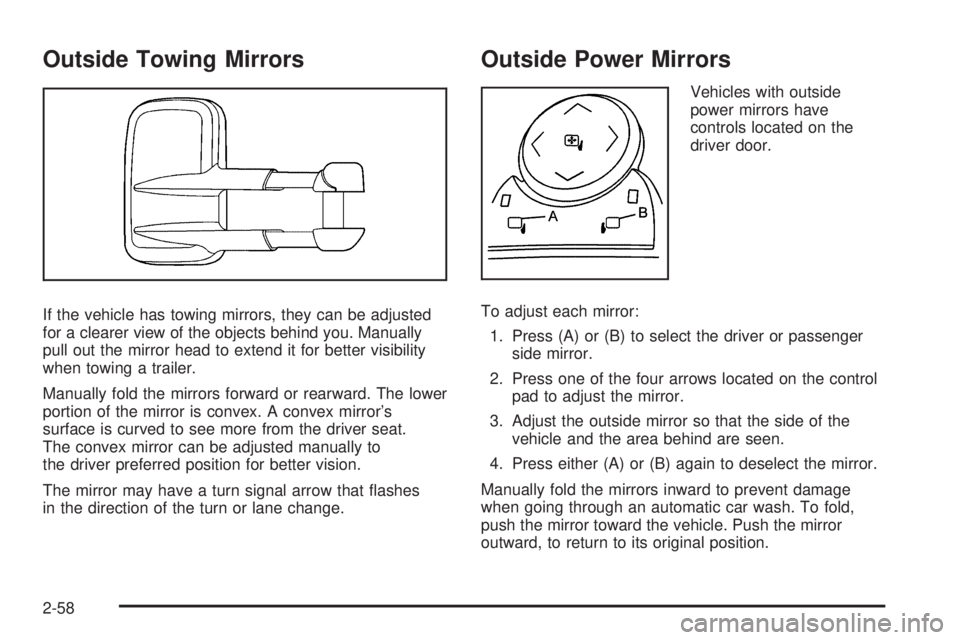
Outside Towing Mirrors
If the vehicle has towing mirrors, they can be adjusted
for a clearer view of the objects behind you. Manually
pull out the mirror head to extend it for better visibility
when towing a trailer.
Manually fold the mirrors forward or rearward. The lower
portion of the mirror is convex. A convex mirror’s
surface is curved to see more from the driver seat.
The convex mirror can be adjusted manually to
the driver preferred position for better vision.
The mirror may have a turn signal arrow that �ashes
in the direction of the turn or lane change.
Outside Power Mirrors
Vehicles with outside
power mirrors have
controls located on the
driver door.
To adjust each mirror:
1. Press (A) or (B) to select the driver or passenger
side mirror.
2. Press one of the four arrows located on the control
pad to adjust the mirror.
3. Adjust the outside mirror so that the side of the
vehicle and the area behind are seen.
4. Press either (A) or (B) again to deselect the mirror.
Manually fold the mirrors inward to prevent damage
when going through an automatic car wash. To fold,
push the mirror toward the vehicle. Push the mirror
outward, to return to its original position.
2-58
Page 157 of 602
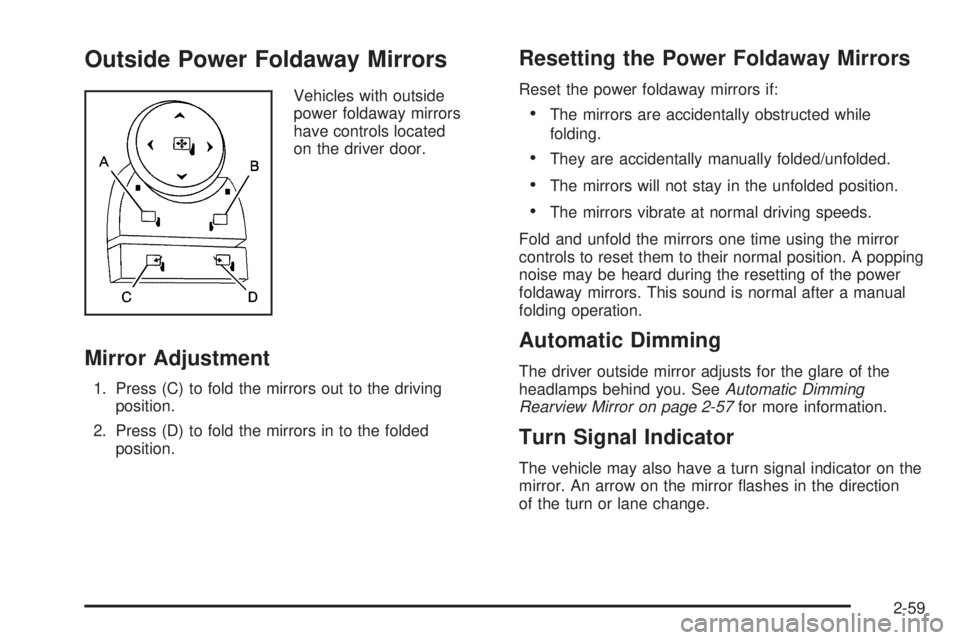
Outside Power Foldaway Mirrors
Vehicles with outside
power foldaway mirrors
have controls located
on the driver door.
Mirror Adjustment
1. Press (C) to fold the mirrors out to the driving
position.
2. Press (D) to fold the mirrors in to the folded
position.
Resetting the Power Foldaway Mirrors
Reset the power foldaway mirrors if:
The mirrors are accidentally obstructed while
folding.
They are accidentally manually folded/unfolded.
The mirrors will not stay in the unfolded position.
The mirrors vibrate at normal driving speeds.
Fold and unfold the mirrors one time using the mirror
controls to reset them to their normal position. A popping
noise may be heard during the resetting of the power
foldaway mirrors. This sound is normal after a manual
folding operation.
Automatic Dimming
The driver outside mirror adjusts for the glare of the
headlamps behind you. SeeAutomatic Dimming
Rearview Mirror on page 2-57for more information.
Turn Signal Indicator
The vehicle may also have a turn signal indicator on the
mirror. An arrow on the mirror �ashes in the direction
of the turn or lane change.
2-59
Page 535 of 602
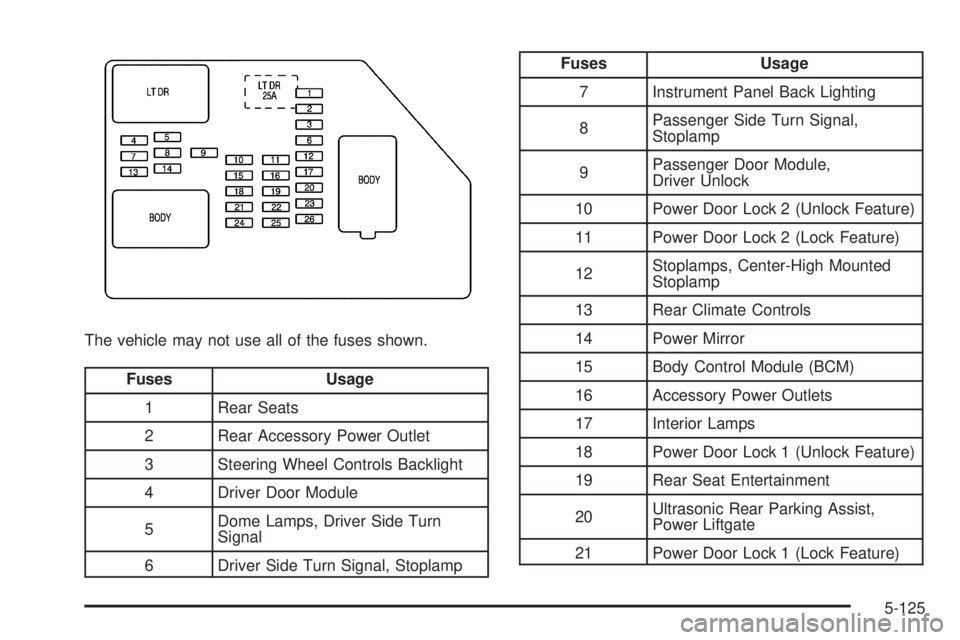
The vehicle may not use all of the fuses shown.
Fuses Usage
1 Rear Seats
2 Rear Accessory Power Outlet
3 Steering Wheel Controls Backlight
4 Driver Door Module
5Dome Lamps, Driver Side Turn
Signal
6 Driver Side Turn Signal, Stoplamp
Fuses Usage
7 Instrument Panel Back Lighting
8Passenger Side Turn Signal,
Stoplamp
9Passenger Door Module,
Driver Unlock
10 Power Door Lock 2 (Unlock Feature)
11 Power Door Lock 2 (Lock Feature)
12Stoplamps, Center-High Mounted
Stoplamp
13 Rear Climate Controls
14 Power Mirror
15 Body Control Module (BCM)
16 Accessory Power Outlets
17 Interior Lamps
18 Power Door Lock 1 (Unlock Feature)
19 Rear Seat Entertainment
20Ultrasonic Rear Parking Assist,
Power Liftgate
21 Power Door Lock 1 (Lock Feature)
5-125