center console GMC SIERRA 1500 2013 Owners Manual
[x] Cancel search | Manufacturer: GMC, Model Year: 2013, Model line: SIERRA 1500, Model: GMC SIERRA 1500 2013Pages: 534, PDF Size: 7.85 MB
Page 31 of 534
Black plate (25,1)GMC Sierra Owner Manual - 2013 - crc - 8/14/12
In Brief 1-25
For vehicles with a Rear Seat
Entertainment System (RSE) and
Rear Seat Audio System (RSA), see
Rear Seat Entertainment (RSE)
System on page 7‑38andRear
Seat Audio (RSA) System on
page 7‑47 for more information.
Storing Radio Stations
A maximum of 36 stations can be
stored as favorites using the six
softkeys located below the radio
station frequency tabs and by using
the radio FAV button. Press FAV to
go through up to six pages of
favorites, each having six favorite
stations available per page. Each
page of favorites can contain any
combination of AM, FM, or SiriusXM
stations.
For more information, see “Storing
Radio Stations” inAM-FM Radio on
page 7‑10.
Setting the Clock
To set the time and date:
1. Turn the ignition key to ACC/ ACCESSORY or ON/RUN, then
press
O, to turn the radio on.
2. Press
Hto display HR, MIN,
MM, DD, and YYYY (hour,
minute, month, day, and year).
3. Press the softkey located under any one of the labels to be
changed.
4. To increase or decrease the time or date, turn
fclockwise or
counter-clockwise.
For detailed instructions on setting
the clock for the vehicle's specific
audio system, see Clock on
page 5‑7.
Satellite Radio
SiriusXM®is a satellite radio service
based in the 48 contiguous United
States and 10 Canadian provinces.
SiriusXM satellite radio has a wide variety of programming and
commercial-free music, coast to
coast, and in digital-quality sound.
A fee is required to receive the
SiriusXM service.
For more information, refer to:
.www.siriusxm.com or call
1-866-635-2349 (U.S.)
.www.xmradio.ca or call
1-877-209-0079 (Canada)
See Satellite Radio on page 7‑12.
Portable Audio Devices
This vehicle may have an auxiliary
input located on the radio faceplate
and a USB port located in the center
console or on the instrument panel.
External devices such as an iPod
®,
laptop computer, MP3 player, CD
changer, or USB storage device can
be connected to the auxiliary port
using a 3.5 mm (1/8 in) input cable
or the USB port depending on the
audio system.
Page 129 of 534
Black plate (1,1)GMC Sierra Owner Manual - 2013 - crc - 8/14/12
Storage 4-1
Storage
Storage Compartments
Instrument Panel Storage . . . . . 4-1
Glove Box . . . . . . . . . . . . . . . . . . . . 4-1
Cupholders . . . . . . . . . . . . . . . . . . . 4-1
Armrest Storage . . . . . . . . . . . . . . 4-1
Center Console Storage . . . . . . 4-2
Storage
Compartments
Instrument Panel Storage
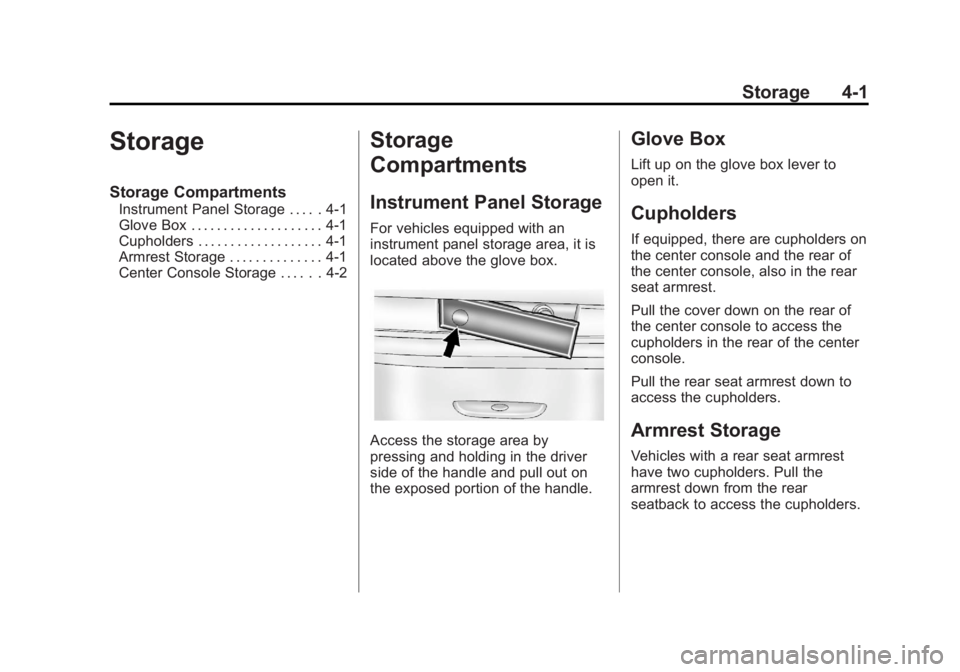
For vehicles equipped with an
instrument panel storage area, it is
located above the glove box.
Access the storage area by
pressing and holding in the driver
side of the handle and pull out on
the exposed portion of the handle.
Glove Box
Lift up on the glove box lever to
open it.
Cupholders
If equipped, there are cupholders on
the center console and the rear of
the center console, also in the rear
seat armrest.
Pull the cover down on the rear of
the center console to access the
cupholders in the rear of the center
console.
Pull the rear seat armrest down to
access the cupholders.
Armrest Storage
Vehicles with a rear seat armrest
have two cupholders. Pull the
armrest down from the rear
seatback to access the cupholders.
Page 130 of 534
Black plate (2,1)GMC Sierra Owner Manual - 2013 - crc - 8/14/12
4-2 Storage
Center Console Storage
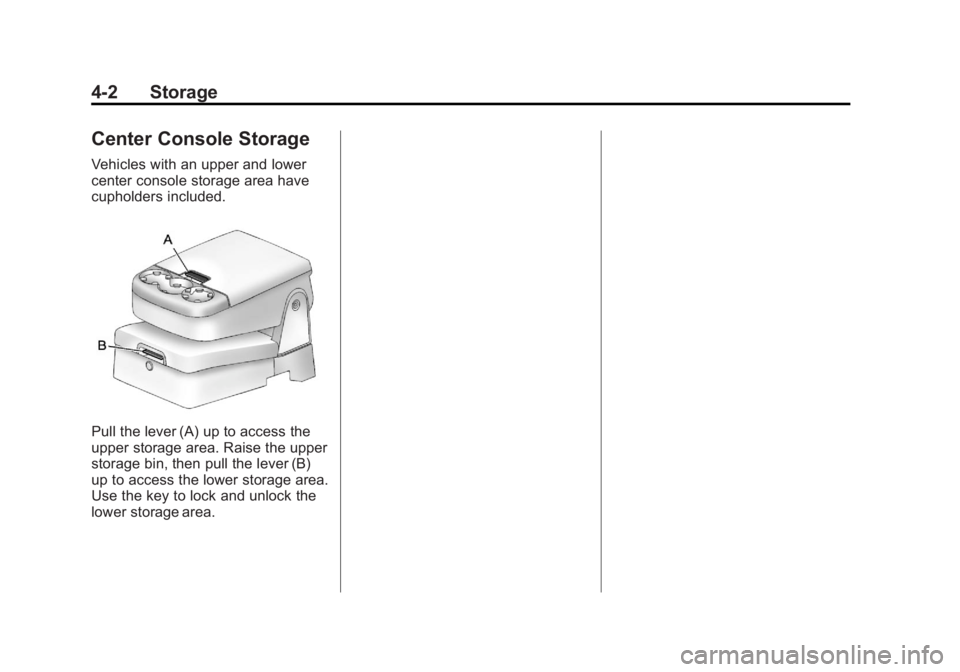
Vehicles with an upper and lower
center console storage area have
cupholders included.
Pull the lever (A) up to access the
upper storage area. Raise the upper
storage bin, then pull the lever (B)
up to access the lower storage area.
Use the key to lock and unlock the
lower storage area.
Page 196 of 534
Black plate (6,1)GMC Sierra Owner Manual - 2013 - crc - 8/14/12
6-6 Lighting
SIGNAL ON will also appear in the
Driver Information Control (DIC). To
turn the chime and message off,
move the turn signal lever to the off
position.
Fog Lamps
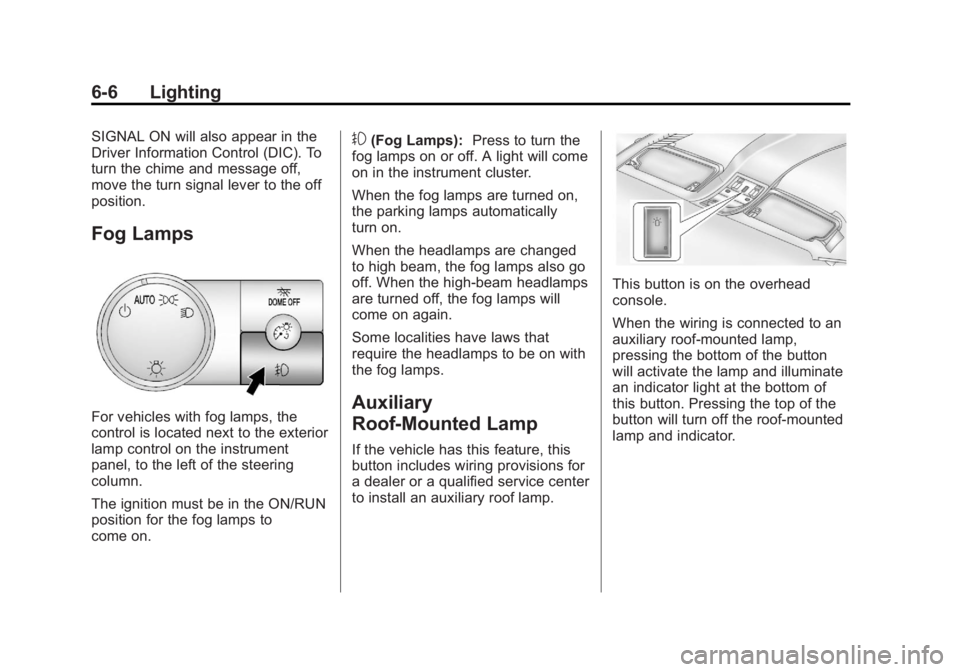
For vehicles with fog lamps, the
control is located next to the exterior
lamp control on the instrument
panel, to the left of the steering
column.
The ignition must be in the ON/RUN
position for the fog lamps to
come on.
#(Fog Lamps):Press to turn the
fog lamps on or off. A light will come
on in the instrument cluster.
When the fog lamps are turned on,
the parking lamps automatically
turn on.
When the headlamps are changed
to high beam, the fog lamps also go
off. When the high-beam headlamps
are turned off, the fog lamps will
come on again.
Some localities have laws that
require the headlamps to be on with
the fog lamps.
Auxiliary
Roof-Mounted Lamp
If the vehicle has this feature, this
button includes wiring provisions for
a dealer or a qualified service center
to install an auxiliary roof lamp.
This button is on the overhead
console.
When the wiring is connected to an
auxiliary roof-mounted lamp,
pressing the bottom of the button
will activate the lamp and illuminate
an indicator light at the bottom of
this button. Pressing the top of the
button will turn off the roof-mounted
lamp and indicator.
Page 234 of 534
Black plate (34,1)GMC Sierra Owner Manual - 2013 - crc - 8/14/12
7-34 Infotainment System
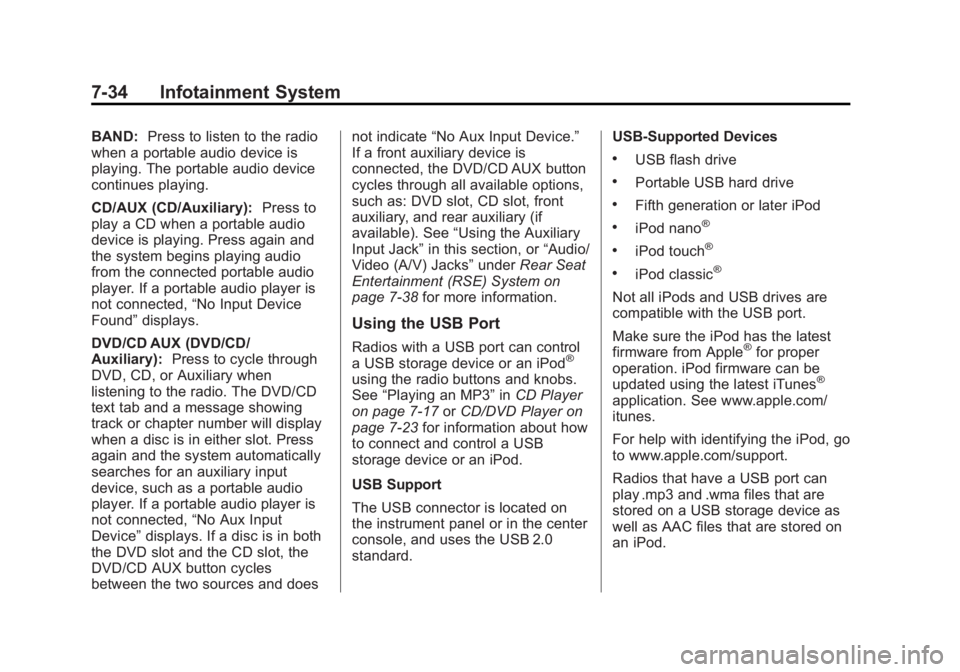
BAND:Press to listen to the radio
when a portable audio device is
playing. The portable audio device
continues playing.
CD/AUX (CD/Auxiliary): Press to
play a CD when a portable audio
device is playing. Press again and
the system begins playing audio
from the connected portable audio
player. If a portable audio player is
not connected, “No Input Device
Found” displays.
DVD/CD AUX (DVD/CD/
Auxiliary): Press to cycle through
DVD, CD, or Auxiliary when
listening to the radio. The DVD/CD
text tab and a message showing
track or chapter number will display
when a disc is in either slot. Press
again and the system automatically
searches for an auxiliary input
device, such as a portable audio
player. If a portable audio player is
not connected, “No Aux Input
Device” displays. If a disc is in both
the DVD slot and the CD slot, the
DVD/CD AUX button cycles
between the two sources and does not indicate
“No Aux Input Device.”
If a front auxiliary device is
connected, the DVD/CD AUX button
cycles through all available options,
such as: DVD slot, CD slot, front
auxiliary, and rear auxiliary (if
available). See “Using the Auxiliary
Input Jack” in this section, or “Audio/
Video (A/V) Jacks” underRear Seat
Entertainment (RSE) System on
page 7‑38 for more information.
Using the USB Port
Radios with a USB port can control
a USB storage device or an iPod®
using the radio buttons and knobs.
See“Playing an MP3” inCD Player
on page 7‑17 orCD/DVD Player on
page 7‑23 for information about how
to connect and control a USB
storage device or an iPod.
USB Support
The USB connector is located on
the instrument panel or in the center
console, and uses the USB 2.0
standard. USB-Supported Devices
.USB flash drive
.Portable USB hard drive
.Fifth generation or later iPod
.iPod nano®
.iPod touch®
.iPod classic®
Not all iPods and USB drives are
compatible with the USB port.
Make sure the iPod has the latest
firmware from Apple
®for proper
operation. iPod firmware can be
updated using the latest iTunes
®
application. See www.apple.com/
itunes.
For help with identifying the iPod, go
to www.apple.com/support.
Radios that have a USB port can
play .mp3 and .wma files that are
stored on a USB storage device as
well as AAC files that are stored on
an iPod.
Page 235 of 534
Black plate (35,1)GMC Sierra Owner Manual - 2013 - crc - 8/14/12
Infotainment System 7-35
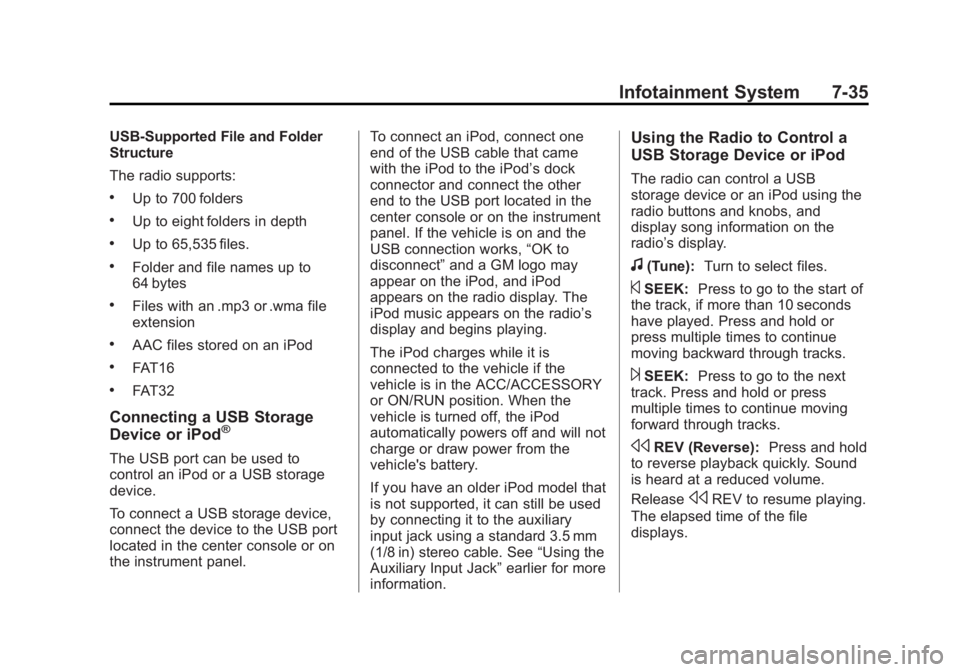
USB-Supported File and Folder
Structure
The radio supports:
.Up to 700 folders
.Up to eight folders in depth
.Up to 65,535 files.
.Folder and file names up to
64 bytes
.Files with an .mp3 or .wma file
extension
.AAC files stored on an iPod
.FAT16
.FAT32
Connecting a USB Storage
Device or iPod®
The USB port can be used to
control an iPod or a USB storage
device.
To connect a USB storage device,
connect the device to the USB port
located in the center console or on
the instrument panel.To connect an iPod, connect one
end of the USB cable that came
with the iPod to the iPod’s dock
connector and connect the other
end to the USB port located in the
center console or on the instrument
panel. If the vehicle is on and the
USB connection works,
“OK to
disconnect” and a GM logo may
appear on the iPod, and iPod
appears on the radio display. The
iPod music appears on the radio’s
display and begins playing.
The iPod charges while it is
connected to the vehicle if the
vehicle is in the ACC/ACCESSORY
or ON/RUN position. When the
vehicle is turned off, the iPod
automatically powers off and will not
charge or draw power from the
vehicle's battery.
If you have an older iPod model that
is not supported, it can still be used
by connecting it to the auxiliary
input jack using a standard 3.5 mm
(1/8 in) stereo cable. See “Using the
Auxiliary Input Jack” earlier for more
information.
Using the Radio to Control a
USB Storage Device or iPod
The radio can control a USB
storage device or an iPod using the
radio buttons and knobs, and
display song information on the
radio’s display.
f(Tune): Turn to select files.
©SEEK:Press to go to the start of
the track, if more than 10 seconds
have played. Press and hold or
press multiple times to continue
moving backward through tracks.
¨SEEK: Press to go to the next
track. Press and hold or press
multiple times to continue moving
forward through tracks.
sREV (Reverse): Press and hold
to reverse playback quickly. Sound
is heard at a reduced volume.
Release
sREV to resume playing.
The elapsed time of the file
displays.
Page 522 of 534
Black plate (2,1)GMC Sierra Owner Manual - 2013 - crc - 8/14/12
i-2 INDEX
AuxiliaryDevices . . . . . . . . . . . . . . . . . . . . . . . 7-33
Roof Mounted Lamp . . . . . . . . . . . 6-6
Axle, Front . . . . . . . . . . . . . . . . . . . . 10-29
Axle, Rear . . . . . . . . . . . . . . . . . . . . 10-30
B
Battery . . . . . . . . . . . . . . . . . . . . . . . 10-27 Jump Starting . . . . . . . . . . . . . . . 10-82
Load Management . . . . . . . . . . . . . 6-9
Power Protection . . . . . . . . . . . . . . 6-9
Voltage and ChargingMessages . . . . . . . . . . . . . . . . . . . 5-37
Blade Replacement, Wiper . . . 10-33
Bluetooth . . . . . . . . . . . . . . . . . . . . . . 7-49
Brake Pedal and AdjustableThrottle . . . . . . . . . . . . . . . . . . . . . . 9-23
System Warning Light . . . . . . . . 5-23
Brakes . . . . . . . . . . . . . . . . . . . . . . . . 10-24 Antilock . . . . . . . . . . . . . . . . . . . . . . . 9-50
Assist . . . . . . . . . . . . . . . . . . . . . . . . . 9-52
Fluid . . . . . . . . . . . . . . . . . . . . . . . . 10-25
Parking . . . . . . . . . . . . . . . . . . . . . . . 9-51
System Messages . . . . . . . . . . . . 5-38 Braking . . . . . . . . . . . . . . . . . . . . . . . . . 9-3
Break-In, New Vehicle . . . . . . . . . 9-23
Bulb Replacement . . . . . . . . . . . . 10-38
Center High-MountedStoplamp (CHMSL) and
Cargo Lamp . . . . . . . . . . . . . . . 10-37
Fog Lamps . . . . . . . . . . . . . . . . . . . . 6-6
Halogen Bulbs . . . . . . . . . . . . . . 10-34
Headlamp Aiming . . . . . . . . . . . 10-34
Headlamps . . . . . . . . . . . . . . . . . 10-34
Headlamps, Front Turn
Signal, Sidemarker, and
Parking Lamps . . . . . . . . . . . . 10-35
License Plate Lamps . . . . . . . 10-37
Pick-up Box Identification and Fender Marker
Lamps . . . . . . . . . . . . . . . . . . . . 10-35
Taillamps . . . . . . . . . . . . . . . . . . . 10-36
Taillamps, Turn Signal, Stoplamps, and
Back-up Lamps . . . . . . . . . . . 10-36
Buying New Tires . . . . . . . . . . . . . 10-65
C
Calibration . . . . . . . . . . . . . . . . . . . . . . 5-5
California Fuel Requirements . . . . . . . . . . . 9-66
Perchlorate MaterialsRequirements . . . . . . . . . . . . . . . 10-3
Warning . . . . . . . . . . . . . . . . . . . . . . 10-2
Camera, Rear Vision . . . . . . . . . . 9-60
Canadian Vehicle Owners . . . . . . . . iii
Capacities and Specifications . . . . . . . . . . . . . . . . 12-2
Carbon Monoxide Engine Exhaust . . . . . . . . . . . . . . . 9-31
Tailgate . . . . . . . . . . . . . . . . . . . . . . . . 2-9
Winter Driving . . . . . . . . . . . . . . . . 9-12
Cargo Lamp . . . . . . . . . . . . . . . . . . . . 6-7
Cautions, Danger, and
Warnings . . . . . . . . . . . . . . . . . . . . . . . . iv
CD Player . . . . . . . . . . . . . . . . . . . . . 7-17
CD/DVD Player . . . . . . . . . . . . . . . . 7-23
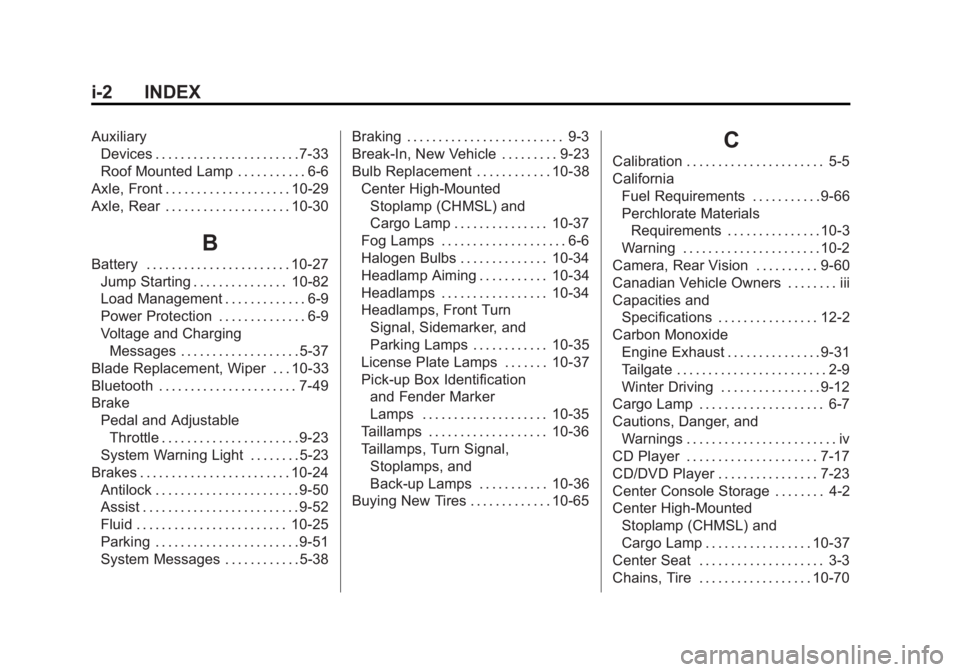
Center Console Storage . . . . . . . . 4-2
Center High-Mounted Stoplamp (CHMSL) and
Cargo Lamp . . . . . . . . . . . . . . . . . 10-37
Center Seat . . . . . . . . . . . . . . . . . . . . 3-3
Chains, Tire . . . . . . . . . . . . . . . . . . 10-70
Page 531 of 534
Black plate (11,1)GMC Sierra Owner Manual - 2013 - crc - 8/14/12
INDEX i-11
SecurityLight . . . . . . . . . . . . . . . . . . . . . . . . . . 5-27
Messages . . . . . . . . . . . . . . . . . . . . 5-43
OnStar
®. . . . . . . . . . . . . . . . . . . . . . 14-2
Vehicle . . . . . . . . . . . . . . . . . . . . . . . 2-10
Vehicle Alarm . . . . . . . . . . . . . . . . . 2-10
Service
Accessories andModifications . . . . . . . . . . . . . . . . 10-3
Doing Your Own Work . . . . . . . . 10-3
Engine Soon Light . . . . . . . . . . . . 5-21
Maintenance Records . . . . . . .11-16
Maintenance, General Information . . . . . . . . . . . . . . . . . . 11-1
Parts Identification Label . . . . . 12-1
Publications Ordering Information . . . . . . . . . . . . . . . . 13-16
Scheduling Appointments . . . 13-12
Servicing the Airbag . . . . . . . . . . . 3-35
Shift Lock Control Function Check, Automatic
Transmission . . . . . . . . . . . . . . . . 10-32
Shifting Into Park . . . . . . . . . . . . . . . . . . . . . . 9-28
Out of Park . . . . . . . . . . . . . . . . . . . 9-30 Signals, Turn and
Lane-Change . . . . . . . . . . . . . . . . . 6-5
Snow Plow . . . . . . . . . . . . . . . . . . . 9-101
Specifications and Capacities . . . . . . . . . . . . . . . . . . . . 12-2
Speedometer . . . . . . . . . . . . . . . . . . 5-12
StabiliTrak OFF Light . . . . . . . . . . . . . . . . . . . . . 5-25
System . . . . . . . . . . . . . . . . . . . . . . . 9-53
Start Assist, Hills . . . . . . . . . . . . . . 9-52
Start Vehicle, Remote . . . . . . . . . . 2-4
Starter Switch Check . . . . . . . . . 10-32
Starting the Engine . . . . . . . . . . . . 9-25
Starting the Vehicle Messsages . . . . . . . . . . . . . . . . . . . 5-43
Steering . . . . . . . . . . . . . . . . . . . . . . . . 9-4
Fluid, Power . . . . . . . . . . . . . . . . 10-23
Wheel Adjustment . . . . . . . . . . . . . 5-2
Wheel Controls . . . . . . . . . . . . . . . . 5-2
Stoplamps and Back-up Lamps Bulb Replacement . . . . . . . . . . 10-36
Storage Areas Armrest . . . . . . . . . . . . . . . . . . . . . . . . 4-1
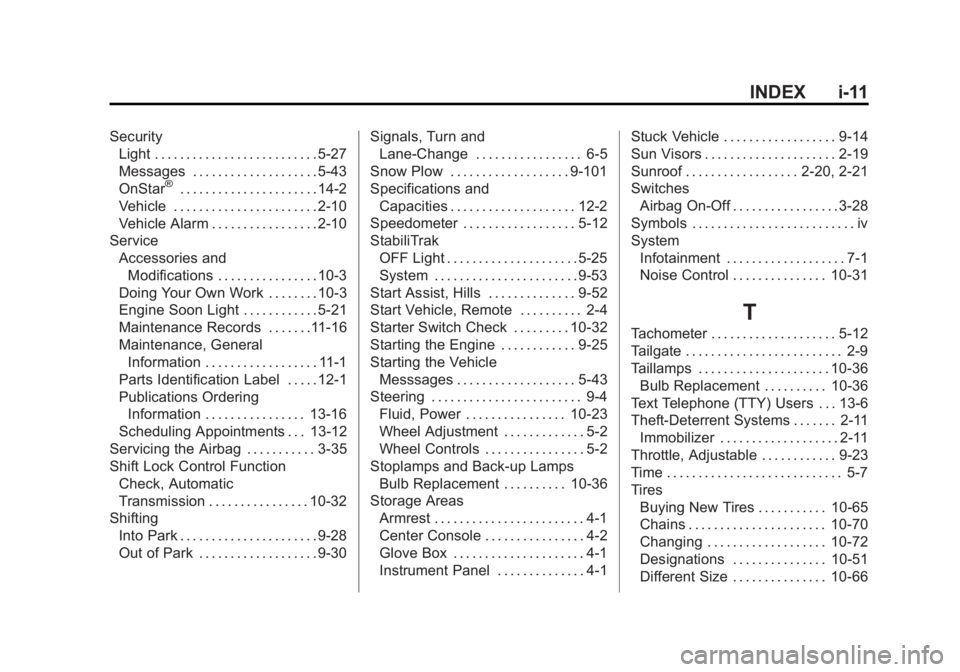
Center Console . . . . . . . . . . . . . . . . 4-2
Glove Box . . . . . . . . . . . . . . . . . . . . . 4-1
Instrument Panel . . . . . . . . . . . . . . 4-1 Stuck Vehicle . . . . . . . . . . . . . . . . . . 9-14
Sun Visors . . . . . . . . . . . . . . . . . . . . . 2-19
Sunroof . . . . . . . . . . . . . . . . . . 2-20, 2-21
Switches
Airbag On-Off . . . . . . . . . . . . . . . . . 3-28
Symbols . . . . . . . . . . . . . . . . . . . . . . . . . . iv
System Infotainment . . . . . . . . . . . . . . . . . . . 7-1
Noise Control . . . . . . . . . . . . . . . 10-31
T
Tachometer . . . . . . . . . . . . . . . . . . . . 5-12
Tailgate . . . . . . . . . . . . . . . . . . . . . . . . . 2-9
Taillamps . . . . . . . . . . . . . . . . . . . . . 10-36Bulb Replacement . . . . . . . . . . 10-36
Text Telephone (TTY) Users . . . 13-6
Theft-Deterrent Systems . . . . . . . 2-11 Immobilizer . . . . . . . . . . . . . . . . . . . 2-11
Throttle, Adjustable . . . . . . . . . . . . 9-23
Time . . . . . . . . . . . . . . . . . . . . . . . . . . . . 5-7
Tires Buying New Tires . . . . . . . . . . . 10-65
Chains . . . . . . . . . . . . . . . . . . . . . . 10-70
Changing . . . . . . . . . . . . . . . . . . . 10-72
Designations . . . . . . . . . . . . . . . 10-51
Different Size . . . . . . . . . . . . . . . 10-66