GMC SIERRA 1500 2015 Owners Manual
Manufacturer: GMC, Model Year: 2015, Model line: SIERRA 1500, Model: GMC SIERRA 1500 2015Pages: 539, PDF Size: 6.81 MB
Page 381 of 539
Black plate (14,1)GMC Sierra Owner Manual (GMNA Localizing-U.S/Canada/Mexico-
7299746) - 2015 - crc - 11/11/13
10-14 Vehicle Care
How to Reset the Engine Oil
Life System
Reset the system whenever the
engine oil is changed so that the
system can calculate the next
engine oil change. Always reset the
engine oil life to 100% after every oil
change. It will not reset itself. To
reset the engine oil life system:
1. Display the OIL LIFEREMAINING on the DIC. If the
vehicle does not have DIC
buttons, the vehicle must be in
P (Park) to access this display.
See Driver Information Center
(DIC) (Base Level) on page 5-30
or Driver Information Center
(DIC) (Uplevel) on page 5-32.
2. Press and hold
V, or the trip
odometer reset stem if the
vehicle does not have DIC
buttons, for several seconds.
The oil life will change to 100%. The oil life system can also be reset
as follows:
1. Turn the ignition to ON/RUN with
the engine off.
2. Fully press the accelerator pedal slowly three times within
five seconds.
3. Display the OIL LIFE REMAINING on the DIC. If the
display shows 100%, the system
is reset.
If the vehicle has a CHANGE
ENGINE OIL SOON message and it
comes back on when the vehicle is
started and/or the OIL LIFE
REMAINING is near 0%, the engine
oil life system has not been reset.
Repeat the procedure.
Automatic Transmission
Fluid
When to Check and Change
Automatic Transmission Fluid
It is usually not necessary to check
the transmission fluid level. The only
reason for fluid loss is a
transmission leak or overheated
transmission. If a small leak is
suspected, then use the following
checking procedures to check the
fluid level. However, if there is a
large leak, then it may be necessary
to have the vehicle towed to a
dealer service department and have
it repaired before driving the vehicle
further.
Page 382 of 539
Black plate (15,1)GMC Sierra Owner Manual (GMNA Localizing-U.S/Canada/Mexico-
7299746) - 2015 - crc - 11/11/13
Vehicle Care 10-15
{Caution
Use of the incorrect automatic
transmission fluid may damage
the vehicle, and the damage may
not be covered by the vehicle
warranty. Always use the
automatic transmission fluid listed
inRecommended Fluids and
Lubricants on page 11-12.
Change the fluid and filter at the
scheduled maintenance intervals
listed in Maintenance Schedule on
page 11-3. Be sure to use the
transmission fluid listed in
Recommended Fluids and
Lubricants on page 11-12.
How to Check Automatic
Transmission Fluid
{Caution
Too much or too little fluid can
damage the transmission. Too
much can mean that some of the
fluid could come out and fall on
hot engine parts or exhaust
system parts, starting a fire. Too
little fluid could cause the
transmission to overheat. Be sure
to get an accurate reading if
checking the transmission fluid.
Before checking the fluid level,
prepare the vehicle:
1. Start the engine and park the vehicle on a level surface. Keep
the engine running.
2. Apply the parking brake and place the shift lever in P (Park).
3. With your foot on the brake pedal, move the shift lever
through each gear range, pausing for about three seconds
in each range. Then, move the
shift lever back to P (Park).
4. Allow the engine to idle (500– 800 rpm) for at least one minute.
Slowly release the brake pedal.
5. Keep the engine running and check the transmission fluid
temperature on the Driver
Information Center (DIC). See
Driver Information Center (DIC)
(Base Level) on page 5-30 or
Driver Information Center (DIC)
(Uplevel) on page 5-32.
6. Using the transmission fluid temperature reading, determine
and perform the appropriate
check procedure. If the
transmission fluid temperature
reading is not within the required
temperature ranges, allow the
vehicle to cool, or operate the
vehicle until the appropriate
transmission fluid temperature is
reached.
Page 383 of 539
Black plate (16,1)GMC Sierra Owner Manual (GMNA Localizing-U.S/Canada/Mexico-
7299746) - 2015 - crc - 11/11/13
10-16 Vehicle Care
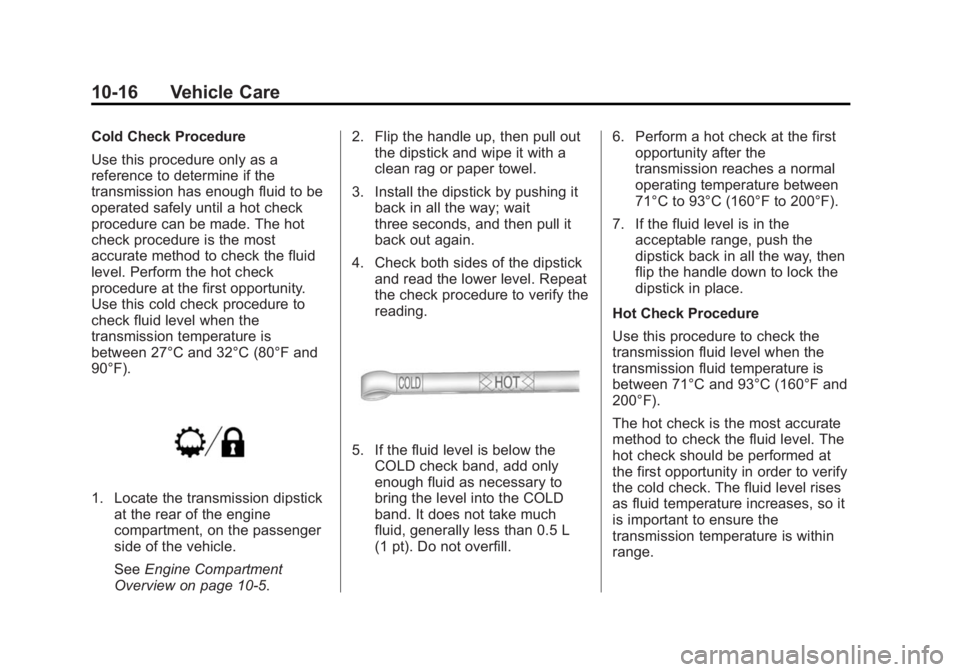
Cold Check Procedure
Use this procedure only as a
reference to determine if the
transmission has enough fluid to be
operated safely until a hot check
procedure can be made. The hot
check procedure is the most
accurate method to check the fluid
level. Perform the hot check
procedure at the first opportunity.
Use this cold check procedure to
check fluid level when the
transmission temperature is
between 27°C and 32°C (80°F and
90°F).
1. Locate the transmission dipstickat the rear of the engine
compartment, on the passenger
side of the vehicle.
See Engine Compartment
Overview on page 10-5. 2. Flip the handle up, then pull out
the dipstick and wipe it with a
clean rag or paper towel.
3. Install the dipstick by pushing it back in all the way; wait
three seconds, and then pull it
back out again.
4. Check both sides of the dipstick and read the lower level. Repeat
the check procedure to verify the
reading.
5. If the fluid level is below the
COLD check band, add only
enough fluid as necessary to
bring the level into the COLD
band. It does not take much
fluid, generally less than 0.5 L
(1 pt). Do not overfill. 6. Perform a hot check at the first
opportunity after the
transmission reaches a normal
operating temperature between
71°C to 93°C (160°F to 200°F).
7. If the fluid level is in the acceptable range, push the
dipstick back in all the way, then
flip the handle down to lock the
dipstick in place.
Hot Check Procedure
Use this procedure to check the
transmission fluid level when the
transmission fluid temperature is
between 71°C and 93°C (160°F and
200°F).
The hot check is the most accurate
method to check the fluid level. The
hot check should be performed at
the first opportunity in order to verify
the cold check. The fluid level rises
as fluid temperature increases, so it
is important to ensure the
transmission temperature is within
range.
Page 384 of 539
Black plate (17,1)GMC Sierra Owner Manual (GMNA Localizing-U.S/Canada/Mexico-
7299746) - 2015 - crc - 11/11/13
Vehicle Care 10-17
1. Locate the transmission dipstickat the rear of the engine
compartment, on the passenger
side of the vehicle.
See Engine Compartment
Overview on page 10-5.
2. Flip the handle up, then pull out the dipstick and wipe it with a
clean rag or paper towel.
3. Install the dipstick by pushing it back in all the way; wait
three seconds, and then pull it
back out again.
4. Check both sides of the dipstick and read the lower level. Repeat
the check procedure to verify the
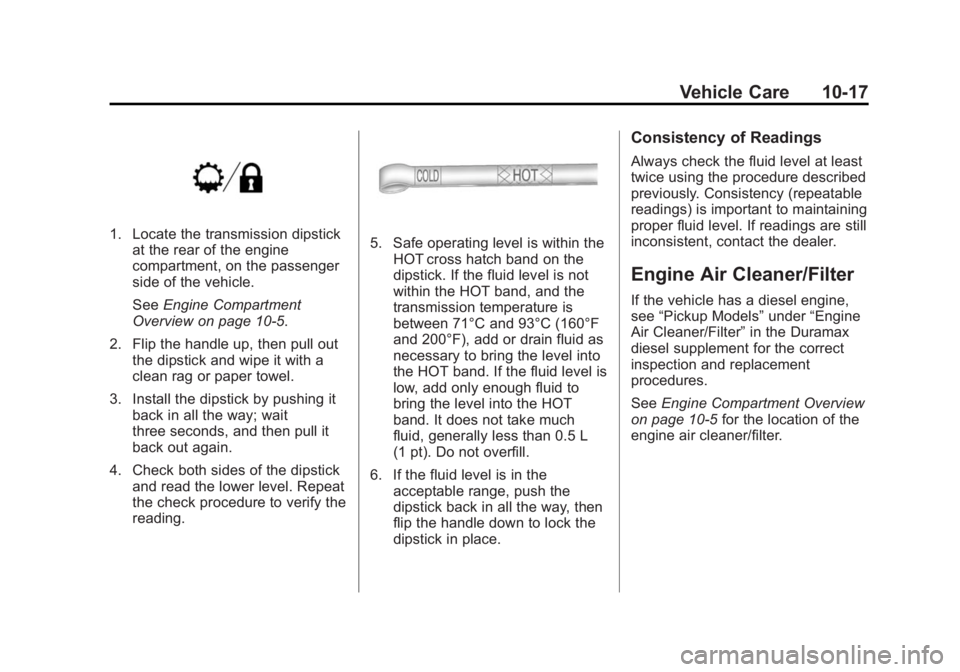
reading.5. Safe operating level is within theHOT cross hatch band on the
dipstick. If the fluid level is not
within the HOT band, and the
transmission temperature is
between 71°C and 93°C (160°F
and 200°F), add or drain fluid as
necessary to bring the level into
the HOT band. If the fluid level is
low, add only enough fluid to
bring the level into the HOT
band. It does not take much
fluid, generally less than 0.5 L
(1 pt). Do not overfill.
6. If the fluid level is in the acceptable range, push the
dipstick back in all the way, then
flip the handle down to lock the
dipstick in place.
Consistency of Readings
Always check the fluid level at least
twice using the procedure described
previously. Consistency (repeatable
readings) is important to maintaining
proper fluid level. If readings are still
inconsistent, contact the dealer.
Engine Air Cleaner/Filter
If the vehicle has a diesel engine,
see “Pickup Models” under“Engine
Air Cleaner/Filter” in the Duramax
diesel supplement for the correct
inspection and replacement
procedures.
See Engine Compartment Overview
on page 10-5 for the location of the
engine air cleaner/filter.
Page 385 of 539
Black plate (18,1)GMC Sierra Owner Manual (GMNA Localizing-U.S/Canada/Mexico-
7299746) - 2015 - crc - 11/11/13
10-18 Vehicle Care
When to Inspect the Engine Air
Cleaner/Filter
Inspect the air cleaner/filter at the
scheduled maintenance intervals
and replace it at the first oil change
after each 80 000 km (50,000 mi)
interval. SeeMaintenance Schedule
on page 11-3. If driving in dusty/dirty
conditions, inspect the filter at each
engine oil change.
How to Inspect the Engine Air
Cleaner/Filter
To inspect the air cleaner/filter,
remove the engine air cleaner/filter
from the vehicle by following
Steps 1−8. When the engine air
cleaner/filter is removed, lightly
shake it to release loose dust and
dirt. If the engine air cleaner/filter
remains covered with dirt, a new
filter is required. Never use
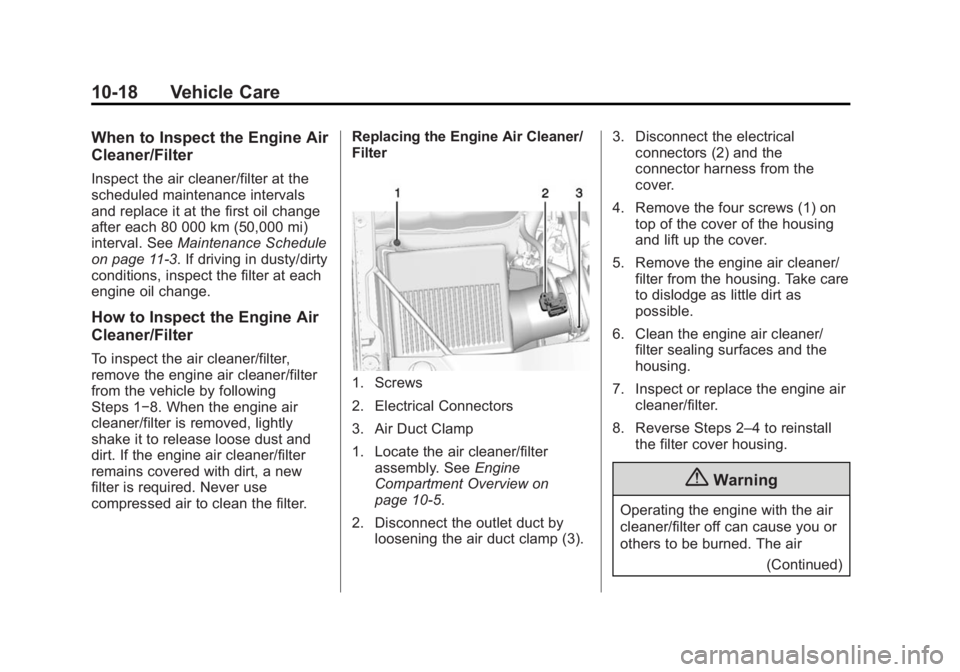
compressed air to clean the filter. Replacing the Engine Air Cleaner/
Filter
1. Screws
2. Electrical Connectors
3. Air Duct Clamp
1. Locate the air cleaner/filter
assembly. See Engine
Compartment Overview on
page 10-5.
2. Disconnect the outlet duct by loosening the air duct clamp (3). 3. Disconnect the electrical
connectors (2) and the
connector harness from the
cover.
4. Remove the four screws (1) on top of the cover of the housing
and lift up the cover.
5. Remove the engine air cleaner/ filter from the housing. Take care
to dislodge as little dirt as
possible.
6. Clean the engine air cleaner/ filter sealing surfaces and the
housing.
7. Inspect or replace the engine air cleaner/filter.
8. Reverse Steps 2–4 to reinstall the filter cover housing.
{Warning
Operating the engine with the air
cleaner/filter off can cause you or
others to be burned. The air
(Continued)
Page 386 of 539
Black plate (19,1)GMC Sierra Owner Manual (GMNA Localizing-U.S/Canada/Mexico-
7299746) - 2015 - crc - 11/11/13
Vehicle Care 10-19
Warning (Continued)
cleaner not only cleans the air; it
helps to stop flames if the engine
backfires. Use caution when
working on the engine and do not
drive with the air cleaner/filter off.
{Caution
If the air cleaner/filter is off, dirt
can easily get into the engine,
which could damage it. Always
have the air cleaner/filter in place
when you are driving.
Cooling System
If the vehicle has the Duramax
diesel engine, see the Duramax
diesel supplement.
The cooling system allows the
engine to maintain the correct
working temperature.
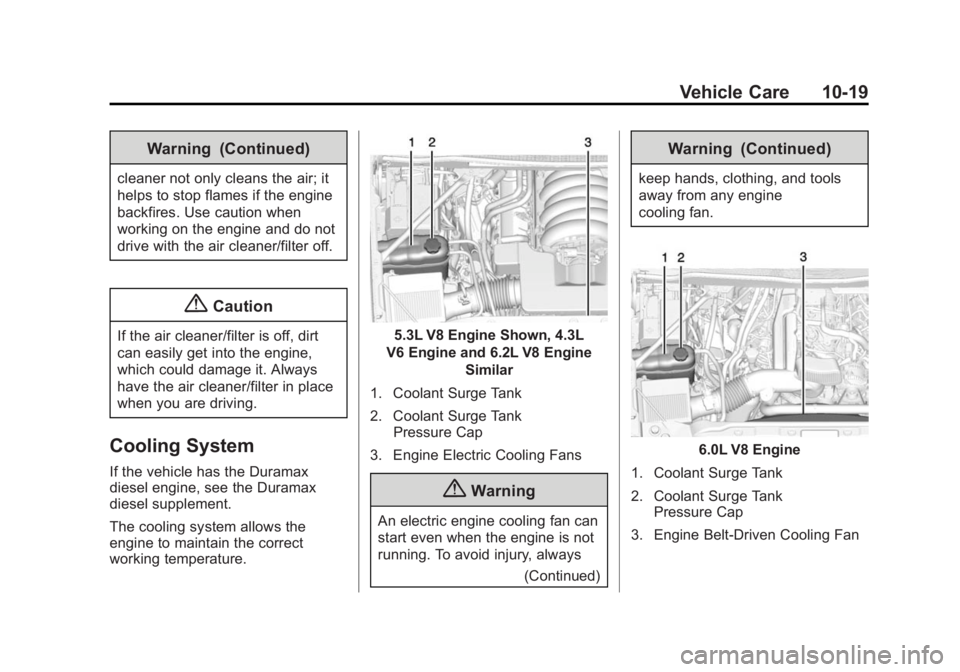
5.3L V8 Engine Shown, 4.3L
V6 Engine and 6.2L V8 Engine Similar
1. Coolant Surge Tank
2. Coolant Surge Tank Pressure Cap
3. Engine Electric Cooling Fans
{Warning
An electric engine cooling fan can
start even when the engine is not
running. To avoid injury, always (Continued)
Warning (Continued)
keep hands, clothing, and tools
away from any engine
cooling fan.
6.0L V8 Engine
1. Coolant Surge Tank
2. Coolant Surge Tank Pressure Cap
3. Engine Belt-Driven Cooling Fan
Page 387 of 539
Black plate (20,1)GMC Sierra Owner Manual (GMNA Localizing-U.S/Canada/Mexico-
7299746) - 2015 - crc - 11/11/13
10-20 Vehicle Care
{Warning
Heater and radiator hoses, and
other engine parts, can be very
hot. Do not touch them. If you do,
you can be burned.
Do not run the engine if there is a
leak. If you run the engine, it
could lose all coolant. That could
cause an engine fire, and you
could be burned. Get any leak
fixed before you drive the vehicle.
{Caution
Using coolant other than
DEX-COOL®can cause
premature engine, heater core,
or radiator corrosion. In addition,
the engine coolant could require
changing sooner. Any repairs
would not be covered by the
(Continued)
Caution (Continued)
vehicle warranty. Always use
DEX-COOL (silicate-free) coolant
in the vehicle.
Engine Coolant
The cooling system in the vehicle is
filled with DEX-COOL®engine
coolant. This coolant is designed to
remain in the vehicle for 5 years or
240 000 km (150,000 mi), whichever
occurs first.
The following explains the cooling
system and how to check and add
coolant when it is low. If there is a
problem with engine overheating,
see Engine Overheating on
page 10-23.
What to Use
{Warning
Adding only plain water or some
other liquid to the cooling system
can be dangerous. Plain water
and other liquids, can boil before
the proper coolant mixture will.
The coolant warning system is set
for the proper coolant mixture.
With plain water or the wrong
mixture, the engine could get too
hot but you would not get the
overheat warning. The engine
could catch fire and you or others
could be burned. Use a 50/
50 mixture of clean, drinkable
water and DEX-COOL coolant.
Page 388 of 539
Black plate (21,1)GMC Sierra Owner Manual (GMNA Localizing-U.S/Canada/Mexico-
7299746) - 2015 - crc - 11/11/13
Vehicle Care 10-21
Use a 50/50 mixture of clean,
drinkable water and DEX-COOL
coolant. If using this mixture,
nothing else needs to be added.
This mixture:
.Gives freezing protection down
to−37°C (−34°F), outside
temperature.
.Gives boiling protection up to
129°C (265°F), engine
temperature.
.Protects against rust and
corrosion.
.Will not damage aluminum parts.
.Helps keep the proper engine
temperature.
{Caution
If improper coolant mixture,
inhibitors, or additives are used in
the vehicle cooling system, the
engine could overheat and be
damaged. Too much water in the
(Continued)
Caution (Continued)
mixture can freeze and crack
engine cooling parts. The repairs
would not be covered by the
vehicle warranty. Use only the
proper mixture of engine coolant
for the cooling system. See
Recommended Fluids and
Lubricants on page 11-12.
Never dispose of engine coolant by
putting it in the trash, or by pouring
it on the ground, or into sewers,
streams, or bodies of water. Have
the coolant changed by an
authorized service center, familiar
with legal requirements regarding
used coolant disposal. This will help
protect the environment and your
health.
Checking Coolant
The coolant surge tank is located in
the engine compartment on the
passenger side of the vehicle. See
Engine Compartment Overview on
page 10-5.
The vehicle must be on a level
surface when checking the coolant
level.
Check to see if coolant is visible in
the coolant surge tank. If the coolant
inside the coolant surge tank is
boiling, wait until it cools down. The
coolant level should be at or above
the FULL COLD mark. If it is not,
there may be a leak in the cooling
system.
If coolant is visible but the coolant
level is not at or above the FULL
COLD mark, see “How to Add
Coolant to the Coolant Surge Tank
for Gasoline Engines,” following.
Page 389 of 539
Black plate (22,1)GMC Sierra Owner Manual (GMNA Localizing-U.S/Canada/Mexico-
7299746) - 2015 - crc - 11/11/13
10-22 Vehicle Care
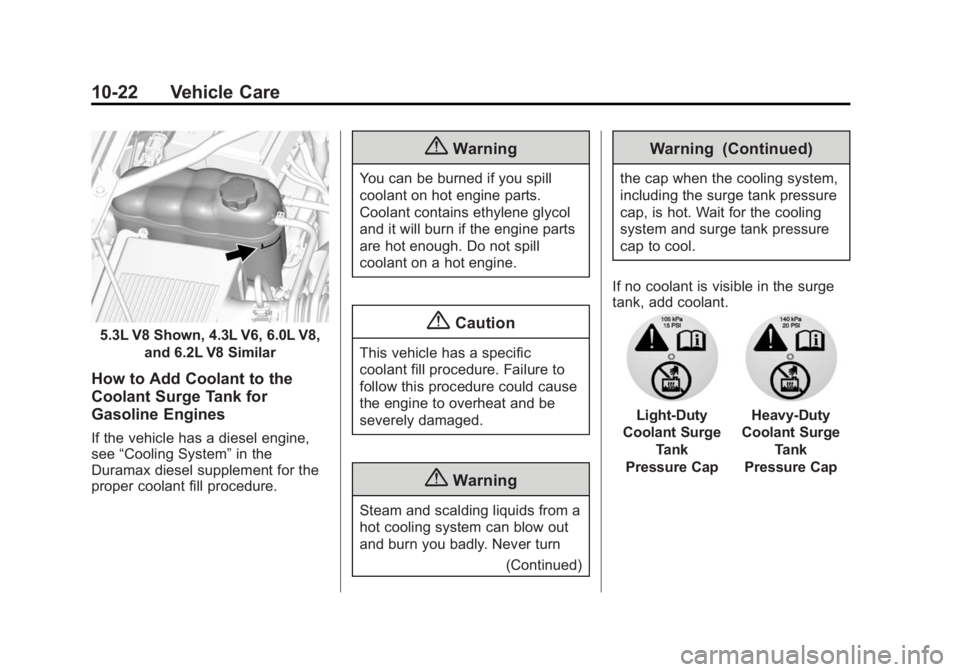
5.3L V8 Shown, 4.3L V6, 6.0L V8,and 6.2L V8 Similar
How to Add Coolant to the
Coolant Surge Tank for
Gasoline Engines
If the vehicle has a diesel engine,
see“Cooling System” in the
Duramax diesel supplement for the
proper coolant fill procedure.
{Warning
You can be burned if you spill
coolant on hot engine parts.
Coolant contains ethylene glycol
and it will burn if the engine parts
are hot enough. Do not spill
coolant on a hot engine.
{Caution
This vehicle has a specific
coolant fill procedure. Failure to
follow this procedure could cause
the engine to overheat and be
severely damaged.
{Warning
Steam and scalding liquids from a
hot cooling system can blow out
and burn you badly. Never turn
(Continued)
Warning (Continued)
the cap when the cooling system,
including the surge tank pressure
cap, is hot. Wait for the cooling
system and surge tank pressure
cap to cool.
If no coolant is visible in the surge
tank, add coolant.
Light-Duty
Coolant Surge Tank
Pressure CapHeavy-Duty
Coolant Surge Tank
Pressure Cap
Page 390 of 539
Black plate (23,1)GMC Sierra Owner Manual (GMNA Localizing-U.S/Canada/Mexico-
7299746) - 2015 - crc - 11/11/13
Vehicle Care 10-23
1. Remove the coolant surge tankpressure cap when the cooling
system, including the coolant
surge tank pressure cap and
upper radiator hose, is no
longer hot.
Turn the pressure cap slowly
counterclockwise about one full
turn. If a hiss is heard, wait for
that to stop. A hiss means there
is still some pressure left.
2. Keep turning the pressure cap slowly, and remove it.
3. Fill the coolant surge tank with the proper mixture to the FULL
COLD mark.
4. With the coolant surge tank pressure cap off, start the
engine and let it run until the
engine coolant temperature
gauge indicates approximately
90°C (195°F).
By this time, the coolant level
inside the coolant surge tank
may be lower. If the level is
lower, add more of the proper mixture to the coolant surge tank
until the level reaches the FULL
COLD mark.
5. Replace the pressure cap tightly.
6. Verify coolant level after the engine is shut off and the
coolant is cold. If necessary,
repeat coolant fill procedure
Steps 1–6.
{Caution
If the pressure cap is not tightly
installed, coolant loss and
possible engine damage may
occur. Be sure the cap is properly
and tightly secured.
Engine Overheating
If the vehicle has the Duramax
diesel engine, see the Duramax
diesel supplement.
{Caution
Running the engine without
coolant may cause damage or a
fire. Vehicle damage would not be
covered by the vehicle warranty.
The vehicle has several indicators
to warn of engine overheating.
There is a coolant temperature
gauge in the vehicle's instrument
cluster. See Engine Coolant
Temperature Gauge on page 5-16.
In addition, there are ENGINE
OVERHEATED STOP ENGINE,
ENGINE OVERHEATED IDLE
ENGINE, and ENGINE POWER IS
REDUCED messages in the Driver
Information Center (DIC). See
Engine Cooling System Messages
on page 5-37 andEngine Power
Messages on page 5-38.