roof GMC SIERRA 1996 Owners Manual
[x] Cancel search | Manufacturer: GMC, Model Year: 1996, Model line: SIERRA, Model: GMC SIERRA 1996Pages: 404, PDF Size: 21.57 MB
Page 168 of 404

Before You Go Off-Roading
There are some things to do before you go out. For
example,
be sure to have all necessary maintenance and
service work done. Check
to make sure all underbody
shields (if
so equipped) are properly attached. Be sure
you read all the information about your four-wheel-drive
vehicle in
this manual. Is there enough fuel? Is the spare
tire fully inflated? Are
the fluid levels up where they
should be? What are the local laws that apply
to
off-roading where you’ll be driving? If you don’t know,
you should check with law enforcement people in the
area. Will you be on someone’s private land? If so, be
sure to get the necessary permission.
Loading Your Vehicle for Off-Road Driving
There are some important things to remember about
how
to load your vehicle.
The heaviest things should be on the load floor and
forward
of your rear axle. Put heavier items as far
forward
as you can.
Be sure the load is secured properly, so driving on
the off-road terrain doesn’t toss things around.
4 CAUTION: ‘ ’
0
0
e
Cargo on the load floor piled higher than
the seatbacks can be thrown forward
during a sudden stop.
You or your
passengers could be injured. Keep cargo
below the top of the seatbacks.
Unsecured cargo
on the load floor can
be tossed about when driving over rough
terrain.
You or your passengers can
be struck by flying objects. Secure the
cargo properly. Heavy
loads on the roof raise the vehicle’s
center of gravity, making it more likely to
roll over.
You can be seriously or fatally
injured if the vehicle rolls over. Put heavy
loads inside the cargo area, not on the roof.
Keep cargo in the cargo
area as far forward
and low as possible.
You’ll find other important information
in this manual.
See “Vehicle Loading,” “Luggage Carrier” and “Tires”
in the Index.
4-14
ProCarManuals.com
Page 295 of 404

Roof Marker Lamps
I. Remove the screws and lift off the lens.
2. Pull the bulb straight out of the socket.
3. Put a new bulb into the socket and push it in until
it is tight.
4. Replace the lens and tighten the screws.
Tailgate Marker Lamps
1. Use a screwdriver to gently pry the lens/buIb
assembly
from the lens holder.
2. Unplug the lens/bulb assembly at the connector wire.
3. Plug in a new lendbulb assembly and push the
connector wire into
the hole in the tailgate.
4. Snap the lens/buIb assembly into the lens holder.
Taillamps (Pickup Models)
I. Open the tailgate.
cp
I
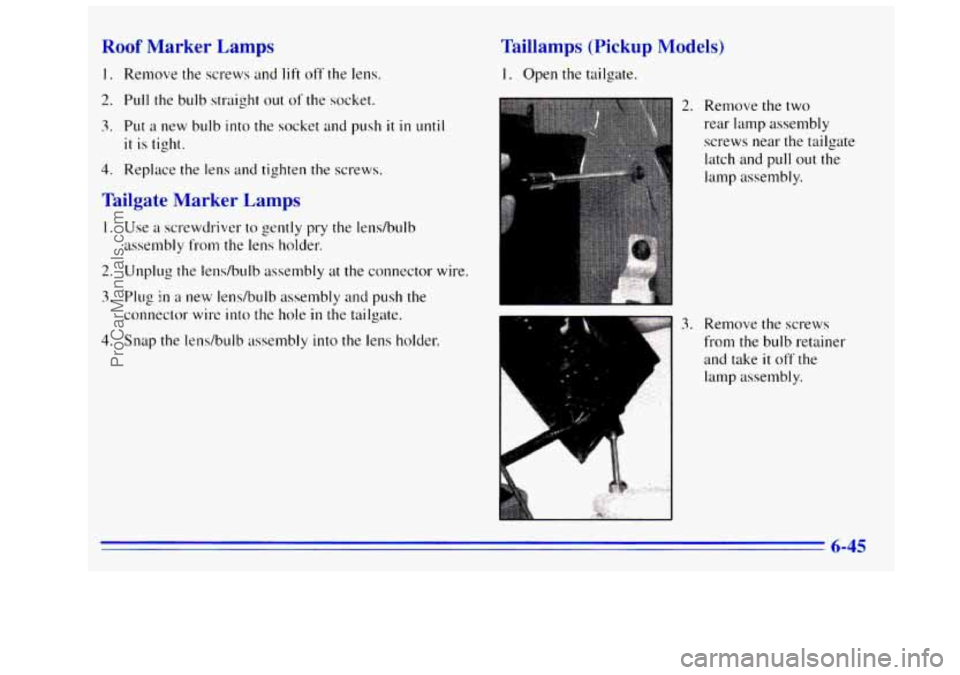
2. Remove the two
rear lamp assembly
screws near the tailgate
latch and pull out the
lamp assembly.
3. Remove the screws
from the
bulb retainer
and take
it off the
lamp assembly.
ProCarManuals.com
Page 320 of 404

014
020
03
09
0 l5
0.
04
0
0
l6
0 22
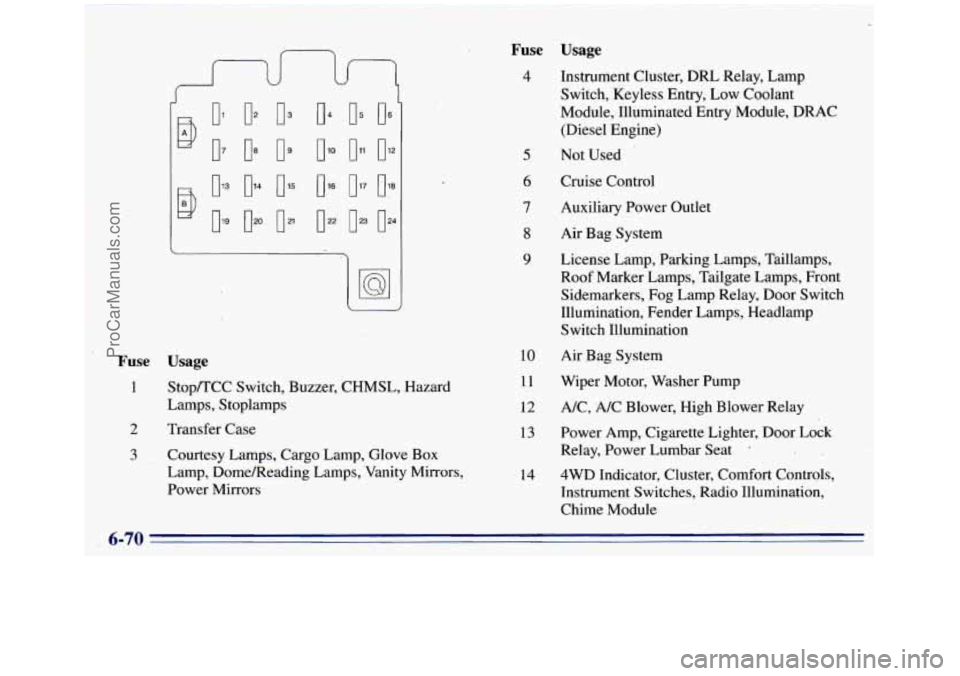
Fuse Usage
1
2
Stop/TCC Switch, Buzzer, CHMSL, Hazard
Lamps, Stoplamps
Transfer Case
3 Courtesy Lamps, Cargo Lamp, Glove
Box
Lamp, Dome/Reading Lamps, Vanity Mirrors,
Power Mirrors
Fuse
4
10
11
12
13
14
Usage
Instrument Cluster, DRL Relay, Lamp
Switch, Keyless
Entry, Low Coolant
Module, Illuminated Entry Module, DRAC
(Diesel Engine)
Not Used
Cruise Control
Auxiliary Power Outlet
Air Bag System
License Lamp, Parking Lamps, Taillamps, Roof Marker Lamps, Tailgate Lamps, Front
Sidemarkers, Fog Lamp Relay, Door Switch
Illumination, Fender Lamps, Headlamp
Switch Illumination
Air Bag System
Wiper Motor, Washer Pump
A/C, A/C Blower, High Blower Relay
Power Amp, Cigarette Lighter, Door Lock
Relay, Power Lumbar Seat
'
4WD Indicator, Cluster, Comfort Controls,
Instrument Switches, Radio Illumination,
Chime Module
6-70
ProCarManuals.com
Page 323 of 404

Replacement Bulbs
Exterior Lamps
Sealed Beam Headlamps
Composite Beam Headlamps
Front Marker Lamp Front Parking
and Turn Lamp
Rear Parking Lamp
Rear
Stop and Turn Lamp
Back-up Lamp
Fender Marker Lamp
Roof Marker Lamp
License Plate Lamp
Center High-Mounted Stoplamp Underhood Reel Lamp
Quantity
2
2
2
4
2
2
2
4
5
2
4
1
Number
H6054
6052
194
2357NA
3057
3057
3156
194
194
194
92 I
232
ProCarManuals.com