tow GMC SIERRA 2001 Owner's Manual
[x] Cancel search | Manufacturer: GMC, Model Year: 2001, Model line: SIERRA, Model: GMC SIERRA 2001Pages: 468, PDF Size: 3.2 MB
Page 2 of 468
Free lockout assistance
Free dead-battery assistance
Free out-of-fuel assistance
Free flat-tire change
Emergency towing
1-800-GMC-8782
(For vehicles purchased in Canada,
call 1-800-268-6800)
that provides in an emergency:
1-800-GMC-8782
(For vehicles purchased in Canada,
call 1-800-268-6800)
Courtesy
Transportation
Trip Routing
Every
2001 Sierra
under warranty is
backed with the
following
services:
Page 5 of 468
iii
Section
3
Comfort Controls and Audio Systems
Section
4
Your Driving and the Road
Section
5
Table of Contents (cont'd)
Your Driving, the Road and Your Vehicle
Defensive Driving
Drunken Driving
Control of a Vehicle
Braking
SteeringDriving Tips for Various Road Conditions
Off-Road Driving
Recreational Vehicle Towing
Loading Your Vehicle
Towing a Trailer Heating and Air Conditioning
Setting the Radio ClockRadio/Cassette Player/CD Player
Radio Theft-Deterrent Feature (If Equipped)
Hazard Warning Flashers
Jump Starting
Towing Your VehicleEngine Overheating
Changing a Flat Tire
If You're Stuck
Problems on the Road
Page 16 of 468
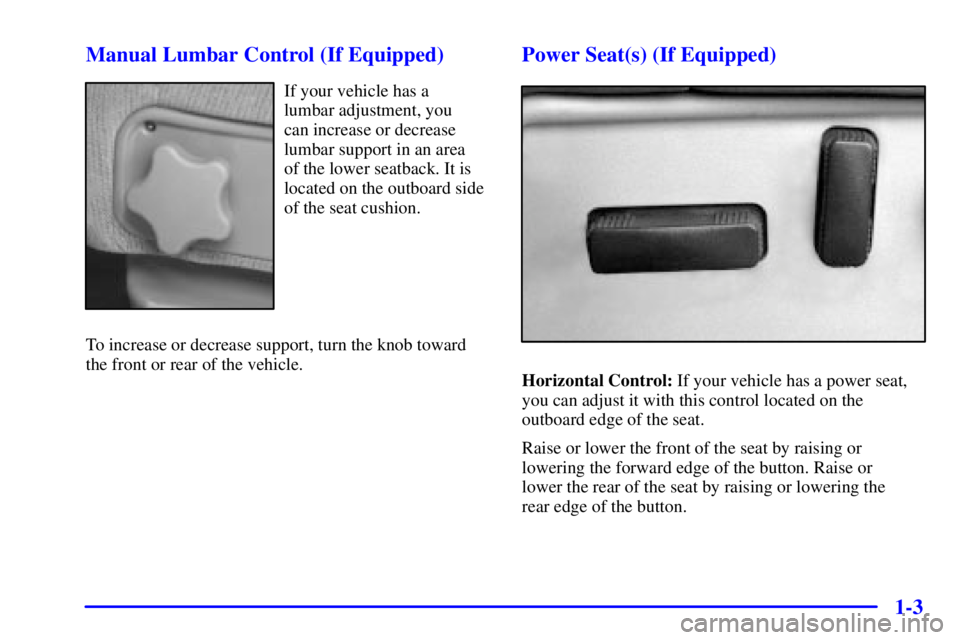
1-3 Manual Lumbar Control (If Equipped)
If your vehicle has a
lumbar adjustment, you
can increase or decrease
lumbar support in an area
of the lower seatback. It is
located on the outboard side
of the seat cushion.
To increase or decrease support, turn the knob toward
the front or rear of the vehicle.
Power Seat(s) (If Equipped)
Horizontal Control: If your vehicle has a power seat,
you can adjust it with this control located on the
outboard edge of the seat.
Raise or lower the front of the seat by raising or
lowering the forward edge of the button. Raise or
lower the rear of the seat by raising or lowering the
rear edge of the button.
Page 17 of 468

1-4
Move the seat forward or rearward by moving the whole
button toward the front or toward the rear of the vehicle.
Moving the whole button up or down raises or lowers
the entire seat cushion.
Vertical Control: If your vehicle has power reclining
seats, you can use this button to adjust the angle of the
seatback. Move the reclining front seatback rearward or
forward by moving the button toward the rear or toward
the front of the vehicle. See ªReclining Seatbacksº in
the Index for further information.
Power Lumbar Control (If Equipped)
If you have power
lumbar adjustment, you
can increase or decrease
lumbar support in an area
of the lower seatback.
The control is located on
the on outboard of the
cushion seat.To increase support, press and hold the front of the
control. Let go of the control when the lower seatback
reaches the desired level of support.
To decrease support, press and hold the rear of the
control. Let go of the control when the lower seatback
reaches the desired level of support.
You can also reshape the back wing area of the
lower seatback.
To increase support, press and hold the top of the
control. Let go of the control when the lower seatback
reaches the desired level of support.
To decrease support, press and hold the bottom of the
control. Let go of the control when the lower seatback
reaches the desired level of support.
Page 21 of 468
1-8
On some models, the head restraints tilt forward and
rearward also.
To tilt the head restraints forward, grasp the top of the
restraint and move it forward to where you want it to go
until you hear a click. It will then be locked into that
position until you need to move it again. Pulling it
forward past the last position will allow the restraint to
return to its upright position.
Seatback Latches
CAUTION:
If the seatback isn't locked, it could move forward
in a sudden stop or crash. That could cause injury
to the person sitting there. Always press rearward
on the seatback to be sure it is locked.
The seatbacks fold forward to let you access the rear
of the cab.
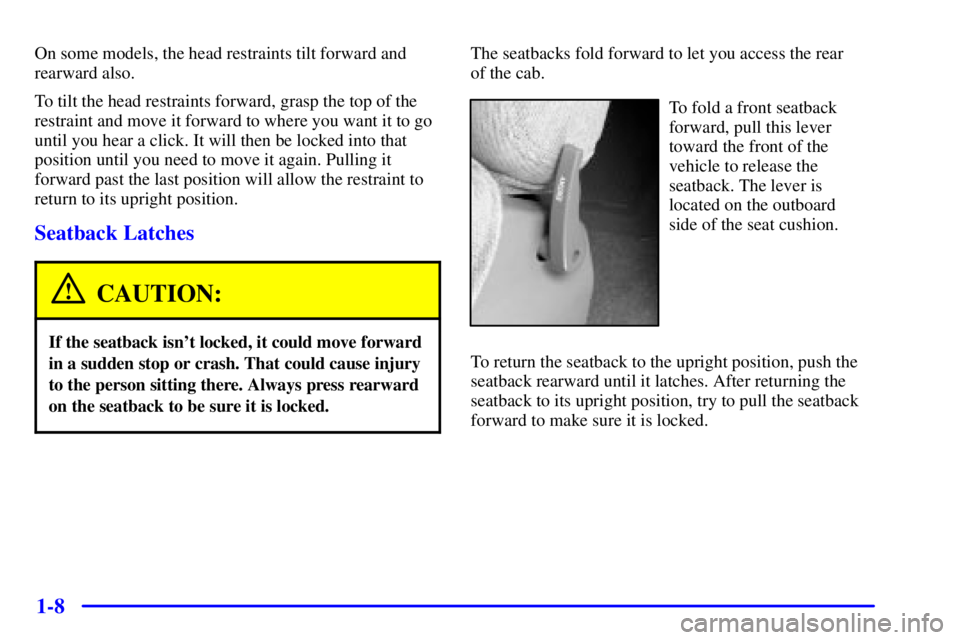
To fold a front seatback
forward, pull this lever
toward the front of the
vehicle to release the
seatback. The lever is
located on the outboard
side of the seat cushion.
To return the seatback to the upright position, push the
seatback rearward until it latches. After returning the
seatback to its upright position, try to pull the seatback
forward to make sure it is locked.
Page 22 of 468
1-9 Easy Entry Seat (Extended Cab Only)
(If Equipped)
CAUTION:
If any easy entry seat isn't locked, it can move.
In a sudden stop or crash, the person sitting there
could be injured. And, even if there is no crash or
sudden stop, a driver sitting in an unlocked easy
entry seat could be startled by the sudden
movement and hit the wrong control or pedal,
causing an accident. After you've used it, be sure
to push rearward on any easy entry seat to be
sure it is locked.
The driver's side manual front bucket seat and the
driver's side manual split bench seat in your vehicle
may have an easy entry feature. This makes it easy
to get in and out of the rear seat.
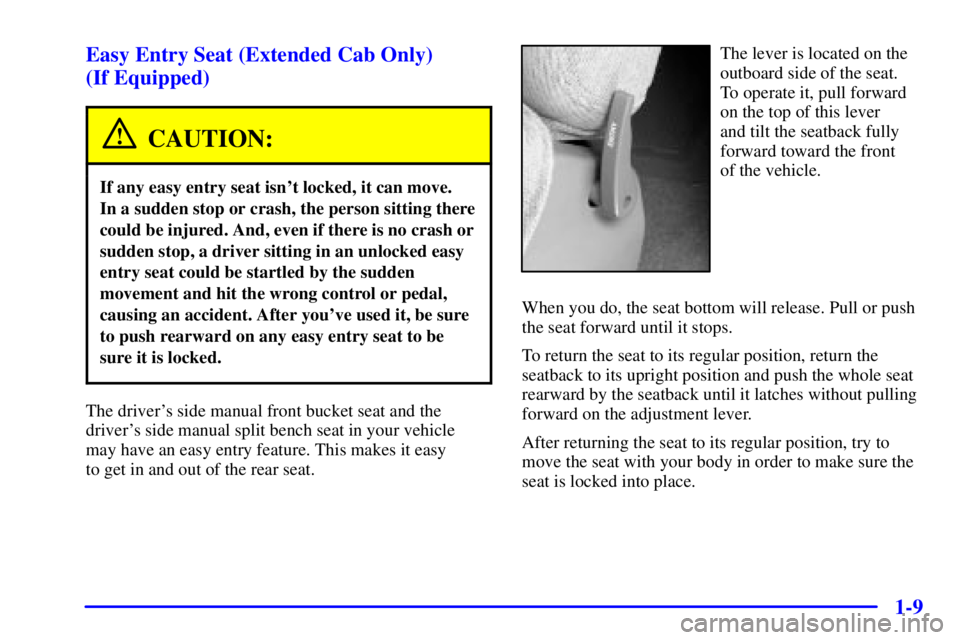
The lever is located on the
outboard side of the seat.
To operate it, pull forward
on the top of this lever
and tilt the seatback fully
forward toward the front
of the vehicle.
When you do, the seat bottom will release. Pull or push
the seat forward until it stops.
To return the seat to its regular position, return the
seatback to its upright position and push the whole seat
rearward by the seatback until it latches without pulling
forward on the adjustment lever.
After returning the seat to its regular position, try to
move the seat with your body in order to make sure the
seat is locked into place.
Page 42 of 468
1-29
What makes an air bag inflate?
In an impact of sufficient severity, the air bag sensing
system detects that the vehicle is in a crash. The sensing
system triggers a release of gas from the inflator, which
inflates the air bag. The inflator, air bag and related
hardware are all part of the air bag modules inside the
steering wheel and in the instrument panel in front of
the right front passenger.
How does an air bag restrain?
In moderate to severe frontal or near
-frontal collisions,
even belted occupants can contact the steering wheel or
the instrument panel. Air bags supplement the protection
provided by safety belts. Air bags distribute the force of
the impact more evenly over the occupant's upper body,
stopping the occupant more gradually. But air bags
would not help you in many types of collisions,
including rollovers, rear impacts and side impacts,
primarily because an occupant's motion is not toward
those air bags. Air bags should never be regarded as
anything more than a supplement to safety belts,
and then only in moderate to severe frontal or
near
-frontal collisions.What will you see after an air bag inflates?
After an air bag inflates, it quickly deflates,
so quickly that some people may not even realize
the air bag inflated. Some components of the air bag
module
-- the steering wheel hub for the driver's
air bag, or the instrument panel for the right front
passenger's bag
-- will be hot for a short time.
The parts of the bag that come into contact with you
may be warm, but not too hot to touch. There will be
some smoke and dust coming from vents in the deflated
air bags. Air bag inflation doesn't prevent the driver
from seeing or from being able to steer the vehicle,
nor does it stop people from leaving the vehicle.
CAUTION:
When an air bag inflates, there is dust in the air.
This dust could cause breathing problems
for people with a history of asthma or other
breathing trouble. To avoid this, everyone in the
vehicle should get out as soon as it is safe to do so.
If you have breathing problems but can't get out
of the vehicle after an air bag inflates, then get
fresh air by opening a window or door.
Page 59 of 468
1-46
Restraint Systems for Children
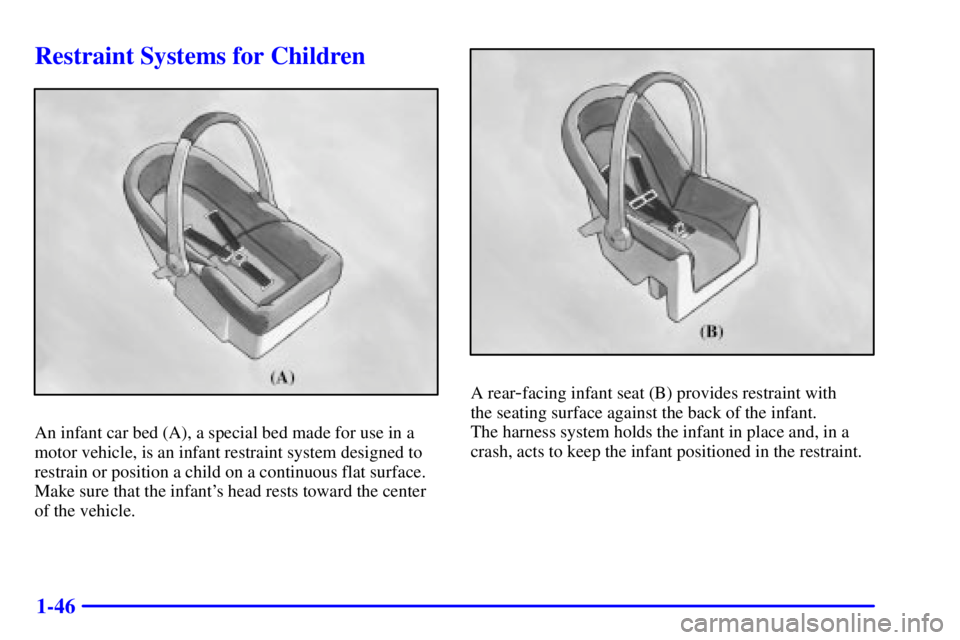
An infant car bed (A), a special bed made for use in a
motor vehicle, is an infant restraint system designed to
restrain or position a child on a continuous flat surface.
Make sure that the infant's head rests toward the center
of the vehicle.
A rear-facing infant seat (B) provides restraint with
the seating surface against the back of the infant.
The harness system holds the infant in place and, in a
crash, acts to keep the infant positioned in the restraint.
Page 81 of 468
1-68
CAUTION:
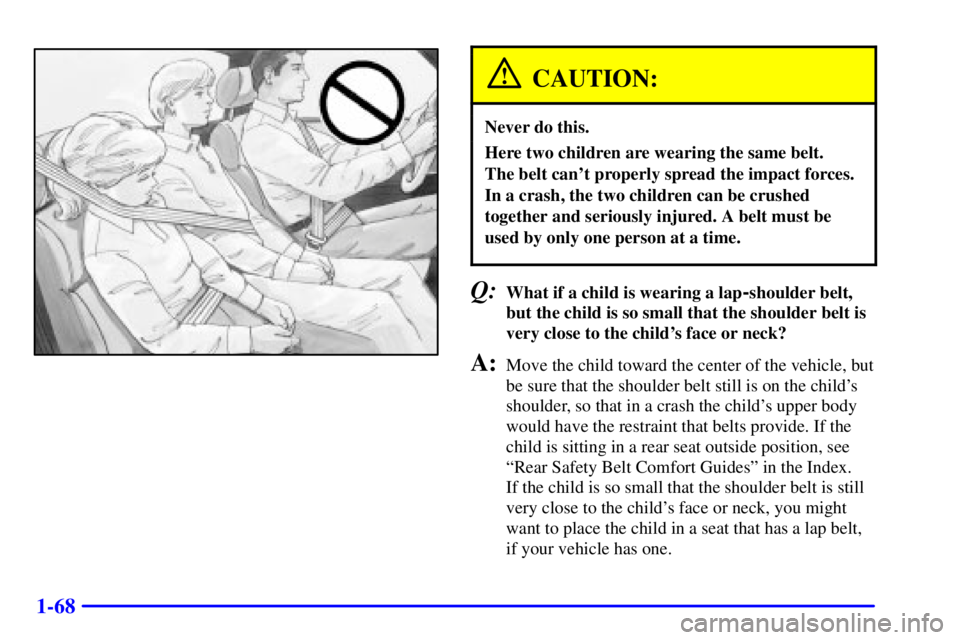
Never do this.
Here two children are wearing the same belt.
The belt can't properly spread the impact forces.
In a crash, the two children can be crushed
together and seriously injured. A belt must be
used by only one person at a time.
Q:What if a child is wearing a lap-shoulder belt,
but the child is so small that the shoulder belt is
very close to the child's face or neck?
A:Move the child toward the center of the vehicle, but
be sure that the shoulder belt still is on the child's
shoulder, so that in a crash the child's upper body
would have the restraint that belts provide. If the
child is sitting in a rear seat outside position, see
ªRear Safety Belt Comfort Guidesº in the Index.
If the child is so small that the shoulder belt is still
very close to the child's face or neck, you might
want to place the child in a seat that has a lap belt,
if your vehicle has one.
Page 87 of 468
2-4
Swing-Out Windows (Extended Cab)
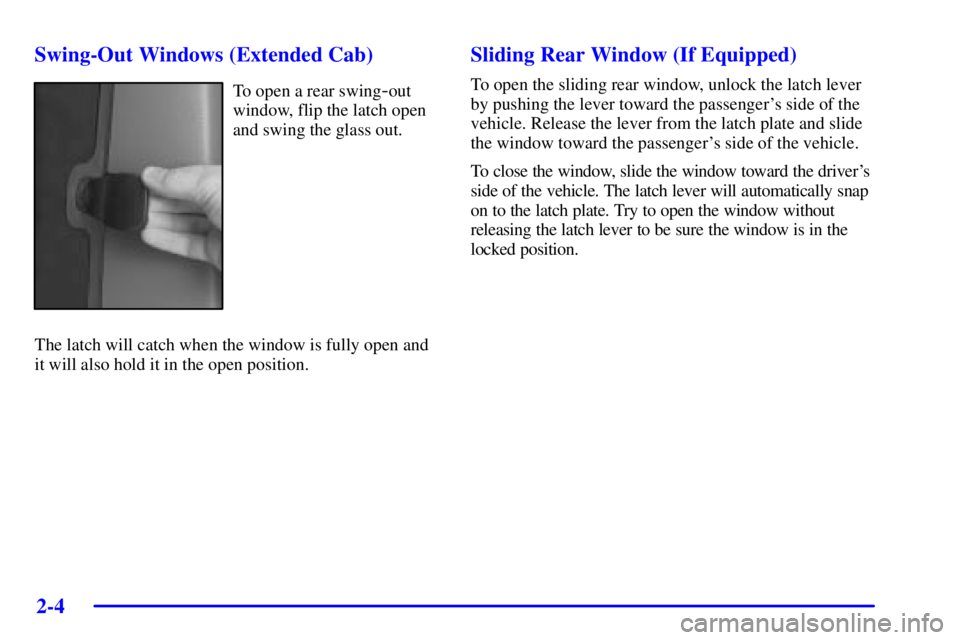
To open a rear swing-out
window, flip the latch open
and swing the glass out.
The latch will catch when the window is fully open and
it will also hold it in the open position.
Sliding Rear Window (If Equipped)
To open the sliding rear window, unlock the latch lever
by pushing the lever toward the passenger's side of the
vehicle. Release the lever from the latch plate and slide
the window toward the passenger's side of the vehicle.
To close the window, slide the window toward the driver's
side of the vehicle. The latch lever will automatically snap
on to the latch plate. Try to open the window without
releasing the latch lever to be sure the window is in the
locked position.