radio controls GMC SIERRA 2003 Owner's Manual
[x] Cancel search | Manufacturer: GMC, Model Year: 2003, Model line: SIERRA, Model: GMC SIERRA 2003Pages: 408, PDF Size: 2.58 MB
Page 119 of 408

4. To add cargo to the
box, remove all bows
and the back rail
and stow them safely.
To clean the tonneau cover, use mild soap and water.
If necessary, use a soft bristle brush to remove dirt
trapped in the grain of the material.Vehicle Personalization
Memory Seat
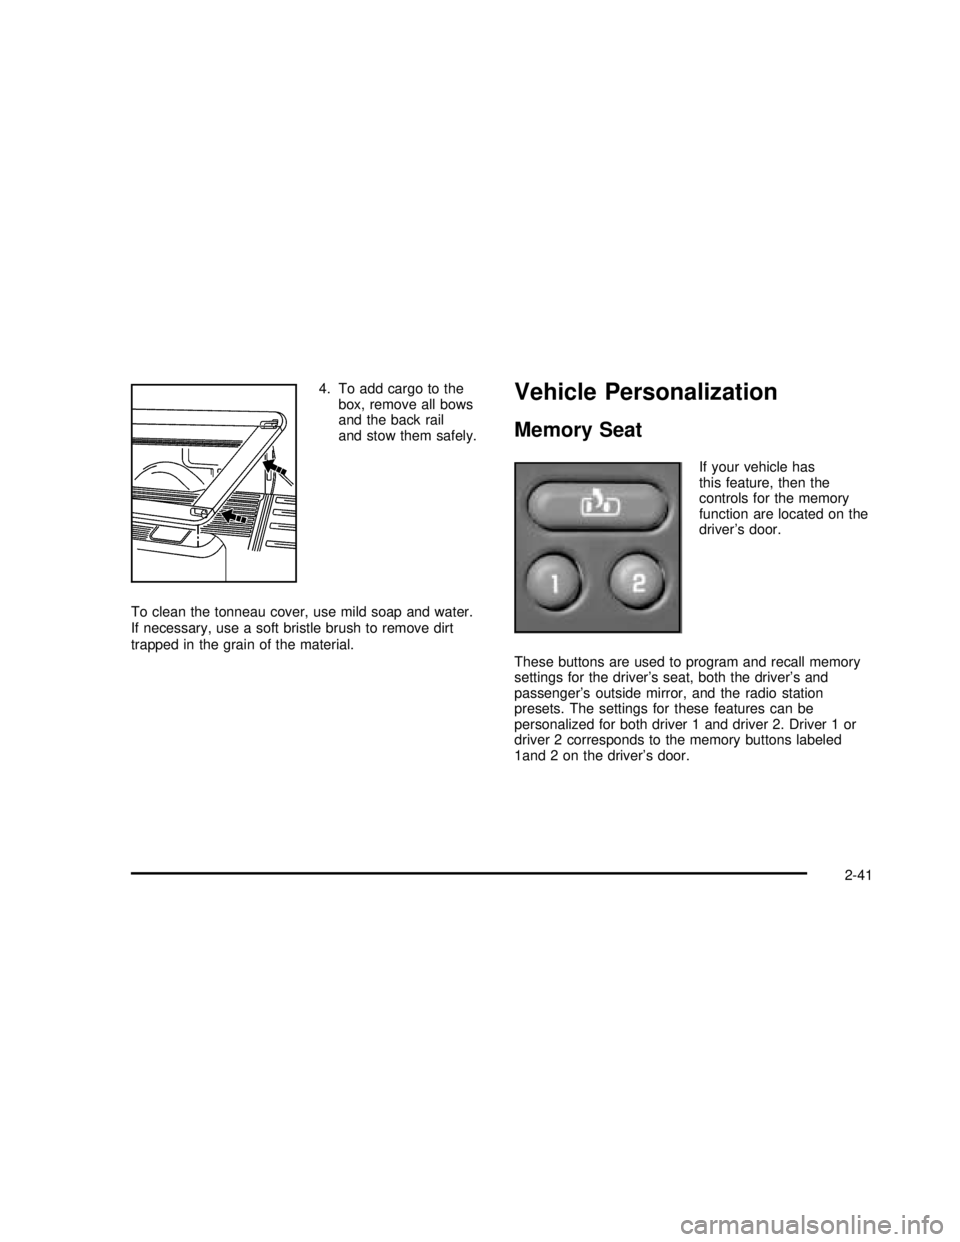
If your vehicle has
this feature, then the
controls for the memory
function are located on the
driver’s door.
These buttons are used to program and recall memory
settings for the driver’s seat, both the driver’s and
passenger’s outside mirror, and the radio station
presets. The settings for these features can be
personalized for both driver 1 and driver 2. Driver 1 or
driver 2 corresponds to the memory buttons labeled
1and 2 on the driver’s door.
2-41
2003 - Sierra Denali
Page 120 of 408

To store your memory seat, mirrors and radio presets,
do the following:
1. Adjust the driver’s seat (including the seatback
recliner, lumbar, and side wing area), both of the
outside mirrors, and the radio station presets to your
preference.
2. Press and hold the 1 or 2 (for driver 1or 2) button
of the memory control for three seconds. A double
chime will sound to let you know that the position
has been stored.
To repeat the procedure for a second driver, follow the
preceding steps, but press the other numbered
memory control button.
Each time button 1 or 2 is pressed and released while
the vehicle is in PARK (P), a single chime will sound and
the memory position will be recalled.
If you use the unlock button on the remote keyless entry
transmitter to enter your vehicle, the preset driver’s
seat, mirror positions and the radio station presets will
be recalled if programmed to do so through the
Driver Information Center (DIC). The numbers on the
back of the transmitters, 1 or 2, correspond to the
numbers on the memory controls.
The seat and mirror positions can also be recalled when
placing the key in the ignition if programmed to do so
through the Driver Information Center (DIC).
To stop recall movement of the memory seat feature at
any time, press one of the memory buttons or power
seat controls.Easy Exit Seat
The controls for this memory function are located on the
driver’s door.
BThis button is used to program and recall the
desired driver’s seat position when exiting/entering the
vehicle. The seat position, can be personalized for
both driver 1 and driver 2.
To store the seat exit position for driver 1 or 2, do the
following:
1. Select the desired driver number by pressing and
releasing the 1 or 2 button. The seat will move to
the stored memory position.
2. Adjust the seat to the desired exit position.
3. Press and hold the exit button of the memory
control for three seconds. A double chime will sound
to let you know that the position has been stored
for the identi�ed driver (1 or 2).
To use the seat exit position, do one of the following:
Press the exit button on the memory control.
Or, if this feature is enabled (active) in the DIC,
then removing the key from the ignition will
cause the seat to move to the exit position.
2-42
2003 - Sierra Denali
Page 121 of 408

Instrument Panel Overview...............................3-2
Hazard Warning Flashers................................3-4
Other Warning Devices...................................3-4
Horn .............................................................3-5
Tilt Wheel.....................................................3-5
Turn Signal/Multifunction Lever.........................3-5
Exterior Lamps.............................................3-11
Interior Lamps..............................................3-15
Accessory Power Outlets...............................3-16
Ashtrays and Cigarette Lighter........................3-17
Climate Controls............................................3-18
Dual Automatic Climate Control System...........3-18
Warning Lights, Gages and Indicators.............3-24
Instrument Panel Cluster................................3-25
Speedometer and Odometer...........................3-26
Tachometer.................................................3-26
Safety Belt Reminder Light.............................3-27
Air Bag Readiness Light................................3-27
Air Bag Off Light..........................................3-28
Passenger Air Bag Status Indicator.................3-31
Battery Warning Light....................................3-33
Voltmeter Gage............................................3-33
Brake System Warning Light..........................3-34
Anti-Lock Brake System Warning Light.............3-35
Engine Coolant Temperature Gage..................3-36Transmission Temperature Gage.....................3-36
Malfunction Indicator Lamp.............................3-37
Oil Pressure Gage........................................3-40
Cruise Control Light......................................3-40
Tow/Haul Mode Light....................................3-41
Fuel Gage...................................................3-41
Low Fuel Warning Light.................................3-41
Driver Information Center (DIC).......................3-42
DIC Operation and Displays...........................3-42
DIC Warnings and Messages.........................3-51
Audio System(s).............................................3-56
Setting the Time...........................................3-57
Radio with Cassette and CD..........................3-57
Navigation/Radio System...............................3-70
Rear Seat Audio (RSA).................................3-71
CD Changer................................................3-73
Theft-Deterrent Feature..................................3-75
Audio Steering Wheel Controls.......................3-76
Understanding Radio Reception......................3-76
Care of Your Cassette Tape Player.................3-77
Care of Your CDs.........................................3-78
Care of Your CD Player................................3-78
Fixed Mast Antenna......................................3-78
XM™ Satellite Radio Antenna System
(United States Only)..................................3-78
Section 3 Instrument Panel
3-1
2003 - Sierra Denali
Page 135 of 408

Interior Lamps
Instrument Panel Brightness Control
P
:This feature controls the brightness of the
instrument panel lights.
The thumbwheel for this feature is located next to the
exterior lamp control.
Turn the thumbwheel up to adjust the instrument panel
lights and return the radio display to full brightness
when the headlamps or parking lamps are on. To turn
on the dome lamps, with the vehicle doors closed,
turn the thumbwheel all the way up.
Exit Lighting
With exit lighting, the interior lamps will come on when
you remove the key from the ignition. The lamps will not
come on if the dome override button is pressed in.
Entry Lighting
Your vehicle is equipped with an illuminated entry
feature.
When a door is opened, the dome lamps and puddle
lamps will come on if the dome override button is in the
out position. If the dome override button is pressed
in, the lamps will not come on.
Front Reading Lamps
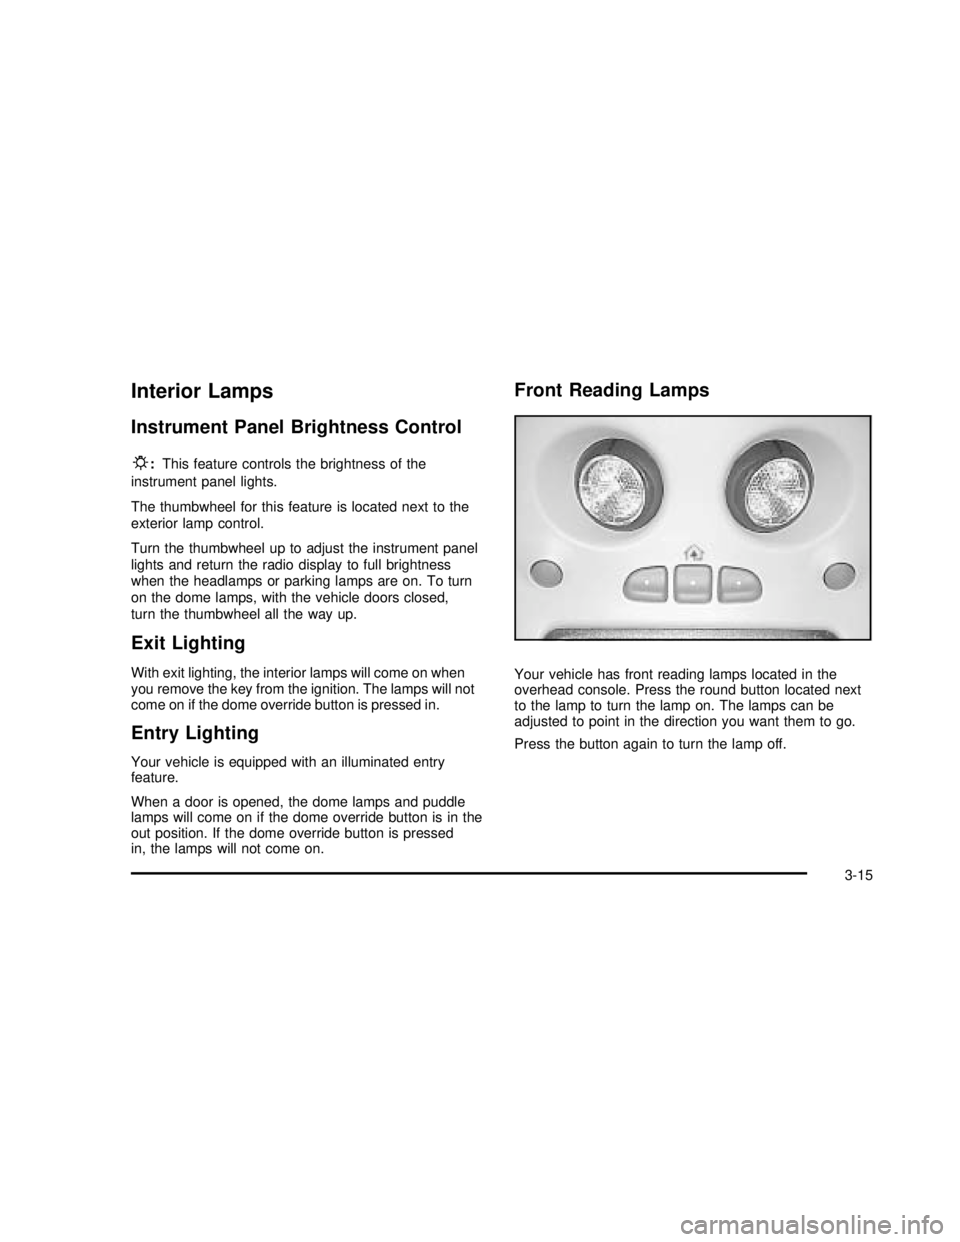
Your vehicle has front reading lamps located in the
overhead console. Press the round button located next
to the lamp to turn the lamp on. The lamps can be
adjusted to point in the direction you want them to go.
Press the button again to turn the lamp off.
3-15
2003 - Sierra Denali
Page 176 of 408

DRIVER DOOR AJAR
If the driver’s door is not fully closed, this message will
appear on the display and you will hear a chime.
Stop and turn off the vehicle, check the door for
obstacles, and close the door again. Check to see if the
message still appears on the DIC. Pressing the select
button will acknowledge this message and clear it
from the DIC display.
PASSENGER DOOR AJAR
If the passenger’s door is not fully closed, this message
will appear on the display and you will hear a chime.
Stop and turn off the vehicle, check the door for
obstacles, and close the door again. Check to see if the
message still appears on the DIC. Pressing the select
button will acknowledge this message and clear it
from the DIC display.
RFA# BATTERY LOW
If a remote keyless entry transmitter battery is low, this
message will appear on the DIC. The battery needs
to be replaced in the transmitter. Pressing the select
button will acknowledge this message and clear it from
the DIC display.
Audio System(s)
Notice:Before you add any sound equipment to
your vehicle–like a tape player, CB radio, mobile
telephone or two-way radio–be sure you can
add what you want. If you can, it’s very important to
do it properly. Added sound equipment may
interfere with the operation of your vehicle’s engine,
radio or other systems, and even damage them.
Your vehicle’s systems may interfere with the
operation of sound equipment that has been added
improperly.
So, before adding sound equipment, check with
your dealer and be sure to check federal rules
covering mobile radio and telephone units.
Your audio system has been designed to operate easily
and to give years of listening pleasure. You will get
the most enjoyment out of it if you acquaint yourself with
itfirst. Figure out which radio you have in your vehicle,
find out what your audio system can do and how to
operate all of its controls to be sure you’re getting the
most out of the advanced engineering that went into it.
Your vehicle may have a feature called Retained
Accessory Power (RAP). With RAP, you can play your
audio system even after the ignition is turned off.
See“Retained Accessory Power (RAP)”underIgnition
Positions on page 2-16.
3-56
2003 - Sierra Denali
Page 180 of 408

Setting the Tone (Bass/Treble)
AUDIO:Press and release the AUDIO knob until BASS
or TREB appears on the display. Turn the knob to
increase or to decrease. The display will show the bass
or treble level. If a station is weak or noisy, you may
want to decrease the treble.
To adjust the bass and treble to the middle position,
push and hold the AUDIO knob. The radio will produce
one beep and adjust the display level to the middle
position.
To adjust all tone and speaker controls to the middle
position, push and hold the AUDIO knob when no tone
or speaker control is displayed. The radio will produce
one beep and display ALL with the level display in
the middle position.
AUTO EQ (Automatic Equalization):Press this button
to enhance the audio performance for different
passengers in the vehicle.
The setting last chosen will appear on the display when
youfirst press AUTO EQ. Each time you press this
button, another setting will appear on the display and
AUTO EQ will switch to one of the preset settings listed.
Your audio system allows you to choose from four
different equalization settings: normal, driver, rear and
spacious. These settings can be used while listening to
the radio, cassette or the CD player.NORMAL:This setting provides the best overall vehicle
sound quality for all seating locations.
DRIVER:This setting gives the driver the best sound
quality.
REAR:This setting gives the rear seat passengers the
best sound quality.
SPACIOUS:This setting makes the listening space
seem larger.
The radio can save separate AUTO EQ settings for
each preset and source.
Adjusting the Speakers (Balance/Fade)
AUDIO:To adjust the balance to the right and the
left speakers, push and release the AUDIO knob until
BAL appears on the display. Turn the knob to move the
sound toward the right or the left speakers.
To adjust the fade to the front and the rear speakers,
push and release the AUDIO knob until FADE appears
on the display. Turn the knob to move the sound
toward the front or the rear speakers.
To adjust the balance and fade to the middle position,
push the AUDIO knob then push it again and hold it until
the radio produces one beep. The balance and fade
will be adjusted to the middle position and the display
will show the speaker balance.
3-60
2003 - Sierra Denali
Page 181 of 408

To adjust all tone and speaker controls to the middle
position, push and hold the AUDIO knob when no tone
or speaker control is displayed. The radio will produce
one beep and display ALL with the level display in
the middle position.
Finding a PTY Station (RDS and XM™)
To select andfind a desired PTY perform the following:
1. Turn the P-TYPE LIST knob. TYPE and a PTY
will appear on the display.
2. Select a category by turning the P-TYPE
LIST knob.
3. Once the desired category is displayed, press the
SEEK TYPE button or one of the SEEK arrows to
take you to the category’sfirst station.
4. If you want to go to another station within that
category and the category is displayed, press
the SEEK TYPE button once. If the category is not
displayed, press the SEEK TYPE button twice
to display the category and then to go to another
station.
If the radio cannotfind the desired program type, NONE
will appear on the display and the radio will return to
the last station you were listening to.SCAN:You can also scan through the channels within
a category by performing the following:
1. Turn the P-TYPE LIST knob. TYPE and a PTY will
appear on the display.
2. Select a category by turning the P-TYPE
LIST knob.
3. Once the desired category is displayed, press either
SCAN arrow, and the radio will begin scanning
within your chosen category.
4. Press wither SCAN arrow again to stop scanning.
BAND (Alternate Frequency):Alternate frequency
allows the radio to switch to a stronger station with the
same program type. Press and hold BAND for two
seconds to turn alternate frequency on. AF ON
will appear on the display. The radio may switch to
stronger stations. Press and hold BAND again for two
seconds to turn alternate frequency off. AF OFF
will appear on the display. The radio will not switch to
other stations.
This function does not apply for XM™.
3-61
2003 - Sierra Denali
Page 185 of 408

XM™Radio Messages (cont’d)
Radio Display
MessageCondition Action Required
XM Locked Theft lock active The XM receiver in your vehicle may have previously been
in another vehicle. For security purposes, XM receivers
cannot be swapped between vehicles. If you receive this
message after having your vehicle serviced, check with the
servicing facility.
Radio ID Radio ID label
(channel 0)If you tune to channel 0, you will see this message
alternating with your XM Radio 8 digit radio ID label. This
label is needed to activate your service.
Unknown Radio ID not known
(should only be if
hardware failure)If you receive this message when you tune to channel 0,
you may have a receiver fault. Consult with your dealer.
Chk XMRcvr Hardware failure If this message does not clear within a short period of time,
your receiver may have a fault. Consult with your retail
location.
Playing a Cassette Tape
Your tape player is built to work best with tapes that are
up to 30 to 45 minutes long on each side. Tapes
longer than that are so thin they may not work well in
this player. The longer side with the tape visible should
face to the right. If the ignition is on, but the radio is
off, the tape can be inserted and will begin playing. A
tape symbol is shown on the display whenever a tape isinserted. If you hear nothing but a garbled sound, the
tape may not be in squarely. Press the eject symbol to
remove the tape and start over.
While the tape is playing, use the VOL, AUDIO and
SEEK controls just as you do for the radio. The display
will show TAPE and an arrow showing which side of
the tape is playing.
3-65
2003 - Sierra Denali
Page 190 of 408

Compact Disc Messages
If the disc comes out, it could be for one of the following
reasons:
•You’re driving on a very rough road. When the road
becomes smoother the disc should play.
•It’s very hot. When the temperature returns to
normal, the disc should play.
•The disc is dirty, scratched, wet or upside down.
•The air is very humid. If so, wait about an hour and
try again.
•There may have been a problem while burning
the CD.
•The label may be caught in the CD player.
If the CD is not playing correctly, for any other reason,
try a known good CD.
If any error occurs repeatedly or if an error can’tbe
corrected, contact your dealer.
Navigation/Radio System
The display screen is located in the center of the
instrument panel. There are“hard”buttons and a touch
sensitive screen.
Your vehicle may be equipped with an AM-FM radio
navigation radio system that includes digital sound
processing (DSP), Radio Data System (RDS) with
program“type”selections (PTY) that will seek out the
kind of music you want to listen to and XM™Satellite
Radio Service capabilities (United States only).Navigation/Radio Display and Controls
3-70
2003 - Sierra Denali
Page 191 of 408

The radio system can also communicate with your
navigation system to broadcast announcements
on traffic, weather and emergency alert communications.
For information on how to use this system, see the
“Navigation/Radio System Supplement”.
Rear Seat Audio (RSA)
This feature allows rear seat passengers to listen to any
of the audio sources: radio, cassette tapes, CDs,
DVDs, XM™(USA only, if equipped) depending on your
vehicles options. However, the rear seat passengers
can only control the music sources that the front
seat passengers are not listening to. For example, rear
seat passengers may listen to a cassette tape through
headphones while the driver listens to the radio through
the front speakers. The rear seat passengers have
control of the volume for each set of headphones.
The front seat audio controls always override the RSA
controls.
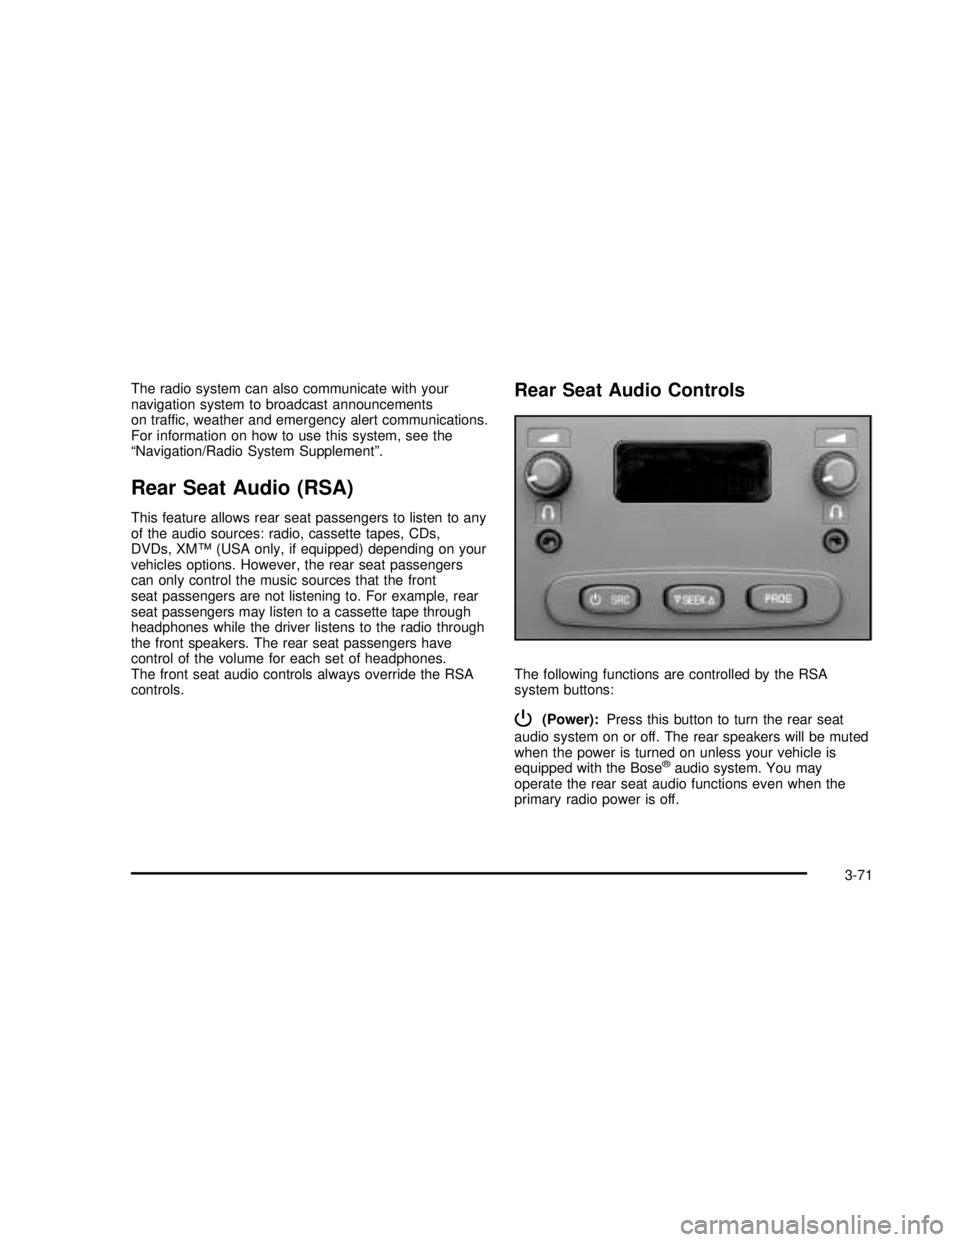
Rear Seat Audio Controls
The following functions are controlled by the RSA
system buttons:
P(Power):Press this button to turn the rear seat
audio system on or off. The rear speakers will be muted
when the power is turned on unless your vehicle is
equipped with the Bose
®audio system. You may
operate the rear seat audio functions even when the
primary radio power is off.
3-71
2003 - Sierra Denali