buttons GMC SIERRA 2004 Get To Know Guide
[x] Cancel search | Manufacturer: GMC, Model Year: 2004, Model line: SIERRA, Model: GMC SIERRA 2004Pages: 16, PDF Size: 0.4 MB
Page 2 of 16

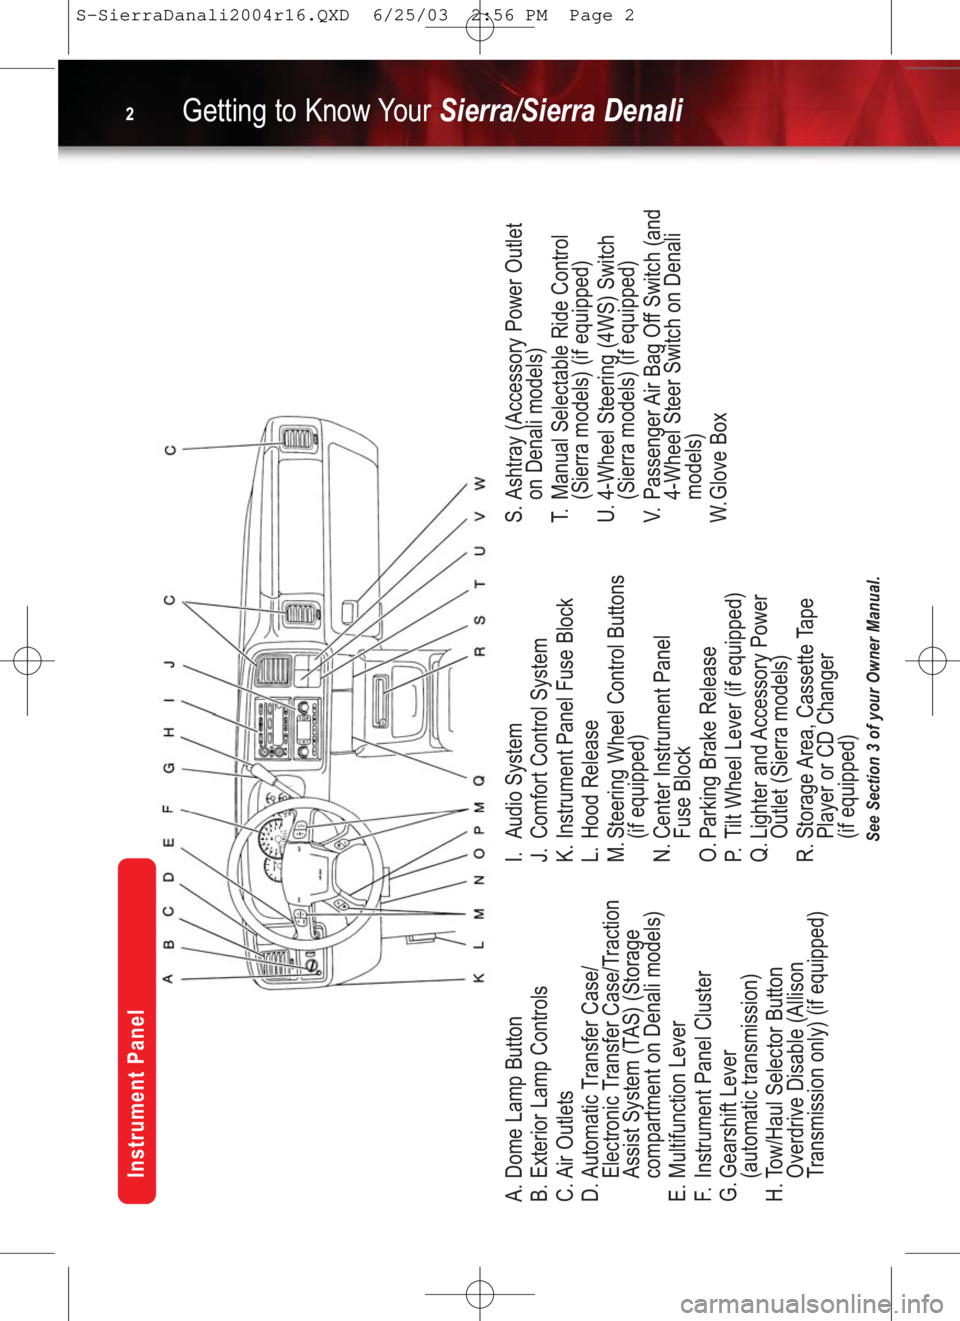
See Section 3 of your Owner Manual.
A. Dome Lamp Button
B. Exterior Lamp Controls
C. Air Outlets
D. Automatic Transfer Case/
Electronic Transfer Case/Traction
Assist System (TAS) (Storage
compartment on Denali models)
E. Multifunction Lever
F.Instrument Panel Cluster
G. Gearshift Lever
(automatic transmission)
H. Tow/Haul Selector Button
Overdrive Disable (Allison
Transmission only) (if equipped)I. Audio System
J. Comfort Control System
K. Instrument Panel Fuse Block
L. Hood Release
M. Steering Wheel Control Buttons
(if equipped)
N. Center Instrument Panel
Fuse Block
O. Parking Brake Release
P.Tilt Wheel Lever (if equipped)
Q. Lighter and Accessory Power
Outlet (Sierra models)
R. Storage Area, Cassette Tape
Player or CD Changer
(if equipped)S. Ashtray (Accessory Power Outlet
on Denali models)
T.Manual Selectable Ride Control
(Sierra models) (if equipped)
U. 4-Wheel Steering (4WS) Switch
(Sierra models) (if equipped)
V.Passenger Air Bag Off Switch (and
4-Wheel Steer Switch on Denali
models)
W.Glove Box
Getting to Know YourSierra/Sierra Denali2
Instrument Panel
S-SierraDanali2004r16.QXD 6/25/03 2:56 PM Page 2
Page 7 of 16

7
Set the time on radios witha Radio
Data System (RDS)
Your radio may have a button marked
“H” or “HR” to represent hours and an
“M” or “MIN” to represent minutes.
•Press and hold the hour button until
the correct hour appears on the
display.
•Press and hold the minute button
until the correct minute appears on
the display.
Program radio station presets
•Turn the radio on.
•Press BAND to select the band
(AM, FM1/FM2/XM1/XM2).
•Use the seek or tune knob to tune in
the desired station.
•Press AUTO EQ or AUTO TONE
(as applicable to your radio) to select
the equalization that best suits the
type of station selected.
•Press and hold one of the six num-
bered buttons until a beep sounds;
release the button.
•Repeat these steps for each station
preset, using a different numbered
button for each station.
Access one of the two available XM
Satellite Radio bands (if equipped)
•Press the BAND button until XM1 or
XM2 appears on the display. Note:
Requires subscription to XM Radio.Six-Disc CD Changer (if equipped)
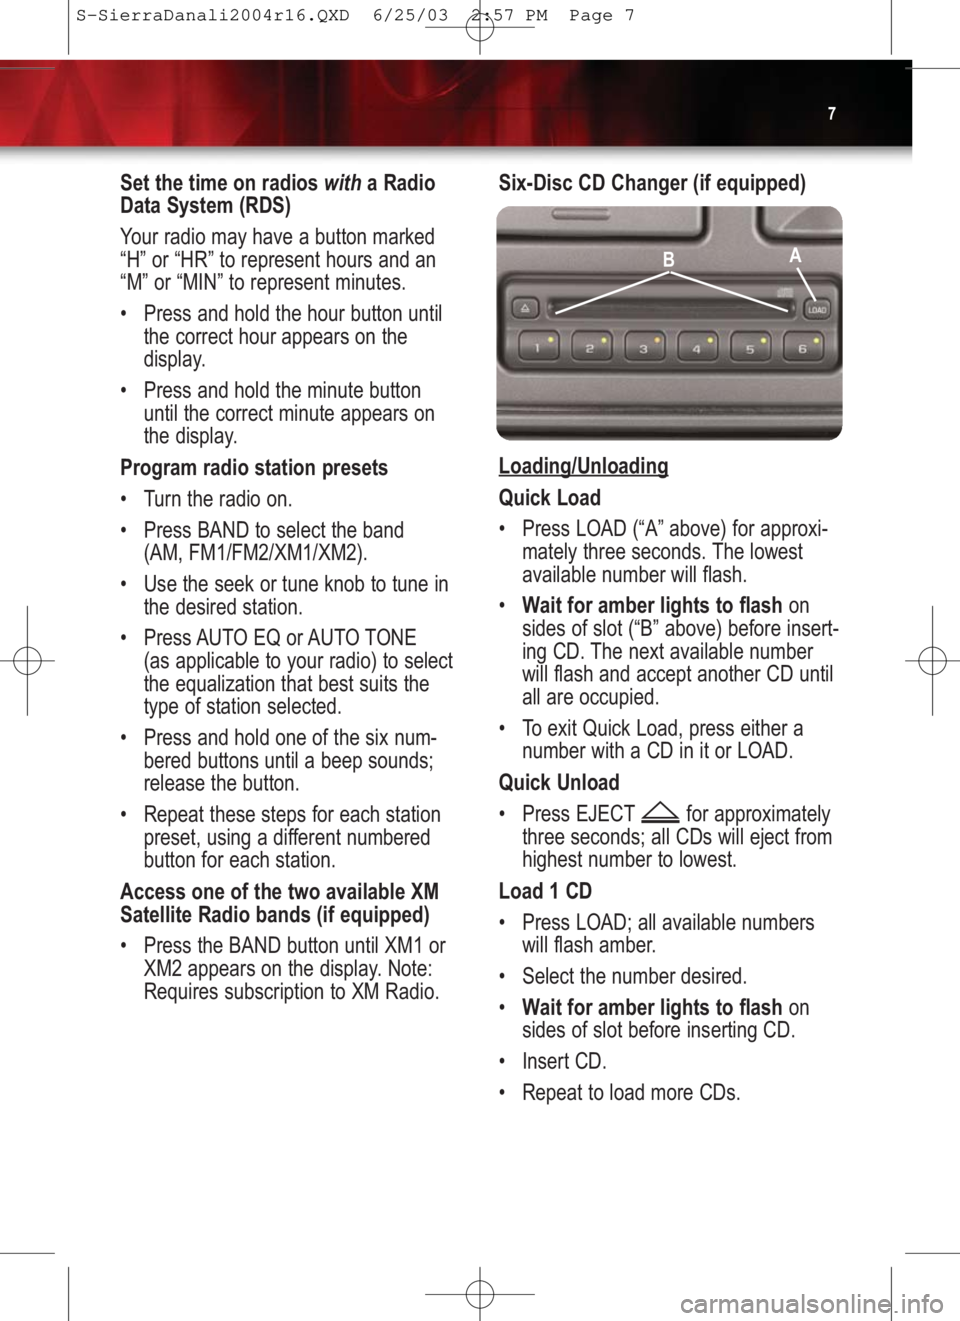
Loading/Unloading
Quick Load
•Press LOAD (“A” above) for approxi-
mately three seconds. The lowest
available number will flash.
•Wait for amber lights to flashon
sides of slot (“B” above) before insert-
ing CD. The next available number
will flash and accept another CD until
all are occupied.
•To exit Quick Load, press either a
number with a CD in it or LOAD.
Quick Unload
•Press EJECT for approximately
three seconds; all CDs will eject from
highest number to lowest.
Load 1 CD
•Press LOAD; all available numbers
will flash amber.
•Select the number desired.
•Wait for amber lights to flashon
sides of slot before inserting CD.
•Insert CD.
•Repeat to load more CDs.
AB
S-SierraDanali2004r16.QXD 6/25/03 2:57 PM Page 7
Page 8 of 16

Getting to Know YourSierra/Sierra Denali8
HomeLink®Transmitter
(if equipped)
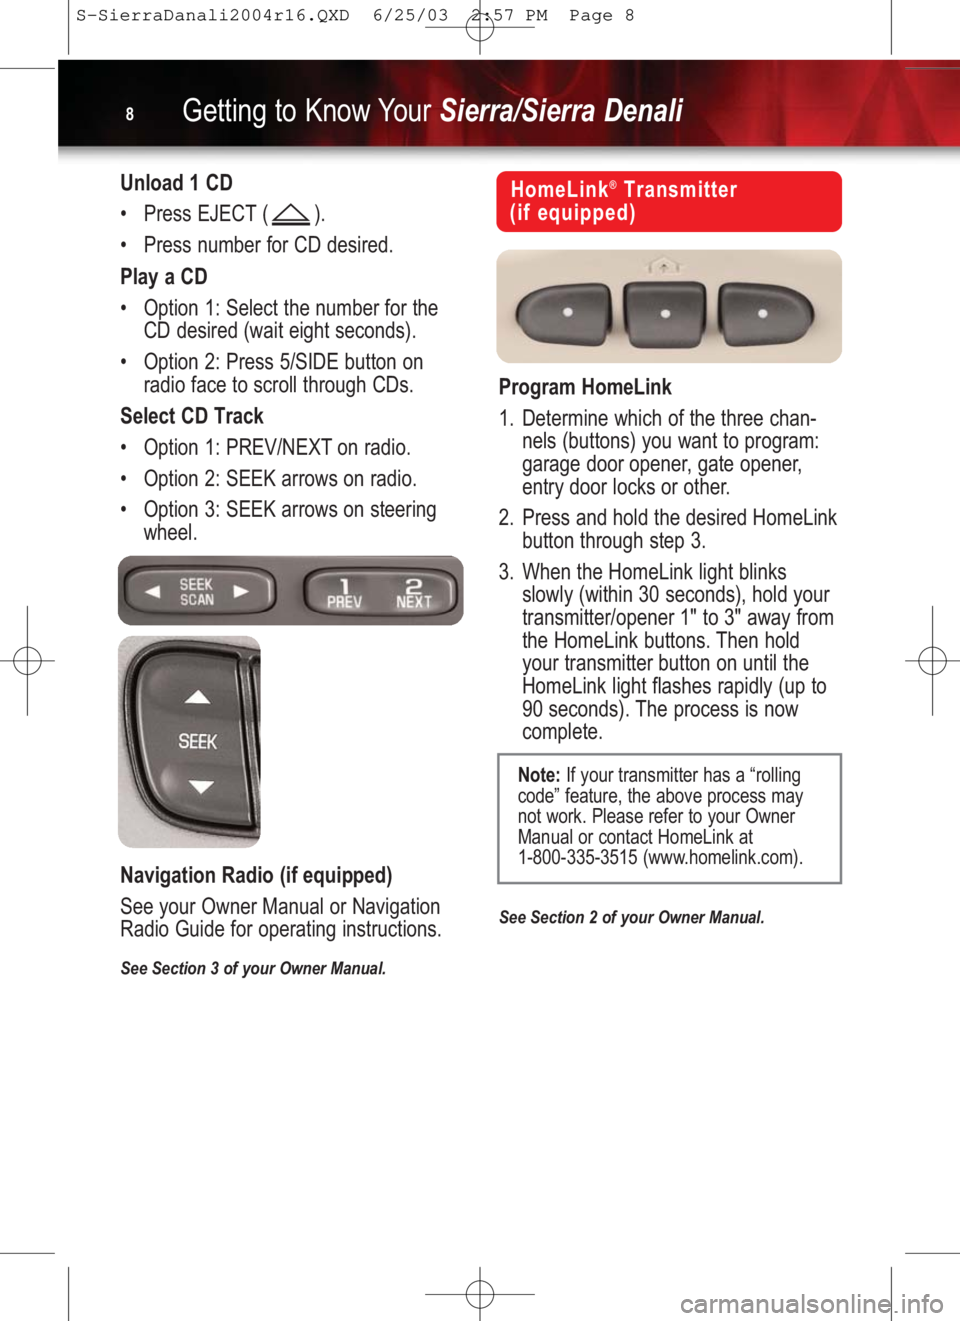
Program HomeLink
1. Determine which of the three chan-
nels (buttons) you want to program:
garage door opener, gate opener,
entry door locks or other.
2. Press and hold the desired HomeLink
button through step 3.
3. When the HomeLink light blinks
slowly (within 30 seconds), hold your
transmitter/opener 1" to 3" away from
the HomeLink buttons. Then hold
your transmitter button on until the
HomeLink light flashes rapidly (up to
90 seconds). The process is now
complete.
See Section 2 of your Owner Manual.
Note:If your transmitter has a “rolling
code” feature, the above process may
not work. Please refer to your Owner
Manual or contact HomeLink at
1-800-335-3515 (www.homelink.com).
Unload 1 CD
•Press EJECT ( ).
•Press number for CD desired.
Play a CD
•Option 1: Select the number for the
CD desired (wait eight seconds).
•Option 2: Press 5/SIDE button on
radio face to scroll through CDs.
Select CD Track
•Option 1: PREV/NEXT on radio.
•Option 2: SEEK arrows on radio.
•Option 3: SEEK arrows on steering
wheel.
Navigation Radio (if equipped)
See your Owner Manual or Navigation
Radio Guide for operating instructions.
See Section 3 of your Owner Manual.
S-SierraDanali2004r16.QXD 6/25/03 2:57 PM Page 8