display GMC SIERRA 2004 Owners Manual
[x] Cancel search | Manufacturer: GMC, Model Year: 2004, Model line: SIERRA, Model: GMC SIERRA 2004Pages: 588, PDF Size: 3.74 MB
Page 292 of 588
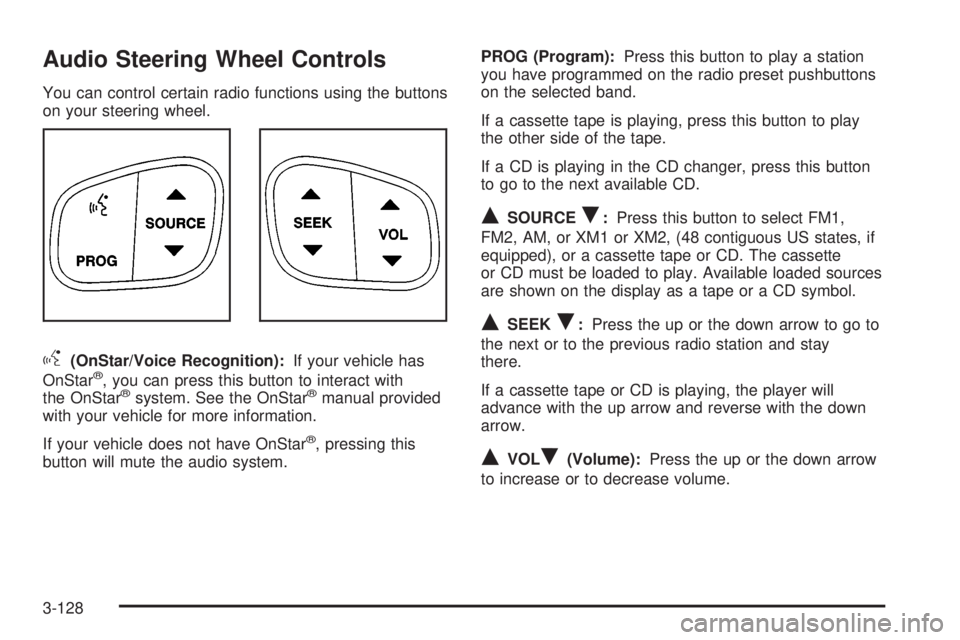
Audio Steering Wheel Controls
You can control certain radio functions using the buttons
on your steering wheel.
g(OnStar/Voice Recognition):If your vehicle has
OnStarž, you can press this button to interact with
the OnStaržsystem. See the OnStaržmanual provided
with your vehicle for more information.
If your vehicle does not have OnStar
ž, pressing this
button will mute the audio system.PROG (Program):Press this button to play a station
you have programmed on the radio preset pushbuttons
on the selected band.
If a cassette tape is playing, press this button to play
the other side of the tape.
If a CD is playing in the CD changer, press this button
to go to the next available CD.
QSOURCER:Press this button to select FM1,
FM2, AM, or XM1 or XM2, (48 contiguous US states, if
equipped), or a cassette tape or CD. The cassette
or CD must be loaded to play. Available loaded sources
are shown on the display as a tape or a CD symbol.
QSEEKR:Press the up or the down arrow to go to
the next or to the previous radio station and stay
there.
If a cassette tape or CD is playing, the player will
advance with the up arrow and reverse with the down
arrow.
QVOLR(Volume):Press the up or the down arrow
to increase or to decrease volume.
3-128
Page 293 of 588
DVD Distortion
You may experience audio distortion in the
IR headphones when operating cellular phones,
scanners, CB radios, Global Positioning Systems
(GPS)*, two-way radios, mobile fax, or walkie talkies.
It may be necessary to turn off the DVD player
when operating one of these devices in or near the
vehicle.
* Excludes the OnStar
žSystem.
Radio Reception
AM
The range for most AM stations is greater than for FM,
especially at night. The longer range, however, can
cause stations to interfere with each other. AM can pick
up noise from things like storms and power lines. Try
reducing the treble to reduce this noise.
FM Stereo
FM stereo will give you the best sound, but FM signals
will reach only about 10 to 40 miles (16 to 65 km).
Tall buildings or hills can interfere with FM signals,
causing the sound to come and go.
XMŸ Satellite Radio Service
(48 Contiguous US States)
XMŸ Satellite Radio gives you digital radio reception
from coast to coast. Just as with FM, tall buildings
or hills can interfere with satellite radio signals, causing
the sound to come and go. Your radio may display
NO SIGNAL to indicate interference.
Care of Your Cassette Tape Player
A tape player that is not cleaned regularly can cause
reduced sound quality, ruined cassettes, or a damaged
mechanism. Cassette tapes should be stored in their
cases away from contaminants, direct sunlight, and
extreme heat. If they are not, they may not operate
properly or may cause failure of the tape player.
Your tape player should be cleaned regularly after every
50 hours of use. Your radio may display CLEAN to
indicate that you have used your tape player for
50 hours without resetting the tape clean timer. If this
message appears on the display, your cassette
tape player needs to be cleaned. It will still play tapes,
but you should clean it as soon as possible to
prevent damage to your tapes and player. If you notice
a reduction in sound quality, try a known good
cassette to see if the tape or the tape player is at fault.
If this other cassette has no improvement in sound
quality, clean the tape player.
3-129
Page 294 of 588
For best results, use a scrubbing action, non-abrasive
cleaning cassette with pads which scrub the tape
head as the hubs of the cleaner cassette turn. The
recommended cleaning cassette is available through
your dealer.
When cleaning the cassette tape player with the
recommended non-abrasive cleaning cassette, it is
possible that the cassette may eject, because the cut
tape detection feature on your radio may recognize it as
a broken tape, in error. To prevent the cleaning
cassette from being ejected, use the following steps:
1. Turn the ignition on.
2. Turn the radio off.
3. Press and hold the TAPE DISC button for ®ve
seconds. READY will appear on the display and
the cassette symbol will ¯ash for ®ve seconds.
4. Insert the scrubbing action cleaning cassette.
5. Eject the cleaning cassette after the manufacturer's
recommended cleaning time.
When the cleaning cassette has been ejected, the cut
tape detection feature is active again.
You may also choose a non-scrubbing action, wet-type
cleaner which uses a cassette with a fabric belt to
clean the tape head. This type of cleaning cassette will
not eject on its own. A non-scrubbing action cleanermay not clean as thoroughly as the scrubbing type
cleaner. The use of a non-scrubbing action, dry-type
cleaning cassette is not recommended.
After you clean the player, press and hold the eject
button for ®ve seconds to reset the CLEAN indicator.
The radio will display --- or CLEANED to show the
indicator was reset.
Cassettes are subject to wear and the sound quality
may degrade over time. Always make sure the cassette
tape is in good condition before you have your tape
player serviced.
Care of Your CDs and DVDs
Handle discs carefully. Store them in their original cases
or other protective cases and away from direct sunlight
and dust. If the surface of a disc is soiled, dampen
a clean, soft cloth in a mild, neutral detergent solution
and clean it, wiping from the center to the edge.
Be sure never to touch the side without writing when
handling discs. Pick up discs by grasping the outer
edges or the edge of the hole and the outer edge.
3-130
Page 295 of 588
Care of Your CD and DVD Player
The use of CD lens cleaner discs is not advised, due to
the risk of contaminating the lens of the CD optics
with lubricants internal to the CD mechanism.
Cleaning the Video Screen
Pour some isopropyl or rubbing alcohol on a clean cloth
and gently wipe the video screen. Do not spray
directly onto the screen and do not press too hard or
too long on the video screen.
Fixed Mast Antenna
The ®xed mast antenna can withstand most car washes
without being damaged. If the mast should ever
become slightly bent, you can straighten it out by hand.
If the mast is badly bent, as it might be by vandals,
you should replace it.
Check occasionally to be sure the mast is still tightened
to the cowl. If tightening is required, tighten by hand,
then with a wrench one quarter turn.
XMŸ Satellite Radio Antenna
System (48 Contiguous US States)
Your XMŸ Satellite Radio antenna is located on the roof
of your vehicle. Keep this antenna clear of snow and
ice build up for clear radio reception.
Chime Level Adjustment
The radio is the vehicle chime producer. To change the
volume level, press and hold pushbutton 6 with the
ignition on and the radio power off. The chime volume
level will change from the normal level to loud, and LOUD
will appear on the display. To change back to the default
or normal setting, press and hold pushbutton 6 again.
The chime level will change from the loud level to normal,
and NORMAL will appear on the display. Each time the
chime volume is changed, three chimes will sound as an
example of the new volume selected. Removing the radio
and not replacing it with a factory radio or chime module
will disable vehicle chimes.
3-131
Page 422 of 588
How to Reset the CHANGE ENGINE OIL
Message
The GM Oil Life System calculates when to change
your engine oil and ®lter based on vehicle use. Anytime
your oil is changed, reset the system so it can
calculate when the next oil change is required. If a
situation occurs where you change your oil prior to a
CHANGE ENGINE OIL message being turned on, reset
the system.
To reset the CHANGE ENGINE OIL message, see ªGM
Oil Life Systemº under
DIC Operation and Displays
on page 3-55for vehicles equipped with the DIC, or do
the following:
1. Turn the ignition key to RUN with the engine off.
2. Fully press and release the accelerator pedal three
times within ®ve seconds.
If the OIL LIFE RESET message ¯ashes for 10
seconds, the system is resetting.
3. Turn the key to LOCK.
If the CHANGE ENGINE OIL message comes back on
when you start your vehicle, the engine oil life system
has not reset. Repeat the procedure. If it still does
not reset, see your dealer for service.
What to Do with Used Oil
Used engine oil contains certain elements that may be
unhealthy for your skin and could even cause cancer.
Do not let used oil stay on your skin for very long. Clean
your skin and nails with soap and water, or a good
hand cleaner. Wash or properly dispose of clothing or
rags containing used engine oil. See the manufacturer's
warnings about the use and disposal of oil products.
Used oil can be a threat to the environment. If you
change your own oil, be sure to drain all the oil from the
®lter before disposal. Never dispose of oil by putting it in
the trash, pouring it on the ground, into sewers, or into
streams or bodies of water. Instead, recycle it by taking it
to a place that collects used oil. If you have a problem
properly disposing of your used oil, ask your dealer, a
service station or a local recycling center for help.
5-22
Page 436 of 588
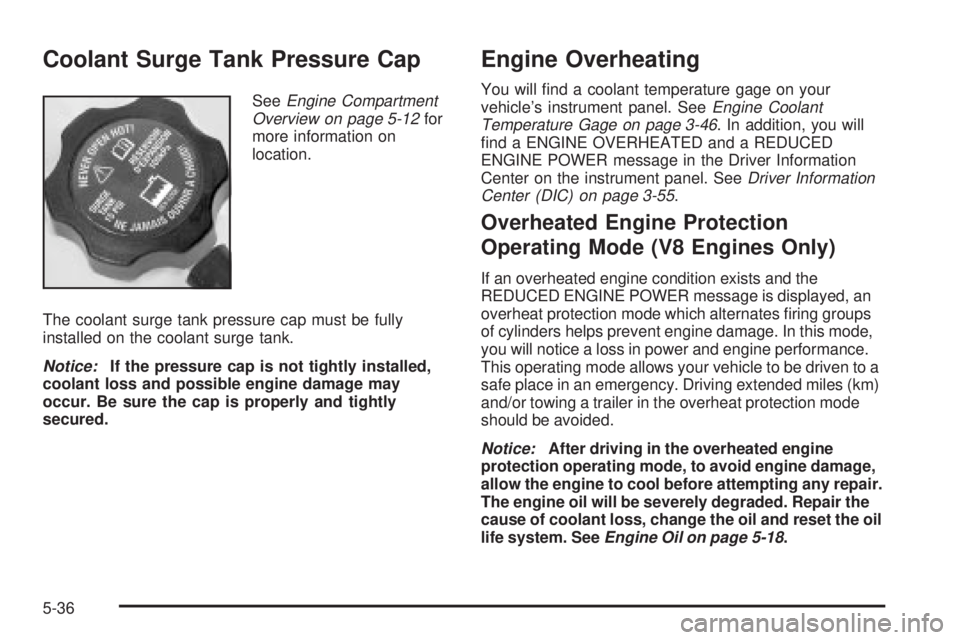
Coolant Surge Tank Pressure Cap
SeeEngine Compartment
Overview on page 5-12for
more information on
location.
The coolant surge tank pressure cap must be fully
installed on the coolant surge tank.
Notice:If the pressure cap is not tightly installed,
coolant loss and possible engine damage may
occur. Be sure the cap is properly and tightly
secured.
Engine Overheating
You will ®nd a coolant temperature gage on your
vehicle's instrument panel. SeeEngine Coolant
Temperature Gage on page 3-46. In addition, you will
®nd a ENGINE OVERHEATED and a REDUCED
ENGINE POWER message in the Driver Information
Center on the instrument panel. See
Driver Information
Center (DIC) on page 3-55.
Overheated Engine Protection
Operating Mode (V8 Engines Only)
If an overheated engine condition exists and the
REDUCED ENGINE POWER message is displayed, an
overheat protection mode which alternates ®ring groups
of cylinders helps prevent engine damage. In this mode,
you will notice a loss in power and engine performance.
This operating mode allows your vehicle to be driven to a
safe place in an emergency. Driving extended miles (km)
and/or towing a trailer in the overheat protection mode
should be avoided.
Notice:After driving in the overheated engine
protection operating mode, to avoid engine damage,
allow the engine to cool before attempting any repair.
The engine oil will be severely degraded. Repair the
cause of coolant loss, change the oil and reset the oil
life system. See
Engine Oil on page 5-18.
5-36
Page 446 of 588
How to Check Power Steering Fluid
Turn the key off, let the engine compartment cool down,
wipe the cap and the top of the reservoir clean, then
unscrew the cap and wipe the dipstick with a clean rag.
Replace the cap and completely tighten it. Then
remove the cap again and look at the ¯uid level on the
dipstick.
The level should be at the FULL COLD mark. If
necessary, add only enough ¯uid to bring the level up to
the mark.
What to Use
To determine what kind of ¯uid to use, seeRecommended Fluids and Lubricants on page 6-14.
Always use the proper ¯uid. Failure to use the proper
¯uid can cause leaks and damage hoses and seals.
Windshield Washer Fluid
What to Use
When you need windshield washer ¯uid, be sure to read
the manufacturer's instructions before use. If you will
be operating your vehicle in an area where the
temperature may fall below freezing, use a ¯uid that has
sufficient protection against freezing. See
Engine
Compartment Overview on page 5-12for reservoir
location.
Adding Washer Fluid
Your vehicle has a low washer ¯uid message that
comes on when the washer ¯uid is low. The message is
displayed for 15 seconds at the start of each ignition
cycle. When the CHECK WASHER FLUID message is
displayed, you will need to add washer ¯uid to the
windshield washer ¯uid reservoir.
5-46
Page 550 of 588
Recommended Fluids and
Lubricants
Fluids and lubricants identi®ed below by name, part
number or speci®cation may be obtained from your
dealer.
Usage Fluid/Lubricant
Engine OilEngine oil which meets GM
Standard GM6094M and displays
the American Petroleum Institute
Certi®ed for Gasoline Engines
starburst symbol. To determine the
proper viscosity for your vehicle's
engine, see
Engine Oil on
page 5-18.
Engine Coolant50/50 mixture of clean, drinkable
water and use only
DEX-COOL
žCoolant. SeeEngine
Coolant on page 5-33.
Hydraulic Brake
SystemDelco Supreme 11 Brake Fluid or
equivalent DOT-3 brake ¯uid.
Usage Fluid/Lubricant
Windshield
Washer SolventGM Optikleen
žWasher Solvent.
Hydraulic
Clutch System
(5±Speed
Trans.)Hydraulic Clutch Fluid
(GM Part No. U.S. 12345347, in
Canada 10953517) or equivalent
DOT-3 brake ¯uid.
Hydraulic
Clutch System
(6±Speed
Trans.)Hydraulic Clutch Fluid. Use only
GM Part No. U.S. 88958860, in
Canada 88901244, Super DOT-4
brake ¯uid.
Power Steering
SystemGM Power Steering Fluid
(GM Part No. U.S. 89021184, in
Canada 89021186).
Manual
Transmission
(5±Speed with
Low Gear,
RPO MW3)GM Goodwrench Synthetic Manual
Transmission Fluid (GM Part No.
U.S. 12346190, in Canada
10953477) or equivalent SAE
75W-85 GL-4 gear oil.
6-14
Page 575 of 588
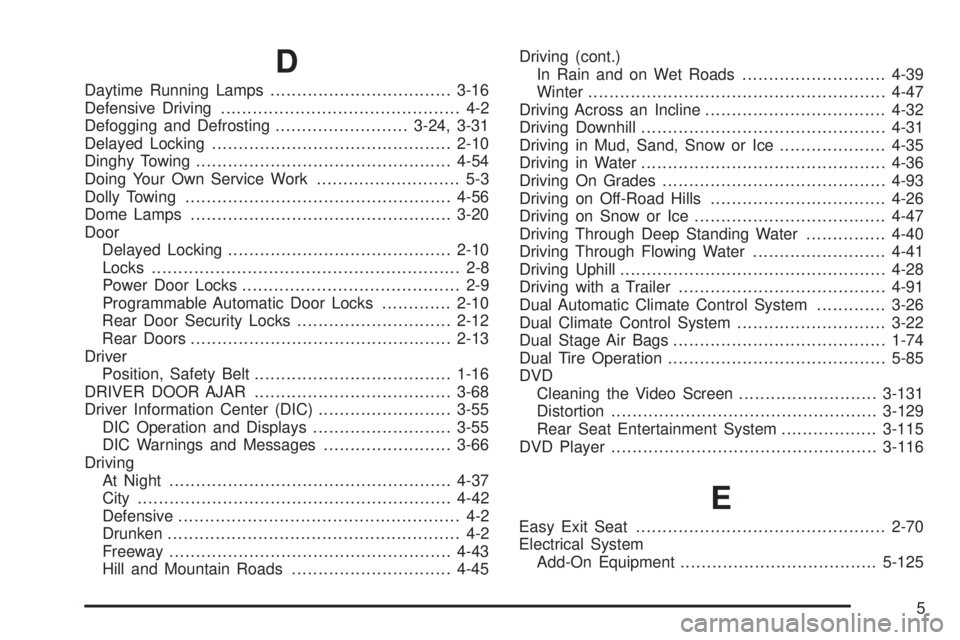
D
Daytime Running Lamps..................................3-16
Defensive Driving............................................. 4-2
Defogging and Defrosting.........................3-24, 3-31
Delayed Locking.............................................2-10
Dinghy Towing................................................4-54
Doing Your Own Service Work........................... 5-3
Dolly Towing..................................................4-56
Dome Lamps.................................................3-20
Door
Delayed Locking..........................................2-10
Locks.......................................................... 2-8
Power Door Locks......................................... 2-9
Programmable Automatic Door Locks.............2-10
Rear Door Security Locks.............................2-12
Rear Doors.................................................2-13
Driver
Position, Safety Belt.....................................1-16
DRIVER DOOR AJAR.....................................3-68
Driver Information Center (DIC).........................3-55
DIC Operation and Displays..........................3-55
DIC Warnings and Messages........................3-66
Driving
At Night.....................................................4-37
City...........................................................4-42
Defensive..................................................... 4-2
Drunken....................................................... 4-2
Freeway.....................................................4-43
Hill and Mountain Roads..............................4-45Driving (cont.)
In Rain and on Wet Roads...........................4-39
Winter........................................................4-47
Driving Across an Incline..................................4-32
Driving Downhill..............................................4-31
Driving in Mud, Sand, Snow or Ice....................4-35
Driving in Water..............................................4-36
Driving On Grades..........................................4-93
Driving on Off-Road Hills.................................4-26
Driving on Snow or Ice....................................4-47
Driving Through Deep Standing Water...............4-40
Driving Through Flowing Water.........................4-41
Driving Uphill..................................................4-28
Driving with a Trailer.......................................4-91
Dual Automatic Climate Control System.............3-26
Dual Climate Control System............................3-22
Dual Stage Air Bags........................................1-74
Dual Tire Operation.........................................5-85
DVD
Cleaning the Video Screen..........................3-131
Distortion..................................................3-129
Rear Seat Entertainment System..................3-115
DVD Player..................................................3-116
E
Easy Exit Seat...............................................2-70
Electrical System
Add-On Equipment.....................................5-125
5
Page 576 of 588
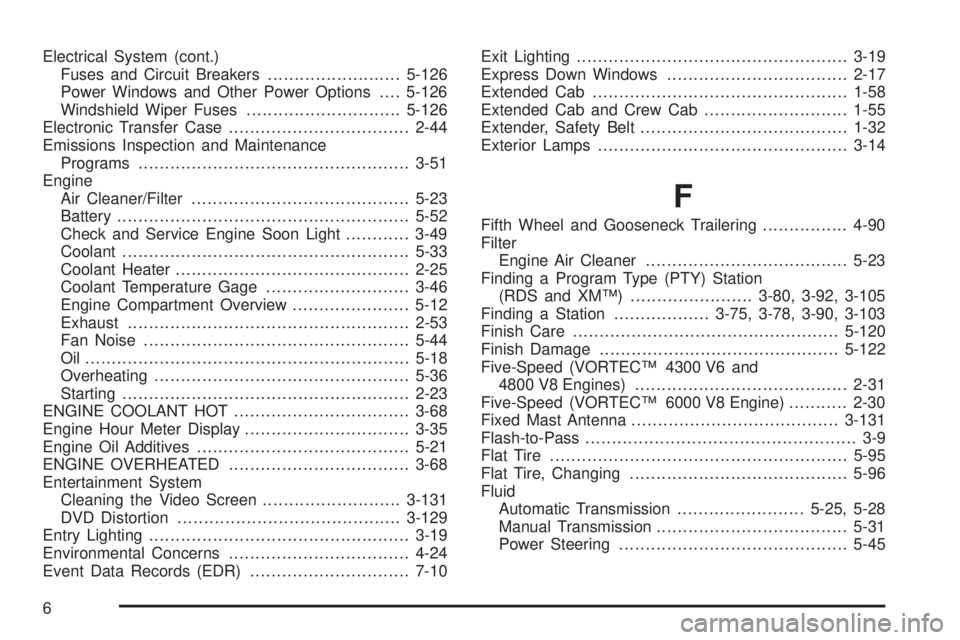
Electrical System (cont.)
Fuses and Circuit Breakers.........................5-126
Power Windows and Other Power Options....5-126
Windshield Wiper Fuses.............................5-126
Electronic Transfer Case..................................2-44
Emissions Inspection and Maintenance
Programs...................................................3-51
Engine
Air Cleaner/Filter.........................................5-23
Battery.......................................................5-52
Check and Service Engine Soon Light............3-49
Coolant......................................................5-33
Coolant Heater............................................2-25
Coolant Temperature Gage...........................3-46
Engine Compartment Overview......................5-12
Exhaust.....................................................2-53
Fan Noise..................................................5-44
Oil .............................................................5-18
Overheating................................................5-36
Starting......................................................2-23
ENGINE COOLANT HOT.................................3-68
Engine Hour Meter Display...............................3-35
Engine Oil Additives........................................5-21
ENGINE OVERHEATED..................................3-68
Entertainment System
Cleaning the Video Screen..........................3-131
DVD Distortion..........................................3-129
Entry Lighting.................................................3-19
Environmental Concerns..................................4-24
Event Data Records (EDR)..............................7-10Exit Lighting...................................................3-19
Express Down Windows..................................2-17
Extended Cab................................................1-58
Extended Cab and Crew Cab...........................1-55
Extender, Safety Belt.......................................1-32
Exterior Lamps...............................................3-14
F
Fifth Wheel and Gooseneck Trailering................4-90
Filter
Engine Air Cleaner......................................5-23
Finding a Program Type (PTY) Station
(RDS and XMŸ).......................3-80, 3-92, 3-105
Finding a Station..................3-75, 3-78, 3-90, 3-103
Finish Care..................................................5-120
Finish Damage.............................................5-122
Five-Speed (VORTECŸ 4300 V6 and
4800 V8 Engines)........................................2-31
Five-Speed (VORTECŸ 6000 V8 Engine)...........2-30
Fixed Mast Antenna.......................................3-131
Flash-to-Pass................................................... 3-9
Flat Tire........................................................5-95
Flat Tire, Changing.........................................5-96
Fluid
Automatic Transmission........................5-25, 5-28
Manual Transmission....................................5-31
Power Steering...........................................5-45
6