light GMC SIERRA 2004 Service Manual
[x] Cancel search | Manufacturer: GMC, Model Year: 2004, Model line: SIERRA, Model: GMC SIERRA 2004Pages: 588, PDF Size: 3.74 MB
Page 150 of 588
Automatic Dimming Mirror Operation
The automatic dimming mirror function is turned
on automatically each time the ignition is started. To
operate the automatic dimming mirror, do the following:
1. Make sure the green indicator light, located to the left
of the on/off button, is lit. If it's not, press and hold the
on/off button for approximately six seconds until the
green light comes on, indicating that the mirror is in
automatic dimming mode.
2. Turn off the automatic dimming mirror function by
pressing and holding the on/off button for
approximately six seconds, until the green indicator
light turns off.
Compass Variance
The mirror is set in zone eight upon leaving the factory.
It will be necessary to adjust the compass to
compensate for compass variance if you live outside of
zone eight. Under certain circumstances, as during a
long distance cross-country trip, it will be necessary to
adjust for compass variance. Compass variance is
the difference between earth's magnetic north and true
geographic north. If not adjusted to account for
compass variance, your compass could give false
readings.To adjust for compass variance do the following:
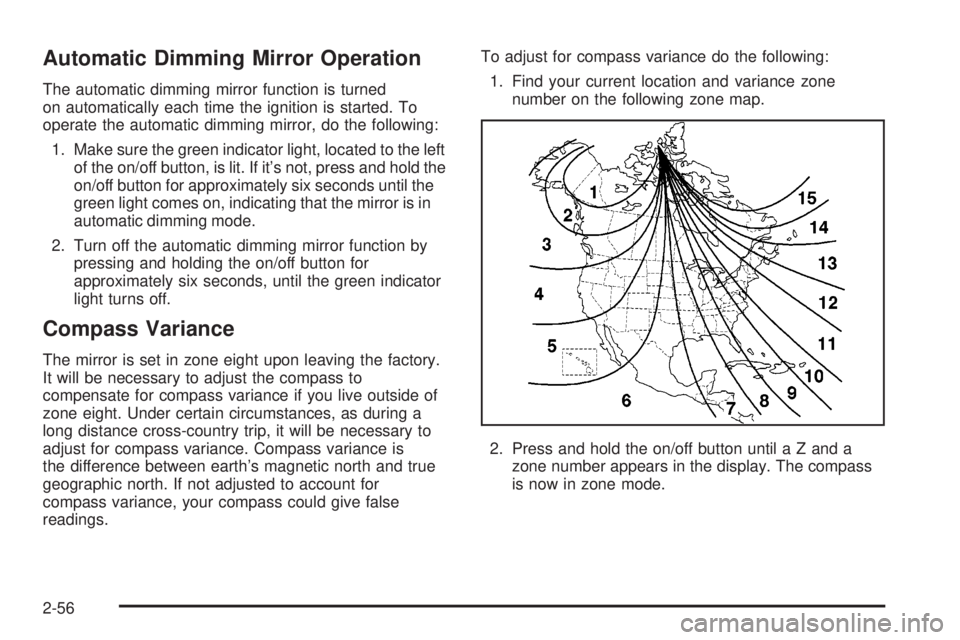
1. Find your current location and variance zone
number on the following zone map.
2. Press and hold the on/off button until a Z and a
zone number appears in the display. The compass
is now in zone mode.
2-56
Page 151 of 588
3. Keep pressing the on/off button until the desired
zone number appears in the display. Release the
button. After approximately four seconds of
inactivity, the new zone number will be locked in
and the compass/temperature display will return.
4. Calibrate the compass as described below.
Compass Calibration
The compass may need calibration if one of the
following occurs:
·After approximately ®ve seconds, the display does
not show a compass heading (N for North, for
example), there may be a strong magnetic ®eld
interfering with the compass. Such interference may
be caused by a magnetic antenna mount, magnetic
note pad holder or a similar magnetic item.
·The compass does not display the correct heading
and the compass zone variance is set correctly.
In order to calibrate, CAL must be displayed in the
mirror compass windows. If CAL is not displayed, push
the on/off button for approximately 12 seconds or
until CAL is displayed.
The compass can be calibrated by driving the vehicle in
circles at 5 mph (8 km/h) or less until the display
reads a direction.
Passenger Air Bag Indicator
Your vehicle may be equipped with a passenger air bag
indicator, on the mirror glass, just above the buttons.
If your vehicle has this feature, the mirror will display the
word ON, or an air bag symbol in Canada, when the
passenger air bag is enabled. For more information, see
Passenger Sensing System on page 1-81.
Cleaning the Mirror
When cleaning the mirror, use a paper towel or similar
material dampened with glass cleaner. Do not spray
glass cleaner directly on the mirror as that may cause
the liquid cleaner to enter the mirror housing.
Automatic Dimming Rearview Mirror
with Compass and Temperature
Display
If your vehicle is equipped with an automatic mirror, it
will, when on, automatically dim to the proper level
to minimize glare from lights behind you after dark.
The mirror also includes a display in the upper
right corner of the mirror face. The compass reading
and the outside temperature will both appear in
the display at the same time. The dual display can be
turned on or off by brie¯y pressing either the TEMP
or the COMP button.
2-57
Page 152 of 588
Temperature Display
The temperature can be displayed by pressing the
TEMP button. Pressing the TEMP button once brie¯y,
will toggle the temperature reading on and off. To
alternate the temperature reading between Fahrenheit
and Celsius, press and hold the TEMP button for
approximately four seconds until the display blinks ÉF
and ÉC. Press and release the TEMP button to
toggle between the Fahrenheit and Celsius readings.
After approximately four seconds of inactivity, the display
will stop blinking and display the last selection made.
If an abnormal reading is displayed, for an extended
period of time, please consult your dealer. Under certain
circumstances, a delay in updating the temperature is
normal.
Automatic Dimming Mirror Operation
The time period you need to press and hold the TEMP
button to turn the automatic dimming feature on or
off is approximately eight seconds. The indicator light to
the left of the TEMP button will still turn on or off to
show you when the automatic dimming feature is
activated. Once the mirror is turned off, it will remain off
until it is turned back on, or until the vehicle is
restarted.
Compass Operation
Press the COMP button once brie¯y to turn the compass
on or off.
When the ignition and the compass feature are on, the
compass will show two character boxes for
approximately two seconds. After two seconds, the
mirror will display the compass heading.
Compass Calibration
The compass may need calibration if one of the
following occurs:
·If CAL is displayed while driving in the vehicle.
·After approximately ®ve seconds, the display does
not show a compass heading (N for North, for
example), there may be a strong magnetic ®eld
interfering with the compass. Such interference may
be caused by a magnetic antenna mount, magnetic
note pad holder or a similar magnetic item.
·The compass does not display the correct heading
and the compass zone variance is set correctly.
In order to calibrate, CAL must be displayed in the
mirror compass windows. If CAL is not displayed, push
in the COMP button for approximately eight seconds
or until CAL is displayed.
2-58
Page 165 of 588
Instrument Panel Overview...............................3-4
Hazard Warning Flashers................................3-6
Other Warning Devices...................................3-6
Horn.............................................................3-7
Tilt Wheel.....................................................3-7
Turn Signal/Multifunction Lever.........................3-7
Exterior Lamps.............................................3-14
Interior Lamps..............................................3-19
Accessory Power Outlets...............................3-20
Ashtrays and Cigarette Lighter........................3-21
Climate Controls............................................3-21
Climate Control System.................................3-21
Dual Climate Control System..........................3-22
Dual Automatic Climate Control System...........3-26
Warning Lights, Gages and Indicators.............3-33
Warning Lights, Gages, and Indicators.............3-33
Instrument Panel Cluster................................3-34
Speedometer and Odometer...........................3-35
Tachometer.................................................3-35
Safety Belt Reminder Light.............................3-36
Air Bag Readiness Light................................3-36Air Bag Off Light..........................................3-37
Passenger Air Bag Status Indicator.................3-40
Battery Warning Light....................................3-42
Voltmeter Gage............................................3-42
Up-Shift Light...............................................3-43
Brake System Warning Light..........................3-43
Anti-Lock Brake System Warning Light.............3-45
Traction Off Light..........................................3-45
Engine Coolant Temperature Gage..................3-46
Transmission Temperature Gage.....................3-47
Malfunction Indicator Lamp.............................3-49
Oil Pressure Gage........................................3-52
Cruise Control Light......................................3-53
Four-Wheel-Drive Light..................................3-53
Tow/Haul Mode Light....................................3-53
Overdrive Disable.........................................3-53
Fuel Gage...................................................3-54
Low Fuel Warning Light.................................3-54
Driver Information Center (DIC).......................3-55
DIC Operation and Displays...........................3-55
DIC Warnings and Messages.........................3-66
Section 3 Instrument Panel
3-1
Page 169 of 588
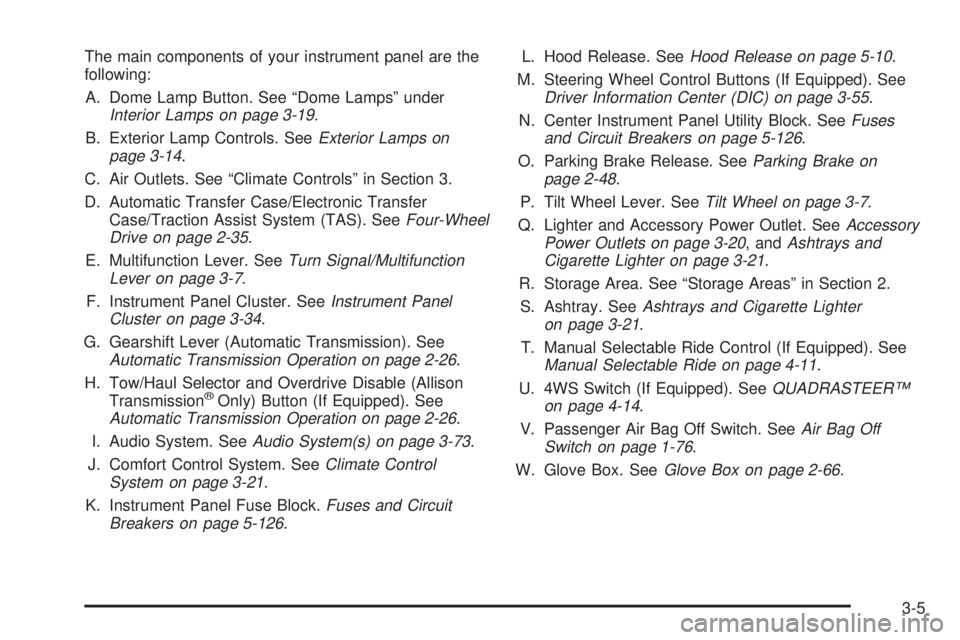
The main components of your instrument panel are the
following:
A. Dome Lamp Button. See ªDome Lampsº under
Interior Lamps on page 3-19.
B. Exterior Lamp Controls. See
Exterior Lamps on
page 3-14.
C. Air Outlets. See ªClimate Controlsº in Section 3.
D. Automatic Transfer Case/Electronic Transfer
Case/Traction Assist System (TAS). See
Four-Wheel
Drive on page 2-35.
E. Multifunction Lever. See
Turn Signal/Multifunction
Lever on page 3-7.
F. Instrument Panel Cluster. See
Instrument Panel
Cluster on page 3-34.
G. Gearshift Lever (Automatic Transmission). See
Automatic Transmission Operation on page 2-26.
H. Tow/Haul Selector and Overdrive Disable (Allison
Transmission
žOnly) Button (If Equipped). SeeAutomatic Transmission Operation on page 2-26.
I. Audio System. See
Audio System(s) on page 3-73.
J. Comfort Control System. See
Climate Control
System on page 3-21.
K. Instrument Panel Fuse Block.
Fuses and Circuit
Breakers on page 5-126.L. Hood Release. See
Hood Release on page 5-10.
M. Steering Wheel Control Buttons (If Equipped). See
Driver Information Center (DIC) on page 3-55.
N. Center Instrument Panel Utility Block. See
Fuses
and Circuit Breakers on page 5-126.
O. Parking Brake Release. See
Parking Brake on
page 2-48.
P. Tilt Wheel Lever. See
Tilt Wheel on page 3-7.
Q. Lighter and Accessory Power Outlet. See
Accessory
Power Outlets on page 3-20, andAshtrays and
Cigarette Lighter on page 3-21.
R. Storage Area. See ªStorage Areasº in Section 2.
S. Ashtray. See
Ashtrays and Cigarette Lighter
on page 3-21.
T. Manual Selectable Ride Control (If Equipped). See
Manual Selectable Ride on page 4-11.
U. 4WS Switch (If Equipped). See
QUADRASTEERŸ
on page 4-14.
V. Passenger Air Bag Off Switch. See
Air Bag Off
Switch on page 1-76.
W. Glove Box. See
Glove Box on page 2-66.
3-5
Page 173 of 588
Headlamp High/Low-Beam Changer
53
(Headlamp High/Low Beam Changer):To
change the headlamps from low to high beam, push the
lever toward the instrument panel. To return to
low-beam headlamps, pull the multifunction lever toward
you. Then release it.
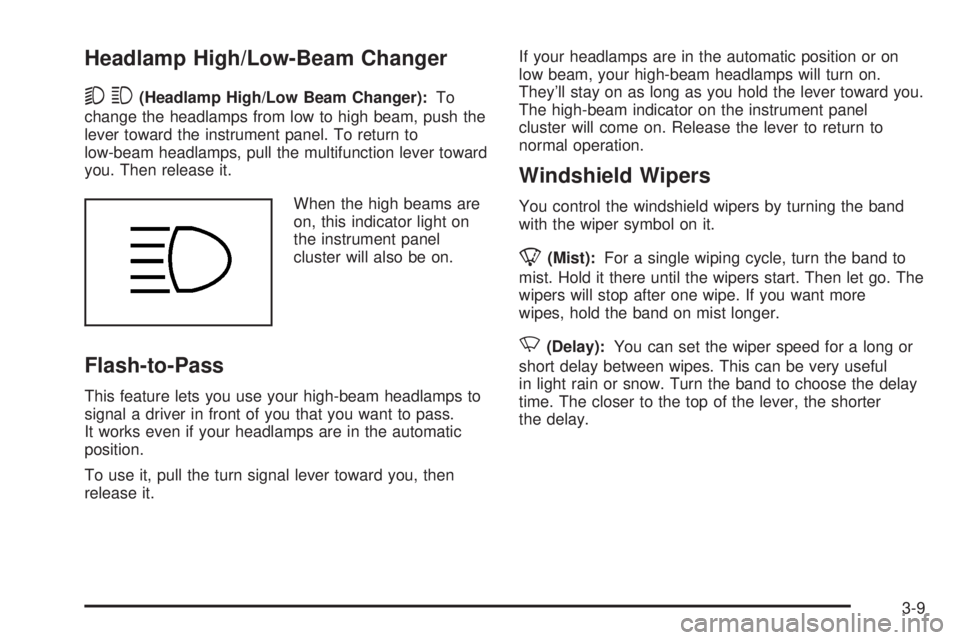
When the high beams are
on, this indicator light on
the instrument panel
cluster will also be on.
Flash-to-Pass
This feature lets you use your high-beam headlamps to
signal a driver in front of you that you want to pass.
It works even if your headlamps are in the automatic
position.
To use it, pull the turn signal lever toward you, then
release it.If your headlamps are in the automatic position or on
low beam, your high-beam headlamps will turn on.
They'll stay on as long as you hold the lever toward you.
The high-beam indicator on the instrument panel
cluster will come on. Release the lever to return to
normal operation.
Windshield Wipers
You control the windshield wipers by turning the band
with the wiper symbol on it.
8(Mist):For a single wiping cycle, turn the band to
mist. Hold it there until the wipers start. Then let go. The
wipers will stop after one wipe. If you want more
wipes, hold the band on mist longer.
N(Delay):You can set the wiper speed for a long or
short delay between wipes. This can be very useful
in light rain or snow. Turn the band to choose the delay
time. The closer to the top of the lever, the shorter
the delay.
3-9
Page 178 of 588
Ending Cruise Control
There are four ways to turn off the cruise control:
·Step lightly on the brake pedal,
·move the cruise control switch to off, or
·shift the transmission to NEUTRAL (N).
·If your vehicle has the Stabilitrakžfeature, cruise
control will turn off if road conditions cause
Stabilitrak
žto activate.
·If the accelerator pedal is held for 60 seconds or
longer, cruise control will turn off.
Erasing Speed Memory
When you turn off the cruise control or the ignition, your
cruise control set speed memory is erased.
Exterior Lamps
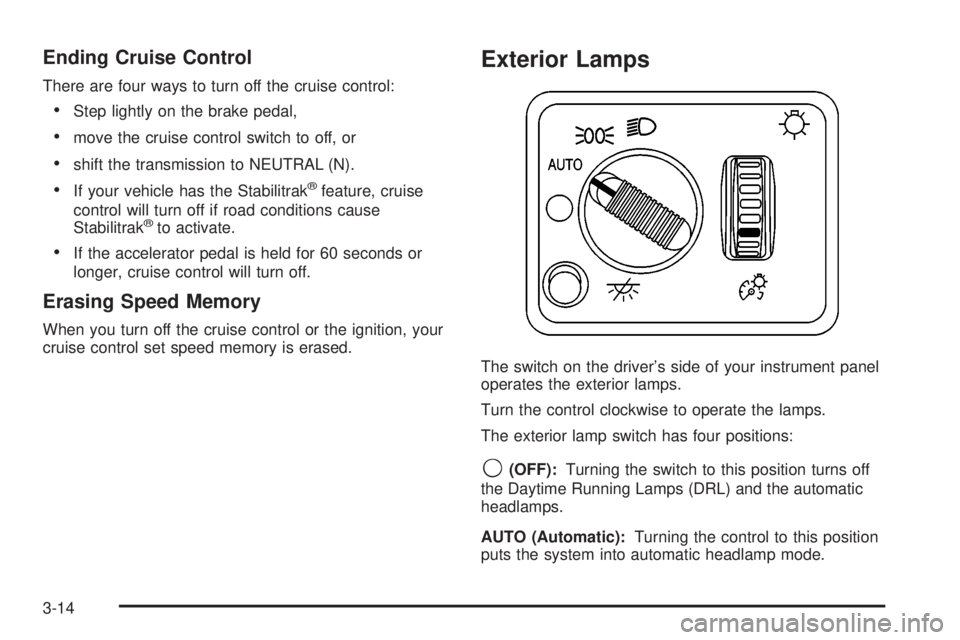
The switch on the driver's side of your instrument panel
operates the exterior lamps.
Turn the control clockwise to operate the lamps.
The exterior lamp switch has four positions:
9(OFF):Turning the switch to this position turns off
the Daytime Running Lamps (DRL) and the automatic
headlamps.
AUTO (Automatic):Turning the control to this position
puts the system into automatic headlamp mode.
3-14
Page 179 of 588
;(Parking Lamps):Turning the control to this
position turns on the parking lamps, together with the
following:
·Sidemarker Lamps
·Taillamps
·License Plate Lamps
·Instrument Panel Lights
·Roof Marker Lamps, if equipped
2(Headlamps):Turning the switch to this position
turns on the headlamps, together with the previously
listed lamps and lights.
You can switch your headlamps from high to low-beam
by pushing the turn signal/high-beam lever towards
the instrument panel.
A circuit breaker protects your headlamps. If you have
an electrical overload, your headlamps will ¯icker on and
off. Have your headlamp wiring checked right away if
this happens.
Automatic Headlamp System
When it is dark enough outside, your automatic
headlamp system will turn on your headlamps at the
normal brightness along with other lamps such as
the taillamps, sidemarker, parking lamps and the
instrument panel lights. The radio lights will also be dim.
Your vehicle is equipped with a light sensor located
on the top of the instrument panel in the defroster grille.
Be sure it is not covered, or the system will be on
whenever the ignition is on.
The system may also turn on your headlamps when
driving through a parking garage, heavy overcast
weather or a tunnel. This is normal.
There is a delay in the transition between the daytime
and nighttime operation of the Daytime Running
Lamps (DRL) and the automatic headlamp systems so
that driving under bridges or bright overhead street
lights does not affect the system. The DRL and
automatic headlamp system will only be affected when
the light sensor sees a change in lighting lasting
longer than the delay.
3-15
Page 180 of 588
If you start your vehicle in a dark garage, the automatic
headlamp system will come on immediately. Once
you leave the garage, it will take approximately
one minute for the automatic headlamp system to
change to DRL if it is bright enough outside. During that
delay, your instrument panel cluster may not be as
bright as usual. Make sure your instrument panel
brightness control is in the full bright position. See
ªInstrument Panel Brightness Controlº under
Interior
Lamps on page 3-19.
To idle your vehicle with the automatic headlamp
system off, turn the control to the off position.
You may be able to turn off your Automatic Headlamp
System. See ªDaytime Running Lamps (DRL)º later
in this section for more information.
As with any vehicle, you should turn on the regular
headlamp system when you need them.
Lamps On Reminder
A reminder chime will sound when your headlamps or
parking lamps are manually turned on and your ignition is
off, in LOCK, ACCESSORY, or your door is open. To
disable the chime, turn the light off then back on.
Daytime Running Lamps
Daytime Running Lamps (DRL) can make it easier for
others to see the front of your vehicle during the
day. DRL can be helpful in many different driving
conditions, but they can be especially helpful in the short
periods after dawn and before sunset. Fully functional
daytime running lamps are required on all vehicles
®rst sold in Canada.
The DRL system will come on when the following
conditions are met:
·The ignition is on
·The exterior lamps control is in AUTO
·The automatic transmission is not in PARK (P)
·The light sensor determines it is daytime
When the DRL system is on, only your DRL lamps will
be on. The taillamps, sidemarker and other lamps
won't be on. The instrument panel won't be lit up either.
When it begins to get dark, the automatic headlamp
system will switch from DRL to the headlamps or the last
chosen headlamp setting that was used.
When you turn the headlamp switch off, the headlamps
will go off, and your DRL lamps will illuminate,
provided it is not dark outside.
3-16
Page 181 of 588
To idle an automatic transmission equipped vehicle with
the DRL off, set the parking brake. Shifting the
transmission into PARK (P) will also allow you to idle
the vehicle with the DRL off. The DRL will stay off until
you release the parking brake or shift the transmission
out of PARK (P).
To idle a manual transmission equipped vehicle with the
DRL off, set the parking brake. The DRL will stay off
until you release the parking brake.
Fog Lamps
If your vehicle has fog lamps, use them for better vision
in foggy or misty conditions.
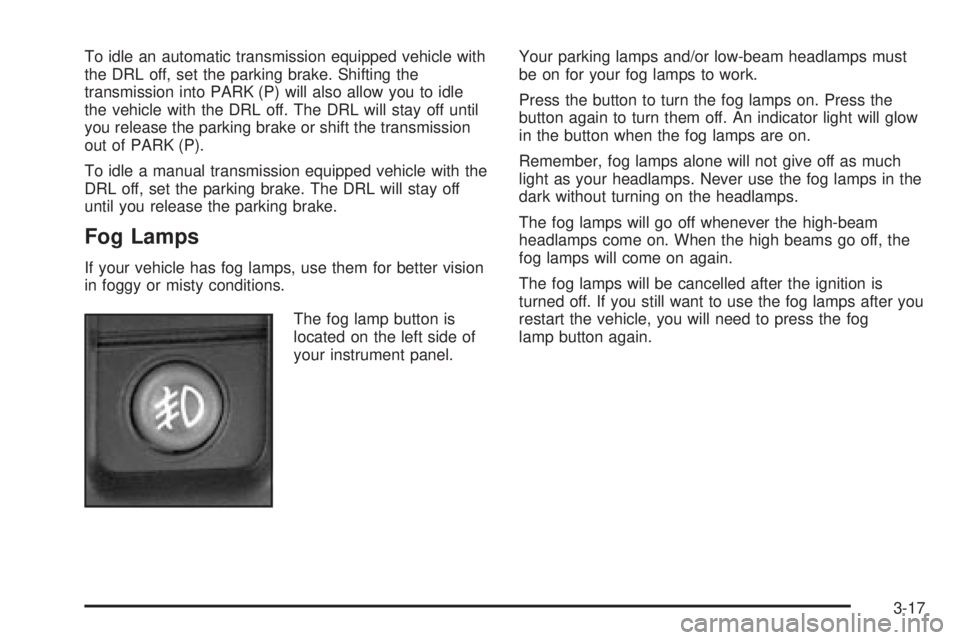
The fog lamp button is
located on the left side of
your instrument panel.Your parking lamps and/or low-beam headlamps must
be on for your fog lamps to work.
Press the button to turn the fog lamps on. Press the
button again to turn them off. An indicator light will glow
in the button when the fog lamps are on.
Remember, fog lamps alone will not give off as much
light as your headlamps. Never use the fog lamps in the
dark without turning on the headlamps.
The fog lamps will go off whenever the high-beam
headlamps come on. When the high beams go off, the
fog lamps will come on again.
The fog lamps will be cancelled after the ignition is
turned off. If you still want to use the fog lamps after you
restart the vehicle, you will need to press the fog
lamp button again.
3-17