door lock GMC SIERRA 2004 Owner's Manual
[x] Cancel search | Manufacturer: GMC, Model Year: 2004, Model line: SIERRA, Model: GMC SIERRA 2004Pages: 588, PDF Size: 3.74 MB
Page 1 of 588
Seats and Restraint Systems........................... 1-1
Front Seats
............................................... 1-3
Rear Seats
............................................... 1-9
Safety Belts
.............................................1-11
Child Restraints
.......................................1-33
Air Bag Systems
......................................1-70
Restraint System Check
............................1-87
Features and Controls..................................... 2-1
Keys
........................................................ 2-3
Doors and Locks
....................................... 2-8
Windows
.................................................2-16
Theft-Deterrent Systems
............................2-19
Starting and Operating Your Vehicle
...........2-21
Mirrors
....................................................2-54
OnStar
žSystem
......................................2-64
Storage Areas
.........................................2-66
Vehicle Personalization
.............................2-69
Instrument Panel............................................. 3-1
Instrument Panel Overview
.......................... 3-4
Climate Controls
......................................3-21
Warning Lights, Gages and Indicators
.........3-33
Driver Information Center (DIC)
..................3-55
Audio System(s)
.......................................3-73Driving Your Vehicle....................................... 4-1
Your Driving, the Road, and Your Vehicle
..... 4-2
Towing
...................................................4-53
Service and Appearance Care.......................... 5-1
Service
..................................................... 5-3
Fuel
......................................................... 5-4
Checking Things Under the Hood
...............5-10
Rear Axle
...............................................5-59
Four-Wheel Drive
.....................................5-60
Noise Control System
...............................5-62
Bulb Replacement
....................................5-64
Windshield Wiper Blade Replacement
.........5-74
Tires
......................................................5-76
Appearance Care
...................................5-116
Vehicle Identi®cation
...............................5-125
Electrical System
....................................5-125
Capacities and Speci®cations
...................5-134
Maintenance Schedule..................................... 6-1
Maintenance Schedule
................................ 6-2
Customer Assistance and Information.............. 7-1
Customer Assistance and Information
........... 7-2
Reporting Safety Defects
...........................7-11
Index................................................................ 1
2004 GMC Sierra Owner ManualM
Page 12 of 588
Heated Seats
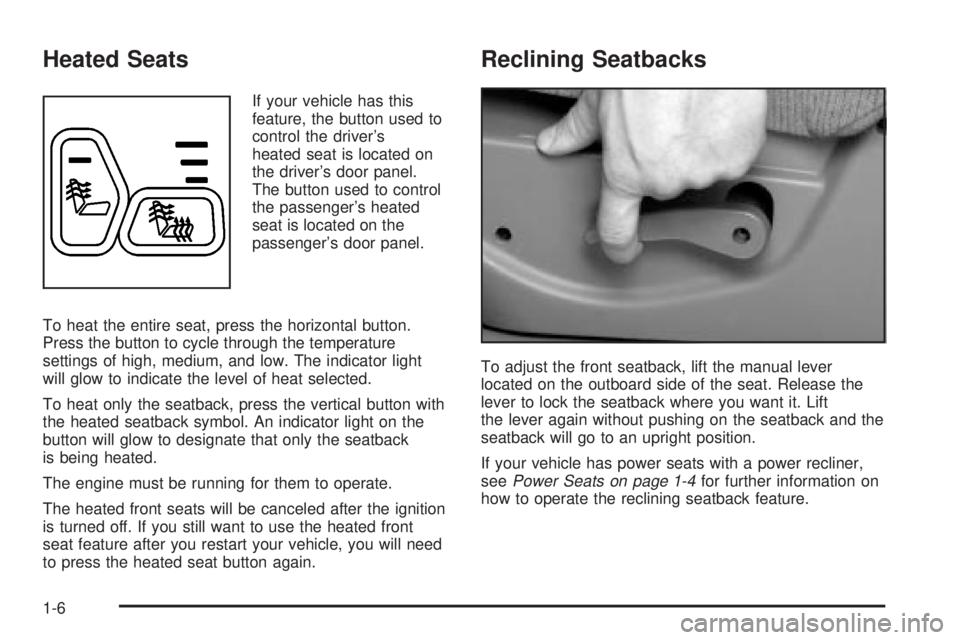
If your vehicle has this
feature, the button used to
control the driver's
heated seat is located on
the driver's door panel.
The button used to control
the passenger's heated
seat is located on the
passenger's door panel.
To heat the entire seat, press the horizontal button.
Press the button to cycle through the temperature
settings of high, medium, and low. The indicator light
will glow to indicate the level of heat selected.
To heat only the seatback, press the vertical button with
the heated seatback symbol. An indicator light on the
button will glow to designate that only the seatback
is being heated.
The engine must be running for them to operate.
The heated front seats will be canceled after the ignition
is turned off. If you still want to use the heated front
seat feature after you restart your vehicle, you will need
to press the heated seat button again.
Reclining Seatbacks
To adjust the front seatback, lift the manual lever
located on the outboard side of the seat. Release the
lever to lock the seatback where you want it. Lift
the lever again without pushing on the seatback and the
seatback will go to an upright position.
If your vehicle has power seats with a power recliner,
see
Power Seats on page 1-4for further information on
how to operate the reclining seatback feature.
1-6
Page 22 of 588
Q:If I'm a good driver, and I never drive far from
home, why should I wear safety belts?
A:You may be an excellent driver, but if you're in an
accident ± even one that isn't your fault ± you and
your passengers can be hurt. Being a good
driver doesn't protect you from things beyond your
control, such as bad drivers.
Most accidents occur within 25 miles (40 km) of
home. And the greatest number of serious injuries
and deaths occur at speeds of less than
40 mph (65 km/h).
Safety belts are for everyone.
How to Wear Safety Belts Properly
This part is only for people of adult size.
Be aware that there are special things to know about
safety belts and children. And there are different
rules for smaller children and babies. If a child will be
riding in your vehicle, see
Older Children on page 1-33orInfants and Young Children on page 1-35. Follow
those rules for everyone's protection.
First, you'll want to know which restraint systems your
vehicle has.
We'll start with the driver position.
Driver Position
This part describes the driver's restraint system.
Lap-Shoulder Belt
The driver has a lap-shoulder belt. Here's how to wear it
properly.
1. Close and lock the door.
2. Adjust the seat so you can sit up straight. To see
how, see ªSeatsº in the Index.
1-16
Page 95 of 588
Keys...............................................................2-3
Remote Keyless Entry System.........................2-4
Remote Keyless Entry System Operation...........2-5
Doors and Locks.............................................2-8
Door Locks....................................................2-8
Power Door Locks..........................................2-9
Delayed Locking...........................................2-10
Programmable Automatic Door Locks..............2-10
Rear Door Security Locks
(Crew Cab)..............................................2-12
Lockout Protection........................................2-13
Rear Doors..................................................2-13
Tailgate.......................................................2-14
Windows........................................................2-16
Manual Windows..........................................2-16
Power Windows............................................2-17
Swing-Out Windows......................................2-18
Sun Visors...................................................2-18
Theft-Deterrent Systems..................................2-19
Content Theft-Deterrent.................................2-19
Passlock
ž....................................................2-21Starting and Operating Your Vehicle................2-21
New Vehicle Break-In....................................2-21
Ignition Positions..........................................2-22
Starting Your Engine.....................................2-23
Engine Coolant Heater..................................2-25
Automatic Transmission Operation...................2-26
Manual Transmission Operation......................2-30
Four-Wheel Drive..........................................2-35
Parking Brake..............................................2-48
Shifting Into Park (P).....................................2-49
Shifting Out of Park (P).................................2-51
Parking Your Vehicle.....................................2-52
Parking Over Things That Burn.......................2-52
Engine Exhaust............................................2-53
Running Your Engine While You Are Parked. . . .2-53
Mirrors...........................................................2-54
Manual Rearview Mirror.................................2-54
Automatic Dimming Rearview Mirror with
OnStar
ž, Compass and Temperature
Display....................................................2-55
Section 2 Features and Controls
2-1
Page 98 of 588
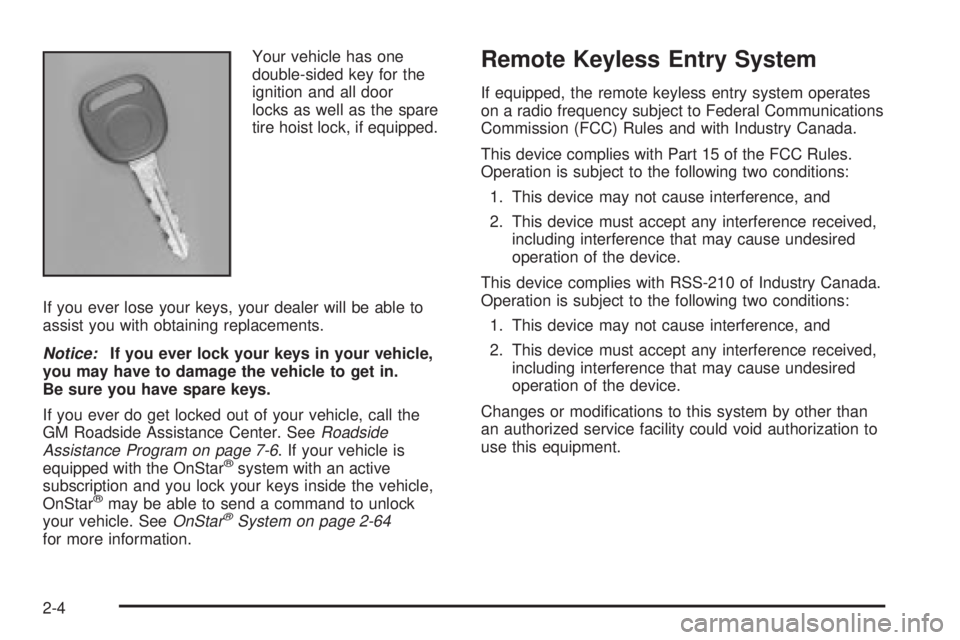
Your vehicle has one
double-sided key for the
ignition and all door
locks as well as the spare
tire hoist lock, if equipped.
If you ever lose your keys, your dealer will be able to
assist you with obtaining replacements.
Notice:If you ever lock your keys in your vehicle,
you may have to damage the vehicle to get in.
Be sure you have spare keys.
If you ever do get locked out of your vehicle, call the
GM Roadside Assistance Center. See
Roadside
Assistance Program on page 7-6. If your vehicle is
equipped with the OnStaržsystem with an active
subscription and you lock your keys inside the vehicle,
OnStar
žmay be able to send a command to unlock
your vehicle. SeeOnStaržSystem on page 2-64for more information.
Remote Keyless Entry System
If equipped, the remote keyless entry system operates
on a radio frequency subject to Federal Communications
Commission (FCC) Rules and with Industry Canada.
This device complies with Part 15 of the FCC Rules.
Operation is subject to the following two conditions:
1. This device may not cause interference, and
2. This device must accept any interference received,
including interference that may cause undesired
operation of the device.
This device complies with RSS-210 of Industry Canada.
Operation is subject to the following two conditions:
1. This device may not cause interference, and
2. This device must accept any interference received,
including interference that may cause undesired
operation of the device.
Changes or modi®cations to this system by other than
an authorized service facility could void authorization to
use this equipment.
2-4
Page 99 of 588
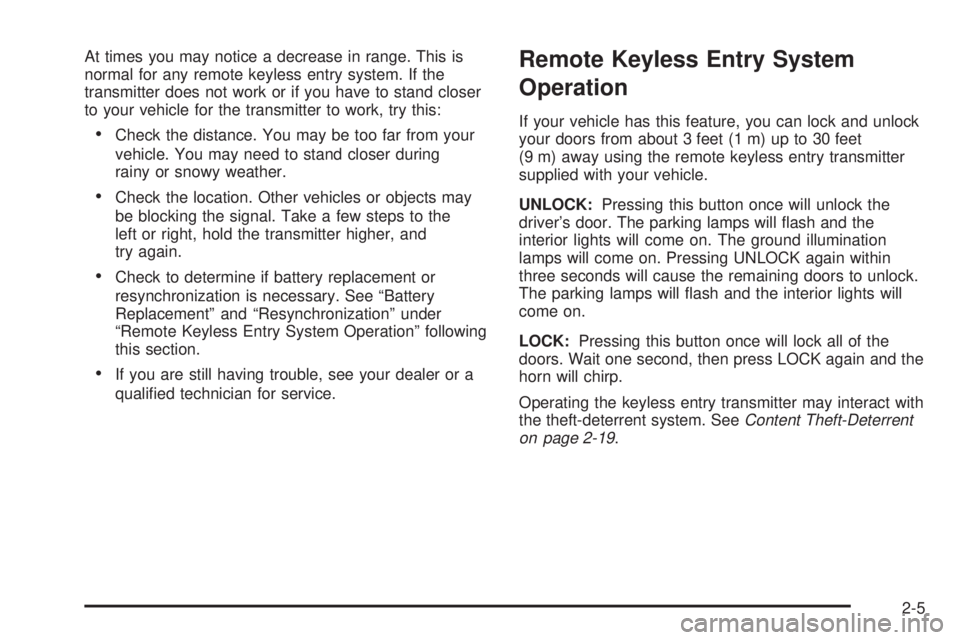
At times you may notice a decrease in range. This is
normal for any remote keyless entry system. If the
transmitter does not work or if you have to stand closer
to your vehicle for the transmitter to work, try this:
·Check the distance. You may be too far from your
vehicle. You may need to stand closer during
rainy or snowy weather.
·Check the location. Other vehicles or objects may
be blocking the signal. Take a few steps to the
left or right, hold the transmitter higher, and
try again.
·Check to determine if battery replacement or
resynchronization is necessary. See ªBattery
Replacementº and ªResynchronizationº under
ªRemote Keyless Entry System Operationº following
this section.
·If you are still having trouble, see your dealer or a
quali®ed technician for service.
Remote Keyless Entry System
Operation
If your vehicle has this feature, you can lock and unlock
your doors from about 3 feet (1 m) up to 30 feet
(9 m) away using the remote keyless entry transmitter
supplied with your vehicle.
UNLOCK:Pressing this button once will unlock the
driver's door. The parking lamps will ¯ash and the
interior lights will come on. The ground illumination
lamps will come on. Pressing UNLOCK again within
three seconds will cause the remaining doors to unlock.
The parking lamps will ¯ash and the interior lights will
come on.
LOCK:Pressing this button once will lock all of the
doors. Wait one second, then press LOCK again and the
horn will chirp.
Operating the keyless entry transmitter may interact with
the theft-deterrent system. See
Content Theft-Deterrent
on page 2-19.
2-5
Page 101 of 588
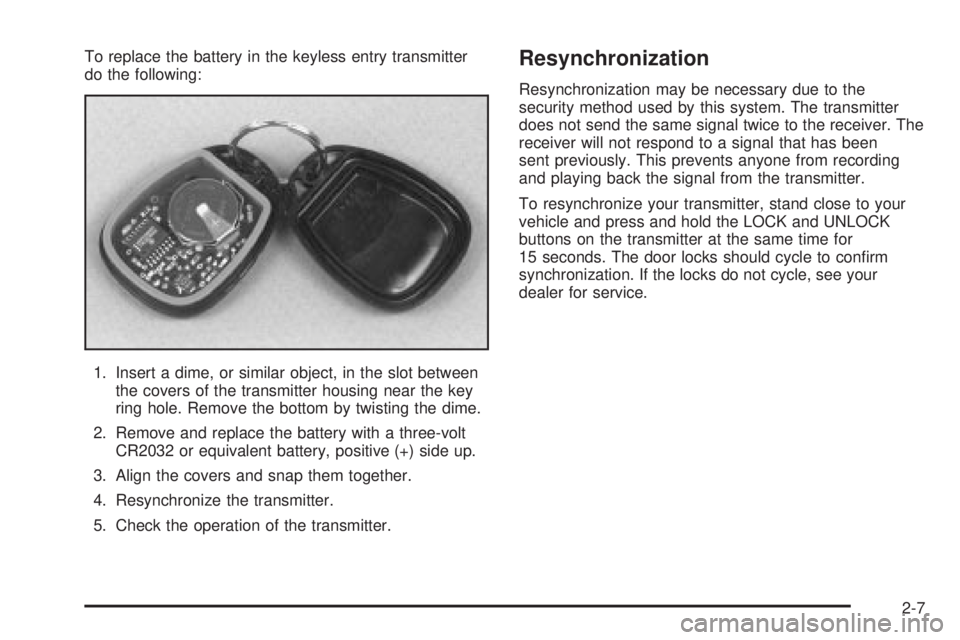
To replace the battery in the keyless entry transmitter
do the following:
1. Insert a dime, or similar object, in the slot between
the covers of the transmitter housing near the key
ring hole. Remove the bottom by twisting the dime.
2. Remove and replace the battery with a three-volt
CR2032 or equivalent battery, positive (+) side up.
3. Align the covers and snap them together.
4. Resynchronize the transmitter.
5. Check the operation of the transmitter.Resynchronization
Resynchronization may be necessary due to the
security method used by this system. The transmitter
does not send the same signal twice to the receiver. The
receiver will not respond to a signal that has been
sent previously. This prevents anyone from recording
and playing back the signal from the transmitter.
To resynchronize your transmitter, stand close to your
vehicle and press and hold the LOCK and UNLOCK
buttons on the transmitter at the same time for
15 seconds. The door locks should cycle to con®rm
synchronization. If the locks do not cycle, see your
dealer for service.
2-7
Page 102 of 588
Doors and Locks
Door Locks
{CAUTION:
Unlocked doors can be dangerous.
·Passengers Ð especially children Ð can
easily open the doors and fall out of a
moving vehicle. When a door is locked, the
handle will not open it. You increase the
chance of being thrown out of the vehicle
in a crash if the doors are not locked. So,
wear safety belts properly and lock the
doors whenever you drive.
·Young children who get into unlocked
vehicles may be unable to get out. A child
can be overcome by extreme heat and can
suffer permanent injuries or even death
from heat stroke. Always lock your vehicle
whenever you leave it.
·Outsiders can easily enter through an
unlocked door when you slow down or
stop your vehicle. Locking your doors can
help prevent this from happening.There are several ways to lock and unlock your vehicle.
You can use the keyless entry system, if equipped,
or you can also use your key.
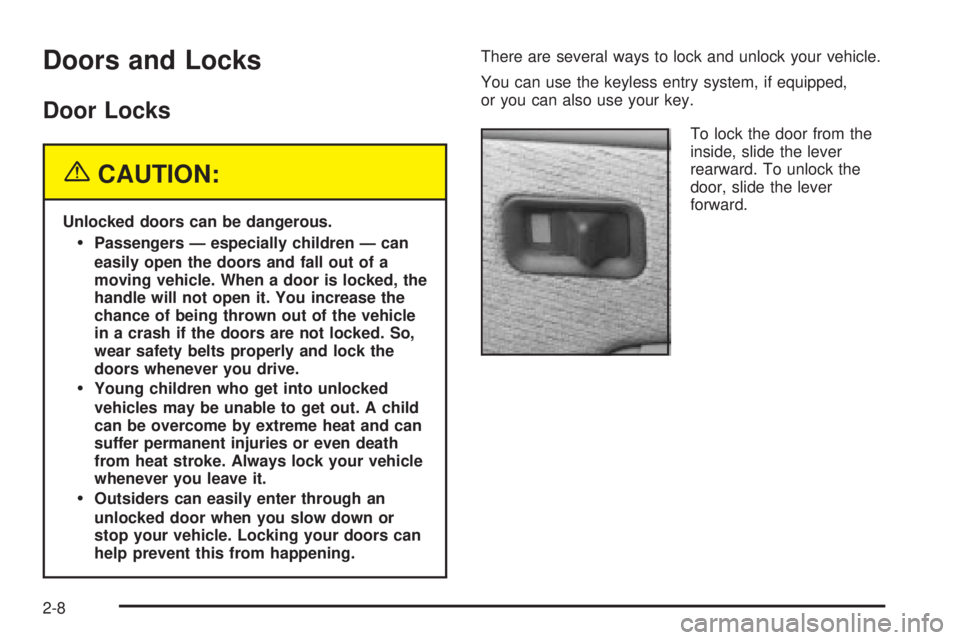
To lock the door from the
inside, slide the lever
rearward. To unlock the
door, slide the lever
forward.
2-8
Page 103 of 588
Power Door Locks
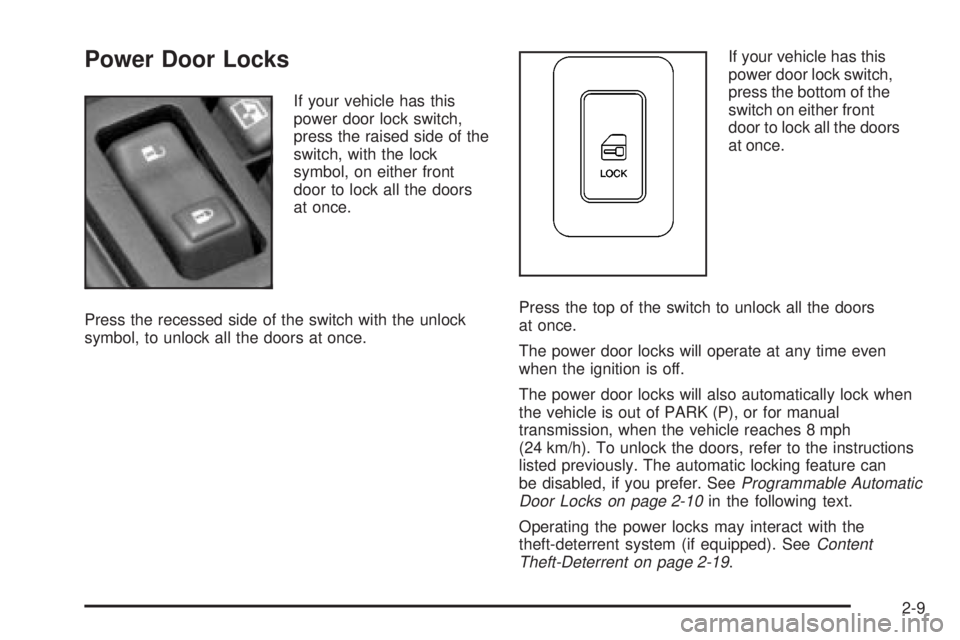
If your vehicle has this
power door lock switch,
press the raised side of the
switch, with the lock
symbol, on either front
door to lock all the doors
at once.
Press the recessed side of the switch with the unlock
symbol, to unlock all the doors at once.If your vehicle has this
power door lock switch,
press the bottom of the
switch on either front
door to lock all the doors
at once.
Press the top of the switch to unlock all the doors
at once.
The power door locks will operate at any time even
when the ignition is off.
The power door locks will also automatically lock when
the vehicle is out of PARK (P), or for manual
transmission, when the vehicle reaches 8 mph
(24 km/h). To unlock the doors, refer to the instructions
listed previously. The automatic locking feature can
be disabled, if you prefer. See
Programmable Automatic
Door Locks on page 2-10in the following text.
Operating the power locks may interact with the
theft-deterrent system (if equipped). See
Content
Theft-Deterrent on page 2-19.
2-9
Page 104 of 588
Delayed Locking
If your vehicle is a Crew Cab, it may be equipped with
this feature. When locking the doors with the power lock
switch or the keyless entry transmitter and a door or the
liftgate is open, the delayed locking feature will delay
locking the doors and tailgate until ®ve seconds after the
last door is closed. You will hear three chimes to signal
that the delayed locking feature is in use.
Pressing the power lock switch or the lock button on the
keyless entry transmitter twice will override the delayed
locking feature and immediately lock all the doors.
You can turn the delayed locking feature off or back on
again by doing the following:
1. Press and hold the power door lock switch in the
lock position.
2. Press unlock twice on the remote keyless entry
transmitter.
This feature will not operate if the key is in the ignition.
You can also program this feature using the DIC.
See ªDelayed Lockingº under
DIC Operation and
Displays on page 3-55.
Programmable Automatic Door
Locks
Your vehicle may be equipped with an automatic
lock/unlock feature which enables you to program your
vehicle's power door locks. You can program this
feature through the Driver Information Center (DIC), or
by the following method.
Programmable Locking Feature
The following is the list of available programming
options:
Mode 1:All doors lock when the transmission is shifted
into gear. This is the mode that is pre-programmed in
the factory for your vehicle for automatic transmission
vehicles.
Mode 2:All doors lock when the vehicle speed is
greater than 8 mph (13 km/h). This is the mode that is
pre-programmed in the factory for manual transmission
vehicles.
Mode 3:No automatic door locking.
2-10