fuses GMC SIERRA 2004 Owner's Manual
[x] Cancel search | Manufacturer: GMC, Model Year: 2004, Model line: SIERRA, Model: GMC SIERRA 2004Pages: 588, PDF Size: 3.74 MB
Page 114 of 588
If a door is opened without the key or the remote
keyless entry transmitter, the alarm will go off. Your
vehicle's headlamps will ¯ash and the horn will sound for
about two minutes, then will turn off to save the
battery power.
Remember, the theft-deterrent system won't activate if
you lock the doors with a key or use the manual
door lock. It activates only if you use a power door lock
switch with the door open, or with the remote keyless
entry transmitter. You should also remember that
you can start your vehicle with the correct ignition key if
the alarm has been set off.
Here's how to avoid setting off the alarm by accident:
·If you don't want to activate the theft-deterrent
system, the vehicle should be locked with the door
key
afterthe doors are closed.
·Always unlock a door with a key, or use the remote
keyless entry transmitter. Unlocking a door any
other way will set off the alarm if the system
has been armed.
If you set off the alarm by accident, unlock any door with
the key. You can also turn off the alarm by pressing
UNLOCK on the remote keyless entry transmitter or by
placing the key in the ignition and turning it to START.
Testing the Alarm
The alarm can be tested by following these steps:
1. From inside the vehicle, lower the driver's window
and open the driver's door.
2. Activate the system by locking the doors with the
power door lock switch while the door is open, or
with the remote keyless entry transmitter.
3. Get out of the vehicle, close the door and wait for
the security light to go out.
4. Then reach in through the window, unlock the door
with the manual door lock and open the door. This
should set off the alarm.
If the alarm does not sound when it should but the
vehicle's headlamps ¯ash, check to see if the horn works.
The horn fuse may be blown. To replace the fuse, see
Fuses and Circuit Breakers on page 5-126.
If the alarm does not sound or the vehicle's headlamps do
not ¯ash, the vehicle should be serviced by an authorized
service center.
2-20
Page 115 of 588
Passlockž
Your vehicle is equipped with the
Passlockžtheft-deterrent system.
Passlockžis a passive theft-deterrent system.
Passlockženables fuel if the ignition lock cylinder is
turned with a valid key. If a correct key is not used or the
ignition lock cylinder is tampered with, fuel is disabled.
If the engine stalls and the security light ¯ashes, wait until
the light stops ¯ashing before trying to restart the engine.
Remember to release the key from START as soon as
the engine starts.
If the engine is running and the security light comes on,
you will be able to restart the engine if you turn the engine
off. However, your Passlock
žsystem is not working
properly and must be serviced by your dealer. Your
vehicle is not protected by Passlock
žat this time. You
may also want to check the fuse. SeeFuses and Circuit
Breakers on page 5-126. See your dealer for service.
In an emergency, call the GM Roadside Assistance
Center. See
Roadside Assistance Program on page 7-6.
Starting and Operating Your
Vehicle
New Vehicle Break-In
Notice:Your vehicle does not need an elaborate
ªbreak-in.º But it will perform better in the long run
if you follow these guidelines:
·Keep your speed at 55 mph (88 km/h) or less for
the ®rst 500 miles (805 km).
·Do not drive at any one speed Ð fast or
slow Ð for the ®rst 500 miles (805 km). Do not
make full-throttle starts.
·Avoid making hard stops for the ®rst 200 miles
(322 km) or so. During this time your new brake
linings are not yet broken in. Hard stops with new
linings can mean premature wear and earlier
replacement. Follow this breaking-in guideline
every time you get new brake linings.
·Do not tow a trailer during break-in. SeeTowing a
Trailer on page 4-70
for more information.
2-21
Page 120 of 588
How long should you keep the coolant heater plugged
in? The answer depends on the outside temperature, the
kind of oil you have, and some other things. Instead
of trying to list everything here, we ask that you contact
your dealer in the area where you'll be parking your
vehicle. The dealer can give you the best advice for that
particular area.
Automatic Transmission Operation
If your vehicle is equipped with an automatic
transmission, it features an electronic shift position
indicator within the instrument panel cluster. This display
must be powered anytime the shift lever is capable of
being moved out of PARK (P). See
Fuses and
Circuit Breakers on page 5-126.
There are several different positions for your shift lever.
PARK (P):This position locks your rear wheels. It's
the best position to use when you start your engine
because your vehicle can't move easily. If your vehicle
is equipped with the Allison
žTransmission, use
PARK (P) for stationary operation of the Power Takeoff
(PTO), if equipped.
{CAUTION:
It is dangerous to get out of your vehicle if the
shift lever is not fully in PARK (P) with the
parking brake ®rmly set. Your vehicle can roll.
Do not leave your vehicle when the engine is
running unless you have to. If you have left the
engine running, the vehicle can move
suddenly. You or others could be injured. To
be sure your vehicle will not move, even when
you are on fairly level ground, always set your
parking brake and move the shift lever to
PARK (P). See
Shifting Into Park (P) on
page 2-49
. If you are pulling a trailer, see
Towing a Trailer on page 4-70.
2-26
Page 169 of 588
The main components of your instrument panel are the
following:
A. Dome Lamp Button. See ªDome Lampsº under
Interior Lamps on page 3-19.
B. Exterior Lamp Controls. See
Exterior Lamps on
page 3-14.
C. Air Outlets. See ªClimate Controlsº in Section 3.
D. Automatic Transfer Case/Electronic Transfer
Case/Traction Assist System (TAS). See
Four-Wheel
Drive on page 2-35.
E. Multifunction Lever. See
Turn Signal/Multifunction
Lever on page 3-7.
F. Instrument Panel Cluster. See
Instrument Panel
Cluster on page 3-34.
G. Gearshift Lever (Automatic Transmission). See
Automatic Transmission Operation on page 2-26.
H. Tow/Haul Selector and Overdrive Disable (Allison
Transmission
žOnly) Button (If Equipped). SeeAutomatic Transmission Operation on page 2-26.
I. Audio System. See
Audio System(s) on page 3-73.
J. Comfort Control System. See
Climate Control
System on page 3-21.
K. Instrument Panel Fuse Block.
Fuses and Circuit
Breakers on page 5-126.L. Hood Release. See
Hood Release on page 5-10.
M. Steering Wheel Control Buttons (If Equipped). See
Driver Information Center (DIC) on page 3-55.
N. Center Instrument Panel Utility Block. See
Fuses
and Circuit Breakers on page 5-126.
O. Parking Brake Release. See
Parking Brake on
page 2-48.
P. Tilt Wheel Lever. See
Tilt Wheel on page 3-7.
Q. Lighter and Accessory Power Outlet. See
Accessory
Power Outlets on page 3-20, andAshtrays and
Cigarette Lighter on page 3-21.
R. Storage Area. See ªStorage Areasº in Section 2.
S. Ashtray. See
Ashtrays and Cigarette Lighter
on page 3-21.
T. Manual Selectable Ride Control (If Equipped). See
Manual Selectable Ride on page 4-11.
U. 4WS Switch (If Equipped). See
QUADRASTEERŸ
on page 4-14.
V. Passenger Air Bag Off Switch. See
Air Bag Off
Switch on page 1-76.
W. Glove Box. See
Glove Box on page 2-66.
3-5
Page 172 of 588
Turn and Lane Change Signals
The turn signal has two upward (for right) and two
downward (for left) positions. These positions allow you
to signal a turn or a lane change.
To signal a turn, move the lever all the way up or down.
When the turn is ®nished, the lever will return
automatically.
To signal a lane change, just raise or lower the lever
until the arrow starts to ¯ash. Hold it there until you
complete your lane change. The lever will return by itself
when you release it.
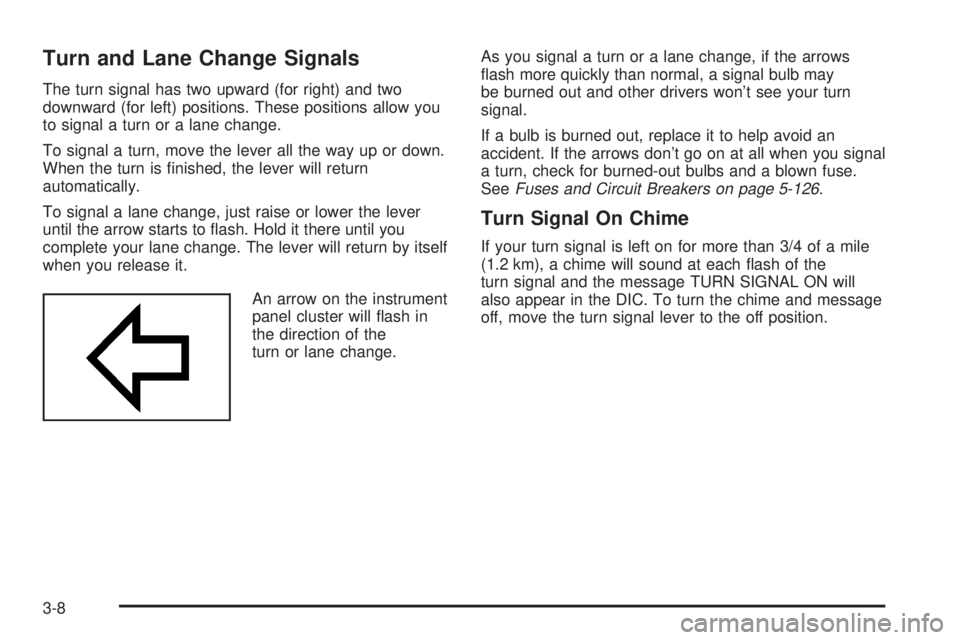
An arrow on the instrument
panel cluster will ¯ash in
the direction of the
turn or lane change.As you signal a turn or a lane change, if the arrows
¯ash more quickly than normal, a signal bulb may
be burned out and other drivers won't see your turn
signal.
If a bulb is burned out, replace it to help avoid an
accident. If the arrows don't go on at all when you signal
a turn, check for burned-out bulbs and a blown fuse.
See
Fuses and Circuit Breakers on page 5-126.
Turn Signal On Chime
If your turn signal is left on for more than 3/4 of a mile
(1.2 km), a chime will sound at each ¯ash of the
turn signal and the message TURN SIGNAL ON will
also appear in the DIC. To turn the chime and message
off, move the turn signal lever to the off position.
3-8
Page 184 of 588
Dome Lamps
The dome lamps will come on when you open a door.
You can also turn the dome lamps on by turning the
thumbwheel, located next to the exterior lamps control, all
the way up. In this position, the dome lamps will remain
on whether the doors are opened or closed.
E:You can use the dome override button, located
below the exterior lamps control, to set the dome lamps
to come on automatically, or remain off, when the
doors are opened. To turn the lamps off, press the
button to the in position. With the button in this position,
the dome lamps will remain off when the doors are
open. To return the lamps to automatic operation, press
the button again and return it to the out position.
Battery Run-Down Protection
This feature shuts off the dome, and reading lamps.
if they are left on for more than 10 minutes when the
ignition is off. The cargo lamp will shut off after
20 minutes. This will keep your battery from
running down.
Accessory Power Outlets
With accessory power outlets you can plug in auxiliary
electrical equipment such as a cellular telephone or
CB radio.
Your vehicle may have two accessory power outlets, or
may have one accessory power outlet located near
the cigarette lighter, if equipped. The cigarette lighter is
designed to ®t only in the receptacle to the right of
the accessory power outlet.
To use the outlet, lift the cover. When not using it,
always close the cover.
Certain power accessory plugs may not be compatible
to the accessory power outlet and could result in
blown vehicle or adapter fuses. If you experience a
problem, see your dealer for additional information on
the accessory power plugs.
Notice:Adding any electrical equipment to your
vehicle may damage it or keep other components
from working as they should. The repairs would not
be covered by your warranty. Check with your
dealer before adding electrical equipment.
When adding electrical equipment, be sure to follow the
proper installation instructions included with the
equipment.
3-20
Page 402 of 588
Windshield Wiper Blade Replacement..............5-74
Tires..............................................................5-76
In¯ation - Tire Pressure.................................5-84
Dual Tire Operation.......................................5-85
Tire Inspection and Rotation...........................5-86
When It Is Time for New Tires.......................5-88
Buying New Tires.........................................5-89
Uniform Tire Quality Grading..........................5-90
Wheel Alignment and Tire Balance..................5-91
Wheel Replacement......................................5-92
Tire Chains..................................................5-94
If a Tire Goes Flat........................................5-95
Changing a Flat Tire.....................................5-96
Spare Tire.................................................5-116
Appearance Care..........................................5-116
Cleaning the Inside of Your Vehicle...............5-117
Care of Safety Belts....................................5-119Weatherstrips.............................................5-119
Cleaning the Outside of Your Vehicle.............5-120
Sheet Metal Damage...................................5-122
Finish Damage...........................................5-122
Underbody Maintenance...............................5-123
Chemical Paint Spotting...............................5-123
Vehicle Care/Appearance Materials................5-123
Vehicle Identi®cation.....................................5-125
Vehicle Identi®cation Number (VIN)................5-125
Service Parts Identi®cation Label...................5-125
Electrical System..........................................5-125
Add-On Electrical Equipment.........................5-125
Windshield Wiper Fuses...............................5-126
Power Windows and Other Power Options......5-126
Fuses and Circuit Breakers..........................5-126
Capacities and Speci®cations........................5-134
Section 5 Service and Appearance Care
5-2
Page 413 of 588
A. Engine Air Cleaner/Filter. SeeEngine Air
Cleaner/Filter on page 5-23.
B. Coolant Surge Tank. See
Engine Coolant on
page 5-33.
C. Air Filter Restriction Indicator (If Equipped). See
Engine Air Cleaner/Filter on page 5-23.
D. Engine Oil Dipstick. See
Engine Oil on page 5-18.
E. Automatic Transmission Dipstick (If equipped).
See
Automatic Transmission Fluid (Except Allison
Transmissionž) on page 5-25orAutomatic
Transmission Fluid (Allison Transmissionž)on
page 5-28.
F. Fan. See
Cooling System on page 5-39.
G. Engine Oil Fill. See
Engine Oil on page 5-18.H. Power Steering Fluid Reservoir. See
Power Steering
Fluid on page 5-45.
I. Remote Negative (-) Terminal (GND). See
Jump
Starting on page 5-53.
J. Remote Positive (+) Terminal. See
Jump Starting on
page 5-53.
K. Brake Fluid Reservoir. See
Brakes on page 5-48.
L. Clutch Fluid Reservoir (If Equipped). See
Hydraulic
Clutch on page 5-32.
M. Underhood Fuse Block. See
Fuses and Circuit
Breakers on page 5-126.
N. Battery. See
Battery on page 5-52.
O. Windshield Washer Fluid Reservoir. See
Windshield
Washer Fluid on page 5-46.
5-13
Page 415 of 588
A. Engine Air Cleaner/Filter. SeeEngine Air
Cleaner/Filter on page 5-23.
B. Coolant Surge Tank. See
Engine Coolant on
page 5-33.
C. Air Filter Restriction Indicator (If Equipped). See
Engine Air Cleaner/Filter on page 5-23.
D. Engine Oil Dipstick. See
Engine Oil on page 5-18.
E. Automatic Transmission Dipstick (If Equipped).
See
Automatic Transmission Fluid (Except Allison
Transmissionž) on page 5-25orAutomatic
Transmission Fluid (Allison Transmissionž)on
page 5-28.
F. Engine Oil Fill. See
Engine Oil on page 5-18.
G. Fan. See
Cooling System on page 5-39.H. Remote Negative (-) Terminal (GND). See
Jump
Starting on page 5-53.
I. Power Steering Fluid Reservoir. See
Power Steering
Fluid on page 5-45.
J. Remote Positive (+) Terminal. See
Jump Starting on
page 5-53.
K. Brake Fluid Reservoir. See
Brakes on page 5-48.
L. Clutch Fluid Reservoir (If Equipped). See
Hydraulic
Clutch on page 5-32.
M. Underhood Fuse Block. See
Fuses and Circuit
Breakers on page 5-126.
N. Battery. See
Battery on page 5-52.
O. Windshield Washer Fluid Reservoir. See
Windshield
Washer Fluid on page 5-46.
5-15
Page 417 of 588
A. Engine Air Cleaner/Filter. SeeEngine Air
Cleaner/Filter on page 5-23.
B. Coolant Surge Tank. See
Engine Coolant on
page 5-33.
C. Air Filter Restriction Indicator (If Equipped). See
Engine Air Cleaner/Filter on page 5-23.
D. Engine Oil Dipstick. See
Engine Oil on page 5-18.
E. Automatic Transmission Dipstick (If Equipped).
See
Automatic Transmission Fluid (Except Allison
Transmissionž) on page 5-25orAutomatic
Transmission Fluid (Allison Transmissionž)on
page 5-28.
F. Engine Oil Fill. See
Engine Oil on page 5-18.
G. Fan. See
Cooling System on page 5-39.H. Remote Negative (-) Terminal (GND). See
Jump
Starting on page 5-53.
I. Remote Positive (+) Terminal. See
Jump Starting on
page 5-53.
J. Power Steering Fluid Reservoir. See
Power Steering
Fluid on page 5-45.
K. Brake Fluid Reservoir. See
Brakes on page 5-48.
L. Clutch Fluid Reservoir (If Equipped). See
Hydraulic
Clutch on page 5-32.
M. Underhood Fuse Block. See
Fuses and Circuit
Breakers on page 5-126.
N. Battery. See
Battery on page 5-52.
O. Windshield Washer Fluid Reservoir. See
Windshield
Washer Fluid on page 5-46.
5-17