heater GMC SIERRA 2004 Owner's Manual
[x] Cancel search | Manufacturer: GMC, Model Year: 2004, Model line: SIERRA, Model: GMC SIERRA 2004Pages: 588, PDF Size: 3.74 MB
Page 95 of 588
Keys...............................................................2-3
Remote Keyless Entry System.........................2-4
Remote Keyless Entry System Operation...........2-5
Doors and Locks.............................................2-8
Door Locks....................................................2-8
Power Door Locks..........................................2-9
Delayed Locking...........................................2-10
Programmable Automatic Door Locks..............2-10
Rear Door Security Locks
(Crew Cab)..............................................2-12
Lockout Protection........................................2-13
Rear Doors..................................................2-13
Tailgate.......................................................2-14
Windows........................................................2-16
Manual Windows..........................................2-16
Power Windows............................................2-17
Swing-Out Windows......................................2-18
Sun Visors...................................................2-18
Theft-Deterrent Systems..................................2-19
Content Theft-Deterrent.................................2-19
Passlock
ž....................................................2-21Starting and Operating Your Vehicle................2-21
New Vehicle Break-In....................................2-21
Ignition Positions..........................................2-22
Starting Your Engine.....................................2-23
Engine Coolant Heater..................................2-25
Automatic Transmission Operation...................2-26
Manual Transmission Operation......................2-30
Four-Wheel Drive..........................................2-35
Parking Brake..............................................2-48
Shifting Into Park (P).....................................2-49
Shifting Out of Park (P).................................2-51
Parking Your Vehicle.....................................2-52
Parking Over Things That Burn.......................2-52
Engine Exhaust............................................2-53
Running Your Engine While You Are Parked. . . .2-53
Mirrors...........................................................2-54
Manual Rearview Mirror.................................2-54
Automatic Dimming Rearview Mirror with
OnStar
ž, Compass and Temperature
Display....................................................2-55
Section 2 Features and Controls
2-1
Page 119 of 588
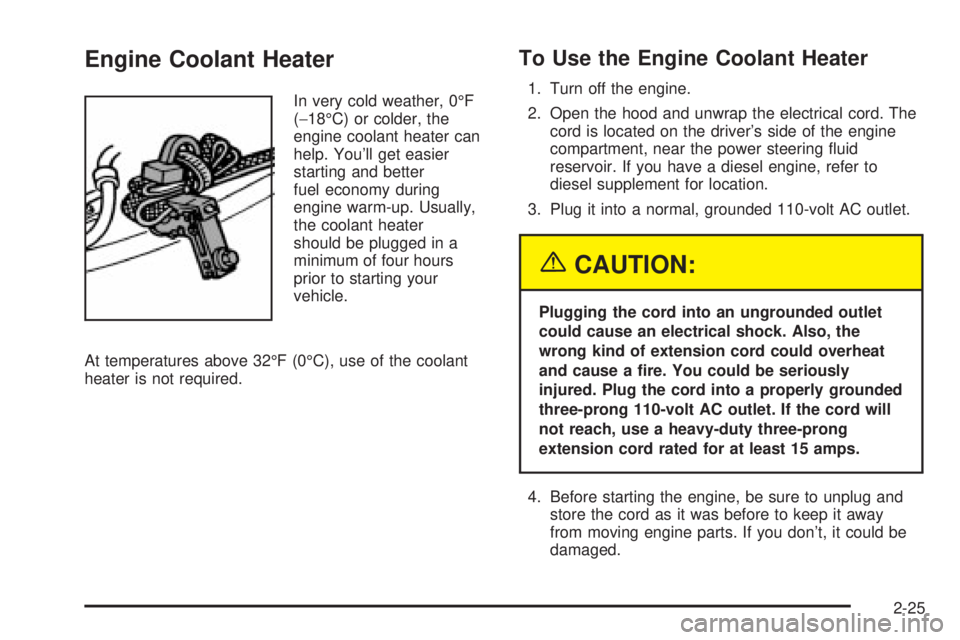
Engine Coolant Heater
In very cold weather, 0ÉF
(-18ÉC) or colder, the
engine coolant heater can
help. You'll get easier
starting and better
fuel economy during
engine warm-up. Usually,
the coolant heater
should be plugged in a
minimum of four hours
prior to starting your
vehicle.
At temperatures above 32ÉF (0ÉC), use of the coolant
heater is not required.
To Use the Engine Coolant Heater
1. Turn off the engine.
2. Open the hood and unwrap the electrical cord. The
cord is located on the driver's side of the engine
compartment, near the power steering ¯uid
reservoir. If you have a diesel engine, refer to
diesel supplement for location.
3. Plug it into a normal, grounded 110-volt AC outlet.
{CAUTION:
Plugging the cord into an ungrounded outlet
could cause an electrical shock. Also, the
wrong kind of extension cord could overheat
and cause a ®re. You could be seriously
injured. Plug the cord into a properly grounded
three-prong 110-volt AC outlet. If the cord will
not reach, use a heavy-duty three-prong
extension cord rated for at least 15 amps.
4. Before starting the engine, be sure to unplug and
store the cord as it was before to keep it away
from moving engine parts. If you don't, it could be
damaged.
2-25
Page 120 of 588
How long should you keep the coolant heater plugged
in? The answer depends on the outside temperature, the
kind of oil you have, and some other things. Instead
of trying to list everything here, we ask that you contact
your dealer in the area where you'll be parking your
vehicle. The dealer can give you the best advice for that
particular area.
Automatic Transmission Operation
If your vehicle is equipped with an automatic
transmission, it features an electronic shift position
indicator within the instrument panel cluster. This display
must be powered anytime the shift lever is capable of
being moved out of PARK (P). See
Fuses and
Circuit Breakers on page 5-126.
There are several different positions for your shift lever.
PARK (P):This position locks your rear wheels. It's
the best position to use when you start your engine
because your vehicle can't move easily. If your vehicle
is equipped with the Allison
žTransmission, use
PARK (P) for stationary operation of the Power Takeoff
(PTO), if equipped.
{CAUTION:
It is dangerous to get out of your vehicle if the
shift lever is not fully in PARK (P) with the
parking brake ®rmly set. Your vehicle can roll.
Do not leave your vehicle when the engine is
running unless you have to. If you have left the
engine running, the vehicle can move
suddenly. You or others could be injured. To
be sure your vehicle will not move, even when
you are on fairly level ground, always set your
parking brake and move the shift lever to
PARK (P). See
Shifting Into Park (P) on
page 2-49
. If you are pulling a trailer, see
Towing a Trailer on page 4-70.
2-26
Page 122 of 588
DRIVE (D):This position is for normal driving. If you
need more power for passing, and you're:
·Going less than about 35 mph (55 km/h), push your
accelerator pedal about halfway down.
·Going about 35 mph (55 km/h) or more, push the
accelerator all the way down.
You'll shift down to the next gear and have more power.
Drive (D) can be used when towing a trailer, carrying
a heavy load, driving on steep hills or for off-road driving.
You may want to shift the transmission to THIRD (3)
or, if necessary, a lower gear selection if the
transmission shifts too often.
Notice:Extended idling for more than ®ve minutes
in DRIVE (D) on vehicles equipped with the Allison
Transmission may cause transmission overheating
and damage. Always put the gearshift lever in
PARK (P) if idle time is longer than ®ve minutes.
If your vehicle is equipped with the Allison
ž
Transmission, it will initially attain ®rst range when
DRIVE (D) is selected. As vehicle speed increases, the
transmission will upshift automatically through each
available range up to FIFTH (5). As the vehicle slows,
the transmission will downshift automatically.
THIRD (3):This position is also used for normal driving,
however it offers more power and lower fuel economy
than DRIVE (D).SECOND (2):This position gives you more power but
lower fuel economy. You can use SECOND (2) on
hills. It can help control your speed as you go down
steep mountain roads, but then you would also want to
use your brakes off and on.
If you manually select SECOND (2) in a light duty
automatic transmission, the transmission will drive in
second gear. You may use this feature for reducing the
speed of the rear wheels when you are trying to start
your vehicle from a stop on slippery road surfaces.
FIRST (1):This position gives you even more power
(but lower fuel economy) than SECOND (2). You
can use it on very steep hills, or in deep snow or mud.
If the selector lever is put in FIRST (1) while the
vehicle is moving forward, the transmission won't shift
into ®rst gear until the vehicle is going slowly enough.
Notice:Spinning the tires or holding the vehicle in
one place on a hill using only the accelerator
pedal may damage the transmission. If you are
stuck, do not spin the tires. When stopping on a hill,
use the brakes to hold the vehicle in place.
On cold days, approximately 32ÉF (0ÉC) or colder, your
transmission is designed to shift differently until the
engine reaches normal operating temperature. This is
intended to improve heater performance.
2-28
Page 189 of 588
Outlet Adjustment
Use the air outlets located
in the center and on the
side of your instrument
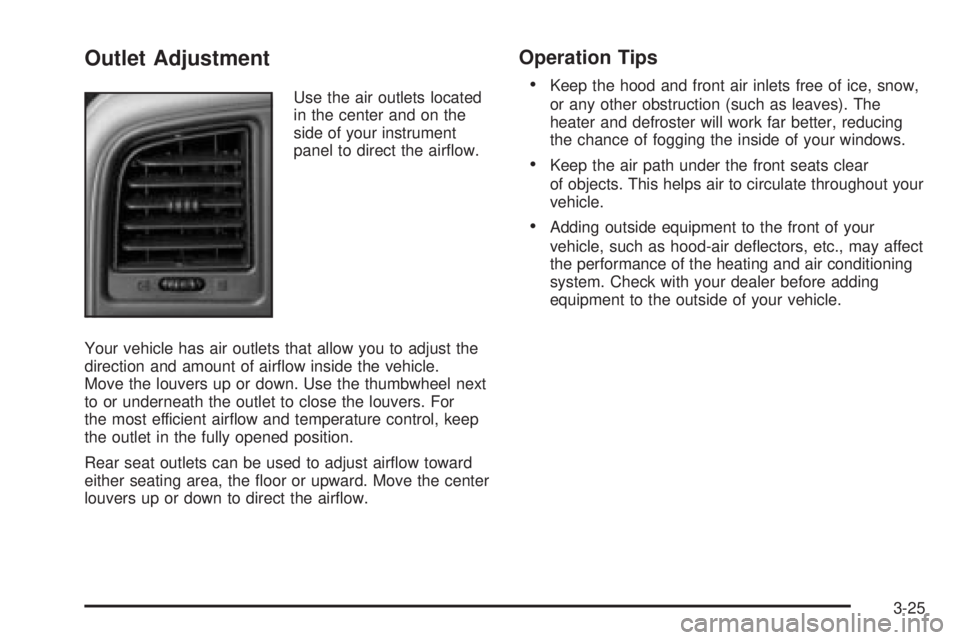
panel to direct the air¯ow.
Your vehicle has air outlets that allow you to adjust the
direction and amount of air¯ow inside the vehicle.
Move the louvers up or down. Use the thumbwheel next
to or underneath the outlet to close the louvers. For
the most efficient air¯ow and temperature control, keep
the outlet in the fully opened position.
Rear seat outlets can be used to adjust air¯ow toward
either seating area, the ¯oor or upward. Move the center
louvers up or down to direct the air¯ow.
Operation Tips
·
Keep the hood and front air inlets free of ice, snow,
or any other obstruction (such as leaves). The
heater and defroster will work far better, reducing
the chance of fogging the inside of your windows.
·Keep the air path under the front seats clear
of objects. This helps air to circulate throughout your
vehicle.
·Adding outside equipment to the front of your
vehicle, such as hood-air de¯ectors, etc., may affect
the performance of the heating and air conditioning
system. Check with your dealer before adding
equipment to the outside of your vehicle.
3-25
Page 195 of 588
On hot days, open the windows long enough to let hot
inside air escape. This reduces the time it takes for
your vehicle to cool down. Then keep your windows
closed for the air conditioner to work its best.
On cool, but sunny days while using manual operation
of the automatic system, use bi-level to deliver warm
air to the ¯oor and cooler air to the instrument
panel outlets. To warm or cool the air delivered, turn the
temperature knob to the desired setting.
In AUTO mode the system will cool and dehumidify the
air inside the vehicle. Also while in AUTO mode, the
system will maximize its performance by using
recirculation as necessary.
Heating
On cold days when using manual operation of the
automatic system, choose ¯oor mode to deliver air to
the ¯oor outlets. To warm or cool the air delivered, turn
the temperature knob to the desired setting.
If you want to use the automatic mode, press AUTO and
adjust the temperature by turning the temperature knob.
The heater works best if you keep the windows closed
while using it.
Defogging and Defrosting
You can use either defog or front defrost to clear fog or
frost from your windshield. Use the defog mode to
clear the windows of fog or moisture. Use the front
defrost button to defrost the front windshield.
-(Defog):Use this setting to clear the windows of fog
or moisture. Press the mode button to select this
setting. This setting will deliver air to the ¯oor and
windshield outlets.
0(Front Defrost):Press the front defrost button to
defrost the windshield. The system will automatically
control the fan speed if you select defrost from AUTO
mode. If the outside temperature is 40ÉF (4ÉC) or
warmer, your air conditioning compressor will
automatically run to help dehumidify the air and dry the
windshield.
3-31
Page 197 of 588
Operation Tips
·
Keep the hood and front air inlets free of ice, snow,
or any other obstruction (such as leaves). The
heater and defroster will work far better, reducing
the chance of fogging the inside of your windows.
·Keep the air path under the front seats clear
of objects. This helps air to circulate throughout your
vehicle.
·Adding outside equipment to the front of your
vehicle, such as hood-air de¯ectors, etc., may affect
the performance of the heating and air conditioning
system. Check with your dealer before adding
equipment to the outside of your vehicle.
Warning Lights, Gages and
Indicators
Warning Lights, Gages, and
Indicators
This part describes the warning lights and gages that
may be on your vehicle. The pictures will help you
locate them.Warning lights and gages can signal that something is
wrong before it becomes serious enough to cause
an expensive repair or replacement. Paying attention to
your warning lights and gages could also save you
or others from injury.
Warning lights come on when there may be or is a
problem with one of your vehicle's functions. As you will
see in the details on the next few pages, some
warning lights come on brie¯y when you start the
engine just to let you know they're working. If you are
familiar with this section, you should not be alarmed
when this happens.
Gages can indicate when there may be or is a problem
with one of your vehicle's functions. Often gages
and warning lights work together to let you know when
there's a problem with your vehicle.
When one of the warning lights comes on and stays on
when you are driving, or when one of the gages shows
there may be a problem, check the section that tells you
what to do about it. Please follow this manual's advice.
Waiting to do repairs can be costly ± and even
dangerous. So please get to know your warning lights
and gages. They're a big help.
Your vehicle also has a driver information system that
works along with the warning lights and gages. See
Driver Information Center (DIC) on page 3-55.
3-33
Page 346 of 588
·Put on extra clothing or wrap a blanket around you.
If you have no blankets or extra clothing, make
body insulators from newspapers, burlap bags, rags,
¯oor mats Ð anything you can wrap around
yourself or tuck under your clothing to keep warm.
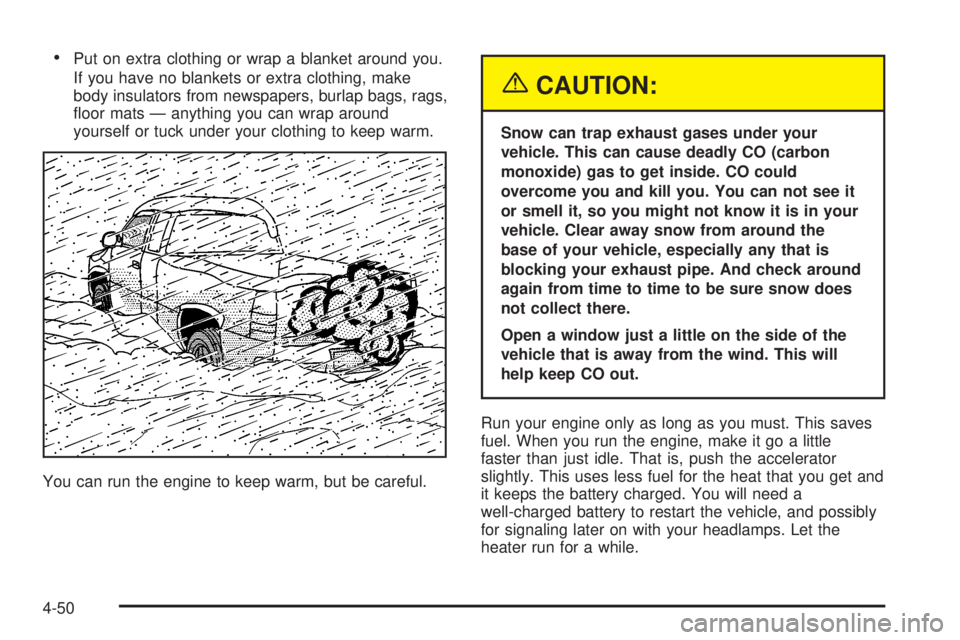
You can run the engine to keep warm, but be careful.
{CAUTION:
Snow can trap exhaust gases under your
vehicle. This can cause deadly CO (carbon
monoxide) gas to get inside. CO could
overcome you and kill you. You can not see it
or smell it, so you might not know it is in your
vehicle. Clear away snow from around the
base of your vehicle, especially any that is
blocking your exhaust pipe. And check around
again from time to time to be sure snow does
not collect there.
Open a window just a little on the side of the
vehicle that is away from the wind. This will
help keep CO out.
Run your engine only as long as you must. This saves
fuel. When you run the engine, make it go a little
faster than just idle. That is, push the accelerator
slightly. This uses less fuel for the heat that you get and
it keeps the battery charged. You will need a
well-charged battery to restart the vehicle, and possibly
for signaling later on with your headlamps. Let the
heater run for a while.
4-50
Page 433 of 588
How to Check and Add Fluid
The proper ¯uid should be added if the level does not
reach the bottom of the diaphragm when it's in place in
the reservoir. See the instructions on the reservoir cap.
Engine Coolant
The cooling system in your vehicle is ®lled with
DEX-COOLžengine coolant. This coolant is designed
to remain in your vehicle for 5 years or 150,000 miles
(240 000 km), whichever occurs ®rst, if you add only
DEX-COOL
žextended life coolant.
The following explains your cooling system and how to
add coolant when it is low. If you have a problem
with engine overheating, see
Engine Overheating on
page 5-36.A 50/50 mixture of clean, drinkable water and
DEX-COOL
žcoolant will:
·Give freezing protection down to-34ÉF (-37ÉC).
·Give boiling protection up to 265ÉF (129ÉC).
·Protect against rust and corrosion.
·Help keep the proper engine temperature.
·Let the warning lights and gages work as they
should.
Notice:Using coolant other than DEX-COOLžmay
cause premature engine, heater core or radiator
corrosion. In addition, the engine coolant may
require changing sooner, at 30,000 miles (50 000 km)
or 24 months, whichever occurs ®rst. Any repairs
would not be covered by your warranty. Always use
DEX-COOL
ž(silicate-free) coolant in your vehicle.
5-33
Page 434 of 588
What to Use
Use a mixture of one-halfclean, drinkable waterand
one-half DEX-COOLžcoolant which won't damage
aluminum parts. If you use this coolant mixture,
you don't need to add anything else.
{CAUTION:
Adding only plain water to your cooling
system can be dangerous. Plain water, or
some other liquid such as alcohol, can boil
before the proper coolant mixture will. Your
vehicle's coolant warning system is set for the
proper coolant mixture. With plain water or the
wrong mixture, your engine could get too hot
but you would not get the overheat warning.
Your engine could catch ®re and you or others
could be burned. Use a 50/50 mixture of clean,
drinkable water and DEX-COOL
žcoolant.
Notice:If you use an improper coolant mixture,
your engine could overheat and be badly damaged.
The repair cost would not be covered by your
warranty. Too much water in the mixture can freeze
and crack the engine, radiator, heater core and
other parts.
If you have to add coolant more than four times a year,
have your dealer check your cooling system.
Notice:If you use the proper coolant, you do not
have to add extra inhibitors or additives which claim
to improve the system. These can be harmful.
5-34