GMC SIERRA 2006 Owner's Manual
Manufacturer: GMC, Model Year: 2006, Model line: SIERRA, Model: GMC SIERRA 2006Pages: 600, PDF Size: 3.49 MB
Page 321 of 600
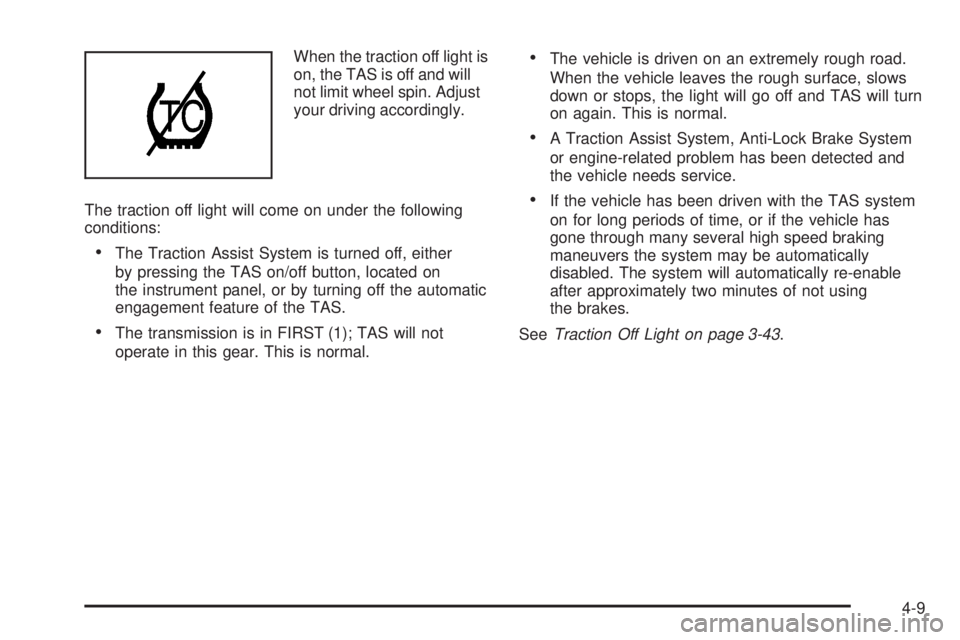
When the traction off light is
on, the TAS is off and will
not limit wheel spin. Adjust
your driving accordingly.
The traction off light will come on under the following
conditions:
The Traction Assist System is turned off, either
by pressing the TAS on/off button, located on
the instrument panel, or by turning off the automatic
engagement feature of the TAS.
The transmission is in FIRST (1); TAS will not
operate in this gear. This is normal.
The vehicle is driven on an extremely rough road.
When the vehicle leaves the rough surface, slows
down or stops, the light will go off and TAS will turn
on again. This is normal.
A Traction Assist System, Anti-Lock Brake System
or engine-related problem has been detected and
the vehicle needs service.
If the vehicle has been driven with the TAS system
on for long periods of time, or if the vehicle has
gone through many several high speed braking
maneuvers the system may be automatically
disabled. The system will automatically re-enable
after approximately two minutes of not using
the brakes.
SeeTraction Off Light on page 3-43.
4-9
Page 322 of 600
The Traction Assist System, as delivered from the
factory, will automatically come on whenever you start
your vehicle. To limit wheel spin, especially in slippery
road conditions, you should always leave the system on.
But you can turn the TAS off if you ever need to. You
should turn the TAS off if your vehicle ever gets stuck in
sand, mud or snow and rocking the vehicle is required.
SeeRocking Your Vehicle to Get It Out on page 4-46and
If Your Vehicle is Stuck in Sand, Mud, Ice or Snow on
page 4-46.
To turn the system on or
off, press the TAS on/off
button located on the
instrument panel.
If you used the button to turn the system off, the traction
off light will come on and stay on. You can turn the
system back on at any time by pressing the button again.
The traction off light should go off.
Adding non-GM accessories can affect your vehicle’s
performance. SeeAccessories and Modi�cations on
page 5-4for more information.Manual Selectable Ride
The main function of this system is to provide superior
ride comfort while trailering or fully loaded, as well as for
unloaded driving. This system also helps to provide:
Improved trailering stability
Improved handling response when trailering or fully
loaded
This button is located on
the center of the instrument
panel near the radio.
Press it to activate the selectable ride setting as desired.
An indicator light near the button will illuminate whenever
the system is active.
4-10
Page 323 of 600
It is recommended to use this system as follows:
For optimum ride comfort in an unloaded vehicle
the button should be out. The indicator light will
not be lit. This button position indicates NORMAL
levels of ride control or damping.
For optimum ride comfort when trailering, fully
loaded, driving off-road, or when personal
preferences demand more control, the button should
be pressed in with the indicator light lit. This switch
position indicates FIRM levels of ride control or
damping.
The following guide can also be used to help determine
the best setting.
NORMAL:The indicator light will not be lit when the
system is in this setting. Use for normal city and highway
driving. This setting provides a smooth, soft ride when
the vehicle is unloaded.
FIRM (Unloaded):Press the button to activate this
setting, the indicator light will be lit. Use this setting
when road conditions or personal preference demand
more control. This setting provides more “feel” or
response to the road conditions.FIRM (Loaded):Press the button to activate this setting,
the indicator light will be lit. Use this setting to minimize
trailer inputs to the vehicle or when the vehicle is fully
loaded. This setting is also appropriate for off-road
driving.
You can select a setting at any time based on road
and trailering conditions to provide the best ride and
handling. Select a new setting whenever driving
conditions change.
Locking Rear Axle
If your vehicle has this feature, your locking rear axle can
give you additional traction on snow, mud, ice, sand or
gravel. It works like a standard axle most of the time, but
when one of the rear wheels has no traction and the other
does, this feature will allow the wheel with traction to
move the vehicle.
Steering
Power Steering
If you lose power steering assist because the engine
stops or the system is not functioning, you can steer
but it will take much more effort.
4-11
Page 324 of 600
Steering Tips
It is important to take curves at a reasonable speed.
A lot of the “driver lost control” accidents mentioned on
the news happen on curves. Here is why:
Experienced driver or beginner, each of us is subject to
the same laws of physics when driving on curves. The
traction of the tires against the road surface makes it
possible for the vehicle to change its path when you turn
the front wheels. If there is no traction, inertia will keep
the vehicle going in the same direction. If you have
ever tried to steer a vehicle on wet ice, you will
understand this.
The traction you can get in a curve depends on the
condition of your tires and the road surface, the angle
at which the curve is banked, and your speed. While you
are in a curve, speed is the one factor you can control.
Suppose you are steering through a sharp curve.
Then you suddenly accelerate. Both control
systems — steering and acceleration — have to
do their work where the tires meet the road. Adding
the sudden acceleration can demand too much of
those places. You can lose control. SeeTraction
Assist System (TAS) on page 4-8.
What should you do if this ever happens? Ease
up on the accelerator pedal, steer the vehicle the
way you want it to go, and slow down.Speed limit signs near curves warn that you should adjust
your speed. Of course, the posted speeds are based on
good weather and road conditions. Under less favorable
conditions you will want to go slower.
If you need to reduce your speed as you approach
a curve, do it before you enter the curve, while your
front wheels are straight ahead.
Try to adjust your speed so you can “drive” through the
curve. Maintain a reasonable, steady speed. Wait to
accelerate until you are out of the curve, and then
accelerate gently into the straightaway.
Adding non-GM accessories can affect your vehicle’s
performance. SeeAccessories and Modi�cations
on page 5-4.
Steering in Emergencies
There are times when steering can be more effective
than braking. For example, you come over a hill and �nd
a truck stopped in your lane, or a car suddenly pulls out
from nowhere, or a child darts out from between parked
cars and stops right in front of you. You can avoid these
problems by braking — if you can stop in time. But
sometimes you cannot; there is not room. That is the
time for evasive action — steering around the problem.
Your vehicle can perform very well in emergencies like
these. First apply your brakes.
4-12
Page 325 of 600
SeeBraking on page 4-5. It is better to remove as much
speed as you can from a possible collision. Then steer
around the problem, to the left or right depending on the
space available.
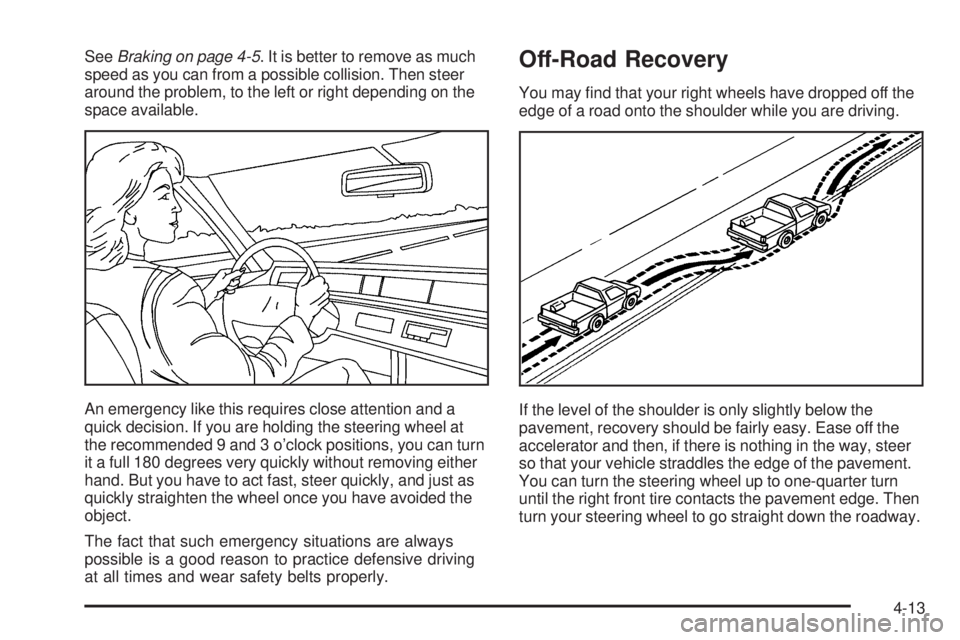
An emergency like this requires close attention and a
quick decision. If you are holding the steering wheel at
the recommended 9 and 3 o’clock positions, you can turn
it a full 180 degrees very quickly without removing either
hand. But you have to act fast, steer quickly, and just as
quickly straighten the wheel once you have avoided the
object.
The fact that such emergency situations are always
possible is a good reason to practice defensive driving
at all times and wear safety belts properly.Off-Road Recovery
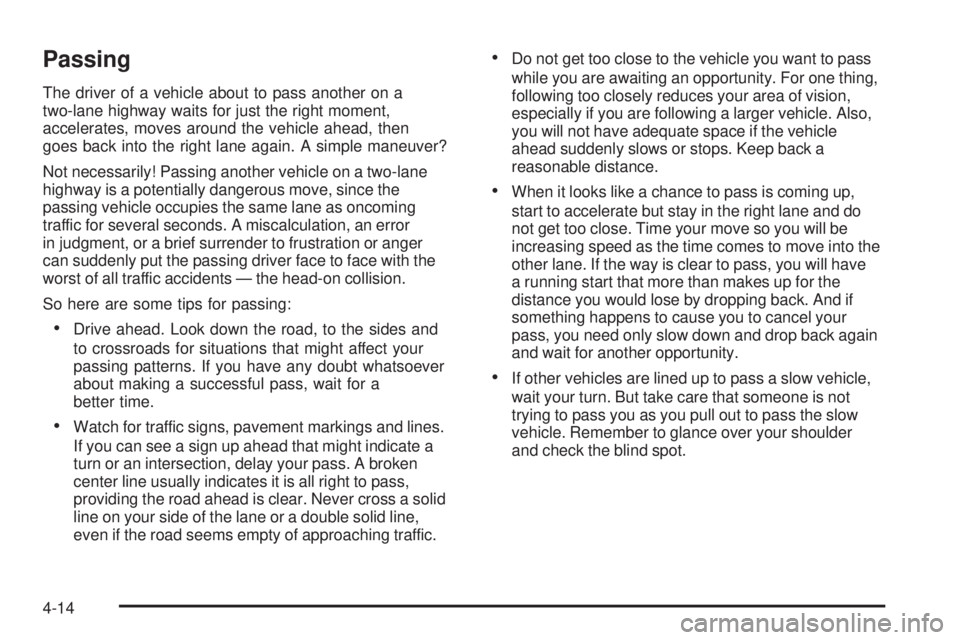
You may �nd that your right wheels have dropped off the
edge of a road onto the shoulder while you are driving.
If the level of the shoulder is only slightly below the
pavement, recovery should be fairly easy. Ease off the
accelerator and then, if there is nothing in the way, steer
so that your vehicle straddles the edge of the pavement.
You can turn the steering wheel up to one-quarter turn
until the right front tire contacts the pavement edge. Then
turn your steering wheel to go straight down the roadway.
4-13
Page 326 of 600
Passing
The driver of a vehicle about to pass another on a
two-lane highway waits for just the right moment,
accelerates, moves around the vehicle ahead, then
goes back into the right lane again. A simple maneuver?
Not necessarily! Passing another vehicle on a two-lane
highway is a potentially dangerous move, since the
passing vehicle occupies the same lane as oncoming
traffic for several seconds. A miscalculation, an error
in judgment, or a brief surrender to frustration or anger
can suddenly put the passing driver face to face with the
worst of all traffic accidents — the head-on collision.
So here are some tips for passing:
Drive ahead. Look down the road, to the sides and
to crossroads for situations that might affect your
passing patterns. If you have any doubt whatsoever
about making a successful pass, wait for a
better time.
Watch for traffic signs, pavement markings and lines.
If you can see a sign up ahead that might indicate a
turn or an intersection, delay your pass. A broken
center line usually indicates it is all right to pass,
providing the road ahead is clear. Never cross a solid
line on your side of the lane or a double solid line,
even if the road seems empty of approaching traffic.
Do not get too close to the vehicle you want to pass
while you are awaiting an opportunity. For one thing,
following too closely reduces your area of vision,
especially if you are following a larger vehicle. Also,
you will not have adequate space if the vehicle
ahead suddenly slows or stops. Keep back a
reasonable distance.
When it looks like a chance to pass is coming up,
start to accelerate but stay in the right lane and do
not get too close. Time your move so you will be
increasing speed as the time comes to move into the
other lane. If the way is clear to pass, you will have
a running start that more than makes up for the
distance you would lose by dropping back. And if
something happens to cause you to cancel your
pass, you need only slow down and drop back again
and wait for another opportunity.
If other vehicles are lined up to pass a slow vehicle,
wait your turn. But take care that someone is not
trying to pass you as you pull out to pass the slow
vehicle. Remember to glance over your shoulder
and check the blind spot.
4-14
Page 327 of 600
Check your mirrors, glance over your shoulder and
start your left lane change signal before moving out
of the right lane to pass. When you are far enough
ahead of the passed vehicle to see its front in your
inside mirror, activate your right lane change signal
and move back into the right lane. Remember that if
your passenger side outside mirror is convex, the
vehicle you just passed may seem to be farther away
from you than it really is.
Try not to pass more than one vehicle at a time on
two-lane roads. Reconsider before passing the next
vehicle.
Do not overtake a slowly moving vehicle too rapidly.
Even though the brake lamps are not �ashing, it may
be slowing down or starting to turn.
If you are being passed, make it easy for the
following driver to get ahead of you. Perhaps you
can ease a little to the right.
Loss of Control
Let us review what driving experts say about what
happens when the three control systems — brakes,
steering, and acceleration — do not have enough friction
where the tires meet the road to do what the driver has
asked.
In any emergency, do not give up. Keep trying to steer
and constantly seek an escape route or area of less
danger.
Skidding
In a skid, a driver can lose control of the vehicle.
Defensive drivers avoid most skids by taking reasonable
care suited to existing conditions, and by not overdriving
those conditions. But skids are always possible.
The three types of skids correspond to your vehicle’s
three control systems. In the braking skid, your wheels
are not rolling. In the steering or cornering skid, too much
speed or steering in a curve causes tires to slip and lose
cornering force. And in the acceleration skid, too much
throttle causes the driving wheels to spin.
A cornering skid is best handled by easing your foot off
the accelerator pedal.
4-15
Page 328 of 600
If you have the Traction Assist System (TAS), remember:
It helps avoid only the acceleration skid. SeeTraction
Assist System (TAS) on page 4-8. If you do not have this
system, or if the system is off, then an acceleration skid is
also best handled by easing your foot off the accelerator
pedal.
If your vehicle starts to slide, ease your foot off the
accelerator pedal and quickly steer the way you want
the vehicle to go. If you start steering quickly enough,
your vehicle may straighten out. Always be ready
for a second skid if it occurs.
Of course, traction is reduced when water, snow, ice,
gravel, or other material is on the road. For safety, you
will want to slow down and adjust your driving to these
conditions. It is important to slow down on slippery
surfaces because stopping distance will be longer and
vehicle control more limited.
While driving on a surface with reduced traction, try your
best to avoid sudden steering, acceleration, or braking,
including engine braking by shifting to a lower gear. Any
sudden changes could cause the tires to slide. You may
not realize the surface is slippery until your vehicle is
skidding. Learn to recognize warning clues — such as
enough water, ice, or packed snow on the road to make a
mirrored surface — and slow down when you have any
doubt.
Remember: Any Anti-Lock Brake System (ABS) helps
avoid only the braking skid.Off-Road Driving
This off-road guide is for vehicles that have four-wheel
drive. Also, seeBraking on page 4-5. If your vehicle
does not have four-wheel drive or is equipped with
20-inch tire/wheel assemblies, you should not drive
off-road unless you are on a level, solid surface.
Off-road driving can be great fun. But it does have some
de�nite hazards. The greatest of these is the terrain itself.
“Off-roading” means you have left the great North
American road system behind. Traffic lanes are not
marked. Curves are not banked. There are no road
signs. Surfaces can be slippery, rough, uphill, or downhill.
In short, you have gone right back to nature.
Off-road driving involves some new skills. And that is why
it is very important that you read this guide. You will �nd
many driving tips and suggestions. These will help make
your off-road driving safer and more enjoyable.
If you think you will need some more ground clearance
at the front of your vehicle, you can remove the front
bumper lower air dam.
4-16
Page 329 of 600
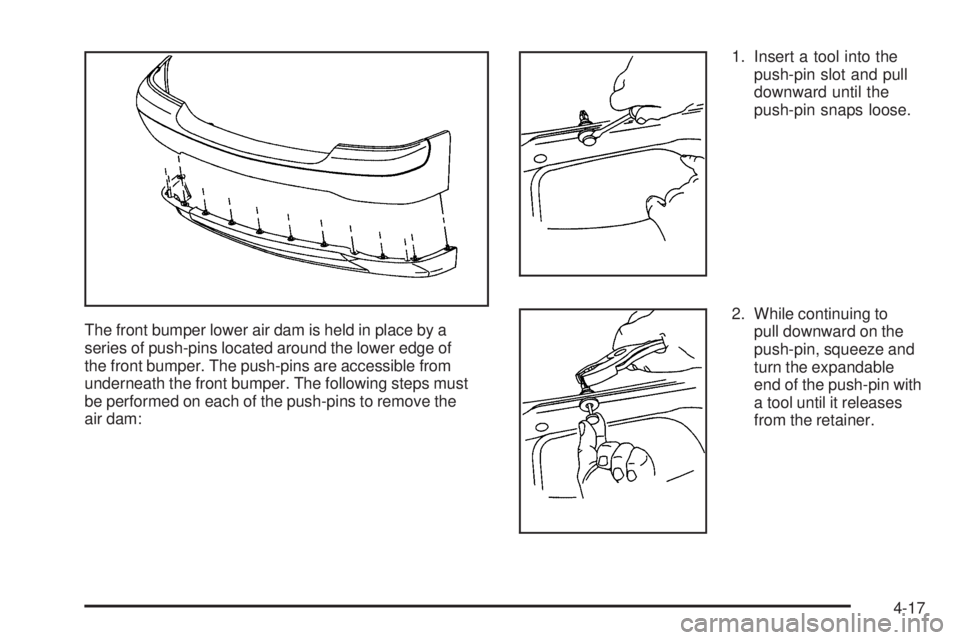
The front bumper lower air dam is held in place by a
series of push-pins located around the lower edge of
the front bumper. The push-pins are accessible from
underneath the front bumper. The following steps must
be performed on each of the push-pins to remove the
air dam:1. Insert a tool into the
push-pin slot and pull
downward until the
push-pin snaps loose.
2. While continuing to
pull downward on the
push-pin, squeeze and
turn the expandable
end of the push-pin with
a tool until it releases
from the retainer.
4-17
Page 330 of 600
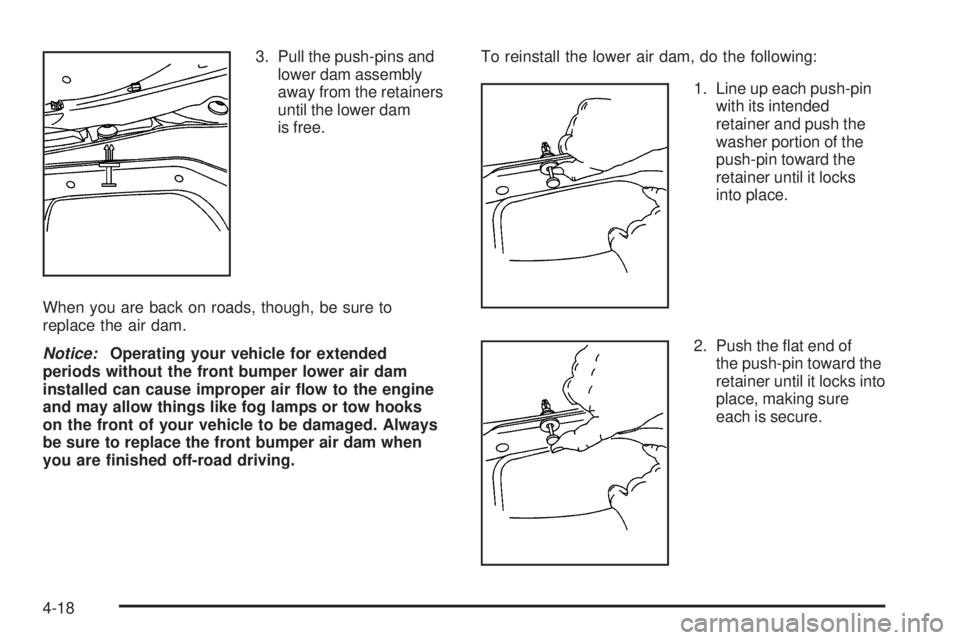
3. Pull the push-pins and
lower dam assembly
away from the retainers
until the lower dam
is free.
When you are back on roads, though, be sure to
replace the air dam.
Notice:Operating your vehicle for extended
periods without the front bumper lower air dam
installed can cause improper air �ow to the engine
and may allow things like fog lamps or tow hooks
on the front of your vehicle to be damaged. Always
be sure to replace the front bumper air dam when
you are �nished off-road driving.To reinstall the lower air dam, do the following:
1. Line up each push-pin
with its intended
retainer and push the
washer portion of the
push-pin toward the
retainer until it locks
into place.
2. Push the �at end of
the push-pin toward the
retainer until it locks into
place, making sure
each is secure.
4-18