heater GMC SIERRA 2007 Owner's Manual
[x] Cancel search | Manufacturer: GMC, Model Year: 2007, Model line: SIERRA, Model: GMC SIERRA 2007Pages: 680, PDF Size: 3.42 MB
Page 101 of 680
See “Safety Belts” and “Child Restraints” in the
Index for additional information about the
importance of proper restraint use.
{CAUTION:
If the airbag readiness light in the
instrument panel cluster ever comes on
and stays on, it means that something
may be wrong with the airbag system. If
this ever happens, have the vehicle
serviced promptly, because an adult-size
person sitting in the right front
passenger’s seat may not have the
protection of the airbag(s). SeeAirbag
Readiness Light on page 250for more on
this, including important safety
information.A thick layer of additional material, such as a
blanket or cushion, or aftermarket equipment such
as seat covers, seat heaters, and seat massagers
can affect how well the passenger sensing
system operates. You may want to consider not
using seat covers or other aftermarket equipment.
SeeAdding Equipment to Your Airbag-Equipped
Vehicle on page 102for more information
about modi�cations that can affect how the system
operates.
{CAUTION:
Stowing of articles under the passenger’s
seat or between the passenger’s seat
cushion and seatback may interfere with
the proper operation of the passenger
sensing system.
101
Page 107 of 680
Keys............................................................ 109
Remote Keyless Entry (RKE) System........ 110
Remote Keyless Entry (RKE) System
Operation............................................... 111
Doors and Locks........................................ 118
Door Locks................................................ 118
Power Door Locks..................................... 119
Delayed Locking........................................ 119
Programmable Automatic Door Locks........ 119
Rear Door Security Locks......................... 120
Lockout Protection..................................... 120
Rear Doors............................................... 121
Tailgate..................................................... 122
Windows...................................................... 124
Manual Windows....................................... 124
Power Windows........................................ 125
Power Sliding Rear Window...................... 126
Sun Visors................................................ 127
Theft-Deterrent Systems............................. 127
Content Theft-Deterrent............................. 128
PASS-Key
®III+......................................... 129
PASS-Key®III+ Operation......................... 130Starting and Operating Your Vehicle......... 132
New Vehicle Break-In................................ 132
Ignition Positions....................................... 133
Retained Accessory Power (RAP)............. 134
Starting the Engine.................................... 134
Adjustable Throttle and Brake Pedal.......... 136
Engine Coolant Heater.............................. 136
Active Fuel Management™........................ 138
Automatic Transmission Operation............. 138
Tow/Haul Mode......................................... 144
Four-Wheel Drive...................................... 147
Parking Brake........................................... 162
Shifting Into Park (P)................................. 163
Shifting Out of Park (P)............................. 165
Parking Over Things That Burn................. 166
Engine Exhaust......................................... 167
Running the Engine While Parked............. 168
Mirrors......................................................... 169
Manual Rearview Mirror............................. 169
Automatic Dimming Rearview Mirror with
OnStar
®, Compass and Temperature
Display................................................... 169
Section 2 Features and Controls
107
Page 136 of 680
Adjustable Throttle and Brake Pedal
If your vehicle has this feature, you can change
the position of the throttle and brake pedals.
This feature is designed for shorter drivers, since
the pedals cannot move farther away from the
standard position, but can move toward the driver
for better pedal reach.
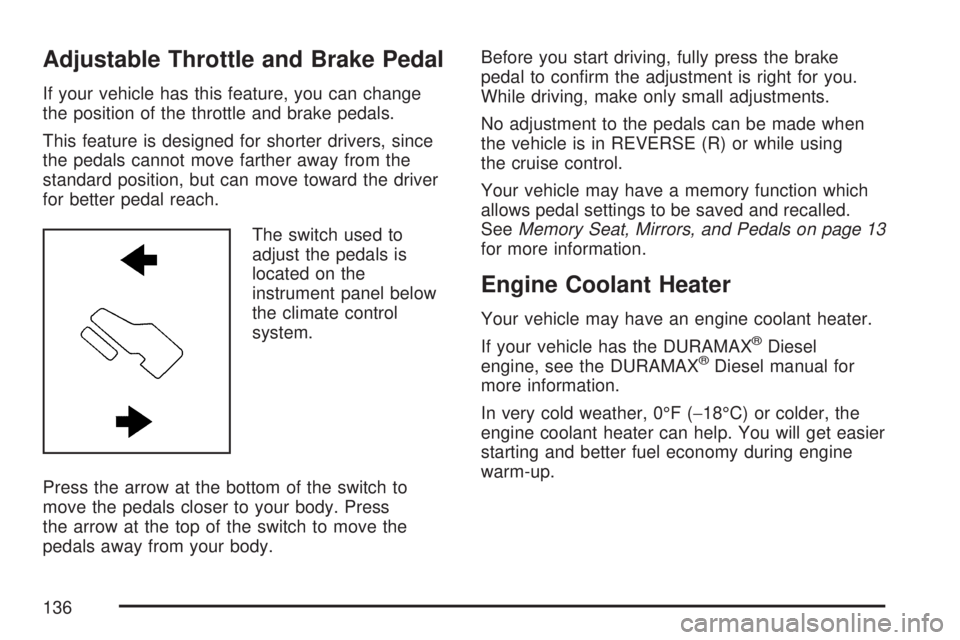
The switch used to
adjust the pedals is
located on the
instrument panel below
the climate control
system.
Press the arrow at the bottom of the switch to
move the pedals closer to your body. Press
the arrow at the top of the switch to move the
pedals away from your body.Before you start driving, fully press the brake
pedal to con�rm the adjustment is right for you.
While driving, make only small adjustments.
No adjustment to the pedals can be made when
the vehicle is in REVERSE (R) or while using
the cruise control.
Your vehicle may have a memory function which
allows pedal settings to be saved and recalled.
SeeMemory Seat, Mirrors, and Pedals on page 13
for more information.
Engine Coolant Heater
Your vehicle may have an engine coolant heater.
If your vehicle has the DURAMAX
®Diesel
engine, see the DURAMAX®Diesel manual for
more information.
In very cold weather, 0°F (−18°C) or colder, the
engine coolant heater can help. You will get easier
starting and better fuel economy during engine
warm-up.
136
Page 137 of 680
Usually, the coolant heater should be plugged in a
minimum of four hours prior to starting your
vehicle. At temperatures above 32°F (0°C), use of
the coolant heater is not required. Your vehicle
may also have an internal thermostat in the
plug end of the cord. This will prevent operation of
the engine coolant heater when the temperature
is at or above 0°F (−18°C) as noted on the cord.
To Use the Engine Coolant Heater
1. Turn off the engine.
2. Open the hood and unwrap the electrical
cord. The cord is located on the driver’s
side of the engine compartment, near
the power steering �uid reservoir.
3. Plug the cord into a normal, grounded
110-volt AC outlet.
{CAUTION:
Plugging the cord into an ungrounded
outlet could cause an electrical shock.
Also, the wrong kind of extension cord
could overheat and cause a �re. You
could be seriously injured. Plug the cord
into a properly grounded three-prong
110-volt AC outlet. If the cord will not
reach, use a heavy-duty three-prong
extension cord rated for at least 15 amps.
4. Before starting the engine, be sure to unplug
and store the cord as it was before to keep it
away from moving engine parts. If you do
not, it could be damaged.
How long should you keep the coolant heater
plugged in? The answer depends on the outside
temperature, the kind of oil you have, and
some other things. Instead of trying to list
everything here, we ask that you contact your
dealer in the area where you will be parking your
vehicle. The dealer can give you the best
advice for that particular area.
137
Page 203 of 680
Instrument Panel Overview........................ 206
Instrument Panel Overview
(Base/Uplevel version)............................ 206
Instrument Panel Overview
(Premium version).................................. 209
Hazard Warning Flashers.......................... 211
Other Warning Devices............................. 211
Horn.......................................................... 211
Tilt Wheel.................................................. 212
Turn Signal/Multifunction Lever.................. 212
Turn and Lane-Change Signals................. 213
Headlamp High/Low-Beam Changer.......... 214
Flash-to-Pass............................................ 214
Windshield Wipers..................................... 215
Rainsense™ II Wipers............................... 216
Windshield Washer.................................... 217
Cruise Control........................................... 218
Exterior Lamps.......................................... 221
Headlamps on Reminder........................... 222
Daytime Running Lamps (DRL)................. 222
Automatic Headlamp System..................... 223Puddle Lamps........................................... 224
Fog Lamps................................................ 224
Auxiliary Roof Mounted Lamp.................... 225
Instrument Panel Brightness...................... 225
Dome Lamps............................................. 226
Dome Lamp Override................................ 226
Entry Lighting............................................ 226
Exit Lighting.............................................. 226
Reading Lamps......................................... 226
Cargo Lamp.............................................. 227
Electric Power Management...................... 227
Battery Run-Down Protection..................... 228
Ultrasonic Rear Parking Assist (URPA)........ 228
Accessory Power Outlet(s)........................ 232
Ashtray(s) and Cigarette Lighter................ 233
Climate Controls......................................... 234
Climate Control System
(With Air Conditioning)........................... 234
Climate Control System (Heater Only)....... 237
Dual Automatic Climate Control System.... 238
Outlet Adjustment...................................... 245
Section 3 Instrument Panel
203
Page 208 of 680
R. Ashtray (If Equipped). SeeAshtray(s) and
Cigarette Lighter on page 233.
S. StabiliTrak
®Button (If Equipped). See
StabiliTrak®System on page 381. Ultrasonic
Rear Park Assist Disable Button (If Equipped).
SeeUltrasonic Rear Parking Assist (URPA)
on page 228. Pedal Adjust Button (If Equipped).
SeeAdjustable Throttle and Brake Pedal on
page 136. Heated Windshield Washer
Fluid Button (If Equipped).Windshield Washer
on page 217.
T. Accessory Power Outlet. SeeAccessory Power
Outlet(s) on page 232.U. Climate Control System. SeeClimate Control
System (With Air Conditioning ) on page 234or
Climate Control System (Heater Only) on
page 237andDual Automatic Climate Control
System on page 238.
V. Power Take Off (PTO) Control (If Equipped).
See Power Take Off (PTO) in the
DURAMAX
®Diesel Supplement Index.
W. Passenger Airbag Off Control (If Equipped).
SeeAirbag Off Switch on page 93.
X. Glove Box. SeeGlove Box on page 196.
208
Page 210 of 680
E. Shift Lever. SeeAutomatic Transmission
Operation on page 138.
F. Tow/Haul Selector Button (If Equipped). See
Tow/Haul Mode on page 144.
G. Driver Information Center (DIC) Controls. See
Driver Information Center (DIC) on page 267.
H. Audio System. SeeAudio System(s) on
page 300.
I. Exterior Lamps Control. SeeExterior Lamps on
page 221.
J. Integrated Trailer Brake Controller (If
Equipped). SeeTowing a Trailer on page 445.
K. Dome Lamp Override Button. SeeDome
Lamp Override on page 226. Dome Lamp
Knob. SeeDome Lamps on page 226.
L. Automatic Transfer Case Control. (If Equipped).
SeeFour-Wheel Drive on page 147.
M. Hood Release. SeeHood Release on
page 497.
N. Parking Brake. SeeParking Brake on
page 162.
O. Cruise Control Buttons. SeeCruise Control on
page 218.
P. Tilt Wheel Lever. SeeTilt Wheel on page 212.Q. Horn. SeeHorn on page 211.
R. Audio Steering Wheel Controls. SeeAudio
Steering Wheel Controls on page 368.
S. Climate Controls. SeeClimate Control System
(With Air Conditioning ) on page 234or
Climate Control System (Heater Only) on
page 237or Dual Automatic Climate Controls
(If Equipped). SeeDual Automatic Climate
Control System on page 238.
T. Accessory Power Outlets. SeeAccessory
Power Outlet(s) on page 232. Cigarette Lighter
(If Equipped). SeeAshtray(s) and Cigarette
Lighter on page 233.
U. StabiliTrak
®Button (If Equipped). See
StabiliTrak®System on page 381. Pedal Adjust
Button (If Equipped). SeeAdjustable Throttle
and Brake Pedal on page 136. Rear Park Assist
Disable Button (If Equipped). SeeUltrasonic
Rear Parking Assist (URPA) on page 228.
Heated Windshield Washer Fluid Button
(If Equipped). SeeWindshield Washer on
page 217.
V. Passenger Airbag Off Control (If Equipped).
SeeAirbag Off Switch on page 93.
W. Glove Box. SeeGlove Box on page 196.
210
Page 237 of 680
Climate Control System
(Heater Only)
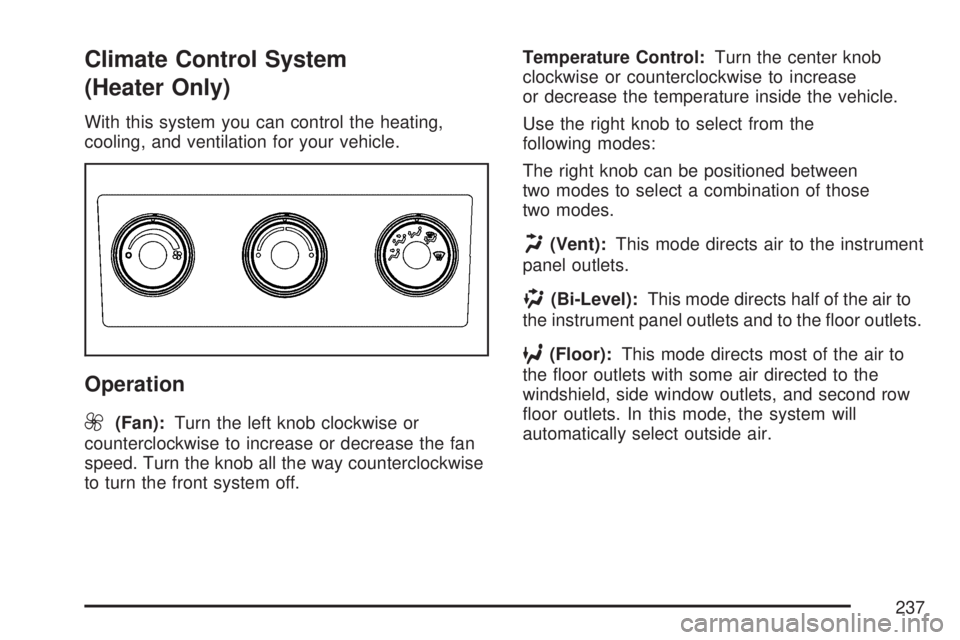
With this system you can control the heating,
cooling, and ventilation for your vehicle.
Operation
9
(Fan):Turn the left knob clockwise or
counterclockwise to increase or decrease the fan
speed. Turn the knob all the way counterclockwise
to turn the front system off.Temperature Control:Turn the center knob
clockwise or counterclockwise to increase
or decrease the temperature inside the vehicle.
Use the right knob to select from the
following modes:
The right knob can be positioned between
two modes to select a combination of those
two modes.
H(Vent):This mode directs air to the instrument
panel outlets.
)(Bi-Level):This mode directs half of the air to
the instrument panel outlets and to the �oor outlets.
6(Floor):This mode directs most of the air to
the �oor outlets with some air directed to the
windshield, side window outlets, and second row
�oor outlets. In this mode, the system will
automatically select outside air.
237
Page 245 of 680
Notice:Do not use a razor blade or sharp
object to clear the inside rear window. Do not
adhere anything to the defogger grid lines
in the rear glass. These actions may damage
the rear defogger. Repairs would not be
covered by your warranty.
W(Heated Mirrors):If your vehicle has heated
outside rearview mirrors, the mirrors will heat
to help clear fog or frost from the surface of the
mirror when the rear window defog button is
pressed. SeeOutside Power Mirrors on page 176.
Outlet Adjustment
Use the air outlets located in the center and on
the side of the instrument panel to direct the
air�ow.
Operation Tips
Keep the hood and front air inlets free of ice,
snow, or any other obstruction, such as
leaves. The heater and defroster will work
better, reducing the chance of fogging
the inside of your windows.
When you enter a vehicle in cold weather, set
the fan speed to maximum air�ow for a few
moments before driving. This helps clear
the intake ducts of snow and moisture, and
reduces the chance of fogging the inside
of your windows.
Keep the air path under the front seats clear
of objects. This helps air to circulate
throughout your vehicle.
Adding outside equipment to the front of the
vehicle, such as hood-air de�ectors, may affect
the performance of the heating and air
conditioning system. Check with your dealer
before adding equipment to the outside of
your vehicle.
245
Page 322 of 680
O(Power/Volume):Turn this knob clockwise or
counterclockwise to increase or decrease the
volume of the portable player. Additional volume
adjustments might be needed from the portable
device if the volume does not go loud or soft
enough.
BAND:Press this button to listen to the radio
when a portable audio device is playing. The
portable audio device continues playing, so you
might want to stop it or turn it off.
CD/AUX (CD/Auxiliary):Press this button to play
a CD when a portable audio device is playing.
Press this button again and the system begins
playing audio from the connected portable audio
player. If a portable audio player is not
connected, No Input Device Found displays.Radio with CD and DVD (MP3)
If your vehicle has a Rear Seat Entertainment
(RSE) system, it has a CD/DVD radio. SeeRear
Seat Entertainment System on page 355for
more information on the vehicle’s RSE system.
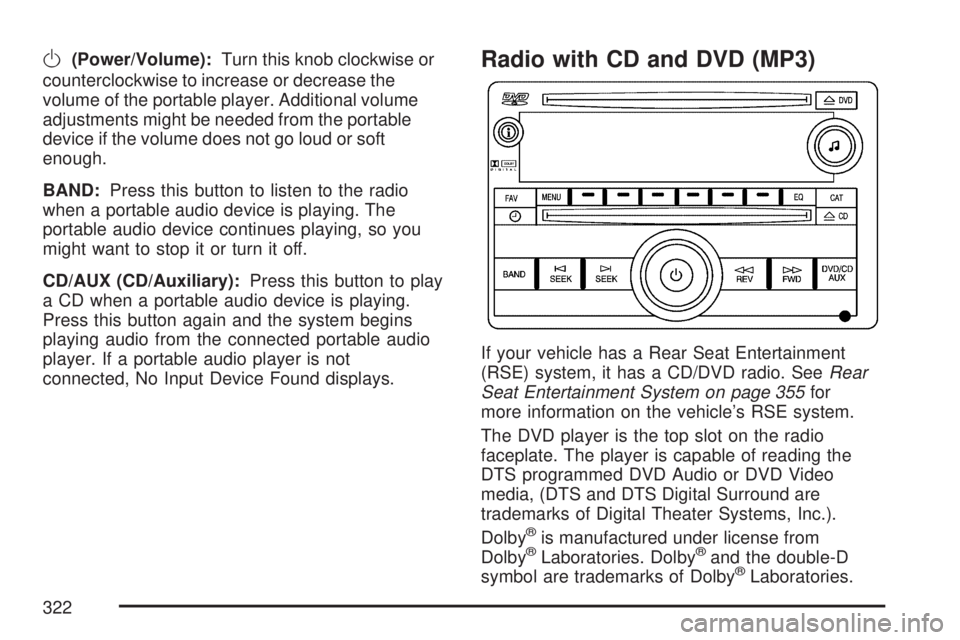
The DVD player is the top slot on the radio
faceplate. The player is capable of reading the
DTS programmed DVD Audio or DVD Video
media, (DTS and DTS Digital Surround are
trademarks of Digital Theater Systems, Inc.).
Dolby
®is manufactured under license from
Dolby®Laboratories. Dolby®and the double-D
symbol are trademarks of Dolby®Laboratories.
322