headlamp GMC SIERRA 2010 Owner's Manual
[x] Cancel search | Manufacturer: GMC, Model Year: 2010, Model line: SIERRA, Model: GMC SIERRA 2010Pages: 630, PDF Size: 4.65 MB
Page 2 of 630

2010 GMC Sierra Owner ManualM
Instrument Panel. . . . . . . . . . . . . . . . . . . . . . . . . . . . . . . . . 4-1
Instrument Panel Overview . . . . . . . . . . . . . . . . . . . . . . . 4-3
Climate Controls . . . . . . . . . . . . . . . . . . . . . . . . . . . . . . . . 4-18
Warning Lights, Gages, and Indicators . . . . . . . . . . 4-29
Driver Information Center (DIC) . . . . . . . . . . . . . . . . . 4-51
Audio System(s) . . . . . . . . . . . . . . . . . . . . . . . . . . . . . . . . 4-84
Driving Your Vehicle . . . . . . . . . . . . . . . . . . . . . . . . . . . . . . 5-1
Your Driving, the Road, and the Vehicle . . . . . . . . . . 5-2
Towing . . . . . . . . . . . . . . . . . . . . . . . . . . . . . . . . . . . . . . . . . . 5-43
Service and Appearance Care . . . . . . . . . . . . . . . . . . . 6-1
Service . . . . . . . . . . . . . . . . . . . . . . . . . . . . . . . . . . . . . . . . . . . 6-4
Fuel . . . . . . . . . . . . . . . . . . . . . . . . . . . . . . . . . . . . . . . . . . . . . . 6-6
Checking Things Under the Hood . . . . . . . . . . . . . . . 6-14
Rear Axle . . . . . . . . . . . . . . . . . . . . . . . . . . . . . . . . . . . . . . . 6-48
Four-Wheel Drive . . . . . . . . . . . . . . . . . . . . . . . . . . . . . . . 6-50
Front Axle . . . . . . . . . . . . . . . . . . . . . . . . . . . . . . . . . . . . . . . 6-52 Noise Control System . . . . . . . . . . . . . . . . . . . . . . . . . . . 6-53
Headlamp Aiming . . . . . . . . . . . . . . . . . . . . . . . . . . . . . . . 6-54
Bulb Replacement . . . . . . . . . . . . . . . . . . . . . . . . . . . . . . 6-57
Windshield Wiper Blade Replacement . . . . . . . . . . . 6-63
Tires . . . . . . . . . . . . . . . . . . . . . . . . . . . . . . . . . . . . . . . . . . . . 6-64
Appearance Care . . . . . . . . . . . . . . . . . . . . . . . . . . . . . . 6-110
Vehicle Identification . . . . . . . . . . . . . . . . . . . . . . . . . . . 6-117
Electrical System . . . . . . . . . . . . . . . . . . . . . . . . . . . . . . 6-117
Capacities and Specifications . . . . . . . . . . . . . . . . . . 6-126
Maintenance Schedule . . . . . . . . . . . . . . . . . . . . . . . . . . . 7-1
Maintenance Schedule . . . . . . . . . . . . . . . . . . . . . . . . . . . 7-2
Customer Assistance Information . . . . . . . . . . . . . . . 8-1
Customer Assistance and Information . . . . . . . . . . . . 8-2
Reporting Safety Defects . . . . . . . . . . . . . . . . . . . . . . . . 8-15
Vehicle Data Recording and Privacy . . . . . . . . . . . . . 8-18
Index . . . . . . . . . . . . . . . . . . . . . . . . . . . . . . . . . . . . i-1
Page 5 of 630
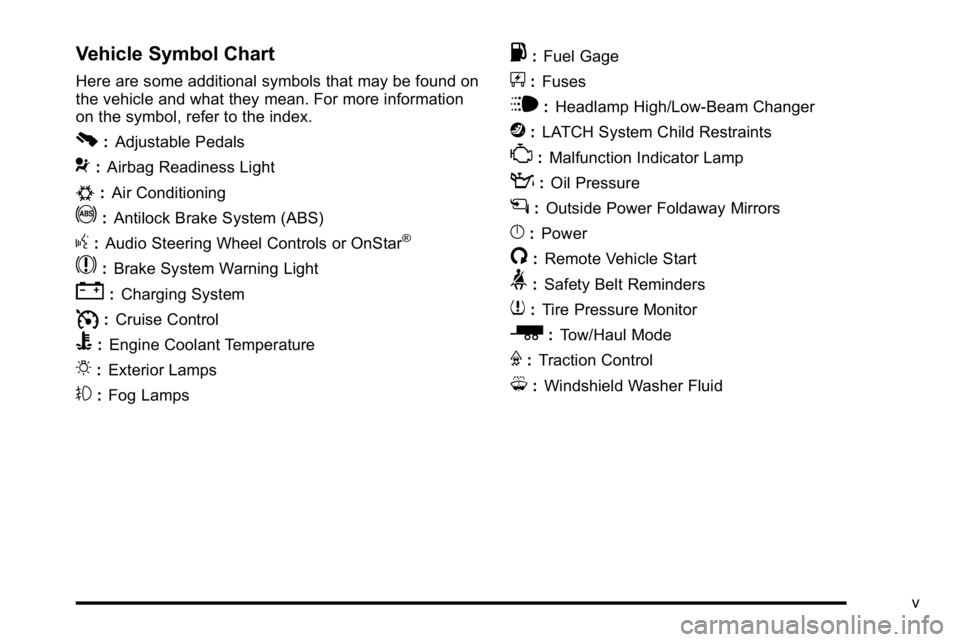
Vehicle Symbol Chart
Here are some additional symbols that may be found on
the vehicle and what they mean. For more information
on the symbol, refer to the index.
0:Adjustable Pedals
9:Airbag Readiness Light
#:Air Conditioning
!:Antilock Brake System (ABS)
g:Audio Steering Wheel Controls or OnStar®
$: Brake System Warning Light
":Charging System
I:Cruise Control
B: Engine Coolant Temperature
O:Exterior Lamps
#:Fog Lamps
.: Fuel Gage
+:Fuses
i: Headlamp High/Low-Beam Changer
j:LATCH System Child Restraints
*: Malfunction Indicator Lamp
::Oil Pressure
g:Outside Power Foldaway Mirrors
}:Power
/:Remote Vehicle Start
>:Safety Belt Reminders
7:Tire Pressure Monitor
_: Tow/Haul Mode
F:Traction Control
M:Windshield Washer Fluid
v
Page 22 of 630
Interior Mirror
Vehicles with a manual rearview mirror can be
adjusted to see clearly behind the vehicle. Hold the
mirror in the center to move it up or down and side to
side. To reduce headlamp glare during nighttime use,
push the tab forward for daytime use and pull it for
nighttime use.
Vehicles with the automatic dimming feature will
automatically reduce the glare of lights from behind
the vehicle. The dimming feature comes on and the
indicator light illuminates each time the vehicle
is started.
SeeAutomatic Dimming Rearview Mirror
on page 3‑56for more information.
Steering Wheel Adjustment
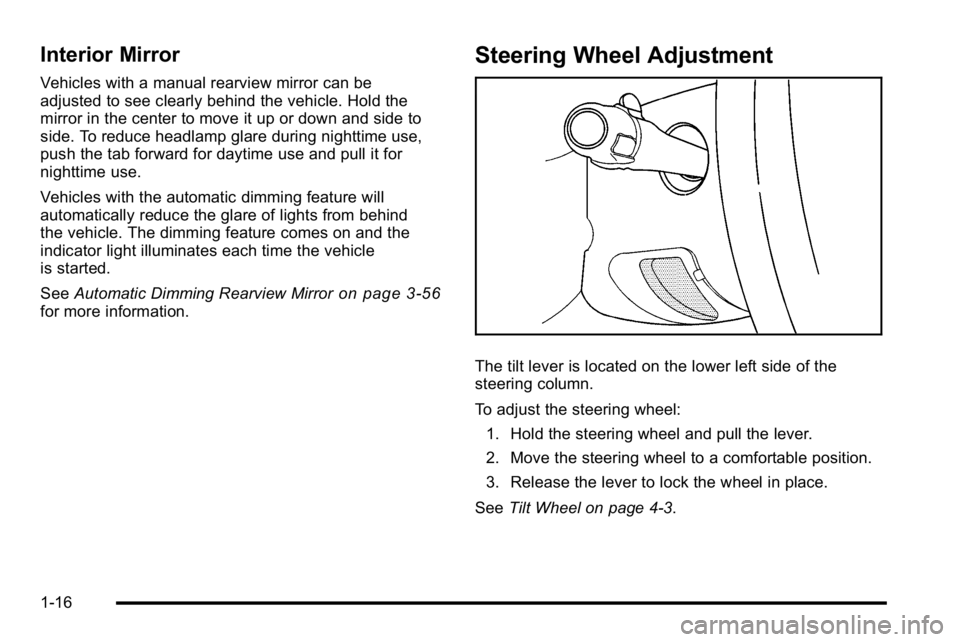
The tilt lever is located on the lower left side of the
steering column.
To adjust the steering wheel:
1. Hold the steering wheel and pull the lever.
2. Move the steering wheel to a comfortable position.
3. Release the lever to lock the wheel in place.
See Tilt Wheel on page 4‑3.
1-16
Page 24 of 630
Reading Lamps
For vehicles with reading lamps in the overhead
console, press the button located next to the lamp to
turn it on or off.
The vehicle may also have reading lamps in other
locations. The lamps cannot be adjusted.
For more information about interior lamps, see:
.Dome Lamps on page 4‑14.
.Reading Lamps on page 4‑15.
.Instrument Panel Brightness on page 4‑14.
Exterior Lighting
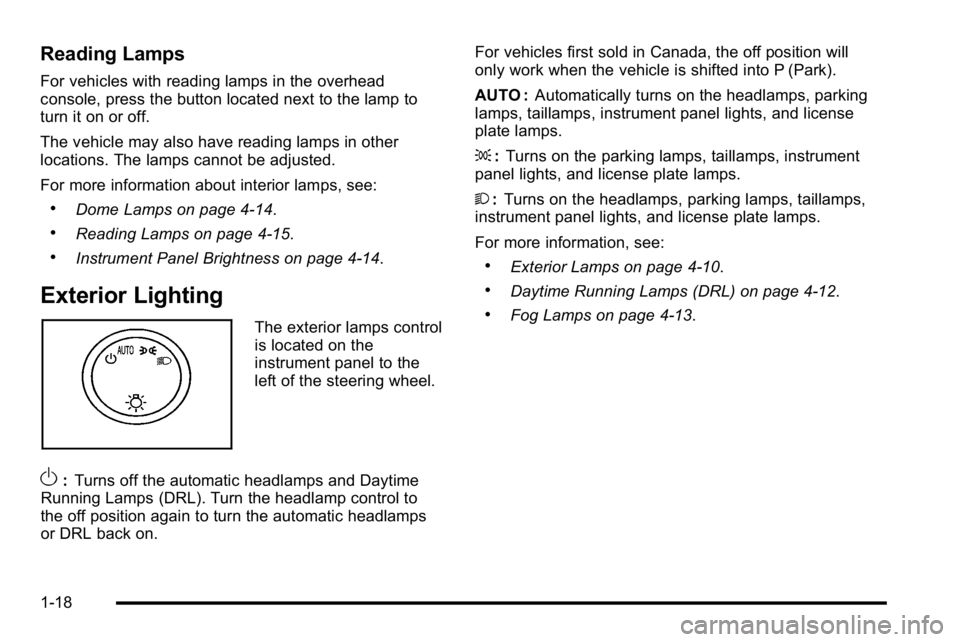
The exterior lamps control
is located on the
instrument panel to the
left of the steering wheel.
O:Turns off the automatic headlamps and Daytime
Running Lamps (DRL). Turn the headlamp control to
the off position again to turn the automatic headlamps
or DRL back on. For vehicles first sold in Canada, the off position will
only work when the vehicle is shifted into P (Park).
AUTO :
Automatically turns on the headlamps, parking
lamps, taillamps, instrument panel lights, and license
plate lamps.
; :Turns on the parking lamps, taillamps, instrument
panel lights, and license plate lamps.
2 :Turns on the headlamps, parking lamps, taillamps,
instrument panel lights, and license plate lamps.
For more information, see:
.Exterior Lamps on page 4‑10.
.Daytime Running Lamps (DRL) on page 4‑12.
.Fog Lamps on page 4‑13.
1-18
Page 153 of 630
Sun Visors
Pull the sun visor down to block glare. Swing the sun
visor to the side to cover the side window.
The passenger's side sun visor may have a vanity
mirror.
Theft-Deterrent Systems
Vehicle theft is big business, especially in some cities.
This vehicle has theft-deterrent features, however, they
do not make it impossible to steal.
Content Theft-Deterrent
Your vehicle may have a content theft-deterrent alarm
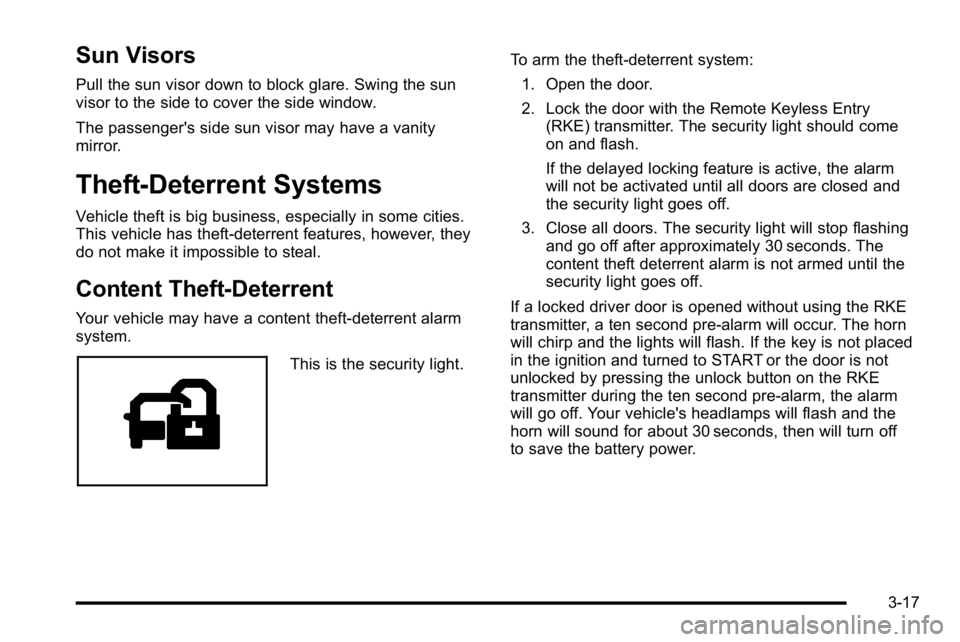
system.
This is the security light.To arm the theft-deterrent system:
1. Open the door.
2. Lock the door with the Remote Keyless Entry (RKE) transmitter. The security light should come
on and flash.
If the delayed locking feature is active, the alarm
will not be activated until all doors are closed and
the security light goes off.
3. Close all doors. The security light will stop flashing and go off after approximately 30 seconds. The
content theft deterrent alarm is not armed until the
security light goes off.
If a locked driver door is opened without using the RKE
transmitter, a ten second pre-alarm will occur. The horn
will chirp and the lights will flash. If the key is not placed
in the ignition and turned to START or the door is not
unlocked by pressing the unlock button on the RKE
transmitter during the ten second pre-alarm, the alarm
will go off. Your vehicle's headlamps will flash and the
horn will sound for about 30 seconds, then will turn off
to save the battery power.
3-17
Page 154 of 630
The theft-deterrent system will not activate if the doors
are locked with the vehicle's key or the manual door
lock. It activates only if you use the power door lock
switch with the door open or the RKE transmitter.
You should also remember that you can start your
vehicle with the correct ignition key if the alarm has
been set off.
To avoid setting off the alarm by accident:
.If you do not want to activate the theft-deterrent
system, the vehicle should be locked with the door
key after the doors are closed.
.Always unlock a door with the RKE transmitter.
Unlocking a door any other way will set off the
alarm if the system has been armed.
If you set off the alarm by accident, press unlock on the
RKE transmitter or place the key in the ignition and turn
it to START to turn it off.
Testing the Alarm
To test the alarm: 1. From inside the vehicle, lower the driver's window and open the driver's door.
2. Activate the system by locking the doors with the RKE transmitter.
3. Get out of the vehicle, close the door and wait for the security light to go out.
4. Then reach in through the window, unlock the door with the manual door lock and open the door.
This should set off the alarm.
If the alarm does not sound when it should but the
headlamps flash, check to see if the horn works.
The horn fuse may be blown. To replace the fuse,
see Fuses and Circuit Breakers on page 6‑118.
If the alarm does not sound or the headlamps do not
flash, see your dealer/retailer for service.
3-18
Page 192 of 630
Mirrors
Manual Rearview Mirror
Hold the inside rearview mirror in the center to move it
for a clearer view behind your vehicle. Adjust the mirror
to avoid glare from the headlamps behind you. Push the
tab forward for daytime use and pull it for nighttime use.
Automatic Dimming Rearview Mirror
The vehicle may have an automatic dimming inside
rearview mirror.
Vehicles with OnStar
®have three additional control
buttons for the OnStar®system. See your dealer/retailer
for more information about OnStar®and how to
subscribe to it. See the OnStar®owner guide for more
information about the services OnStar®provides.
O(On/Off): Press to turn the dimming feature on or off.
The vehicle may also have a Rear Vision Camera
(RVC). See Rear Vision Camera (RVC)
on page 3‑63for more information.
If the vehicle has RVC, the
Obutton may not be
available.
Automatic Dimming Mirror Operation
Automatic dimming reduces the glare from the
headlamps of the vehicle behind you. The dimming
feature comes on and the indicator light illuminates
each time the ignition is turned to start.
Cleaning the Mirror
Do not spray glass cleaner directly on the mirror. Use a
soft towel dampened with water.
Outside Manual Mirrors
Adjust the outside mirror for a clearer view.
Manually fold the mirrors inward to prevent damage
when going through an automatic car wash. To fold,
push the mirror toward the vehicle. Push the mirror
outward, to return to its original position.
Using hood-mounted air deflectors and add-on convex
mirror attachments could decrease mirror performance.
3-56
Page 194 of 630
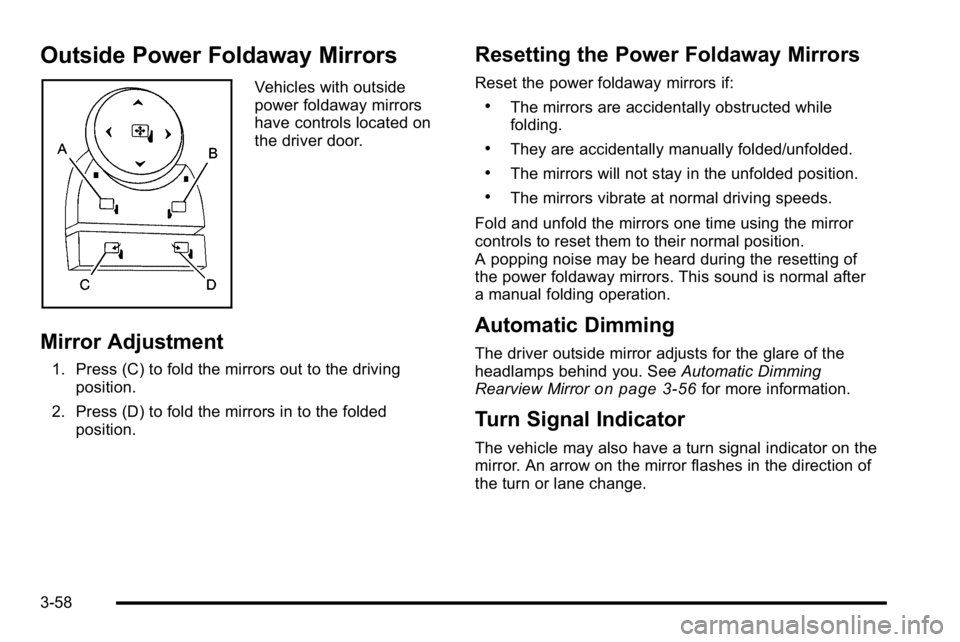
Outside Power Foldaway Mirrors
Vehicles with outside
power foldaway mirrors
have controls located on
the driver door.
Mirror Adjustment
1. Press (C) to fold the mirrors out to the drivingposition.
2. Press (D) to fold the mirrors in to the folded position.
Resetting the Power Foldaway Mirrors
Reset the power foldaway mirrors if:
.The mirrors are accidentally obstructed while
folding.
.They are accidentally manually folded/unfolded.
.The mirrors will not stay in the unfolded position.
.The mirrors vibrate at normal driving speeds.
Fold and unfold the mirrors one time using the mirror
controls to reset them to their normal position.
A popping noise may be heard during the resetting of
the power foldaway mirrors. This sound is normal after
a manual folding operation.
Automatic Dimming
The driver outside mirror adjusts for the glare of the
headlamps behind you. See Automatic Dimming
Rearview Mirror
on page 3‑56for more information.
Turn Signal Indicator
The vehicle may also have a turn signal indicator on the
mirror. An arrow on the mirror flashes in the direction of
the turn or lane change.
3-58
Page 219 of 630
Section 4 Instrument Panel
Instrument Panel Overview. . . . . . . . . . . . . . . . . . . . . . . .4-3
Hazard Warning Flashers . . . . . . . . . . . . . . . . . . . . . . . 4-3
Horn . . . . . . . . . . . . . . . . . . . . . . . . . . . . . . . . . . . . . . . . . . . . 4-3
Tilt Wheel . . . . . . . . . . . . . . . . . . . . . . . . . . . . . . . . . . . . . . . 4-3
Turn Signal/Multifunction Lever . . . . . . . . . . . . . . . . . . 4-4
Turn and Lane-Change Signals . . . . . . . . . . . . . . . . . 4-4
Headlamp High/Low-Beam Changer . . . . . . . . . . . . 4-5
Flash-to-Pass . . . . . . . . . . . . . . . . . . . . . . . . . . . . . . . . . . . 4-5
Windshield Wipers . . . . . . . . . . . . . . . . . . . . . . . . . . . . . . 4-6
Windshield Washer . . . . . . . . . . . . . . . . . . . . . . . . . . . . . 4-6
Cruise Control . . . . . . . . . . . . . . . . . . . . . . . . . . . . . . . . . . 4-7
Exterior Lamps . . . . . . . . . . . . . . . . . . . . . . . . . . . . . . . . 4-10
Headlamps on Reminder . . . . . . . . . . . . . . . . . . . . . . . 4-11
Daytime Running Lamps (DRL) . . . . . . . . . . . . . . . . 4-12
Automatic Headlamp System . . . . . . . . . . . . . . . . . . 4-12
Puddle Lamps . . . . . . . . . . . . . . . . . . . . . . . . . . . . . . . . . 4-13
Fog Lamps . . . . . . . . . . . . . . . . . . . . . . . . . . . . . . . . . . . . 4-13
Auxiliary Roof-Mounted Lamp . . . . . . . . . . . . . . . . . 4-14
Instrument Panel Brightness . . . . . . . . . . . . . . . . . . . 4-14
Dome Lamps . . . . . . . . . . . . . . . . . . . . . . . . . . . . . . . . . . 4-14
Dome Lamp Override . . . . . . . . . . . . . . . . . . . . . . . . . . 4-15
Entry Lighting . . . . . . . . . . . . . . . . . . . . . . . . . . . . . . . . . . 4-15
Exit Lighting . . . . . . . . . . . . . . . . . . . . . . . . . . . . . . . . . . . 4-15
Reading Lamps . . . . . . . . . . . . . . . . . . . . . . . . . . . . . . . . 4-15
Cargo Lamp . . . . . . . . . . . . . . . . . . . . . . . . . . . . . . . . . . . 4-15 Electric Power Management . . . . . . . . . . . . . . . . . . . 4-16
Battery Run-Down Protection . . . . . . . . . . . . . . . . . . 4-16
Accessory Power Outlet(s) . . . . . . . . . . . . . . . . . . . . . 4-17
Ashtray(s) and Cigarette Lighter . . . . . . . . . . . . . . . 4-18
Climate Controls . . . . . . . . . . . . . . . . . . . . . . . . . . . . . . . . . . 4-18
Climate Control System (With Heater Only) . . . . 4-18
Climate Control System (With Air Conditioning) . . . . . . . . . . . . . . . . . . . . . . . 4-20
Dual Automatic Climate Control System . . . . . . . 4-22
Outlet Adjustment . . . . . . . . . . . . . . . . . . . . . . . . . . . . . . 4-29
Warning Lights, Gages, and Indicators . . . . . . . . . .4-29
Instrument Panel Cluster . . . . . . . . . . . . . . . . . . . . . . . 4-30
Speedometer and Odometer . . . . . . . . . . . . . . . . . . . 4-31
Trip Odometer . . . . . . . . . . . . . . . . . . . . . . . . . . . . . . . . . 4-31
Tachometer . . . . . . . . . . . . . . . . . . . . . . . . . . . . . . . . . . . . 4-31
Safety Belt Reminders . . . . . . . . . . . . . . . . . . . . . . . . . 4-32
Airbag Readiness Light . . . . . . . . . . . . . . . . . . . . . . . . 4-33
Airbag Off Light . . . . . . . . . . . . . . . . . . . . . . . . . . . . . . . . 4-34
Passenger Airbag Status Indicator . . . . . . . . . . . . . 4-36
Charging System Light . . . . . . . . . . . . . . . . . . . . . . . . 4-37
Voltmeter Gage . . . . . . . . . . . . . . . . . . . . . . . . . . . . . . . . 4-38
Brake System Warning Light . . . . . . . . . . . . . . . . . . . 4-39
Antilock Brake System (ABS) Warning Light . . . 4-40
StabiliTrak
®Indicator Light . . . . . . . . . . . . . . . . . . . . . 4-41
Engine Coolant Temperature Gage . . . . . . . . . . . . 4-41
4-1
Page 222 of 630
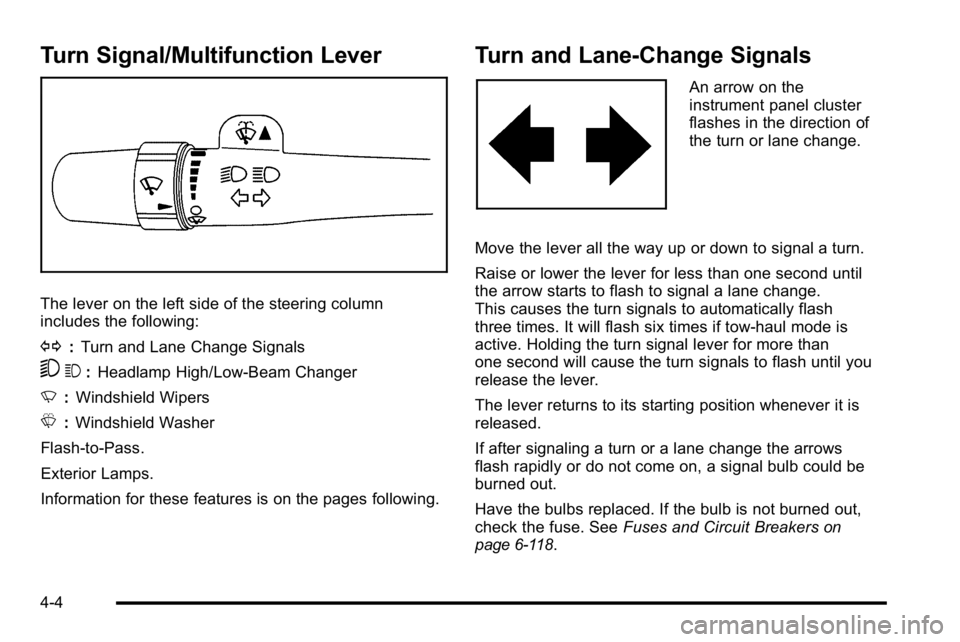
Turn Signal/Multifunction Lever
The lever on the left side of the steering column
includes the following:
G:Turn and Lane Change Signals
53 :Headlamp High/Low-Beam Changer
N :Windshield Wipers
L :Windshield Washer
Flash-to-Pass.
Exterior Lamps.
Information for these features is on the pages following.
Turn and Lane-Change Signals
An arrow on the
instrument panel cluster
flashes in the direction of
the turn or lane change.
Move the lever all the way up or down to signal a turn.
Raise or lower the lever for less than one second until
the arrow starts to flash to signal a lane change.
This causes the turn signals to automatically flash
three times. It will flash six times if tow-haul mode is
active. Holding the turn signal lever for more than
one second will cause the turn signals to flash until you
release the lever.
The lever returns to its starting position whenever it is
released.
If after signaling a turn or a lane change the arrows
flash rapidly or do not come on, a signal bulb could be
burned out.
Have the bulbs replaced. If the bulb is not burned out,
check the fuse. See Fuses and Circuit Breakers
on
page 6‑118.
4-4