service indicator GMC SIERRA 2010 Owner's Manual
[x] Cancel search | Manufacturer: GMC, Model Year: 2010, Model line: SIERRA, Model: GMC SIERRA 2010Pages: 630, PDF Size: 4.65 MB
Page 2 of 630

2010 GMC Sierra Owner ManualM
Instrument Panel. . . . . . . . . . . . . . . . . . . . . . . . . . . . . . . . . 4-1
Instrument Panel Overview . . . . . . . . . . . . . . . . . . . . . . . 4-3
Climate Controls . . . . . . . . . . . . . . . . . . . . . . . . . . . . . . . . 4-18
Warning Lights, Gages, and Indicators . . . . . . . . . . 4-29
Driver Information Center (DIC) . . . . . . . . . . . . . . . . . 4-51
Audio System(s) . . . . . . . . . . . . . . . . . . . . . . . . . . . . . . . . 4-84
Driving Your Vehicle . . . . . . . . . . . . . . . . . . . . . . . . . . . . . . 5-1
Your Driving, the Road, and the Vehicle . . . . . . . . . . 5-2
Towing . . . . . . . . . . . . . . . . . . . . . . . . . . . . . . . . . . . . . . . . . . 5-43
Service and Appearance Care . . . . . . . . . . . . . . . . . . . 6-1
Service . . . . . . . . . . . . . . . . . . . . . . . . . . . . . . . . . . . . . . . . . . . 6-4
Fuel . . . . . . . . . . . . . . . . . . . . . . . . . . . . . . . . . . . . . . . . . . . . . . 6-6
Checking Things Under the Hood . . . . . . . . . . . . . . . 6-14
Rear Axle . . . . . . . . . . . . . . . . . . . . . . . . . . . . . . . . . . . . . . . 6-48
Four-Wheel Drive . . . . . . . . . . . . . . . . . . . . . . . . . . . . . . . 6-50
Front Axle . . . . . . . . . . . . . . . . . . . . . . . . . . . . . . . . . . . . . . . 6-52 Noise Control System . . . . . . . . . . . . . . . . . . . . . . . . . . . 6-53
Headlamp Aiming . . . . . . . . . . . . . . . . . . . . . . . . . . . . . . . 6-54
Bulb Replacement . . . . . . . . . . . . . . . . . . . . . . . . . . . . . . 6-57
Windshield Wiper Blade Replacement . . . . . . . . . . . 6-63
Tires . . . . . . . . . . . . . . . . . . . . . . . . . . . . . . . . . . . . . . . . . . . . 6-64
Appearance Care . . . . . . . . . . . . . . . . . . . . . . . . . . . . . . 6-110
Vehicle Identification . . . . . . . . . . . . . . . . . . . . . . . . . . . 6-117
Electrical System . . . . . . . . . . . . . . . . . . . . . . . . . . . . . . 6-117
Capacities and Specifications . . . . . . . . . . . . . . . . . . 6-126
Maintenance Schedule . . . . . . . . . . . . . . . . . . . . . . . . . . . 7-1
Maintenance Schedule . . . . . . . . . . . . . . . . . . . . . . . . . . . 7-2
Customer Assistance Information . . . . . . . . . . . . . . . 8-1
Customer Assistance and Information . . . . . . . . . . . . 8-2
Reporting Safety Defects . . . . . . . . . . . . . . . . . . . . . . . . 8-15
Vehicle Data Recording and Privacy . . . . . . . . . . . . . 8-18
Index . . . . . . . . . . . . . . . . . . . . . . . . . . . . . . . . . . . . i-1
Page 4 of 630
Safety Warnings and Symbols
Warning messages found on vehicle labels and in this
manual describe hazards and what to do to avoid or
reduce them.
Dangerindicates a hazard with a high level of risk
which will result in serious injury or death.
Warning orCaution indicates a hazard that could result
in injury or death.
{WARNING:
These mean there is something that could hurt
you or other people.
Notice: This means there is something that could
result in property or vehicle damage. This would
not be covered by the vehicle's warranty.
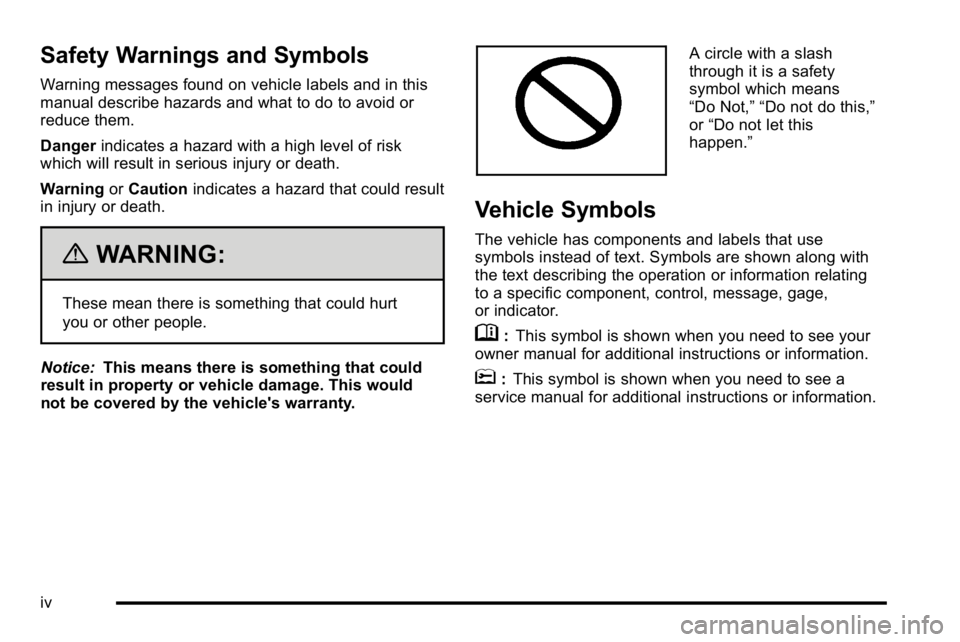
A circle with a slash
through it is a safety
symbol which means
“Do Not,” “Do not do this,”
or “Do not let this
happen.”
Vehicle Symbols
The vehicle has components and labels that use
symbols instead of text. Symbols are shown along with
the text describing the operation or information relating
to a specific component, control, message, gage,
or indicator.
M: This symbol is shown when you need to see your
owner manual for additional instructions or information.
*: This symbol is shown when you need to see a
service manual for additional instructions or information.
iv
Page 129 of 630
The passenger sensing system is designed to turn off
the right front passenger frontal airbag if:
.The right front passenger seat is unoccupied.
.The system determines an infant is present in a
child restraint.
.A right front passenger takes his/her weight off of
the seat for a period of time.
.Or, if there is a critical problem with the airbag
system or the passenger sensing system.
When the passenger sensing system has turned off the
right front passenger frontal airbag, the off indicator will
light and stay lit to remind you that the airbag is off.
See Passenger Airbag Status Indicator on page 4‑36.
The passenger sensing system is designed to turn on
(may inflate) the right front passenger frontal airbag
anytime the system senses that a person of adult size is
sitting properly in the right front passenger seat.
When the passenger sensing system has allowed the
airbag to be enabled, the on indicator will light and stay
lit to remind you that the airbag is active. For some children, including children in child restraints,
and for very small adults, the passenger sensing
system may or may not turn off the right front passenger
frontal airbag, depending upon the person's seating
posture and body build. Everyone in your vehicle who
has outgrown child restraints should wear a safety belt
properly
—whether or not there is an airbag for that
person.
{WARNING:
If the airbag readiness light ever comes on and
stays on, it means that something may be wrong
with the airbag system. To help avoid injury to
yourself or others, have the vehicle serviced right
away. See Airbag Readiness Light
on page 4‑33
for more information, including important safety
information.
2-87
Page 158 of 630
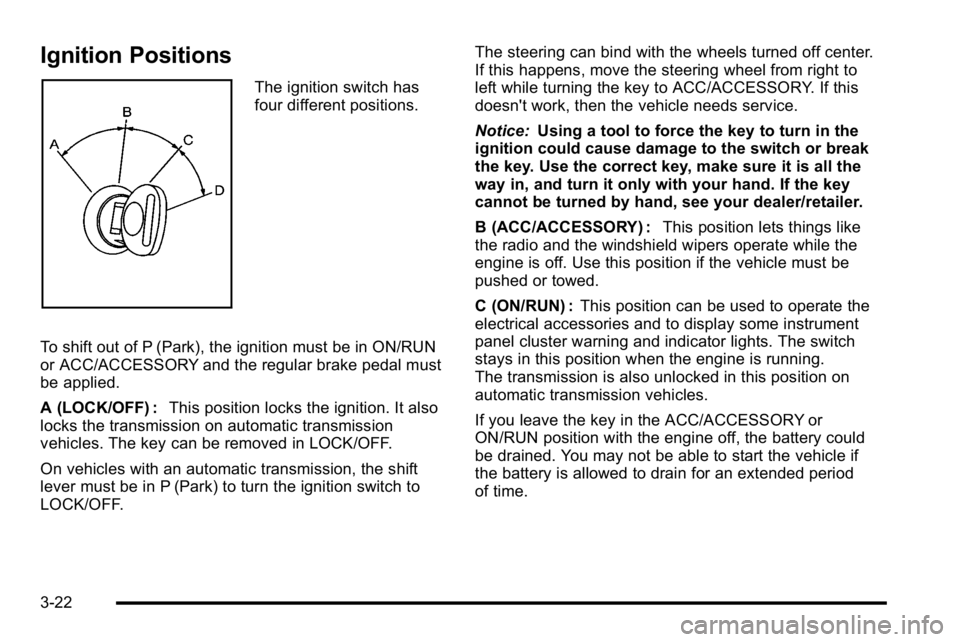
Ignition Positions
The ignition switch has
four different positions.
To shift out of P (Park), the ignition must be in ON/RUN
or ACC/ACCESSORY and the regular brake pedal must
be applied.
A (LOCK/OFF) : This position locks the ignition. It also
locks the transmission on automatic transmission
vehicles. The key can be removed in LOCK/OFF.
On vehicles with an automatic transmission, the shift
lever must be in P (Park) to turn the ignition switch to
LOCK/OFF. The steering can bind with the wheels turned off center.
If this happens, move the steering wheel from right to
left while turning the key to ACC/ACCESSORY. If this
doesn't work, then the vehicle needs service.
Notice:
Using a tool to force the key to turn in the
ignition could cause damage to the switch or break
the key. Use the correct key, make sure it is all the
way in, and turn it only with your hand. If the key
cannot be turned by hand, see your dealer/retailer.
B (ACC/ACCESSORY) : This position lets things like
the radio and the windshield wipers operate while the
engine is off. Use this position if the vehicle must be
pushed or towed.
C (ON/RUN) : This position can be used to operate the
electrical accessories and to display some instrument
panel cluster warning and indicator lights. The switch
stays in this position when the engine is running.
The transmission is also unlocked in this position on
automatic transmission vehicles.
If you leave the key in the ACC/ACCESSORY or
ON/RUN position with the engine off, the battery could
be drained. You may not be able to start the vehicle if
the battery is allowed to drain for an extended period
of time.
3-22
Page 177 of 630
Electronic Transfer Case
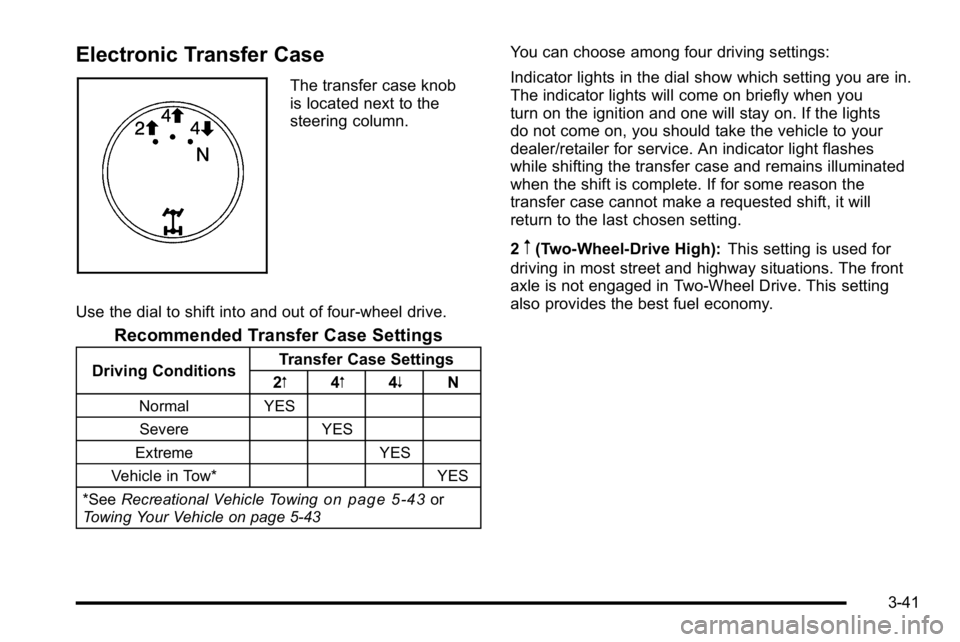
The transfer case knob
is located next to the
steering column.
Use the dial to shift into and out of four-wheel drive.
Recommended Transfer Case Settings
Driving Conditions Transfer Case Settings
2m 4m4n N
Normal YES
Severe YES
Extreme YES
Vehicle in Tow* YES
*See Recreational Vehicle Towing
on page 5‑43or
Towing Your Vehicle on page 5‑43
You can choose among four driving settings:
Indicator lights in the dial show which setting you are in.
The indicator lights will come on briefly when you
turn on the ignition and one will stay on. If the lights
do not come on, you should take the vehicle to your
dealer/retailer for service. An indicator light flashes
while shifting the transfer case and remains illuminated
when the shift is complete. If for some reason the
transfer case cannot make a requested shift, it will
return to the last chosen setting.
2
m(Two-Wheel-Drive High): This setting is used for
driving in most street and highway situations. The front
axle is not engaged in Two-Wheel Drive. This setting
also provides the best fuel economy.
3-41
Page 182 of 630
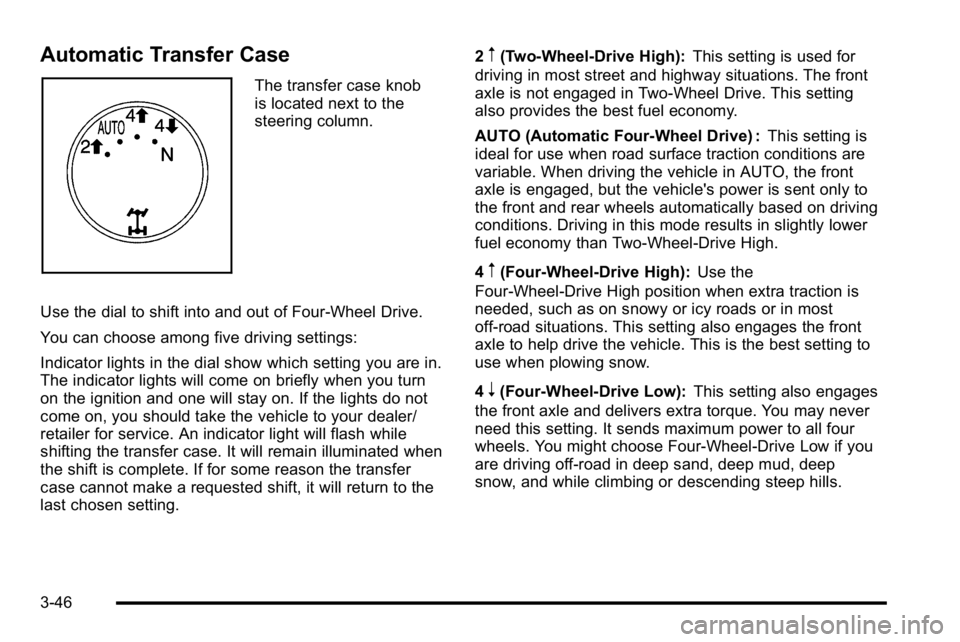
Automatic Transfer Case
The transfer case knob
is located next to the
steering column.
Use the dial to shift into and out of Four-Wheel Drive.
You can choose among five driving settings:
Indicator lights in the dial show which setting you are in.
The indicator lights will come on briefly when you turn
on the ignition and one will stay on. If the lights do not
come on, you should take the vehicle to your dealer/
retailer for service. An indicator light will flash while
shifting the transfer case. It will remain illuminated when
the shift is complete. If for some reason the transfer
case cannot make a requested shift, it will return to the
last chosen setting. 2
m(Two-Wheel-Drive High):
This setting is used for
driving in most street and highway situations. The front
axle is not engaged in Two-Wheel Drive. This setting
also provides the best fuel economy.
AUTO (Automatic Four-Wheel Drive) : This setting is
ideal for use when road surface traction conditions are
variable. When driving the vehicle in AUTO, the front
axle is engaged, but the vehicle's power is sent only to
the front and rear wheels automatically based on driving
conditions. Driving in this mode results in slightly lower
fuel economy than Two-Wheel-Drive High.
4
m(Four-Wheel-Drive High): Use the
Four-Wheel-Drive High position when extra traction is
needed, such as on snowy or icy roads or in most
off-road situations. This setting also engages the front
axle to help drive the vehicle. This is the best setting to
use when plowing snow.
4
n(Four-Wheel-Drive Low): This setting also engages
the front axle and delivers extra torque. You may never
need this setting. It sends maximum power to all four
wheels. You might choose Four-Wheel-Drive Low if you
are driving off-road in deep sand, deep mud, deep
snow, and while climbing or descending steep hills.
3-46
Page 183 of 630
If the vehicle has StabiliTrak®, shifting into
Four-Wheel-Drive Low will turn Traction Control and
StabiliTrak
®off. See StabiliTrak®System on page 5‑6.
{WARNING:
Shifting the transfer case to N (Neutral) can cause
the vehicle to roll even if the transmission is in
P (Park). You or someone else could be seriously
injured. Be sure to set the parking brake before
placing the transfer case in N (Neutral). See
Parking Brake on page 3‑50.
N (Neutral) : Shift the vehicle's transfer case to
N (Neutral) only when towing the vehicle. See
Recreational Vehicle Towing
on page 5‑43or Towing
Your Vehicleon page 5‑43for more information.
If the SERVICE 4–Wheel Drive message stays on,
you should take the vehicle to your dealer/retailer for
service. See “Service 4–Wheel Drive message” under
DIC Warnings and Messages on page 4‑65.
Shifting Into Four-Wheel-Drive High or
AUTO (Automatic Four-Wheel Drive)
Turn the knob to the Four-Wheel-Drive High or AUTO
position. This can be done at any speed, except when
shifting from Four-Wheel-Drive Low. The indicator light
will flash while shifting. It will remain on when the shift is
completed.
Shifting Into Two-Wheel-Drive High
Turn the knob to the Two-Wheel-Drive High position.
This can be done at any speed, except when shifting
from Four-Wheel-Drive Low. The indicator light will
flash while shifting. It will remain on when the shift is
completed.
Shifting Into Four-Wheel-Drive Low
When Four-Wheel-Drive Low is engaged, vehicle speed
should be kept below 45 mph. Extended high-speed
operation in Four-Wheel-Drive Low may damage or
shorten the life of the drivetrain.
To shift to the Four-Wheel-Drive Low position, the
ignition must be in ON/RUN and the vehicle must be
stopped or moving less than 3 mph (5 km/h) with the
transmission in N (Neutral). The preferred method for
shifting into Four-Wheel-Drive Low is to have the
vehicle moving 1 to 2 mph (1.6 to 3.2 km/h). Turn the
knob to the Four-Wheel-Drive Low position.
3-47
Page 192 of 630
Mirrors
Manual Rearview Mirror
Hold the inside rearview mirror in the center to move it
for a clearer view behind your vehicle. Adjust the mirror
to avoid glare from the headlamps behind you. Push the
tab forward for daytime use and pull it for nighttime use.
Automatic Dimming Rearview Mirror
The vehicle may have an automatic dimming inside
rearview mirror.
Vehicles with OnStar
®have three additional control
buttons for the OnStar®system. See your dealer/retailer
for more information about OnStar®and how to
subscribe to it. See the OnStar®owner guide for more
information about the services OnStar®provides.
O(On/Off): Press to turn the dimming feature on or off.
The vehicle may also have a Rear Vision Camera
(RVC). See Rear Vision Camera (RVC)
on page 3‑63for more information.
If the vehicle has RVC, the
Obutton may not be
available.
Automatic Dimming Mirror Operation
Automatic dimming reduces the glare from the
headlamps of the vehicle behind you. The dimming
feature comes on and the indicator light illuminates
each time the ignition is turned to start.
Cleaning the Mirror
Do not spray glass cleaner directly on the mirror. Use a
soft towel dampened with water.
Outside Manual Mirrors
Adjust the outside mirror for a clearer view.
Manually fold the mirrors inward to prevent damage
when going through an automatic car wash. To fold,
push the mirror toward the vehicle. Push the mirror
outward, to return to its original position.
Using hood-mounted air deflectors and add-on convex
mirror attachments could decrease mirror performance.
3-56
Page 232 of 630
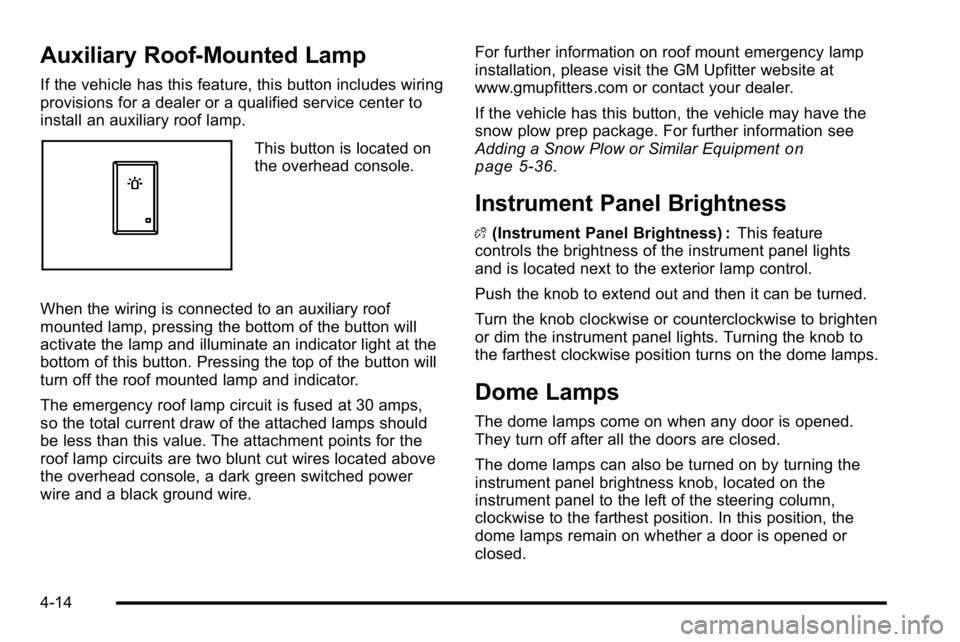
Auxiliary Roof-Mounted Lamp
If the vehicle has this feature, this button includes wiring
provisions for a dealer or a qualified service center to
install an auxiliary roof lamp.
This button is located on
the overhead console.
When the wiring is connected to an auxiliary roof
mounted lamp, pressing the bottom of the button will
activate the lamp and illuminate an indicator light at the
bottom of this button. Pressing the top of the button will
turn off the roof mounted lamp and indicator.
The emergency roof lamp circuit is fused at 30 amps,
so the total current draw of the attached lamps should
be less than this value. The attachment points for the
roof lamp circuits are two blunt cut wires located above
the overhead console, a dark green switched power
wire and a black ground wire. For further information on roof mount emergency lamp
installation, please visit the GM Upfitter website at
www.gmupfitters.com or contact your dealer.
If the vehicle has this button, the vehicle may have the
snow plow prep package. For further information see
Adding a Snow Plow or Similar Equipmenton
page 5‑36.
Instrument Panel Brightness
D (Instrument Panel Brightness) : This feature
controls the brightness of the instrument panel lights
and is located next to the exterior lamp control.
Push the knob to extend out and then it can be turned.
Turn the knob clockwise or counterclockwise to brighten
or dim the instrument panel lights. Turning the knob to
the farthest clockwise position turns on the dome lamps.
Dome Lamps
The dome lamps come on when any door is opened.
They turn off after all the doors are closed.
The dome lamps can also be turned on by turning the
instrument panel brightness knob, located on the
instrument panel to the left of the steering column,
clockwise to the farthest position. In this position, the
dome lamps remain on whether a door is opened or
closed.
4-14
Page 253 of 630
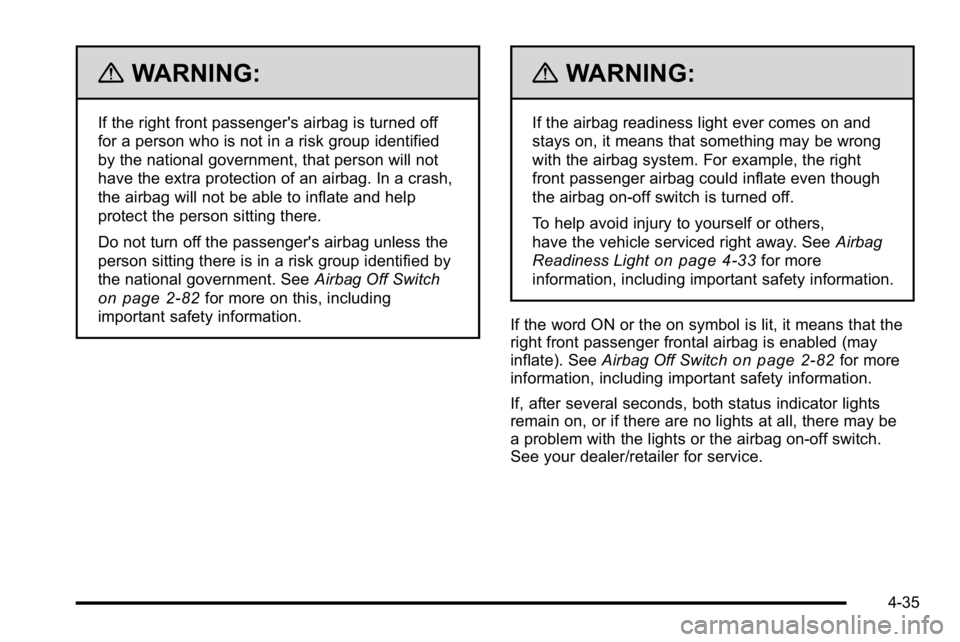
{WARNING:
If the right front passenger's airbag is turned off
for a person who is not in a risk group identified
by the national government, that person will not
have the extra protection of an airbag. In a crash,
the airbag will not be able to inflate and help
protect the person sitting there.
Do not turn off the passenger's airbag unless the
person sitting there is in a risk group identified by
the national government. SeeAirbag Off Switch
on page 2‑82for more on this, including
important safety information.
{WARNING:
If the airbag readiness light ever comes on and
stays on, it means that something may be wrong
with the airbag system. For example, the right
front passenger airbag could inflate even though
the airbag on-off switch is turned off.
To help avoid injury to yourself or others,
have the vehicle serviced right away. See Airbag
Readiness Light
on page 4‑33for more
information, including important safety information.
If the word ON or the on symbol is lit, it means that the
right front passenger frontal airbag is enabled (may
inflate). See Airbag Off Switch
on page 2‑82for more
information, including important safety information.
If, after several seconds, both status indicator lights
remain on, or if there are no lights at all, there may be
a problem with the lights or the airbag on-off switch.
See your dealer/retailer for service.
4-35