change time GMC SIERRA 2011 Owner's Manual
[x] Cancel search | Manufacturer: GMC, Model Year: 2011, Model line: SIERRA, Model: GMC SIERRA 2011Pages: 594, PDF Size: 6.55 MB
Page 33 of 594
Black plate (27,1)GMC Sierra Owner Manual - 2011
In Brief 1-27
Storing Radio Stations
A maximum of 36 stations can
be stored as favorites using the
six softkeys located below the
radio station frequency tabs and by
using the radio FAV button. Press
FAV to go through up to six pages
of favorites, each having six favorite
stations available per page. Each
page of favorites can contain any
combination of AM, FM, or XM
stations.
For more information, see“Storing
Radio Stations” inAM-FM Radio on
page 7‑8.
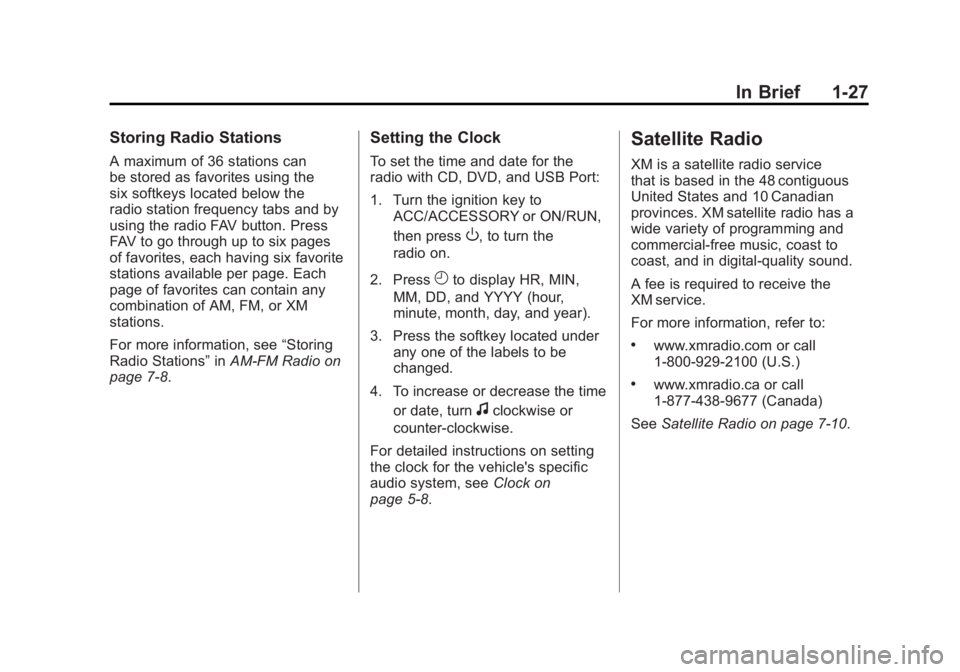
Setting the Clock
To set the time and date for the
radio with CD, DVD, and USB Port:
1. Turn the ignition key to
ACC/ACCESSORY or ON/RUN,
then press
O, to turn the
radio on.
2. Press
Hto display HR, MIN,
MM, DD, and YYYY (hour,
minute, month, day, and year).
3. Press the softkey located under any one of the labels to be
changed.
4. To increase or decrease the time or date, turn
fclockwise or
counter‐clockwise.
For detailed instructions on setting
the clock for the vehicle's specific
audio system, see Clock on
page 5‑8.
Satellite Radio
XM is a satellite radio service
that is based in the 48 contiguous
United States and 10 Canadian
provinces. XM satellite radio has a
wide variety of programming and
commercial-free music, coast to
coast, and in digital-quality sound.
A fee is required to receive the
XM service.
For more information, refer to:
.www.xmradio.com or call
1-800-929-2100 (U.S.)
.www.xmradio.ca or call
1-877-438-9677 (Canada)
See Satellite Radio on page 7‑10.
Page 76 of 594
Black plate (8,1)GMC Sierra Owner Manual - 2011
3-8 Seats and Restraints
To return the seatback to the upright
position:
1. Lift the lever fully withoutapplying pressure to the
seatback, and the seatback will
return to the upright position.
2. Push and pull on the seatback to make sure it is locked.Power Reclining Seatbacks
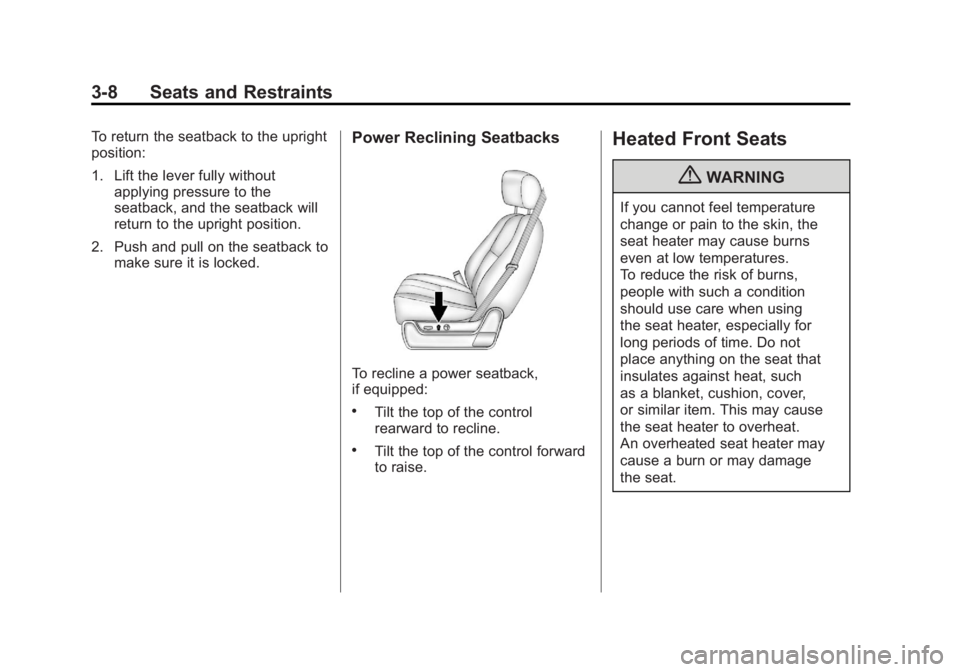
To recline a power seatback,
if equipped:
.Tilt the top of the control
rearward to recline.
.Tilt the top of the control forward
to raise.
Heated Front Seats
{WARNING
If you cannot feel temperature
change or pain to the skin, the
seat heater may cause burns
even at low temperatures.
To reduce the risk of burns,
people with such a condition
should use care when using
the seat heater, especially for
long periods of time. Do not
place anything on the seat that
insulates against heat, such
as a blanket, cushion, cover,
or similar item. This may cause
the seat heater to overheat.
An overheated seat heater may
cause a burn or may damage
the seat.
Page 119 of 594
Black plate (51,1)GMC Sierra Owner Manual - 2011
Seats and Restraints 3-51
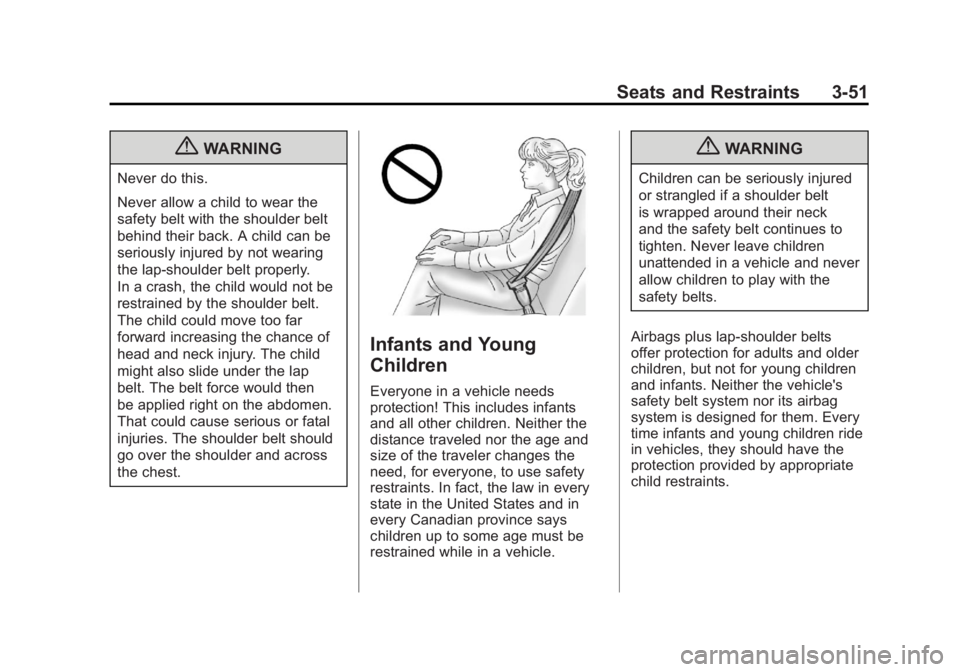
{WARNING
Never do this.
Never allow a child to wear the
safety belt with the shoulder belt
behind their back. A child can be
seriously injured by not wearing
the lap-shoulder belt properly.
In a crash, the child would not be
restrained by the shoulder belt.
The child could move too far
forward increasing the chance of
head and neck injury. The child
might also slide under the lap
belt. The belt force would then
be applied right on the abdomen.
That could cause serious or fatal
injuries. The shoulder belt should
go over the shoulder and across
the chest.
Infants and Young
Children
Everyone in a vehicle needs
protection! This includes infants
and all other children. Neither the
distance traveled nor the age and
size of the traveler changes the
need, for everyone, to use safety
restraints. In fact, the law in every
state in the United States and in
every Canadian province says
children up to some age must be
restrained while in a vehicle.
{WARNING
Children can be seriously injured
or strangled if a shoulder belt
is wrapped around their neck
and the safety belt continues to
tighten. Never leave children
unattended in a vehicle and never
allow children to play with the
safety belts.
Airbags plus lap‐shoulder belts
offer protection for adults and older
children, but not for young children
and infants. Neither the vehicle's
safety belt system nor its airbag
system is designed for them. Every
time infants and young children ride
in vehicles, they should have the
protection provided by appropriate
child restraints.
Page 157 of 594
Black plate (9,1)GMC Sierra Owner Manual - 2011
Instruments and Controls 5-9
4. Press theHbutton until the
12HR or 24HR time format
begins to flash, then turn the
f
knob to change the time format.
5. Press the
Hbutton again until
the clock display stops flashing
to set the currently displayed
time, or wait until the flashing
stops after five seconds and
the current time displayed
automatically sets.
MP3 Radios with a Single CD
or a Single CD and DVD Player
To adjust the time and date:
1. Turn the ignition key to ACC/ACCESSORY or ON/RUN,
then press the
Obutton to turn
the radio on.
2. Press the
Hbutton to display
HR, MIN, MM, DD, YYYY (hour,
minute, month, day, and year). 3. Press the softkey located under
any one of the tabs to change
that setting.
4. To increase the time or date, do one of the following:
.Press the softkey below the
selected tab.
.Press the¨SEEK button.
.Press the\FWD button.
.Turn thefknob clockwise.
5. To decrease the time or date, do one of the following:
.Press the©SEEK button.
.Press thesREV button.
.Turn thefknob
counterclockwise. To change the time default setting
from 12 hour to 24 hour or to change
the date default setting from month/
day/year to day/month/year:
1. Press the
Hbutton and then
the softkey located below the
forward arrow tab. 12H, 24H, the
date MM/DD (month and day),
and DD/MM (day and month)
displays.
2. Press the softkey located below the desired option.
3. Press the
Hbutton again to
apply the desired option, or let
the screen time out.
Page 158 of 594
Black plate (10,1)GMC Sierra Owner Manual - 2011
5-10 Instruments and Controls
MP3 Radio with a Six-Disc CD
Player
To set the time and date:
1. Turn the ignition key toACC/ACCESSORY or ON/RUN,
then press the
Obutton to turn
the radio on.
2. Press the MENU button and then the softkey under the
Htab
to display HR, MIN, MM, DD,
YYYY (hour, minute, month, day,
and year).
3. Press the softkey located under any one of the tabs to change
that setting.
4. To increase the time or date, do one of the following:
.Press the softkey below the
selected tab.
.Press the¨SEEK button.
.Press the\FWD button.
.Turn thefknob clockwise. 5. To decrease the time or date, do
one of the following:
.Press the©SEEK button.
.Press thesREV button.
.Turn thefknob
counterclockwise.
To change the time default setting
from 12 hour to 24 hour or to change
the date default setting from month/
day to day/month:
1. Press the MENU button and then the softkey under
the
Htab.
2. Press the softkey located below the forward arrow tab. 12H, 24H,
the date MM/DD (month and
day), and DD/MM (day and
month) displays.
3. Press the softkey located below the desired option.
4. Press the MENU button again to apply the desired option, or let
the screen time out.
Power Outlets
Accessory power outlets can
be used to plug in electrical
equipment, such as a cell phone,
MP3 player, etc.
The vehicle may have two
accessory power outlets located
below the climate control system,
or may have one accessory power
outlet and one cigarette lighter.
The cigarette lighter is designed
to fit only in the receptacle closest
to the driver.
There may be another accessory
power outlet in the rear cargo area.
If the vehicle has a floor console,
there is an accessory power outlet
inside the storage bin and one on
the rear of the floor console.
Remove the cover to access and
replace when not in use.
Page 183 of 594
Black plate (35,1)GMC Sierra Owner Manual - 2011
Instruments and Controls 5-35
For example, if the vehicle was
driven 8 km (5 miles) before it
is started again, and then the
retro-active reset feature is
activated, the display will show
8 km (5 miles). As the vehicle
begins moving, the display will
then increase to 8.2 km (5.1 miles),
8.4 km (5.2 miles), etc.
Fuel Range
Press the trip/fuel button until
FUEL RANGE displays. This display
shows the approximate number of
remaining kilometers (km) or miles
the vehicle can be driven without
refueling. The display will show
LOW if the fuel level is low.
The fuel range estimate is based
on an average of the vehicle's fuel
economy over recent driving history
and the amount of fuel remaining
in the fuel tank. This estimate will
change if driving conditions change.For example, if driving in traffic and
making frequent stops, this display
may read one number, but if the
vehicle is driven on a freeway,
the number may change even
though the same amount of fuel
is in the fuel tank. This is because
different driving conditions produce
different fuel economies. Generally,
freeway driving produces better
fuel economy than city driving.
Fuel range cannot be reset.
Average Economy
Press the trip/fuel button
until AVG ECONOMY displays.
This display shows the
approximate average liters per
100 kilometers (L/100 km) or miles
per gallon (mpg). This number is
calculated based on the number of
L/100 km (mpg) recorded since the
last time this menu item was reset.
To reset AVG ECONOMY, press
and hold the set/reset button.Fuel Used
Press the trip/fuel button until
FUEL USED displays. This display
shows the number of liters (L) or
gallons (gal) of fuel used since the
last reset of this menu item. To reset
the fuel used information, press
and hold the set/reset button while
FUEL USED is displayed.
Timer
Press the trip/fuel button until
TIMER displays. This display can
be used as a timer.
To start the timer, press the
set/reset button while TIMER is
displayed. The display will show
the amount of time that has passed
since the timer was last reset, not
including time the ignition is off.
Time will continue to be counted as
long as the ignition is on, even if
another display is being shown
on the DIC. The timer will record
up to 99 hours, 59 minutes, and
59 seconds (99:59:59) after which
the display will return to zero.
Page 184 of 594
Black plate (36,1)GMC Sierra Owner Manual - 2011
5-36 Instruments and Controls
To stop the timer, press the set/reset
button briefly while TIMER is
displayed.
To reset the timer to zero, press
and hold the set/reset button while
TIMER is displayed.
Transmission Temperature
Press the trip/fuel button until
TRANS TEMP displays. This
display shows the temperature of
the automatic transmission fluid
in either degrees Celsius (°C) or
degrees Fahrenheit (°F).
Instantaneous Economy and
Active Fuel Management™
Indicator
If the vehicle has this display, press
the trip/fuel button until INST ECON
V8 displays. This display shows the
current fuel economy at a particular
moment and will change frequently
as driving conditions change.This display shows the
instantaneous fuel economy in
liters per 100 kilometers (L/100 km)
or miles per gallon (mpg). Unlike
average economy, this screen
cannot be reset.
An Active Fuel Management
indicator displays on the right
side of the DIC, while INST ECON
displays on the left side. Active
Fuel Management allows the engine
to operate on either four or eight
cylinders, depending on driving
demands. When Active Fuel
Management is active, V4 will
display on the DIC. When Active
Fuel Management is inactive,
V8 will display. See
Active Fuel
Management
®on page 9‑44 for
more information.
Blank Display
This display shows no information.
Vehicle Information Menu
Items (with DIC Buttons)
T(Vehicle Information): Press
this button to scroll through the
following menu items:
Oil Life
Press the vehicle information
button until OIL LIFE REMAINING
displays. This display shows an
estimate of the oil's remaining
useful life. If you see 99% OIL LIFE
REMAINING on the display, that
means 99% of the current oil life
remains. The engine oil life system
will alert you to change the oil on
a schedule consistent with your
driving conditions.
When the remaining oil life is low,
the CHANGE ENGINE OIL SOON
message will appear on the display.
See “CHANGE ENGINE OIL SOON”
under Engine Oil Messages on
page 5‑45. You should change the
oil as soon as you can. See Engine
Oil on page 10‑7. In addition to the
engine oil life system monitoring the
oil life, additional maintenance is
Page 185 of 594

Black plate (37,1)GMC Sierra Owner Manual - 2011
Instruments and Controls 5-37
recommended in the Maintenance
Schedule in this manual.
SeeScheduled Maintenance on
page 11‑2 for more information.
Remember, you must reset the
OIL LIFE display after each oil
change. It will not reset itself. Also,
be careful not to reset the OIL LIFE
display accidentally at any time
other than when the oil has just
been changed. It cannot be reset
accurately until the next oil change.
To reset the engine oil life system,
see Engine Oil Life System on
page 10‑11.
Units
Press the vehicle information button
until UNITS displays. This display
allows you to select between metric
or English units of measurement.
Once in this display, press the
set/reset button to select between
METRIC or ENGLISH units.
All of the vehicle information will
then be displayed in the unit of
measurement selected. Tire Pressure
If the vehicle has the Tire Pressure
Monitor System (TPMS), the
pressure for each tire can be viewed
in the DIC. The tire pressure will be
shown in either kilopascals (kPa)
or pounds per square inch (psi).
Press the vehicle information
button until the DIC displays
FRONT TIRES kPa (PSI) LEFT ##
RIGHT ##. Press the vehicle
information button again until the
DIC displays REAR TIRES kPa
(PSI) LEFT ## RIGHT ##.
If a low tire pressure condition
is detected by the system while
driving, a message advising you to
add pressure in a specific tire will
appear in the display. See
Tire
Pressure on page 10‑66 andTire
Messages on page 5‑49 for more
information.
If the tire pressure display shows
dashes instead of a value, there
may be a problem with the vehicle.
If this consistently occurs, see your
dealer for service. Trailer Gain and Output
On vehicles with the Integrated
Trailer Brake Control (ITBC)
system, the trailer brake display
appears in the DIC. Press the
vehicle information button until
TRAILER GAIN and OUTPUT
display.
TRAILER GAIN shows the trailer
gain setting. This setting can be
adjusted from 0.0 to 10.0 with either
a trailer connected or disconnected.
OUTPUT shows the power output
to the trailer any time a trailer with
electric brakes is connected. Output
is displayed in 0 to 10 bars. Dashes
may appear in the OUTPUT display.
To adjust trailer gain see
“Integrated
Trailer Brake Control System” under
Towing Equipment on page 9‑112
for more information.
Engine Hours
Press the vehicle information button
until ENGINE HOURS displays.
This display shows the total number
of hours the engine has run.
Page 188 of 594
Black plate (40,1)GMC Sierra Owner Manual - 2011
5-40 Instruments and Controls
The trip odometer has a feature
called the retro-active reset. This
can be used to set the trip odometer
to the number of miles (kilometers)
driven since the ignition was last
turned on. This can be used if the
trip odometer is not reset at the
beginning of the trip.
To use the retro-active reset feature,
press and hold the trip odometer
reset stem for at least four seconds.
The trip odometer will display
the number of kilometers (km)
or miles (mi) driven since the
ignition was last turned on and
the vehicle was moving. Once the
vehicle begins moving, the trip
odometer will accumulate mileage.
For example, if the vehicle was
driven 8 km (5 miles) before it
is started again, and then the
retro-active reset feature is
activated, the display will show
8 km (5 miles). As the vehicle
begins moving, the display will
then increase to 8.2 km (5.1 miles),
8.4 km (5.2 miles), etc.Transmission Temperature
Press the trip odometer reset
stem until TRANS TEMP displays.
This display shows the temperature
of the automatic transmission fluid
in either degrees Celsius (°C) or
degrees Fahrenheit (°F).
Trailer Gain and Output
On vehicles with the Integrated
Trailer Brake Control (ITBC) system,
the trailer brake display appears in
the DIC. Press the trip odometer
reset stem until TRAILER GAIN
and OUTPUT display.
TRAILER GAIN shows the trailer
gain setting. This setting can be
adjusted from 0.0 to 10.0 with either
a trailer connected or disconnected.
OUTPUT shows the power output
to the trailer any time a trailer with
electric brakes is connected. Output
is displayed in 0 to 10 bars. Dashes
may appear in the OUTPUT display.
To adjust trailer gain see
“Integrated
Trailer Brake Control System” under
Towing Equipment on page 9‑112
for more information.
Compass Zone Setting
This display allows for setting the
compass zone. See Compass on
page 5‑6 for more information.
Compass Recalibration
This display allows for calibrating
the compass. See Compass on
page 5‑6 for more information.
Oil Life
To access this display, the vehicle
must be in P (Park). Press the trip
odometer reset stem until OIL LIFE
REMAINING displays. This display
shows an estimate of the oil's
remaining useful life. If you see
99% OIL LIFE REMAINING on the
display, that means 99% of the
current oil life remains. The engine
oil life system will alert you to
change the oil on a schedule
consistent with your driving
conditions.
Page 189 of 594
Black plate (41,1)GMC Sierra Owner Manual - 2011
Instruments and Controls 5-41
When the remaining oil life is low,
the CHANGE ENGINE OIL SOON
message will appear on the display.
See“CHANGE ENGINE OIL SOON”
under Engine Oil Messages on
page 5‑45. You should change
the oil as soon as you can.
See Engine Oil on page 10‑7.
In addition to the engine oil life
system monitoring the oil life,
additional maintenance is
recommended in the Maintenance
Schedule in this manual.
See Scheduled Maintenance on
page 11‑2 for more information.
Remember, you must reset the
OIL LIFE display after each oil
change. It will not reset itself. Also,
be careful not to reset the OIL LIFE
display accidentally at any time
other than when the oil has just
been changed. It cannot be reset
accurately until the next oil change.
To reset the engine oil life system,
see Engine Oil Life System on
page 10‑11.Vehicle Messages
Messages displayed on the DIC
indicate the status of the vehicle
or some action may be needed
to correct a condition. Multiple
messages may appear one after
another.
The messages that do not
require immediate action can be
acknowledged and cleared by
pressing
V(Set/Reset) or the
trip odometer reset stem.
The messages that require
immediate action cannot be cleared
until that action is performed.
All messages should be taken
seriously and clearing the message
does not correct the problem.
The following are the possible
messages and some information
about them.
Battery Voltage and
Charging Messages
BATTERY LOW START
VEHICLE
When the vehicle’ s battery is
severely discharged, this message
will display and four chimes
will sound. Start the vehicle
immediately. If the vehicle is not
started and the battery continues
to discharge, the climate controls,
heated seats, and audio systems
will shut off and the vehicle may
require a jump start. These systems
will function again after the vehicle
is started.